Summary
The title says it all. I’ve run through this about ten times now. But I’ll show you how to start a Podman container (with a volume attached) and install ORDS on your local machine. And then, once installed, we’ll create and REST-enable a user so that the user can take full advantage of Oracle REST APIs. (aka ORDS). I’ll finally show you how to log into a SQL Worksheet as that new user. Ready? Let’s go!
Oracle Container Registry
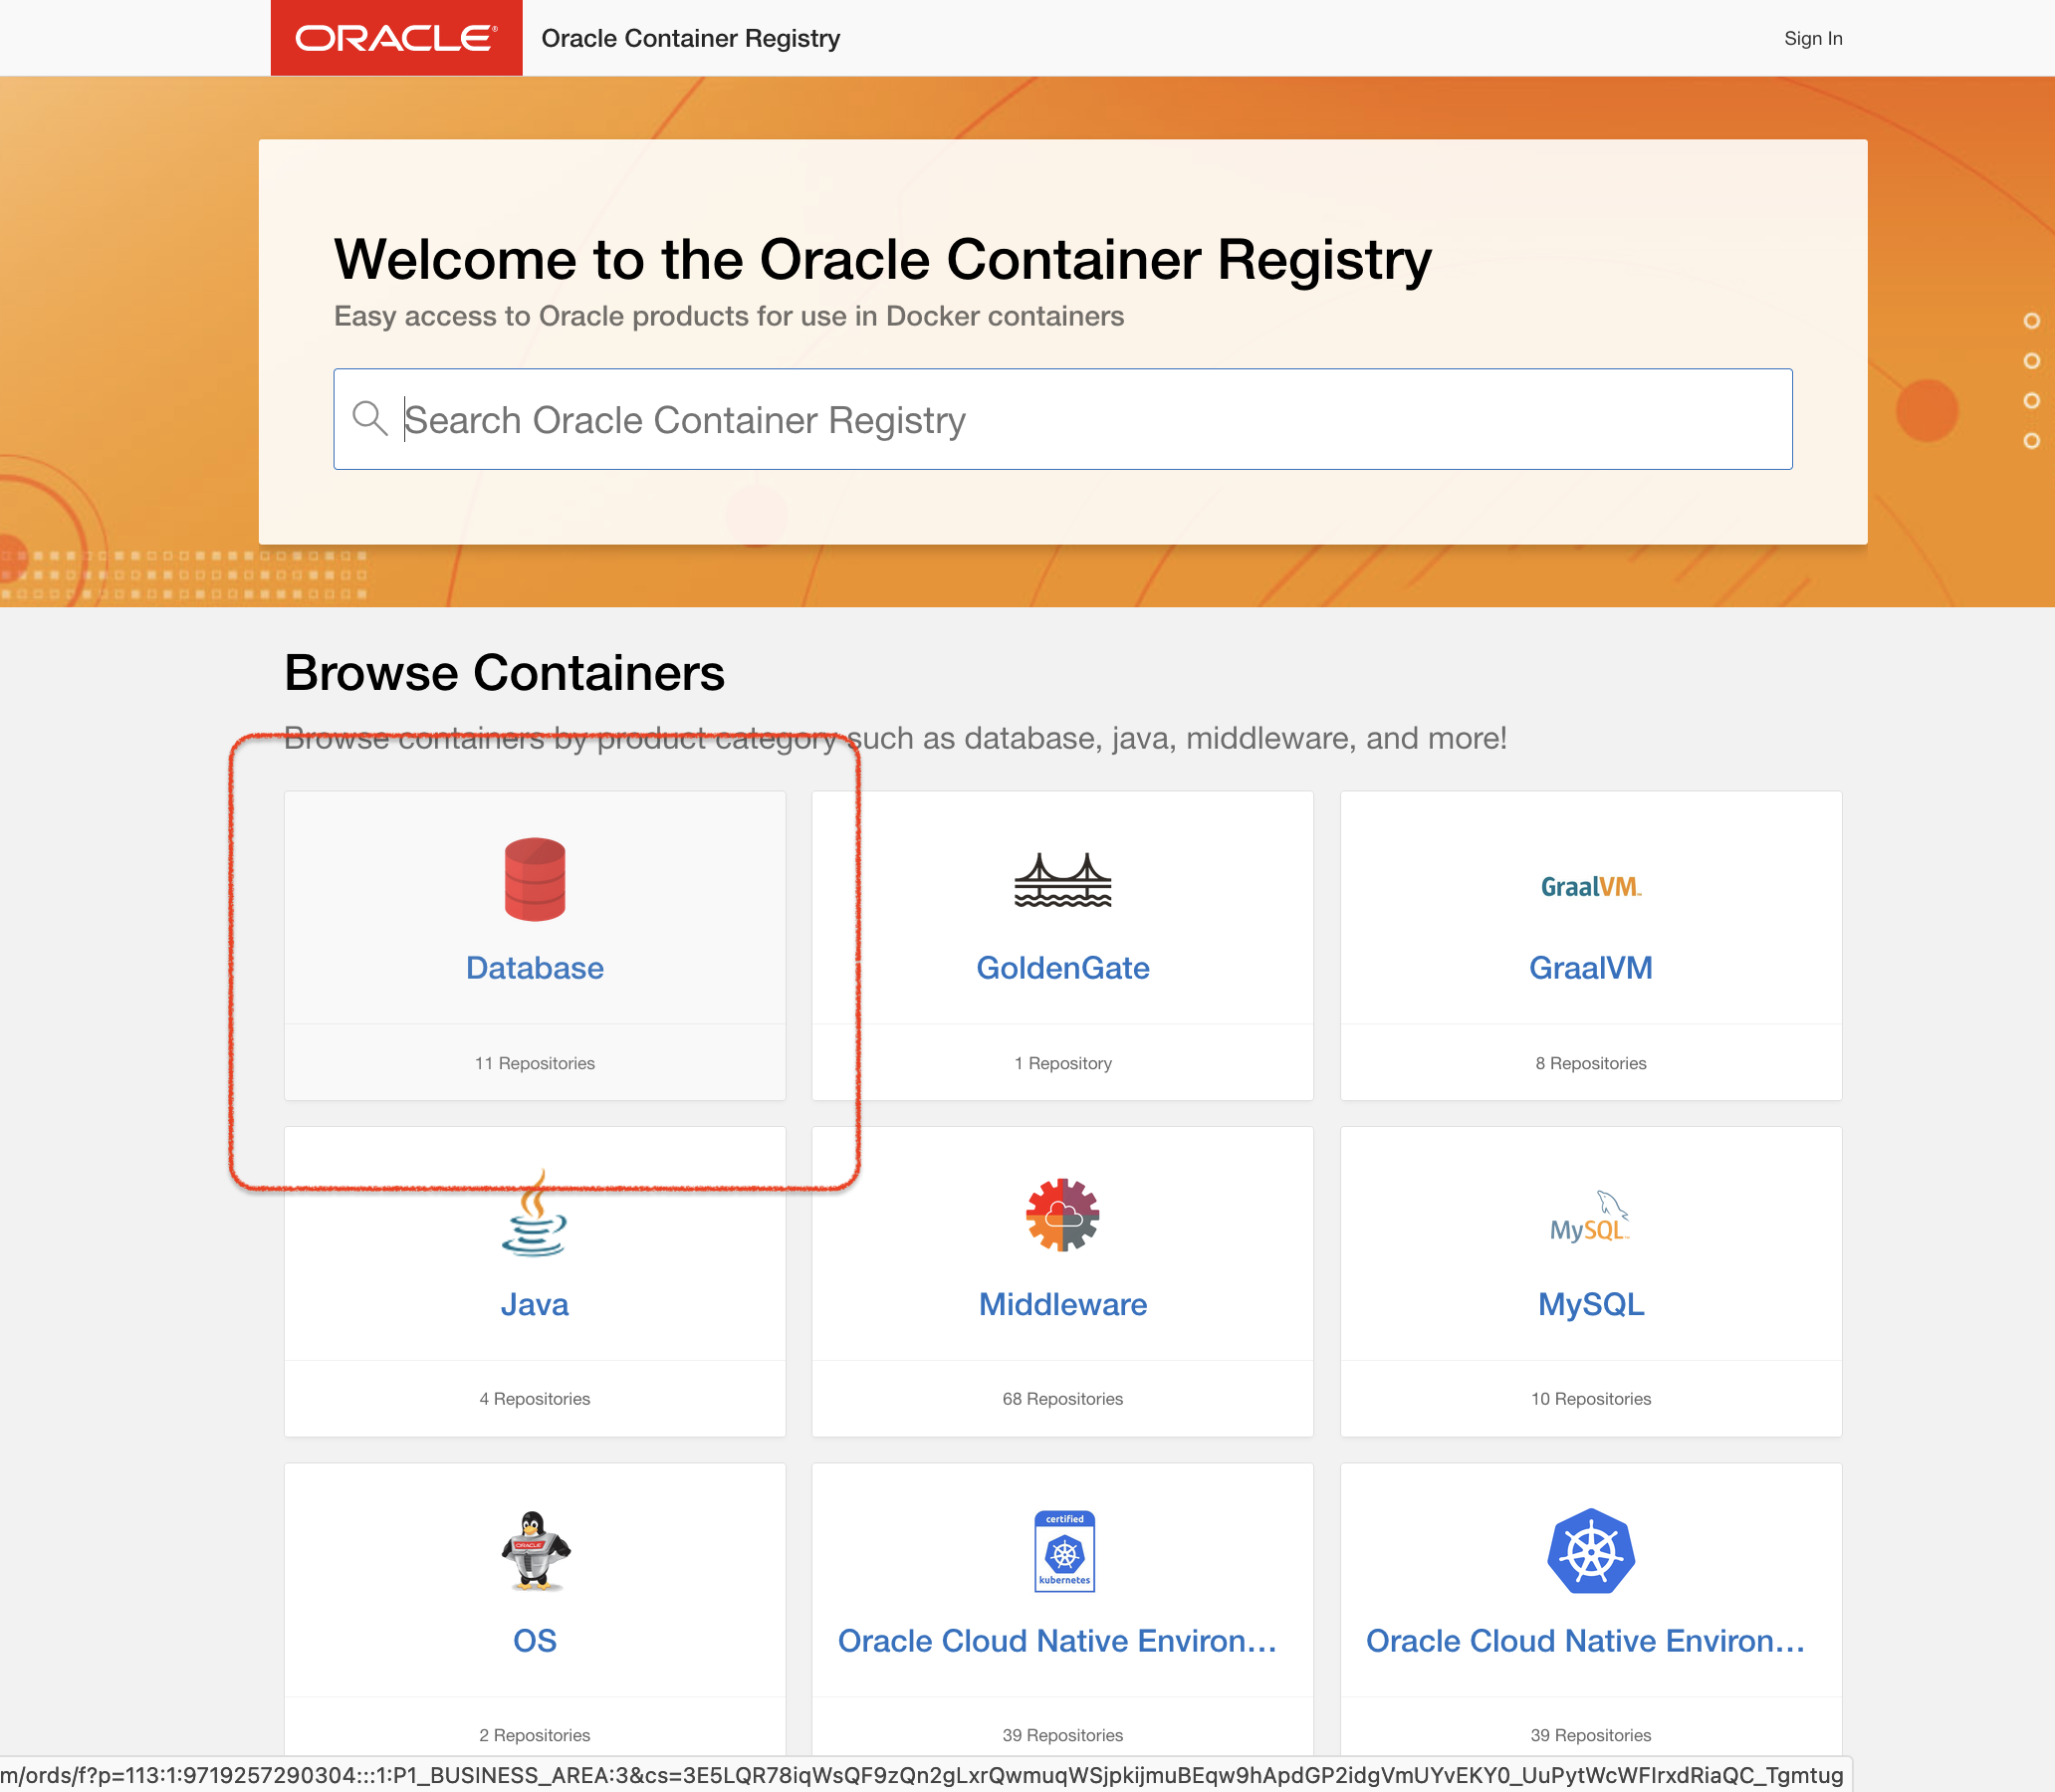
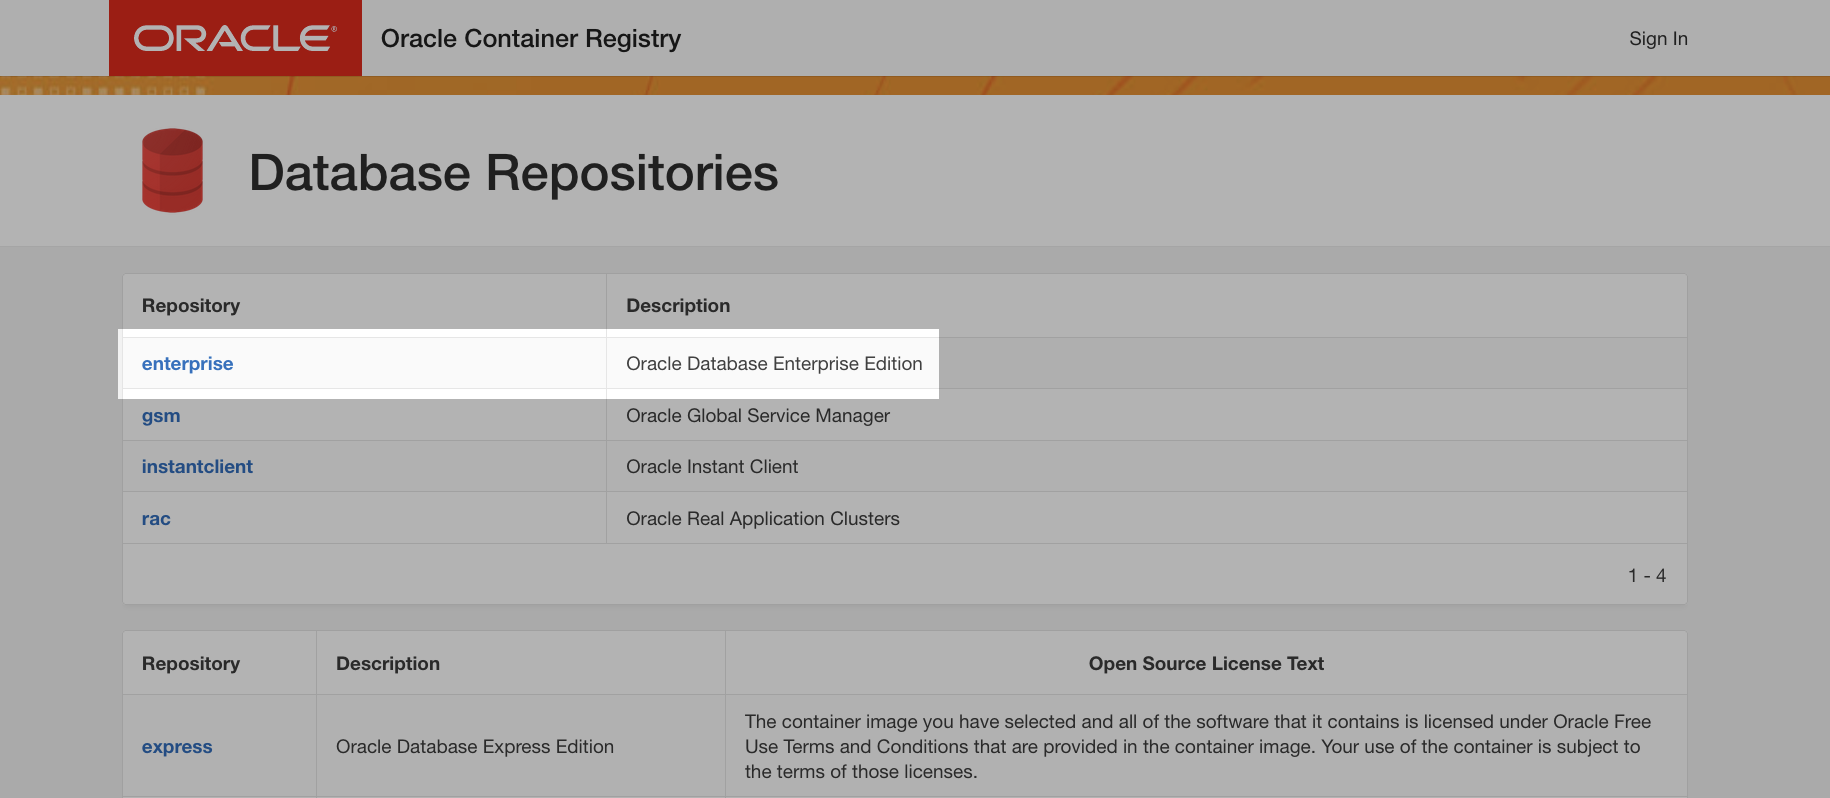
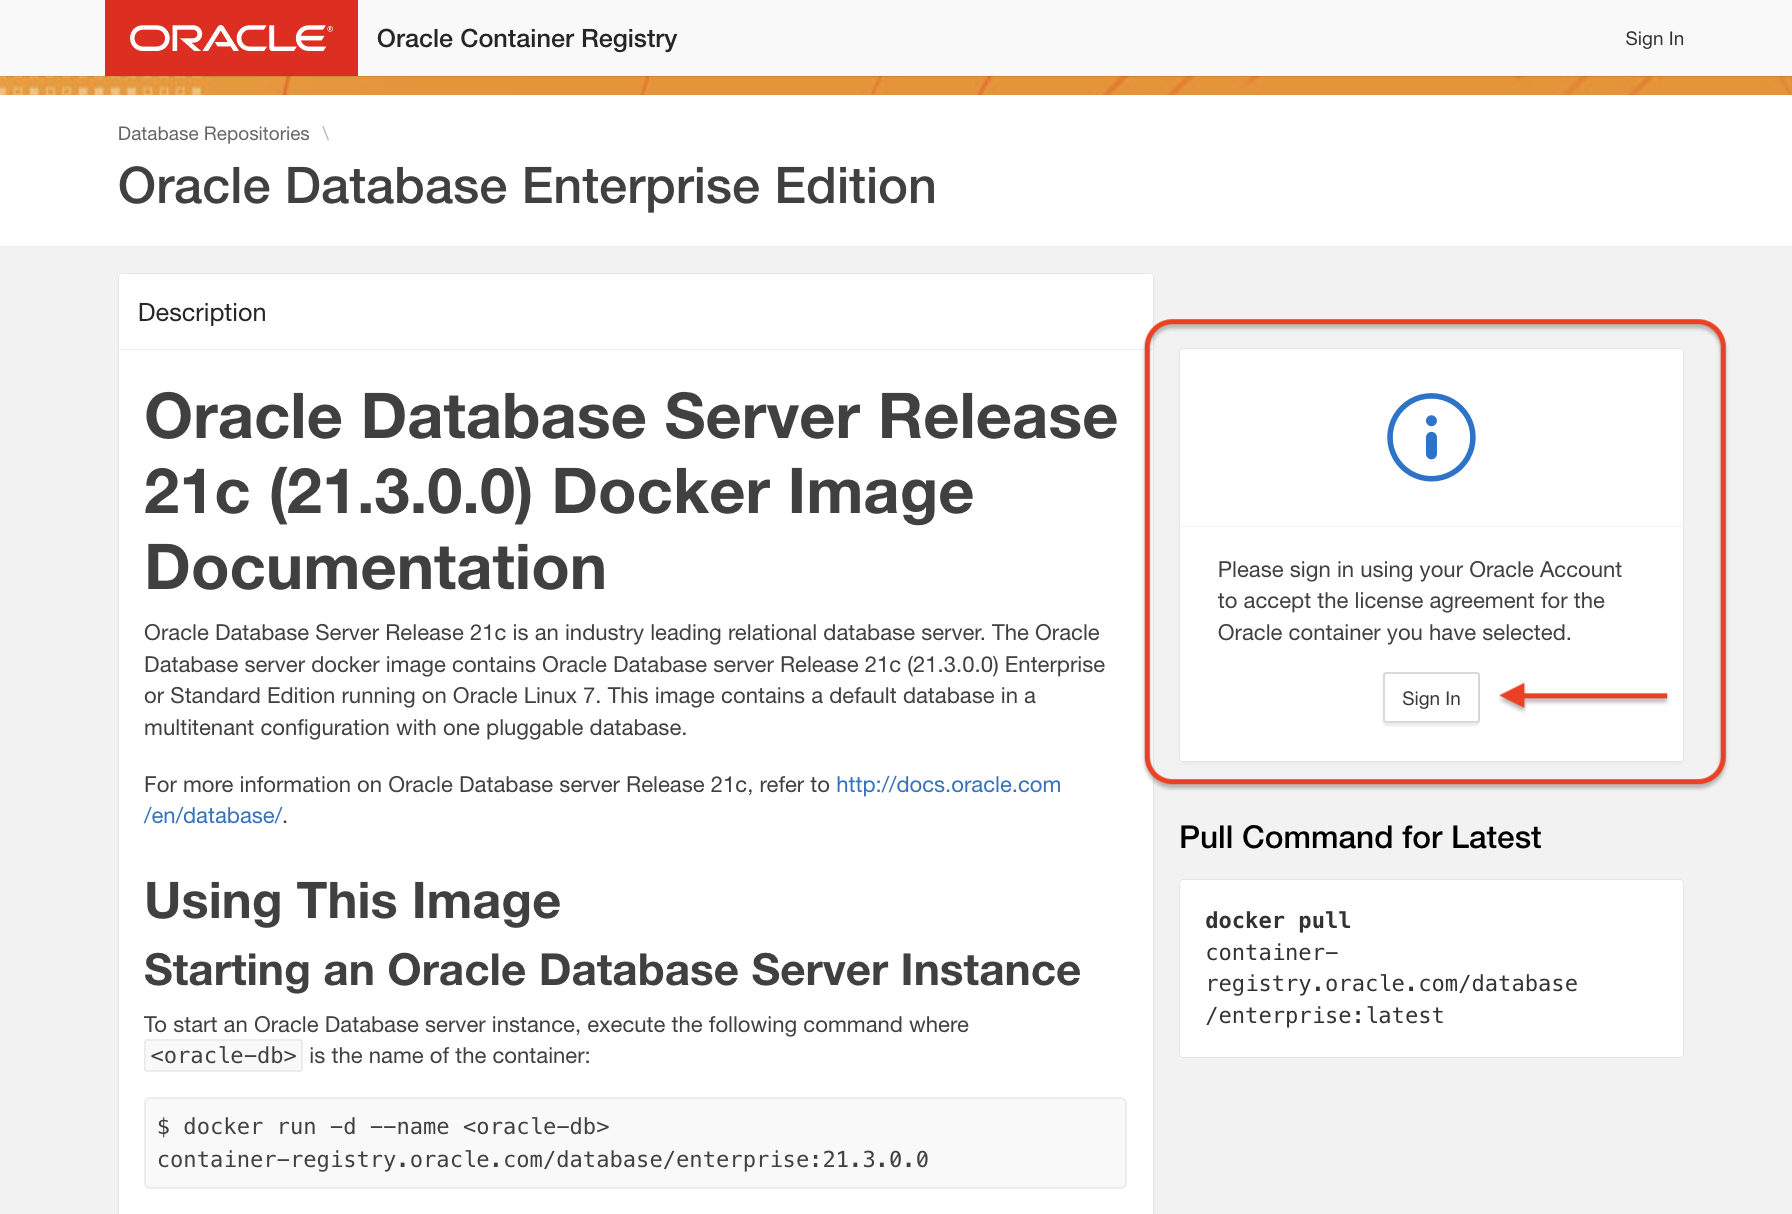
First, visit the registry. Navigate to the Database product category, then select Enterprise. Even better, just navigate to the 21c or 23ai images directly (thanks Killian 😉! Ensure you’ve also signed into the site (otherwise, you won’t be able to pull this image).
FYI: I've gone through these steps in a lot more detail in this previous Podman post.
Podman
For Podman, I’ll review the preferred way to start this container (with a volume; for persisting your data across sessions).
Volumes
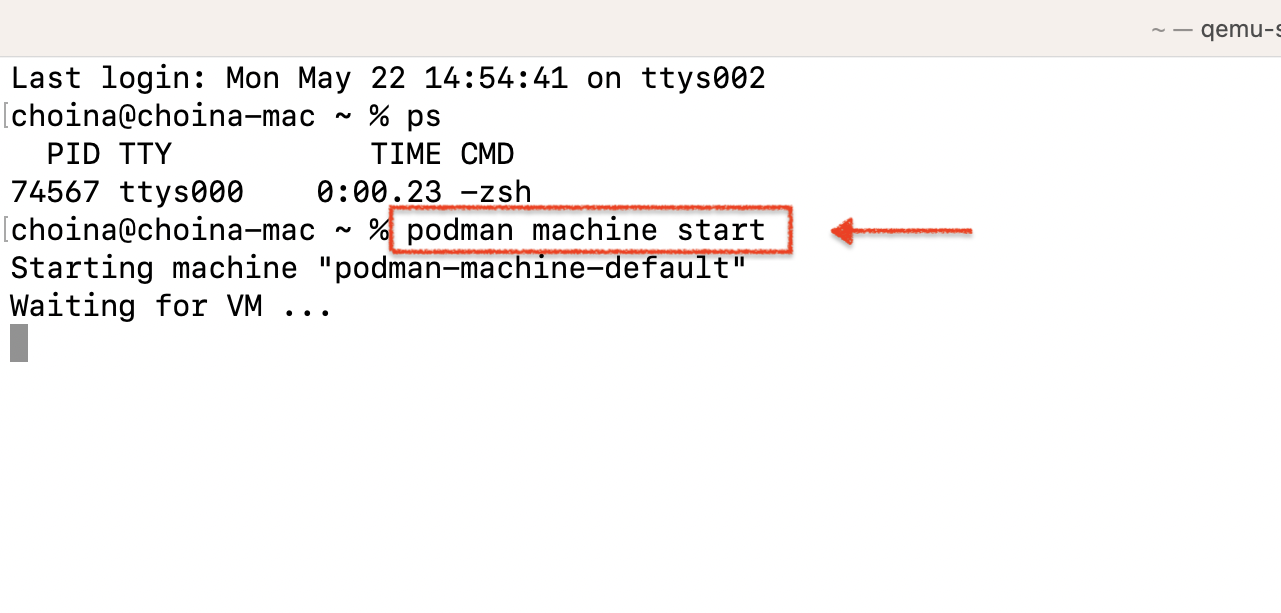
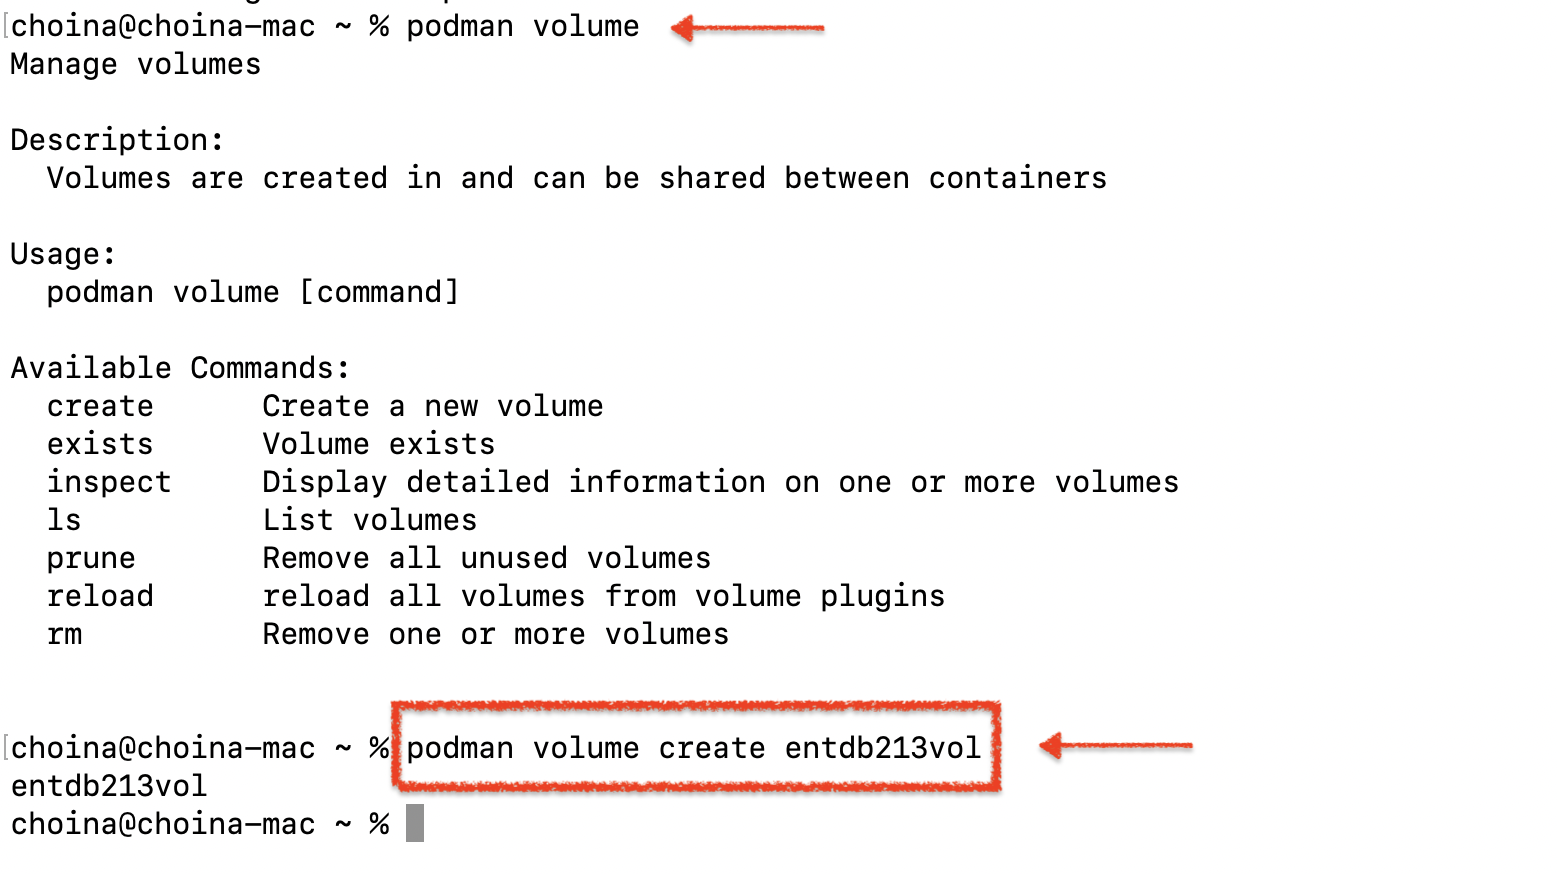
Start your Podman machine with the podman machine start command. Then create a volume with the podman volume create command (that way, you can save data locally and use that volume each time you start your container). Now that we have the volume, we can create a new container and attach that volume simultaneously (more Podman volume info here).
There are a few ways you can attach volumes when starting a container, but I like the one I found in this video:
Ironically, this is an Oracle video. But it is one of the most straightforward ones I found. To start the container, here is the command I used:
podman run -d --name entdb213 -p 1521:1521 --mount=type=volume,source=entdb213vol,destination=/opt/oracle/oradata container-registry.oracle.com/database/enterprise:21.3.0.0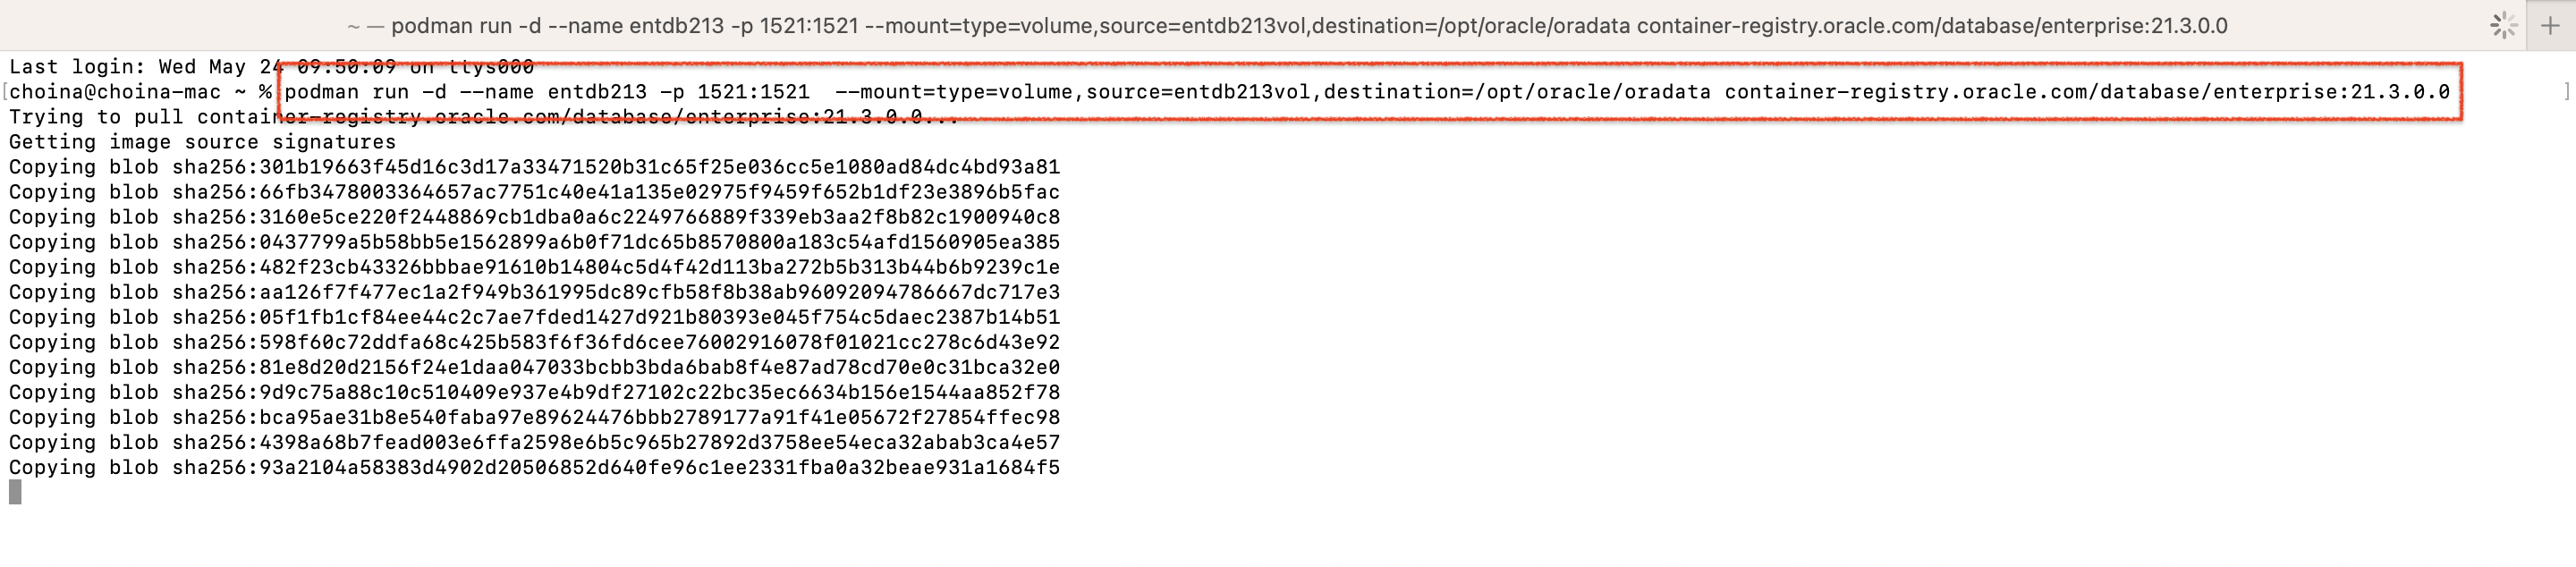
About port mapping
You’ll notice that I used the following port mapping -p 1521:1521. You can remove that leading 1521. If you do, Podman will bind any exposed port to a random port on your host (a MacBook, in my case) within an ephemeral port range. Ephemeral?? (I guess that means all/any available ports, assuming none of these).
At this point, I have created a volume and started a container (with an Oracle Enterprise database inside).
PRO TIP: If this is your first time starting a container with a database of this size, it will take several minutes. So go do some chores while you're waiting 🤪
Altering the db password
I’ll change the database Administrator password to something I can easily remember (“oracle“) using this command:
# Original command
# docker exec <oracle-db> ./setPassword.sh <your_password>
# My modified command
podman exec entdb213 ./setPassword.sh oracle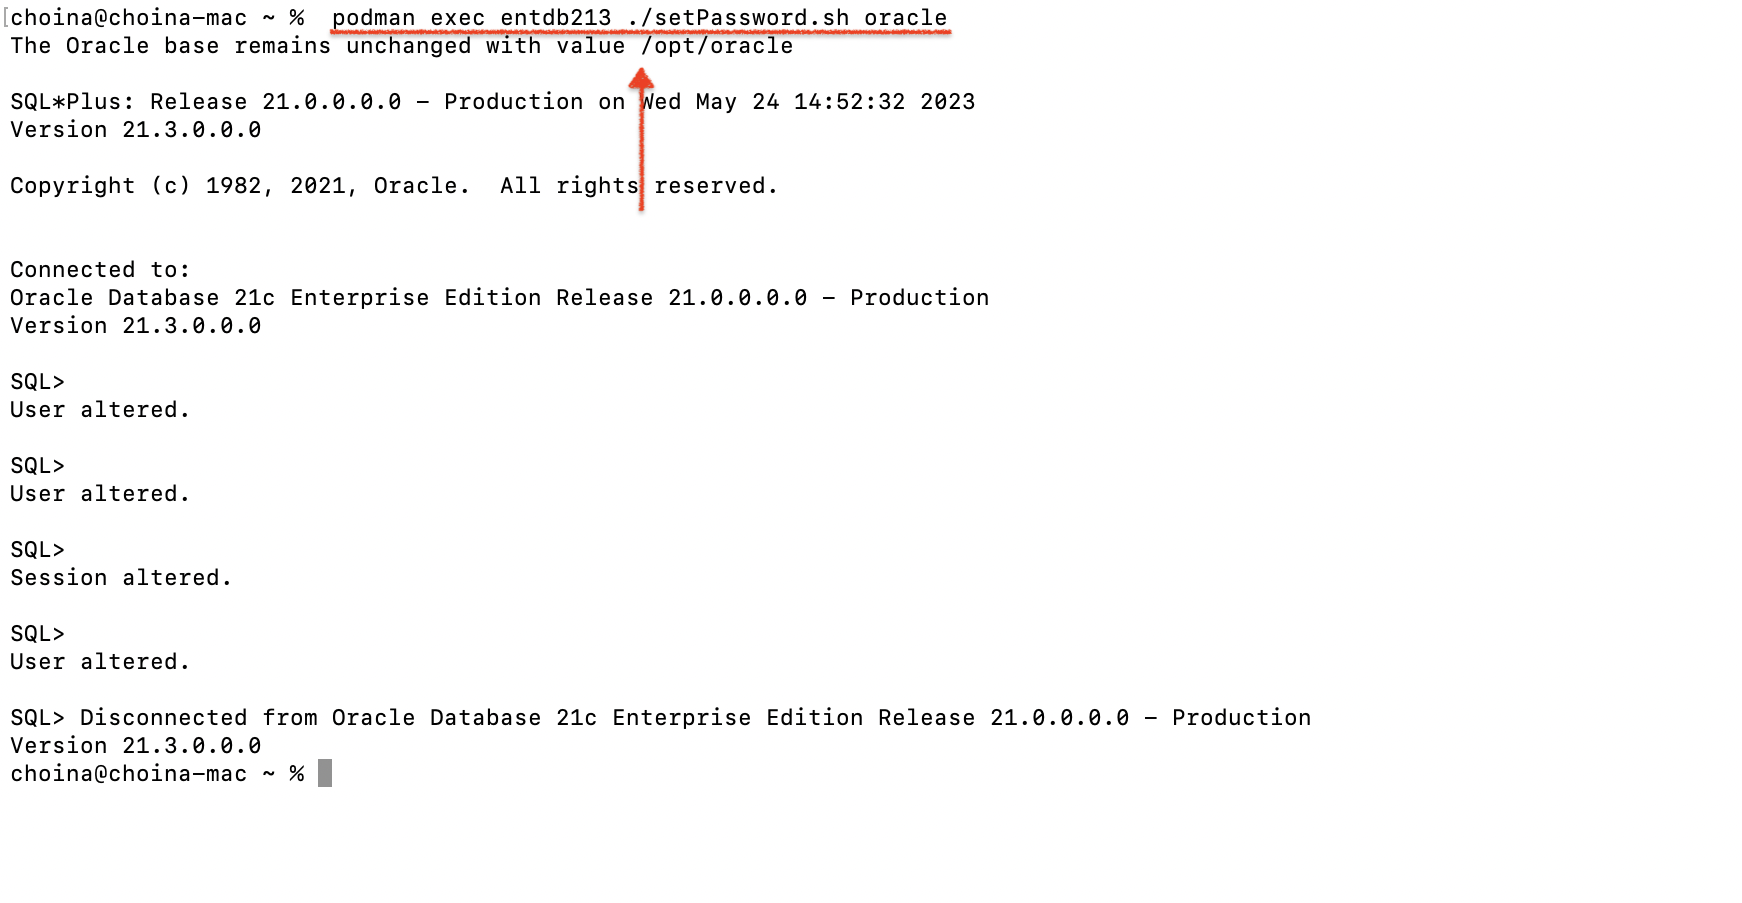
Note: There are several shell scripts included in this container; one of which is the change password script. There are more details on the Oracle Container Registry > Oracle Database Enterprise Edition page (redirects prevent me from linking directly to that page).
Downloading ORDS
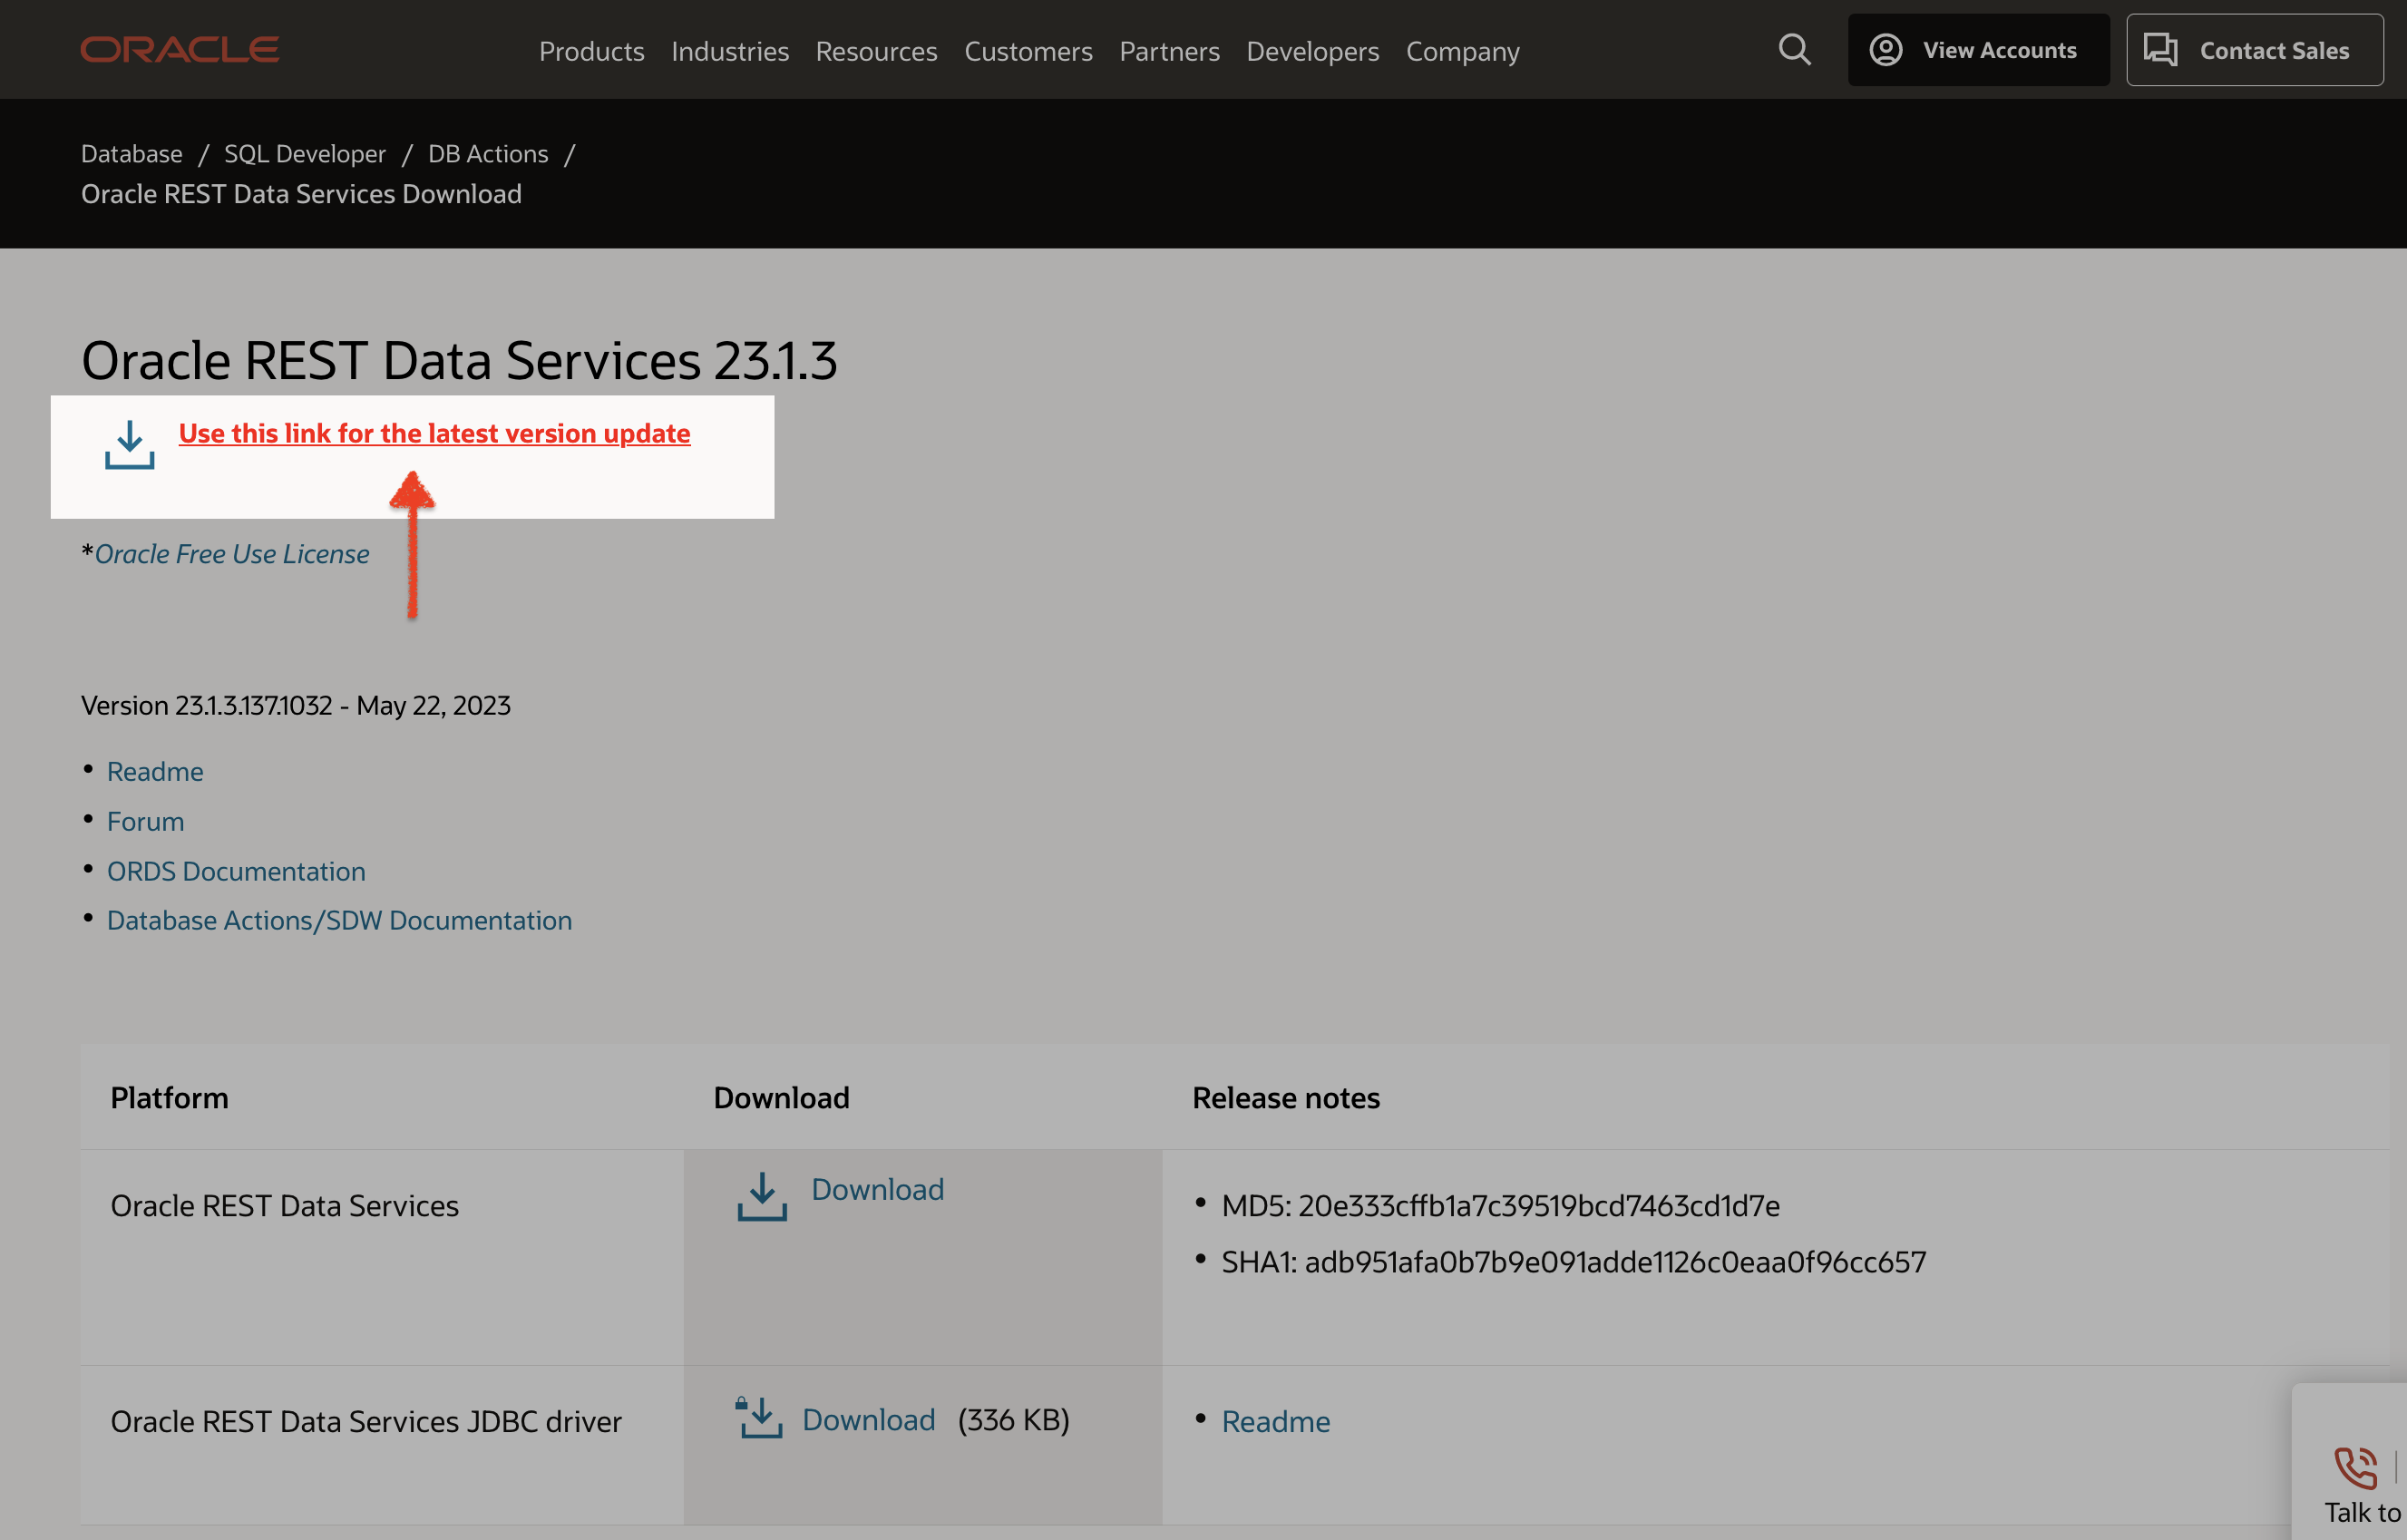
Next, I’ll head to the Oracle REST Data Services download page. And download the latest ORDS build (I’ll be setting this up shortly, I’m just gathering and configuring everything now).
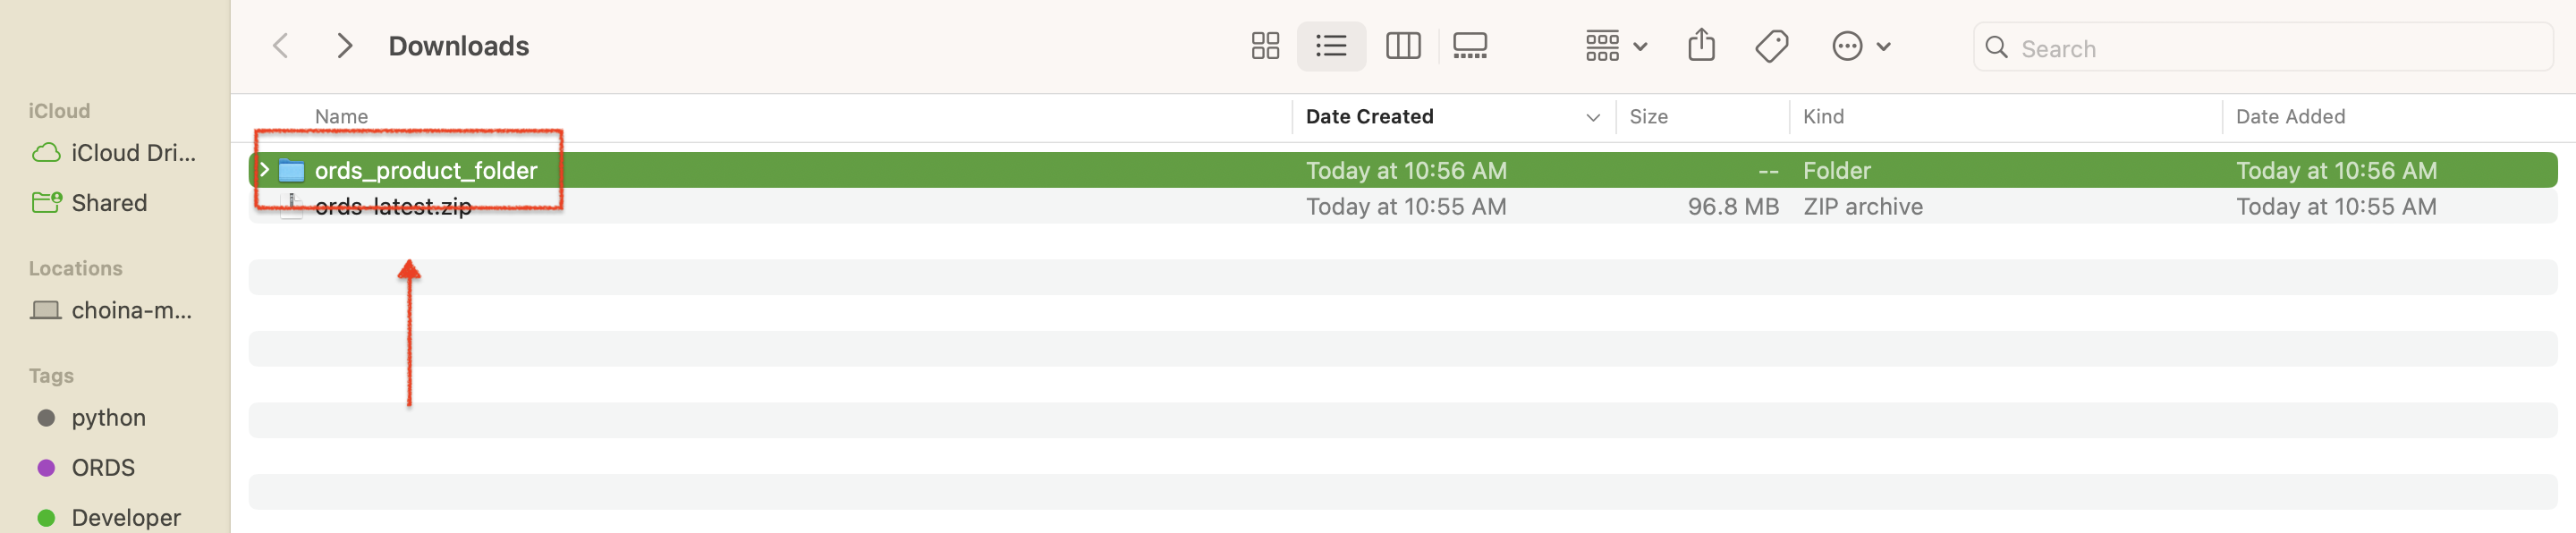
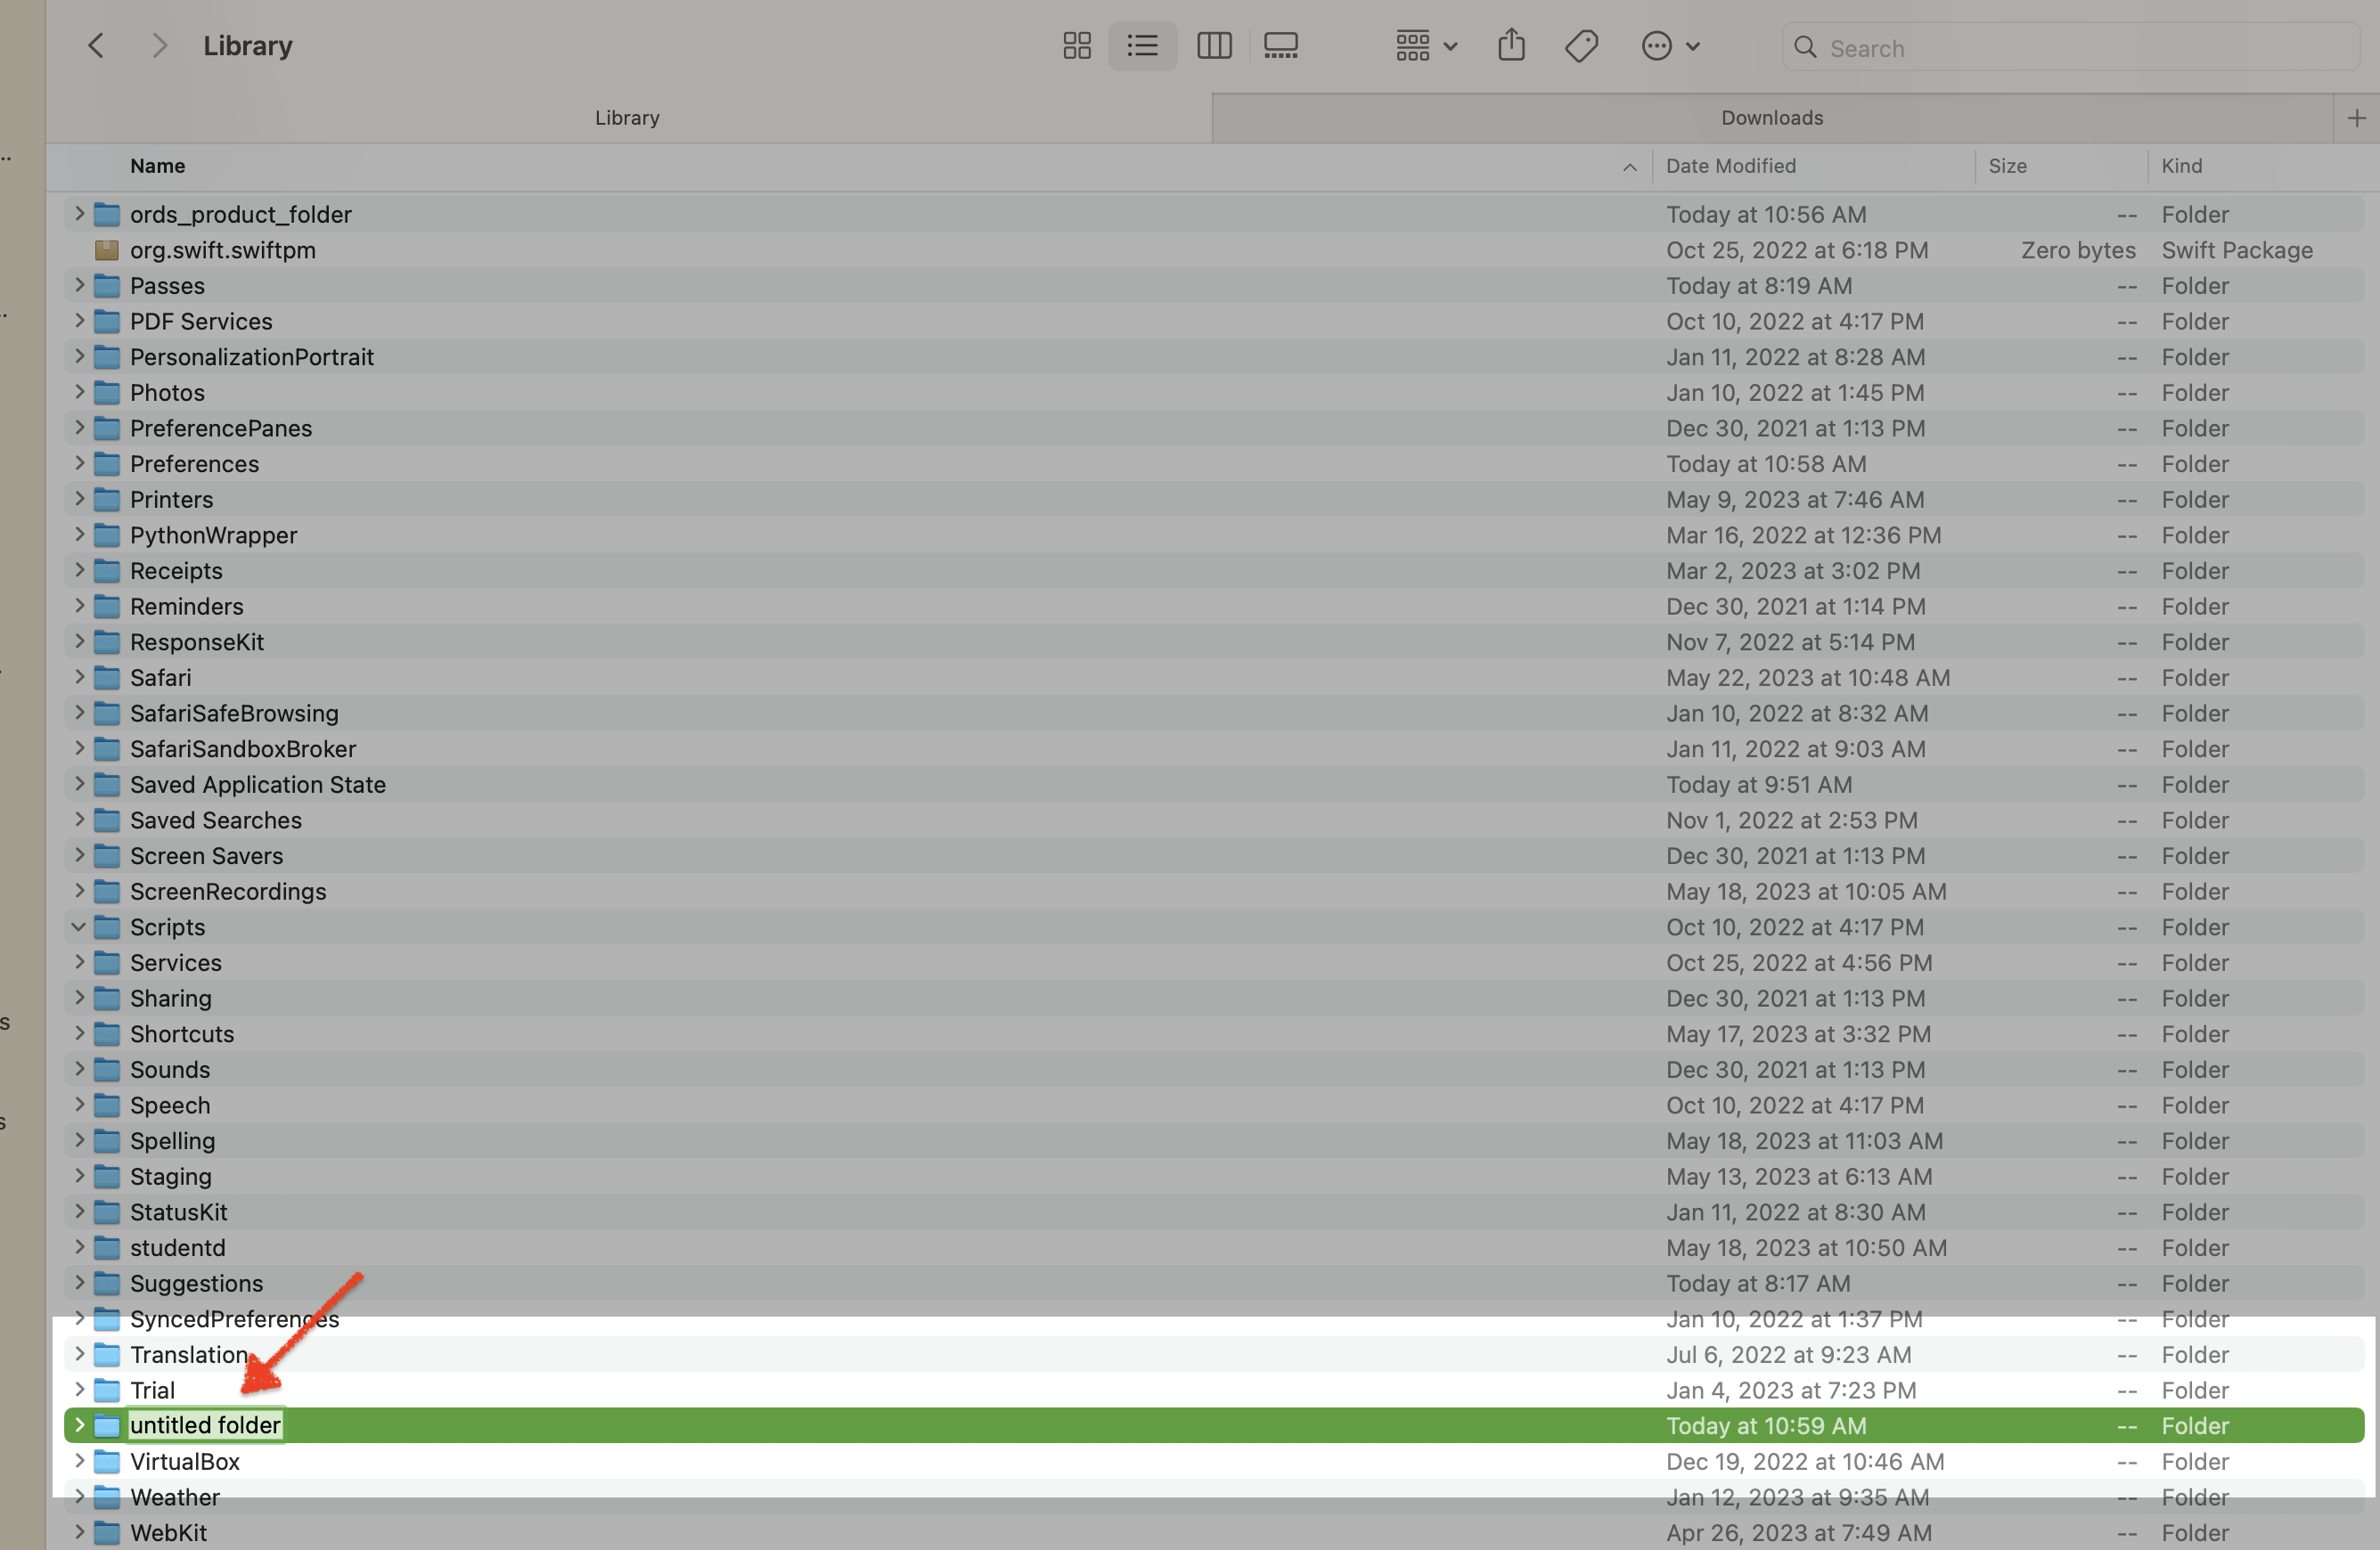
Once that ZIP file is in my downloads folder, I’ll unzip it. At this point, this folder will still be named ords latest. You can certainly keep it like that, but I’ve renamed it to ords_product_folder. This is similar to how we refer to it in our installation/configuration documentation (changing it might make it easier to follow along).
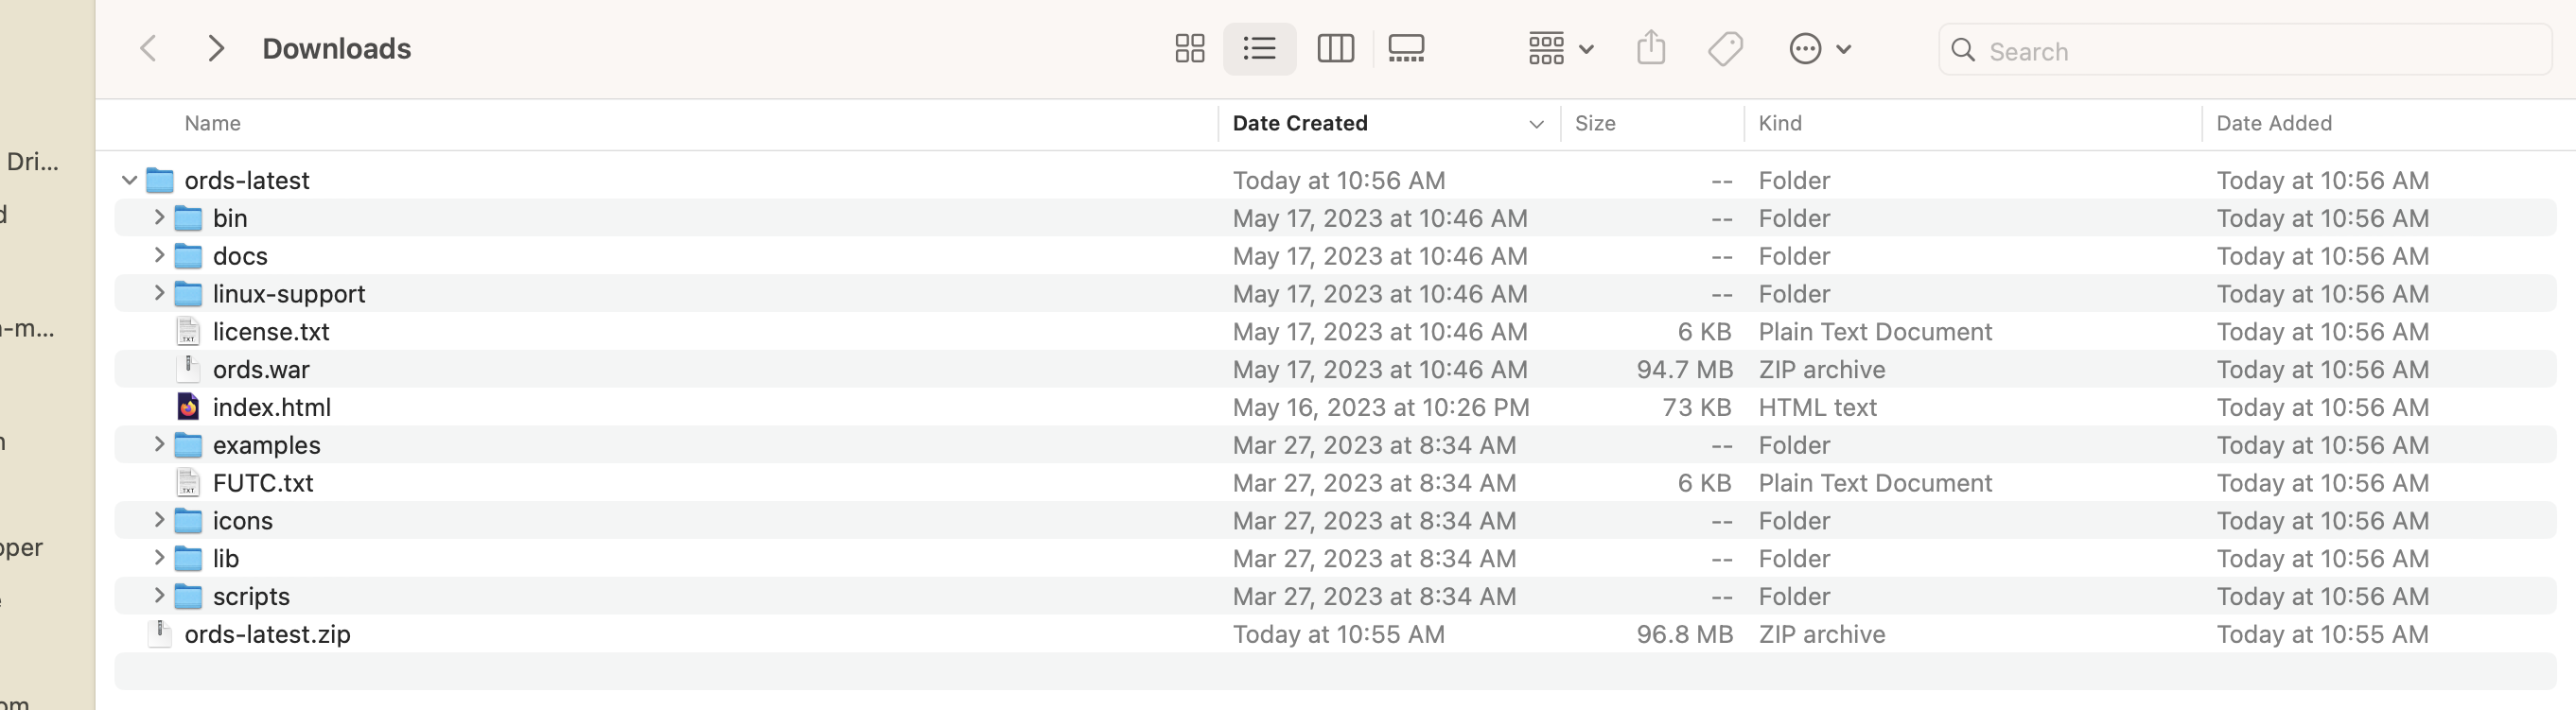
ORDS Configuration
There are two configuration steps I need to perform before I can begin the ORDS installation. You’ll need to set an Environment Variable to the binaries (these are in the bin folder, you should see that in the above image) found in the ords_product_folder. Secondly, you’ll need to create an ORDS Configuration folder.
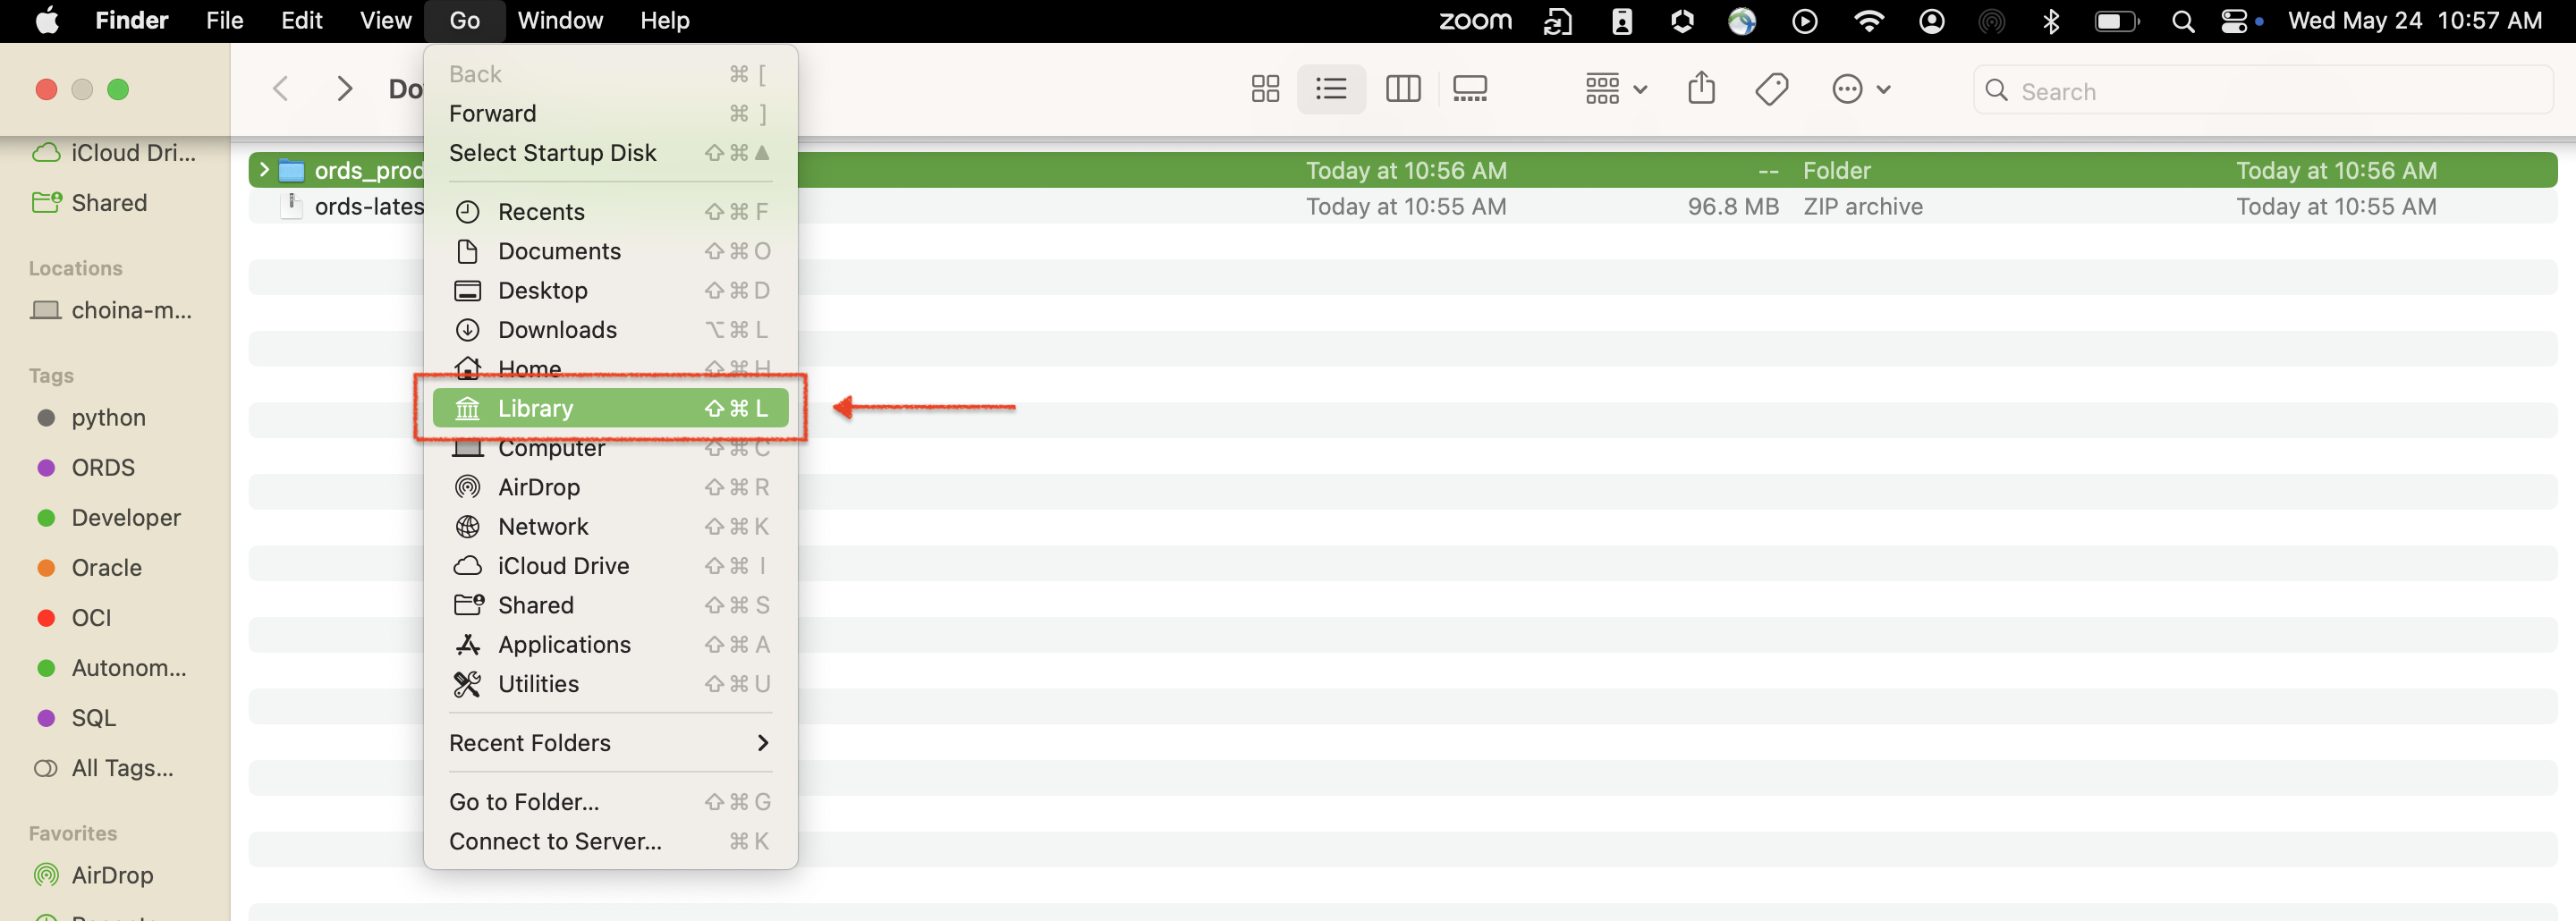
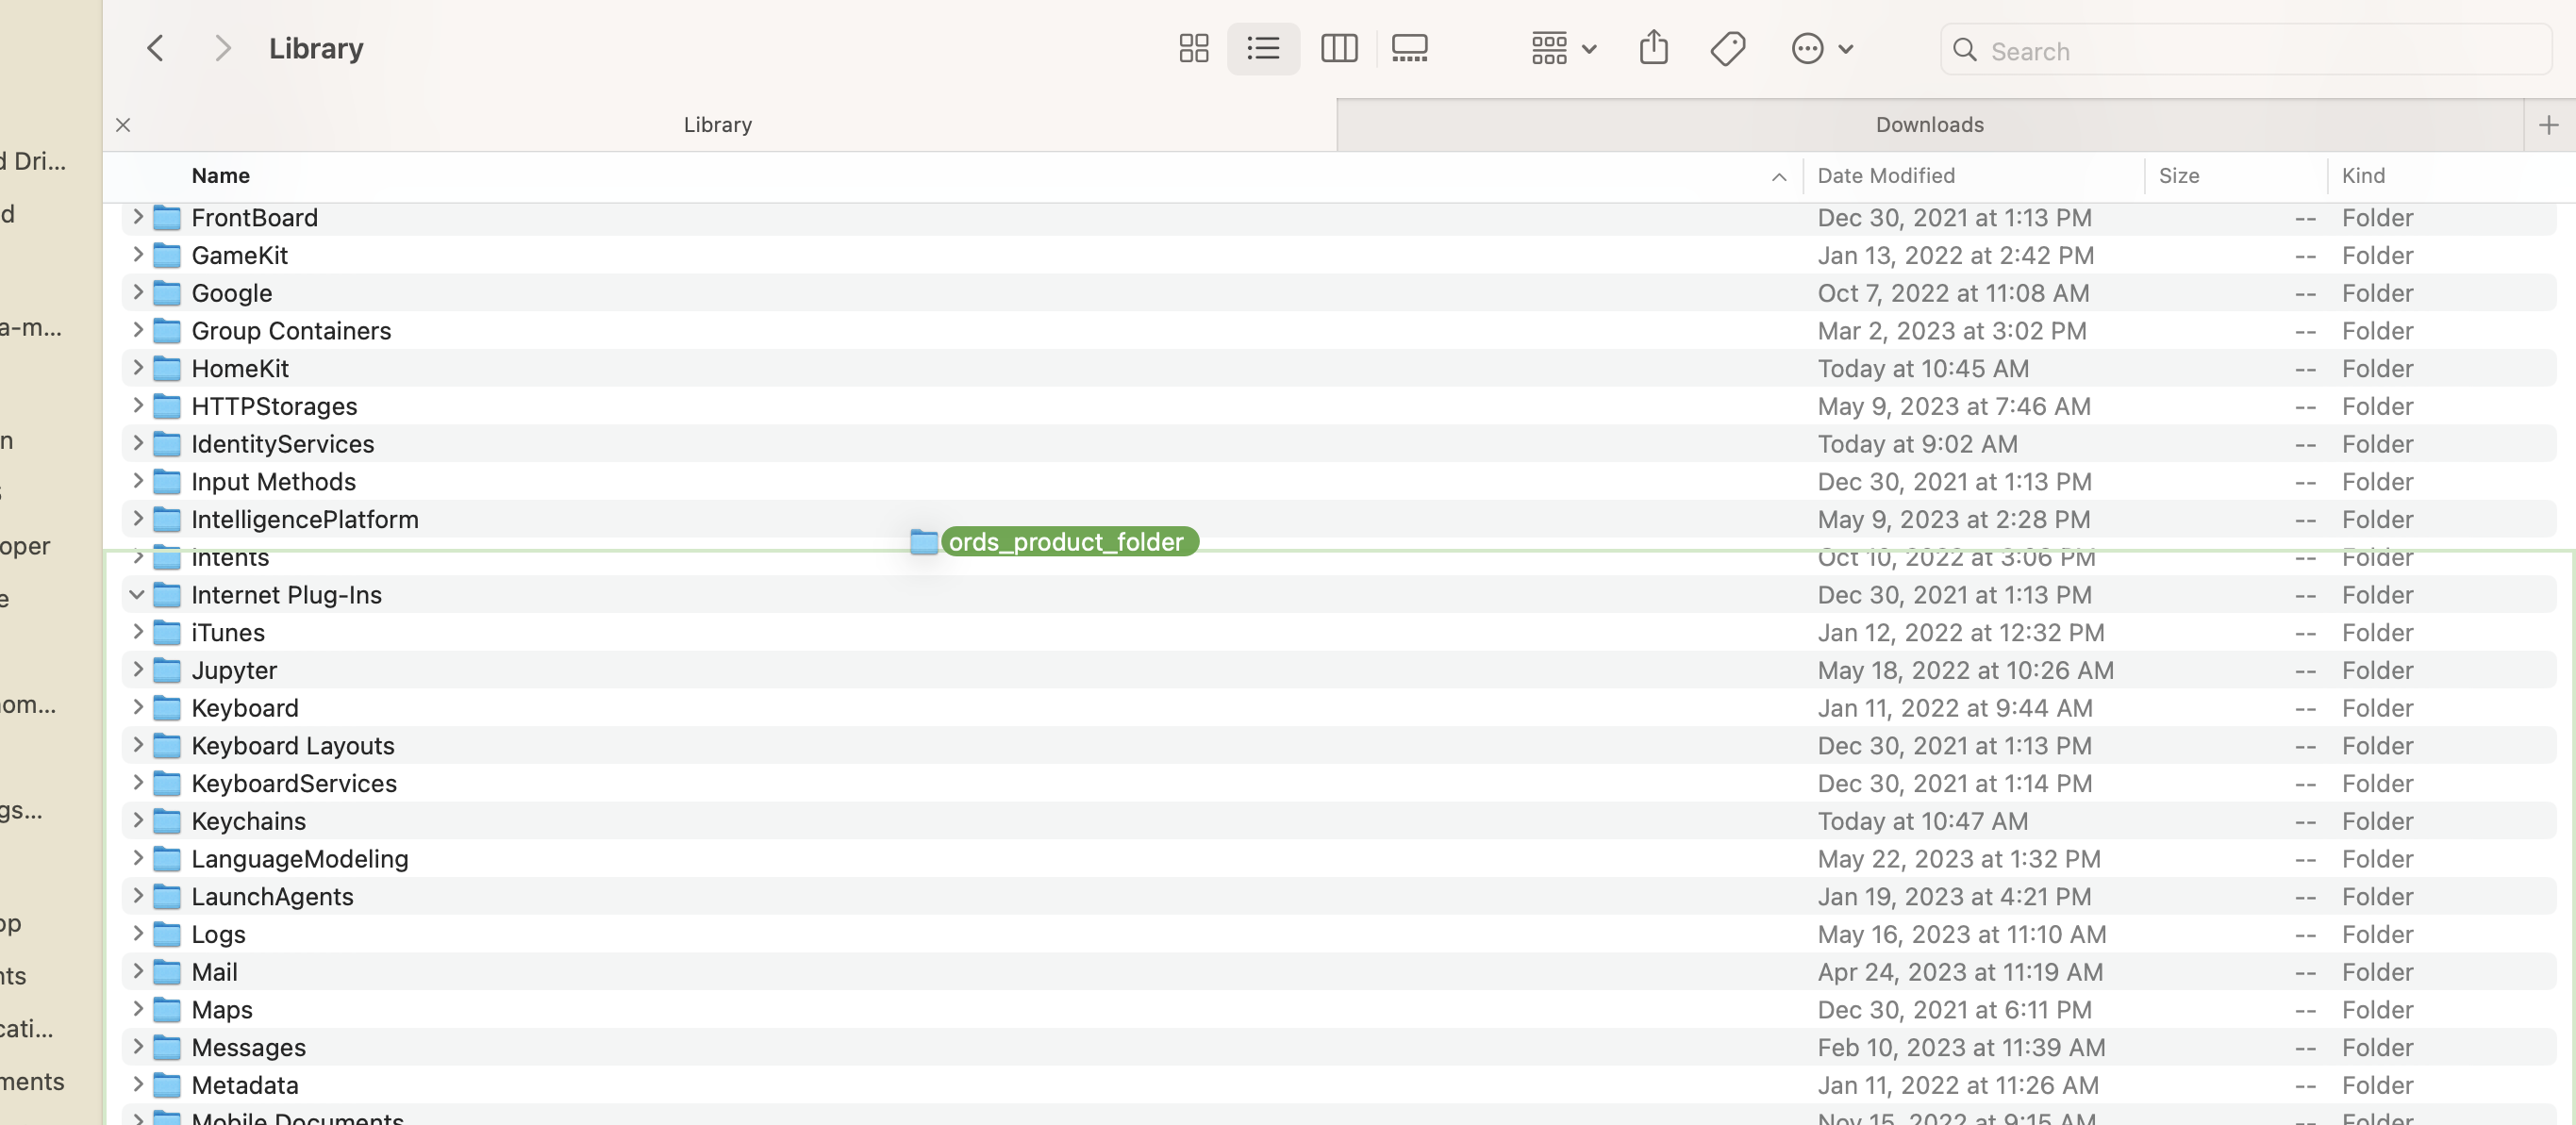

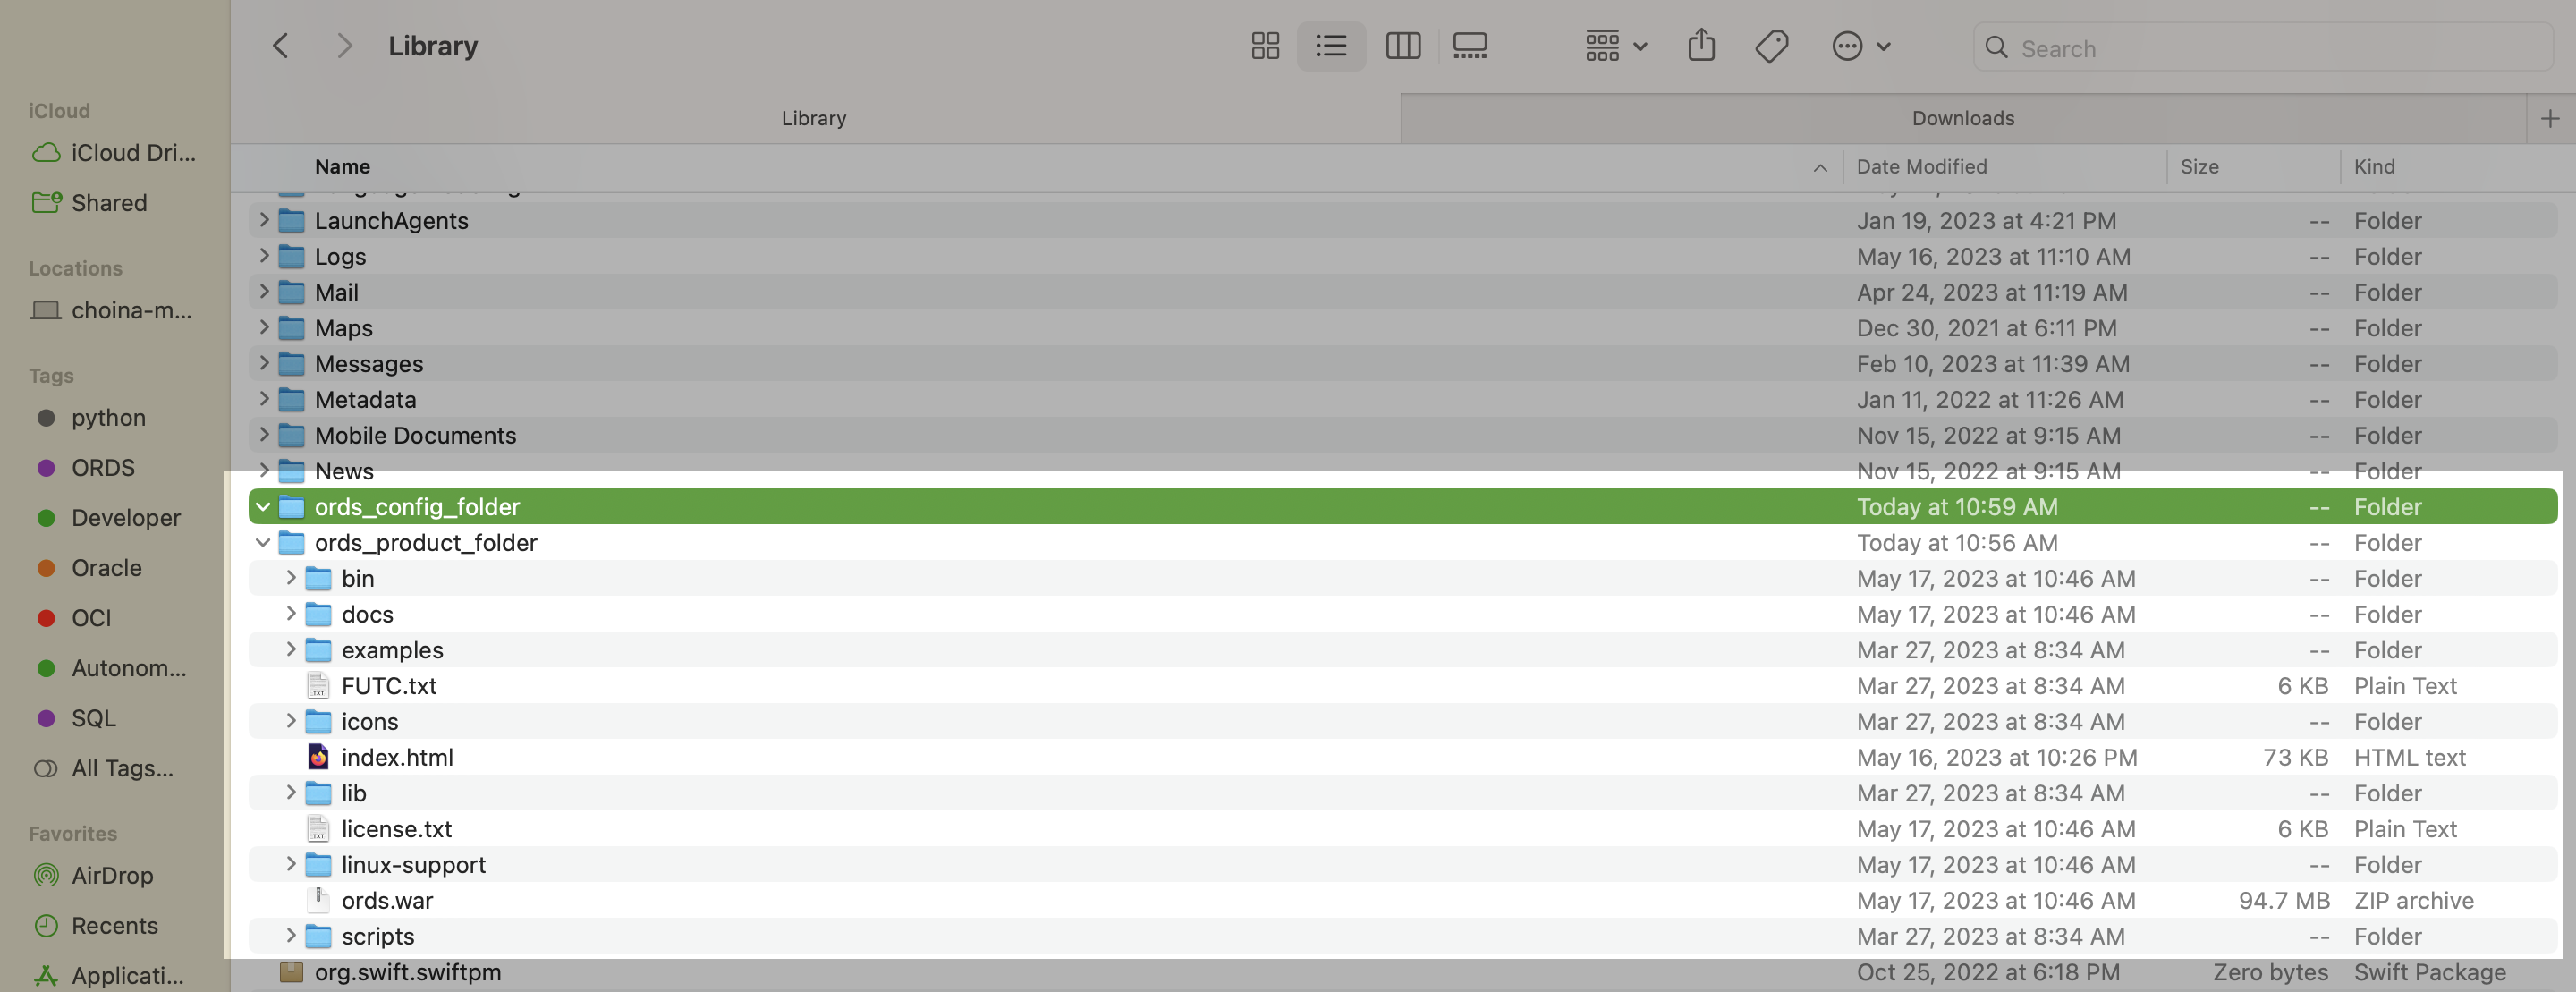
WAIT: If you're still reading this, how is my approach? After some research, placing these two folders in the "Library" seemed to make the most sense. I'm not sure what the analog on a Windows machine would be though. Drop a comment below if you know!
At this point, I’m nearly finished with this initial configuration. I next opened my .zprofile file (this is the file where I’m keeping most of my environment variables) and added the following paths:
export ORDS_CONFIG="/Users/choina/Library/ords_config_folder"
export PATH="$PATH:/Users/choina/Library/ords_product_folder/bin"
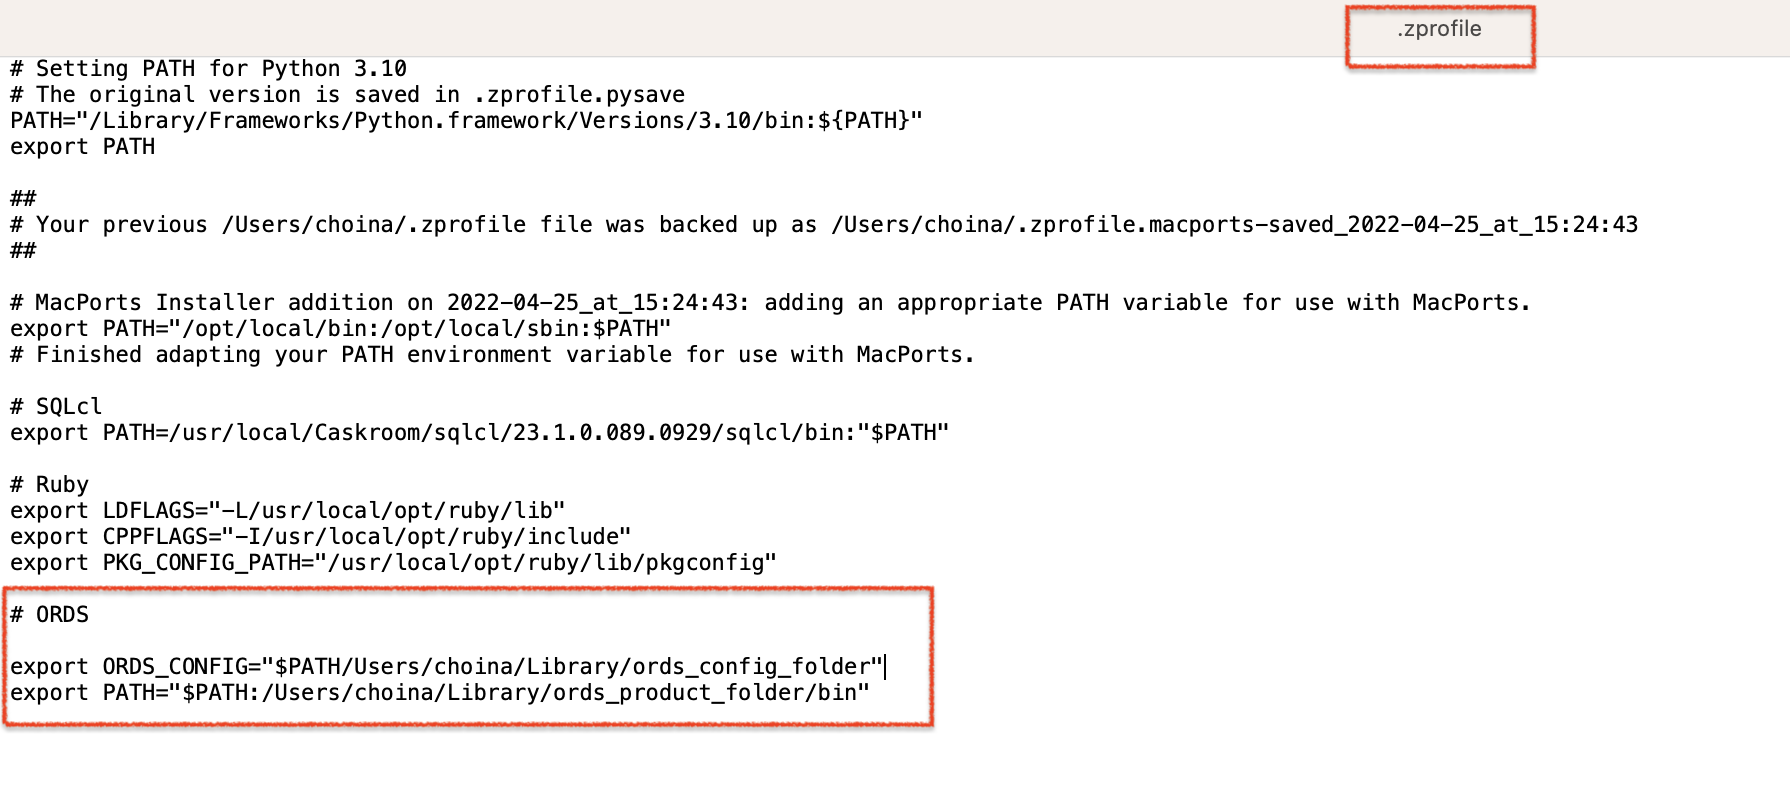
.zprofile file.Pourquoi? I can't seem to find a definitive answer as to where these paths should be saved, but this thread on Stack Exchange does a great job explaining all these files (and when/where they are used).
ORDS Installation
You’ll want to exit out of all your Terminal sessions so that the next session can pick up those changes to the .zprofile file. Podman will still keep doing its thing in the background, and hopefully, by this time, the database container will display as “healthy.”
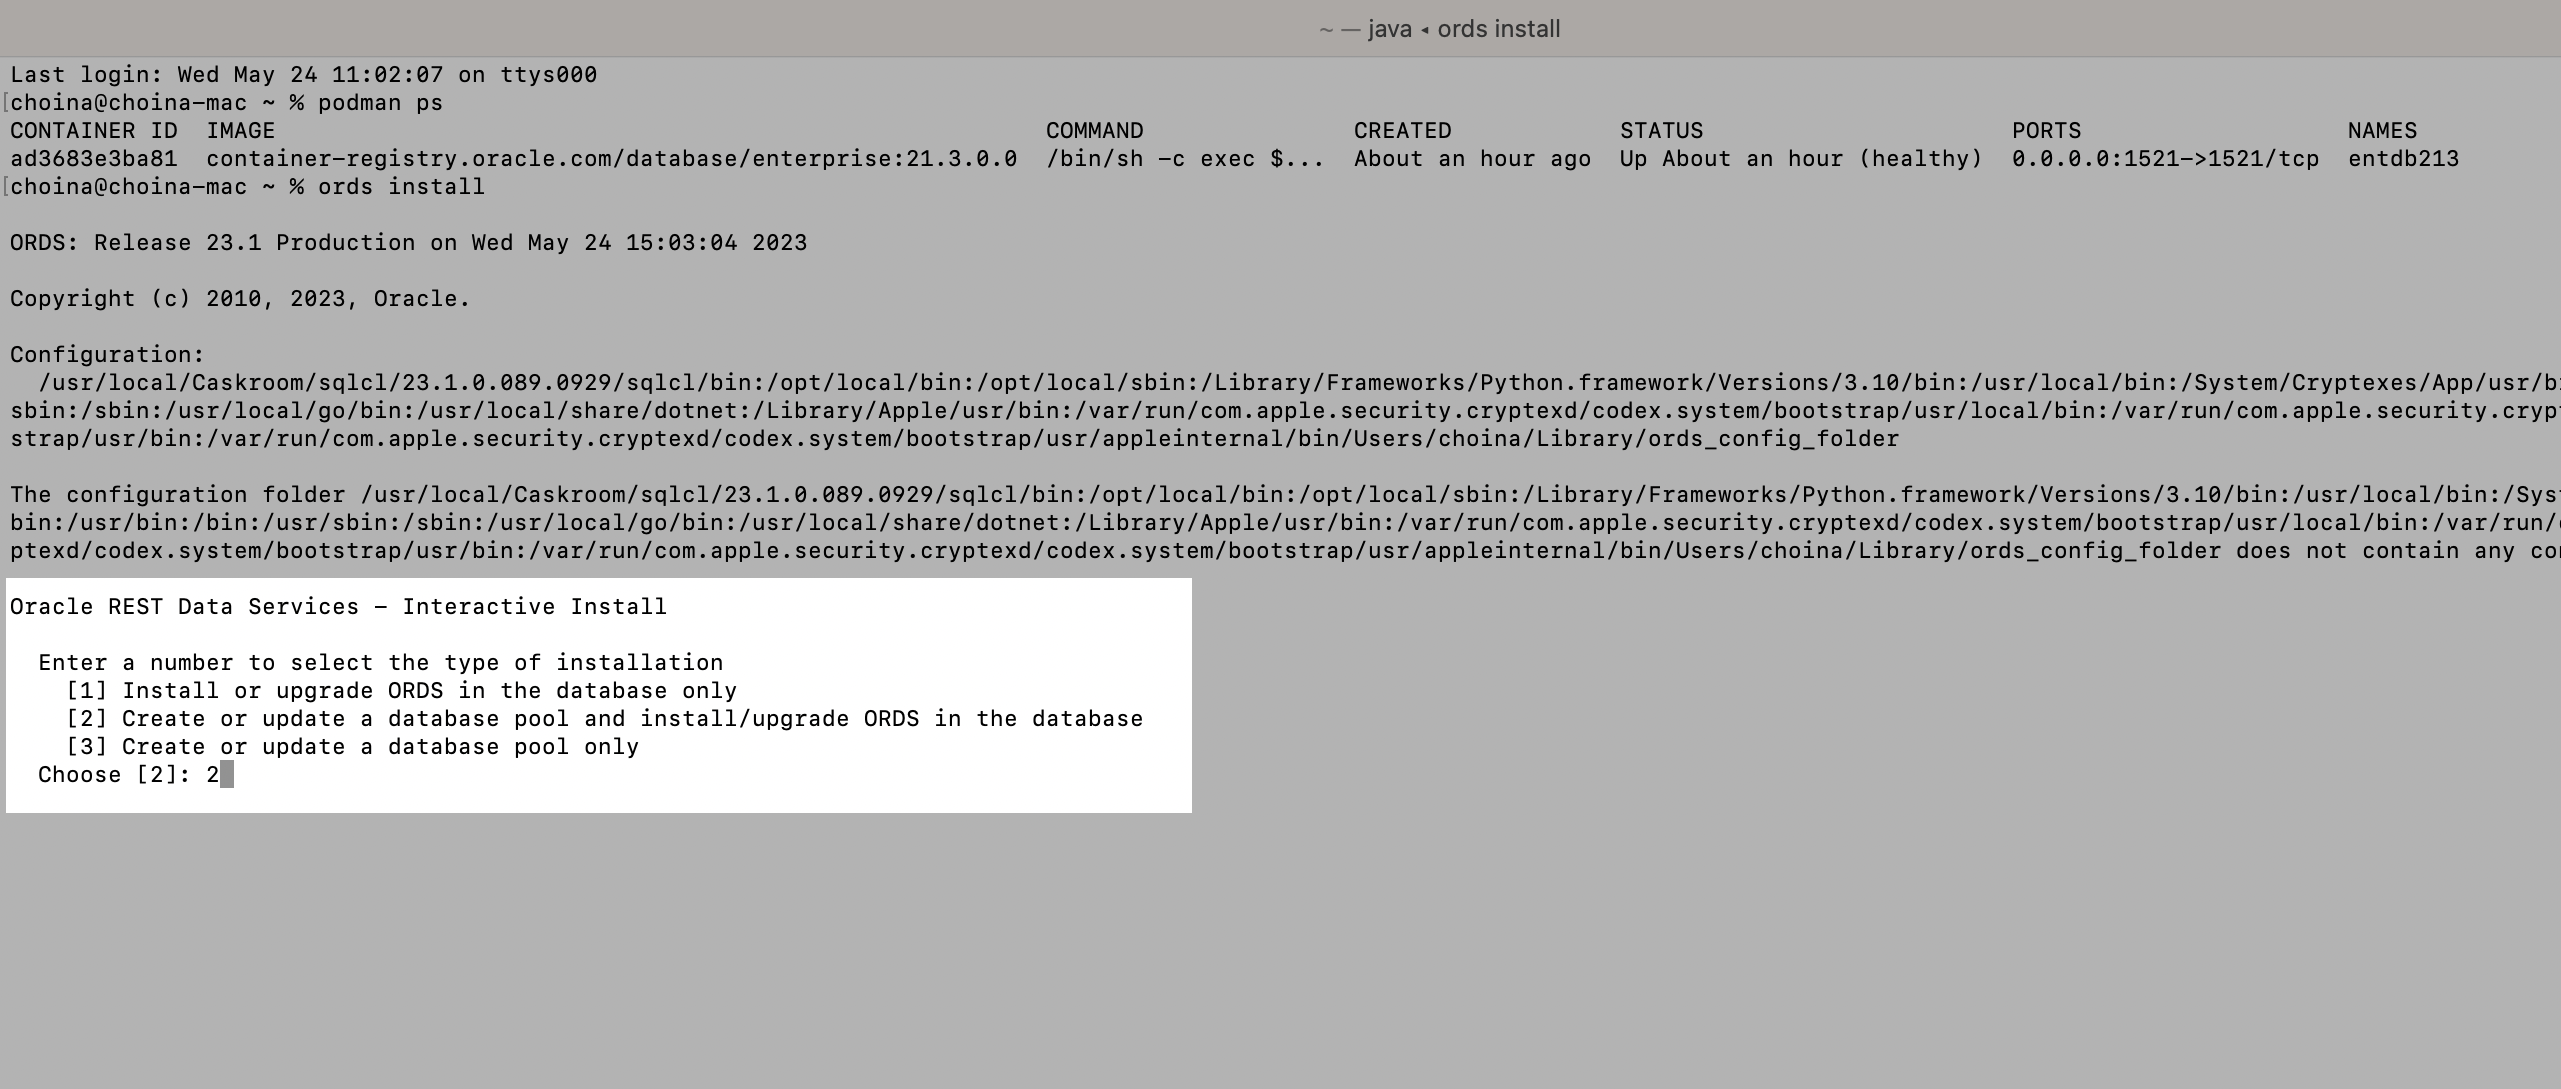
🛑 STOP: This may be obvious to you, but it wasn't to me, the database needs to be ready (healthy), online, and active (whatever you want to call it) for ORDS to install. You can always issue the podman ps command to check the status of the container.

ORDS install, the first attempt
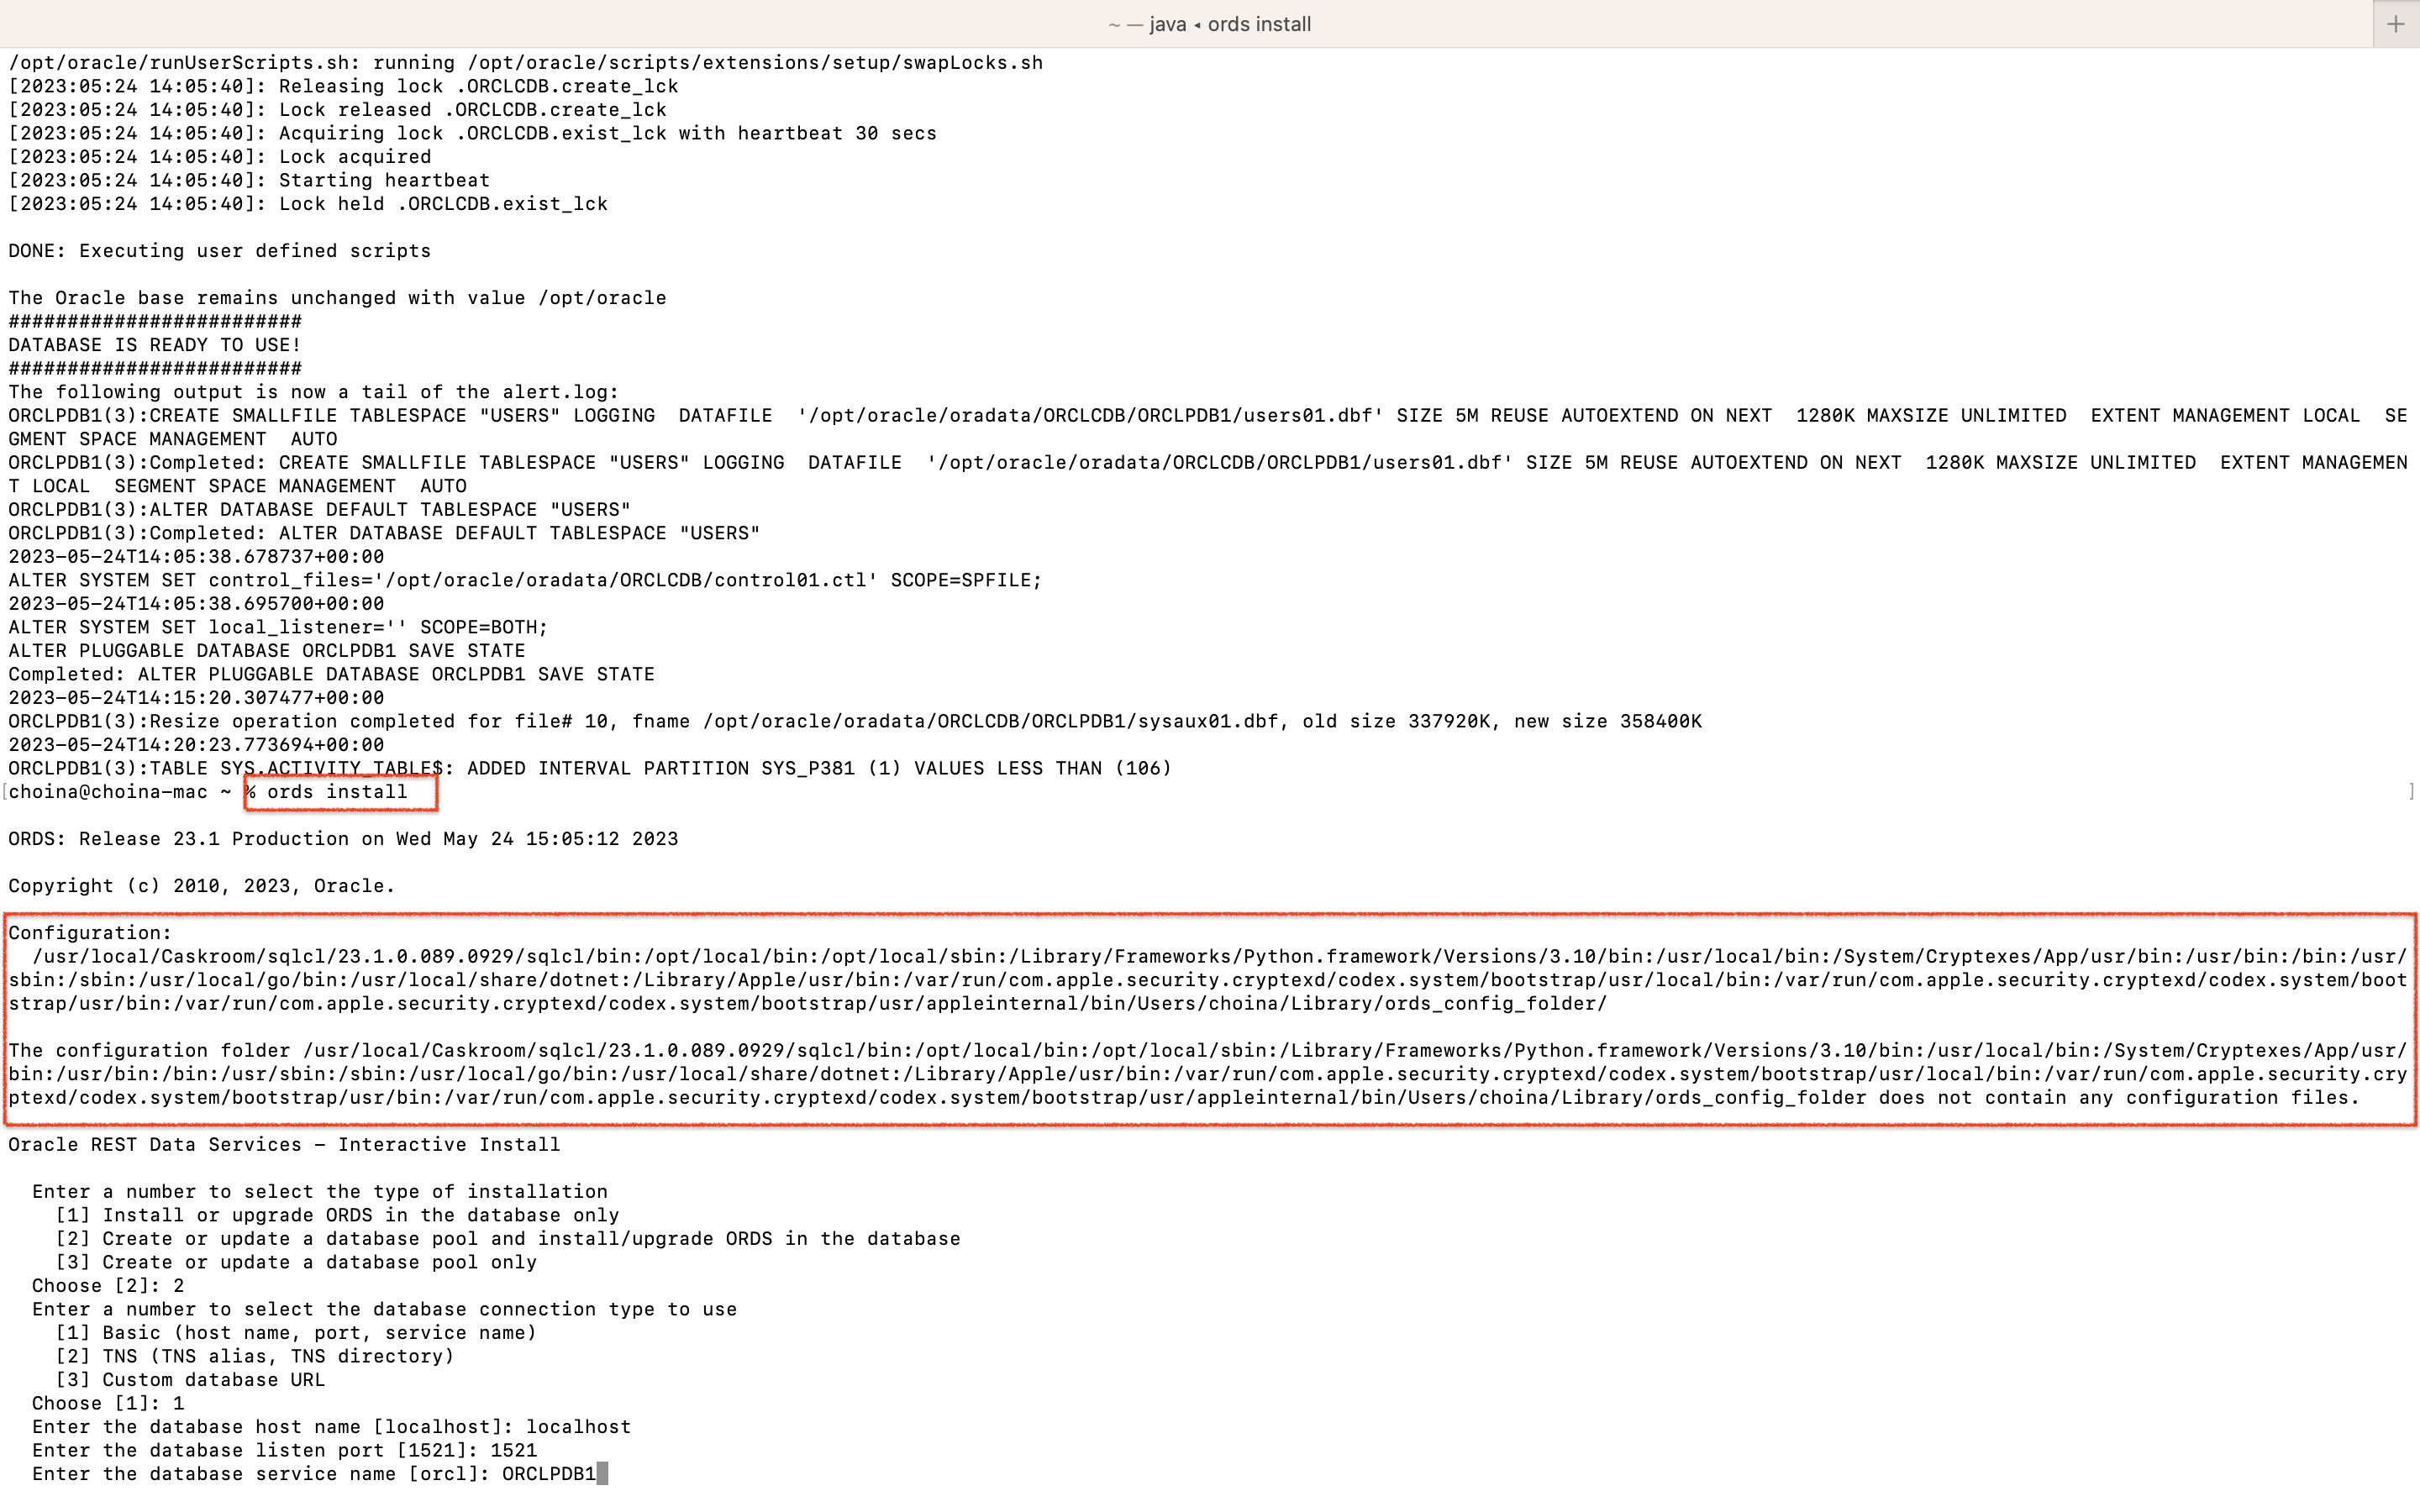
In a new Terminal, I’ll issue the ords install command. If you’ve set up your bin and config environmental variables like me, then you shouldn’t have any issues. Moving through the first few steps is easy.
The ORDS interactive installer will default to recommended settings. Most of the time, these will be correct. Since this is my first time installing ORDS, I’ll choose Option 2 in that first step. I can use “localhost” as the database hostname and 1521 as the port.
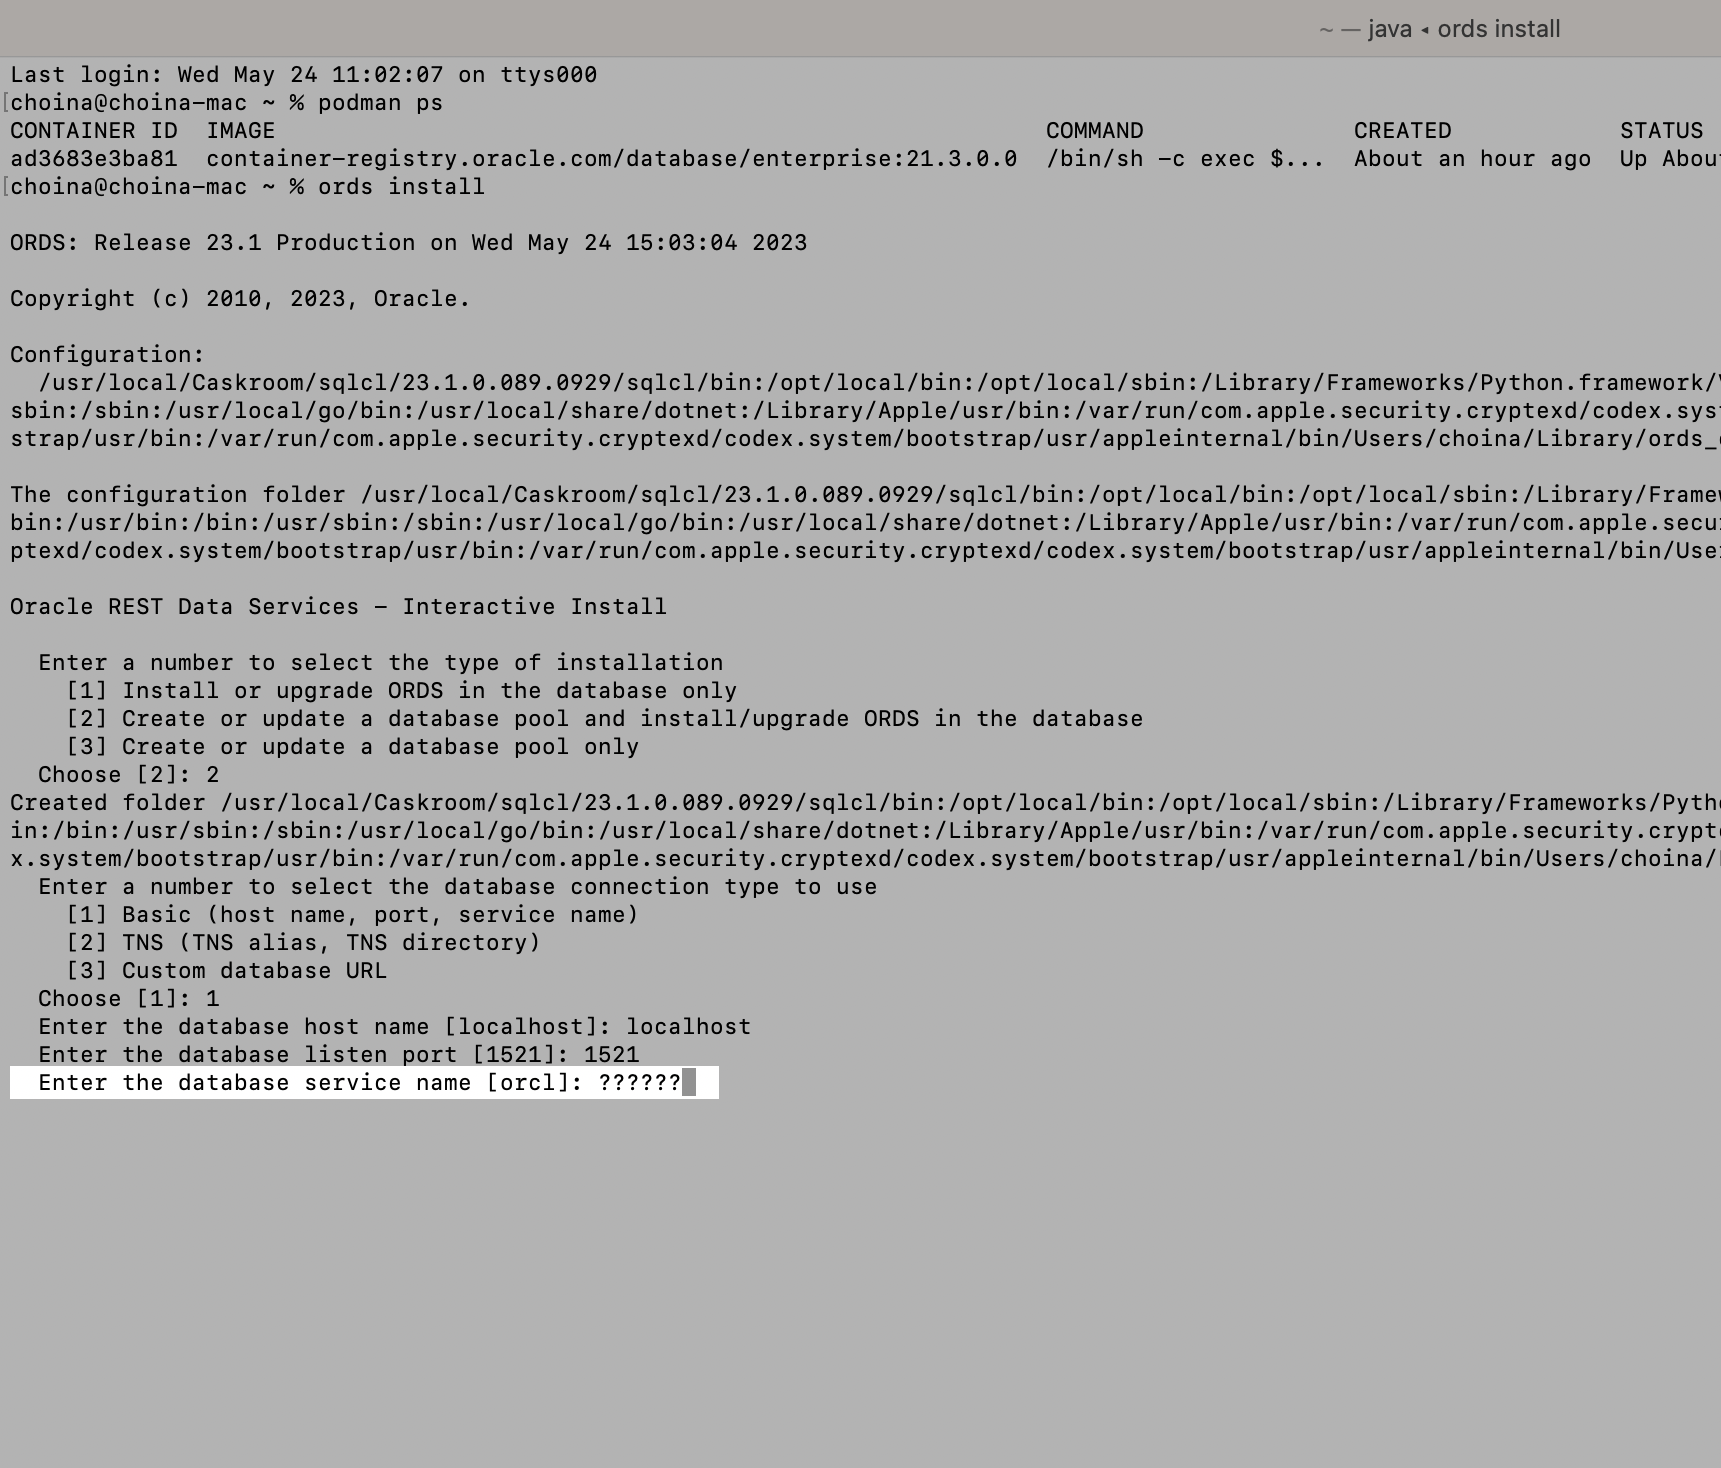
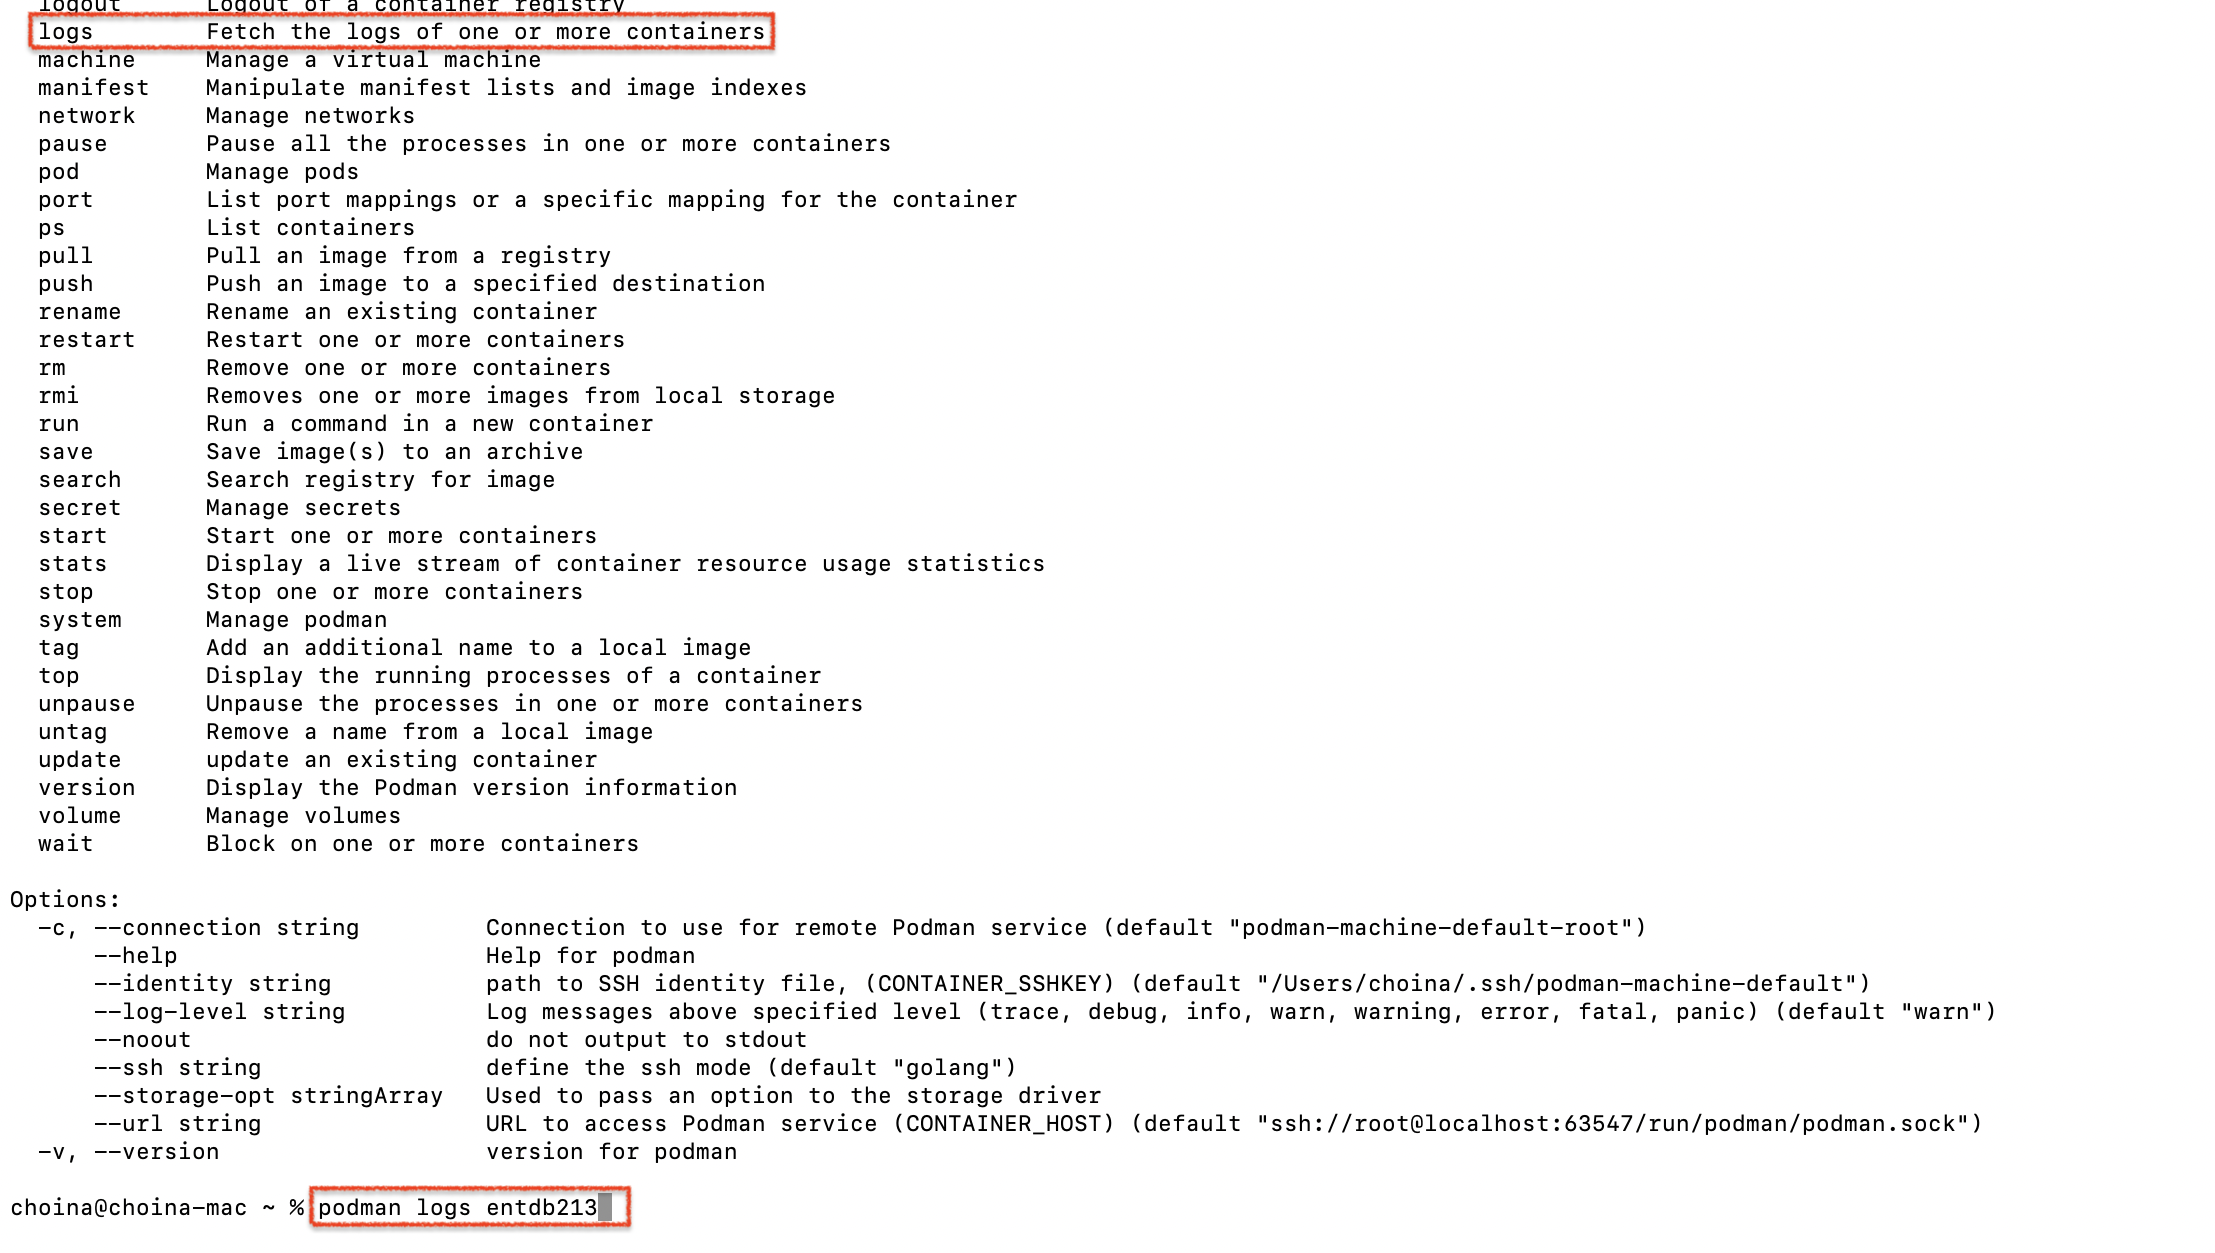
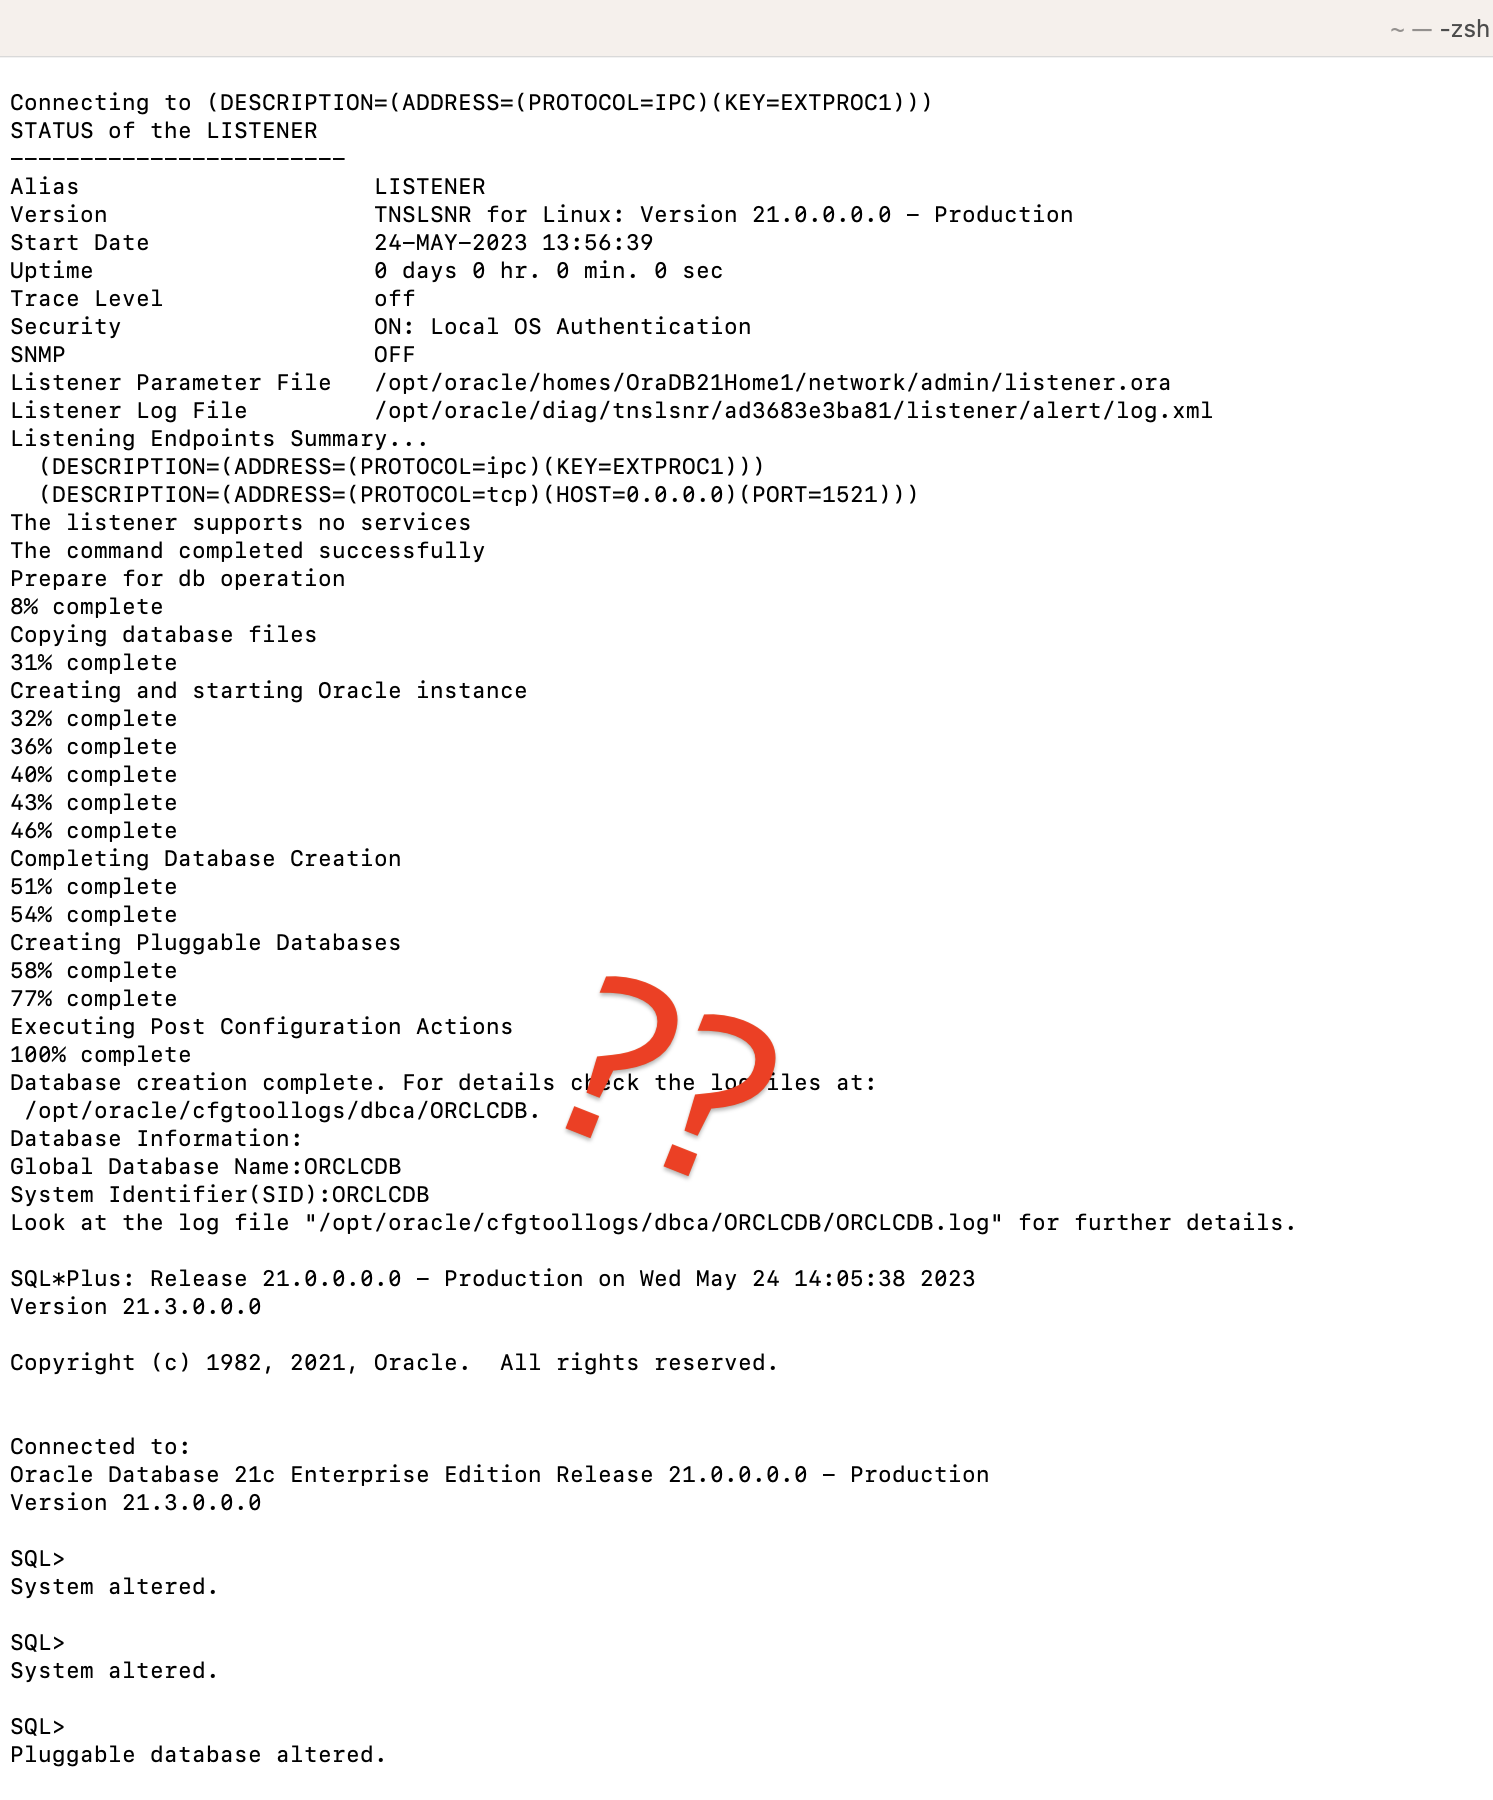
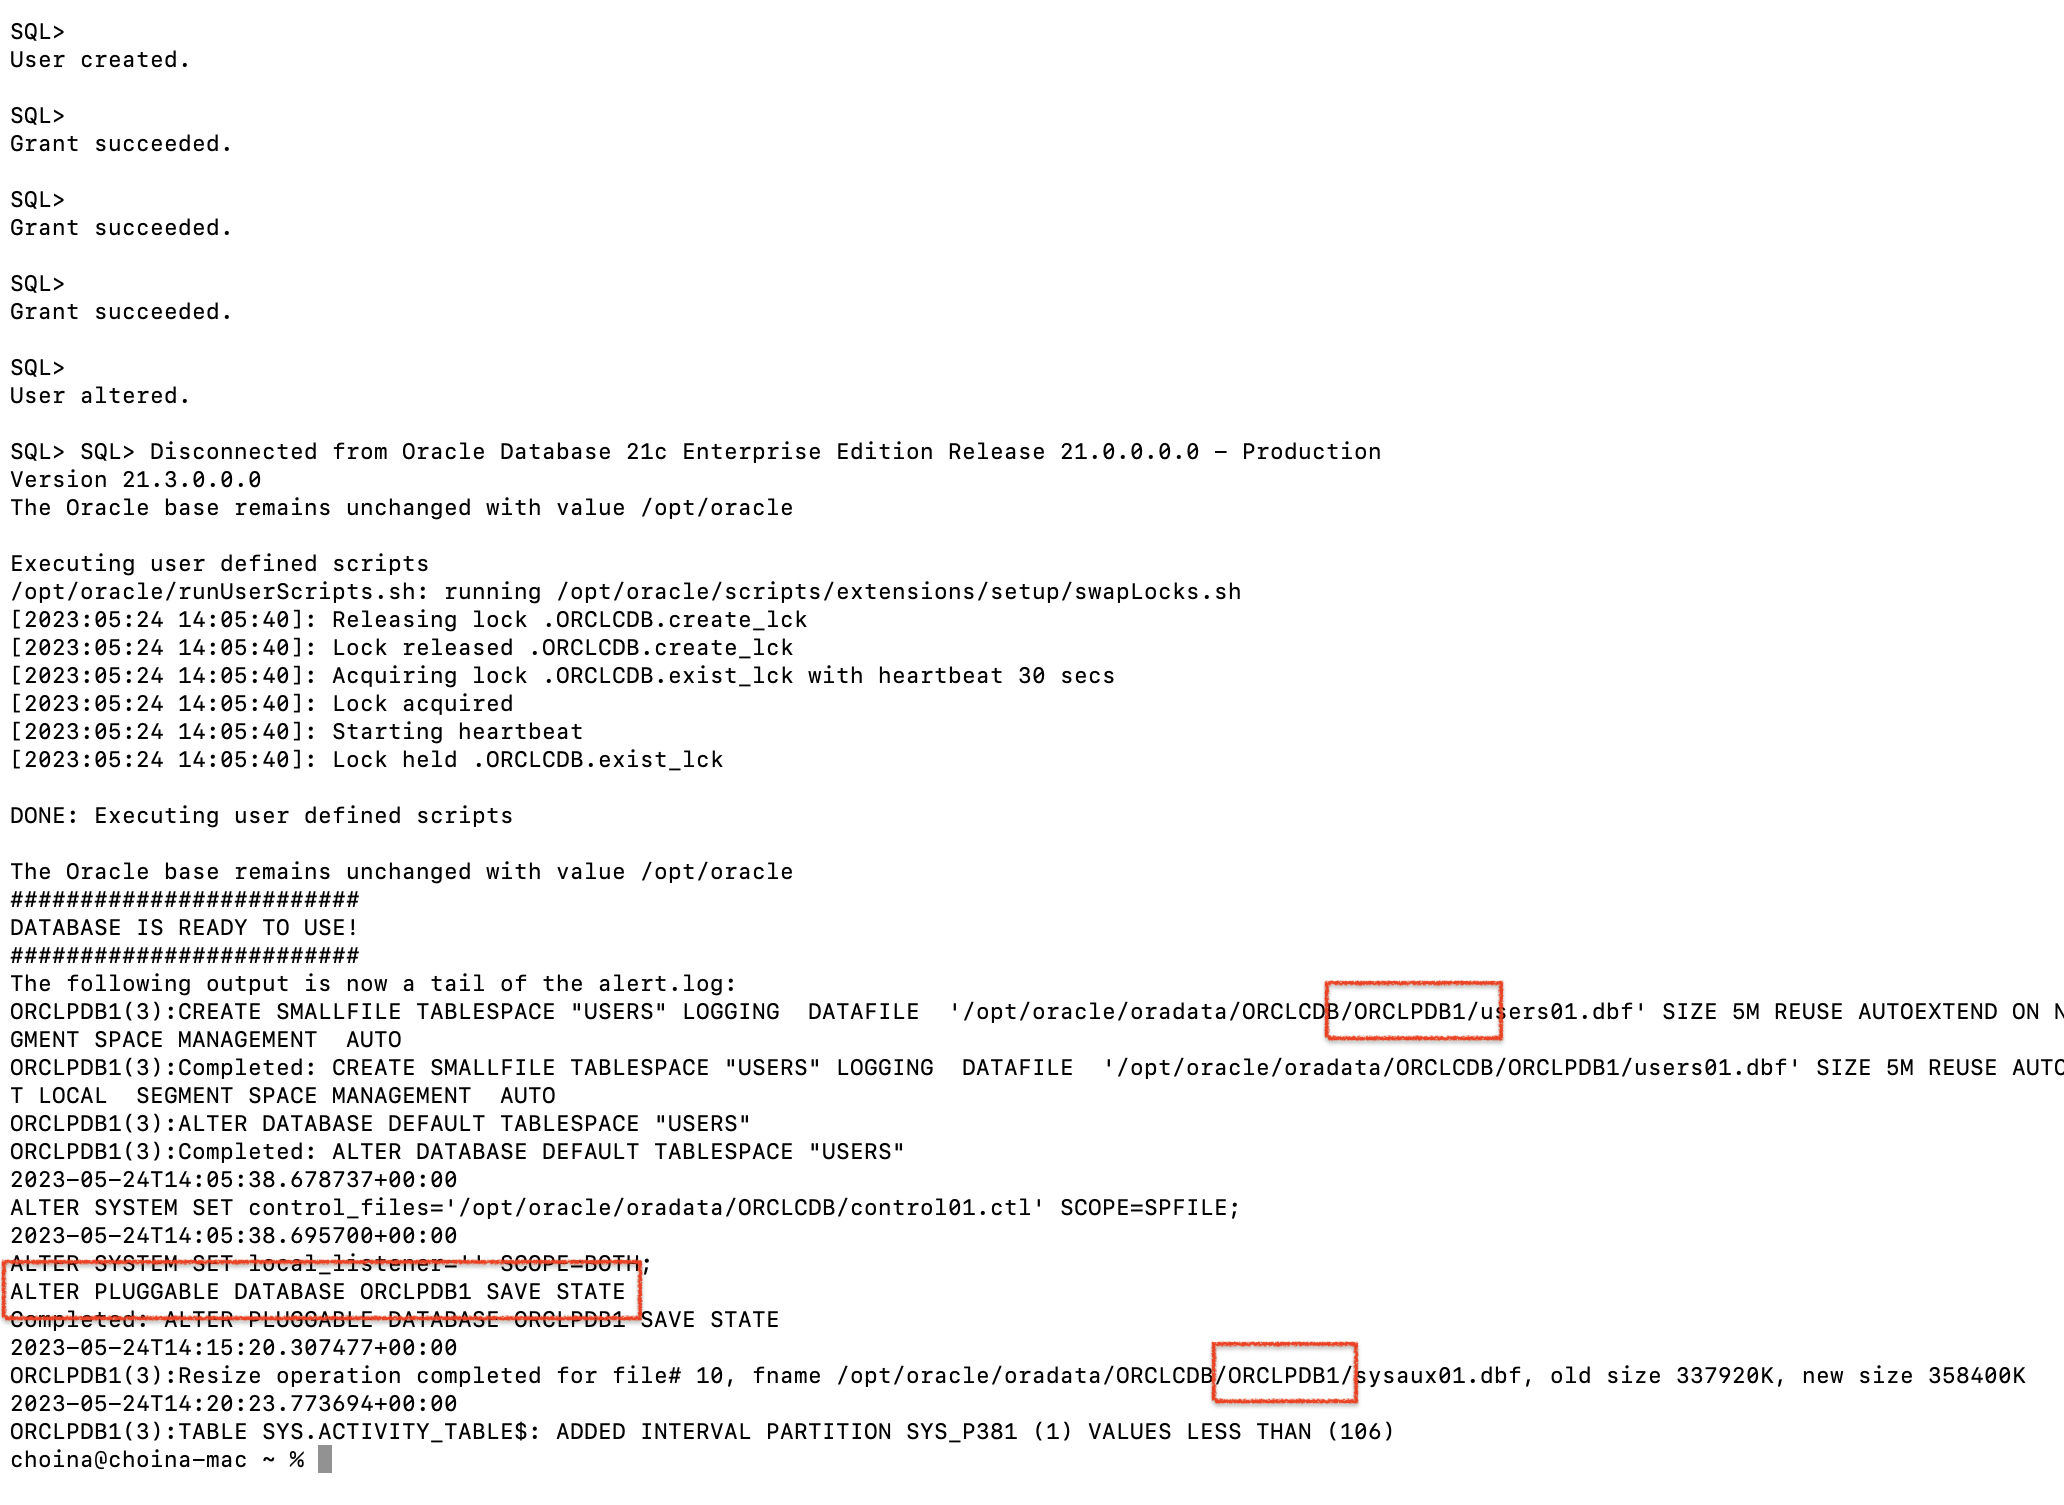
When you get to the database service name, that’s where you might get hung up. The ORDS installer assumes default configuration settings. But here, if you select “orcl” as the database service name, it will install ORDS in the entire database. This is not technically incorrect, but our ORDS Best Practices recommends you install ORDS in a Pluggable Database (PDB). So I’ll issue the podman logs command (in my case: podman logs entdb213) to find the name of the PDB; ORCLPDB1 (that’s the default for this container, it’s well-documented in the container registry docs, I’m just an idiot).
The ORDS interactive installer is very forgiving. I’ve noticed I can exit out of the installation process pretty much anywhere. Given that fact, I’ll restart my Terminal and start the ORDS install over (now that I have the correct database service name).
ORDS install, for real this time
In these images, you can better see the ords install command (it was slightly grayed out in the previous image). And you’ll also see all the steps completed. You can probably keep everything default as I did. You might want to since our documentation refers to that 8080 port (as seen in the images) in most of our tutorials and examples. I find it easier to follow along with the docs when everything matches.
🗒️ NOTE: Make sure you choose to run ORDS in standalone mode. That way you can continue to follow along in later steps.
bin and config folders.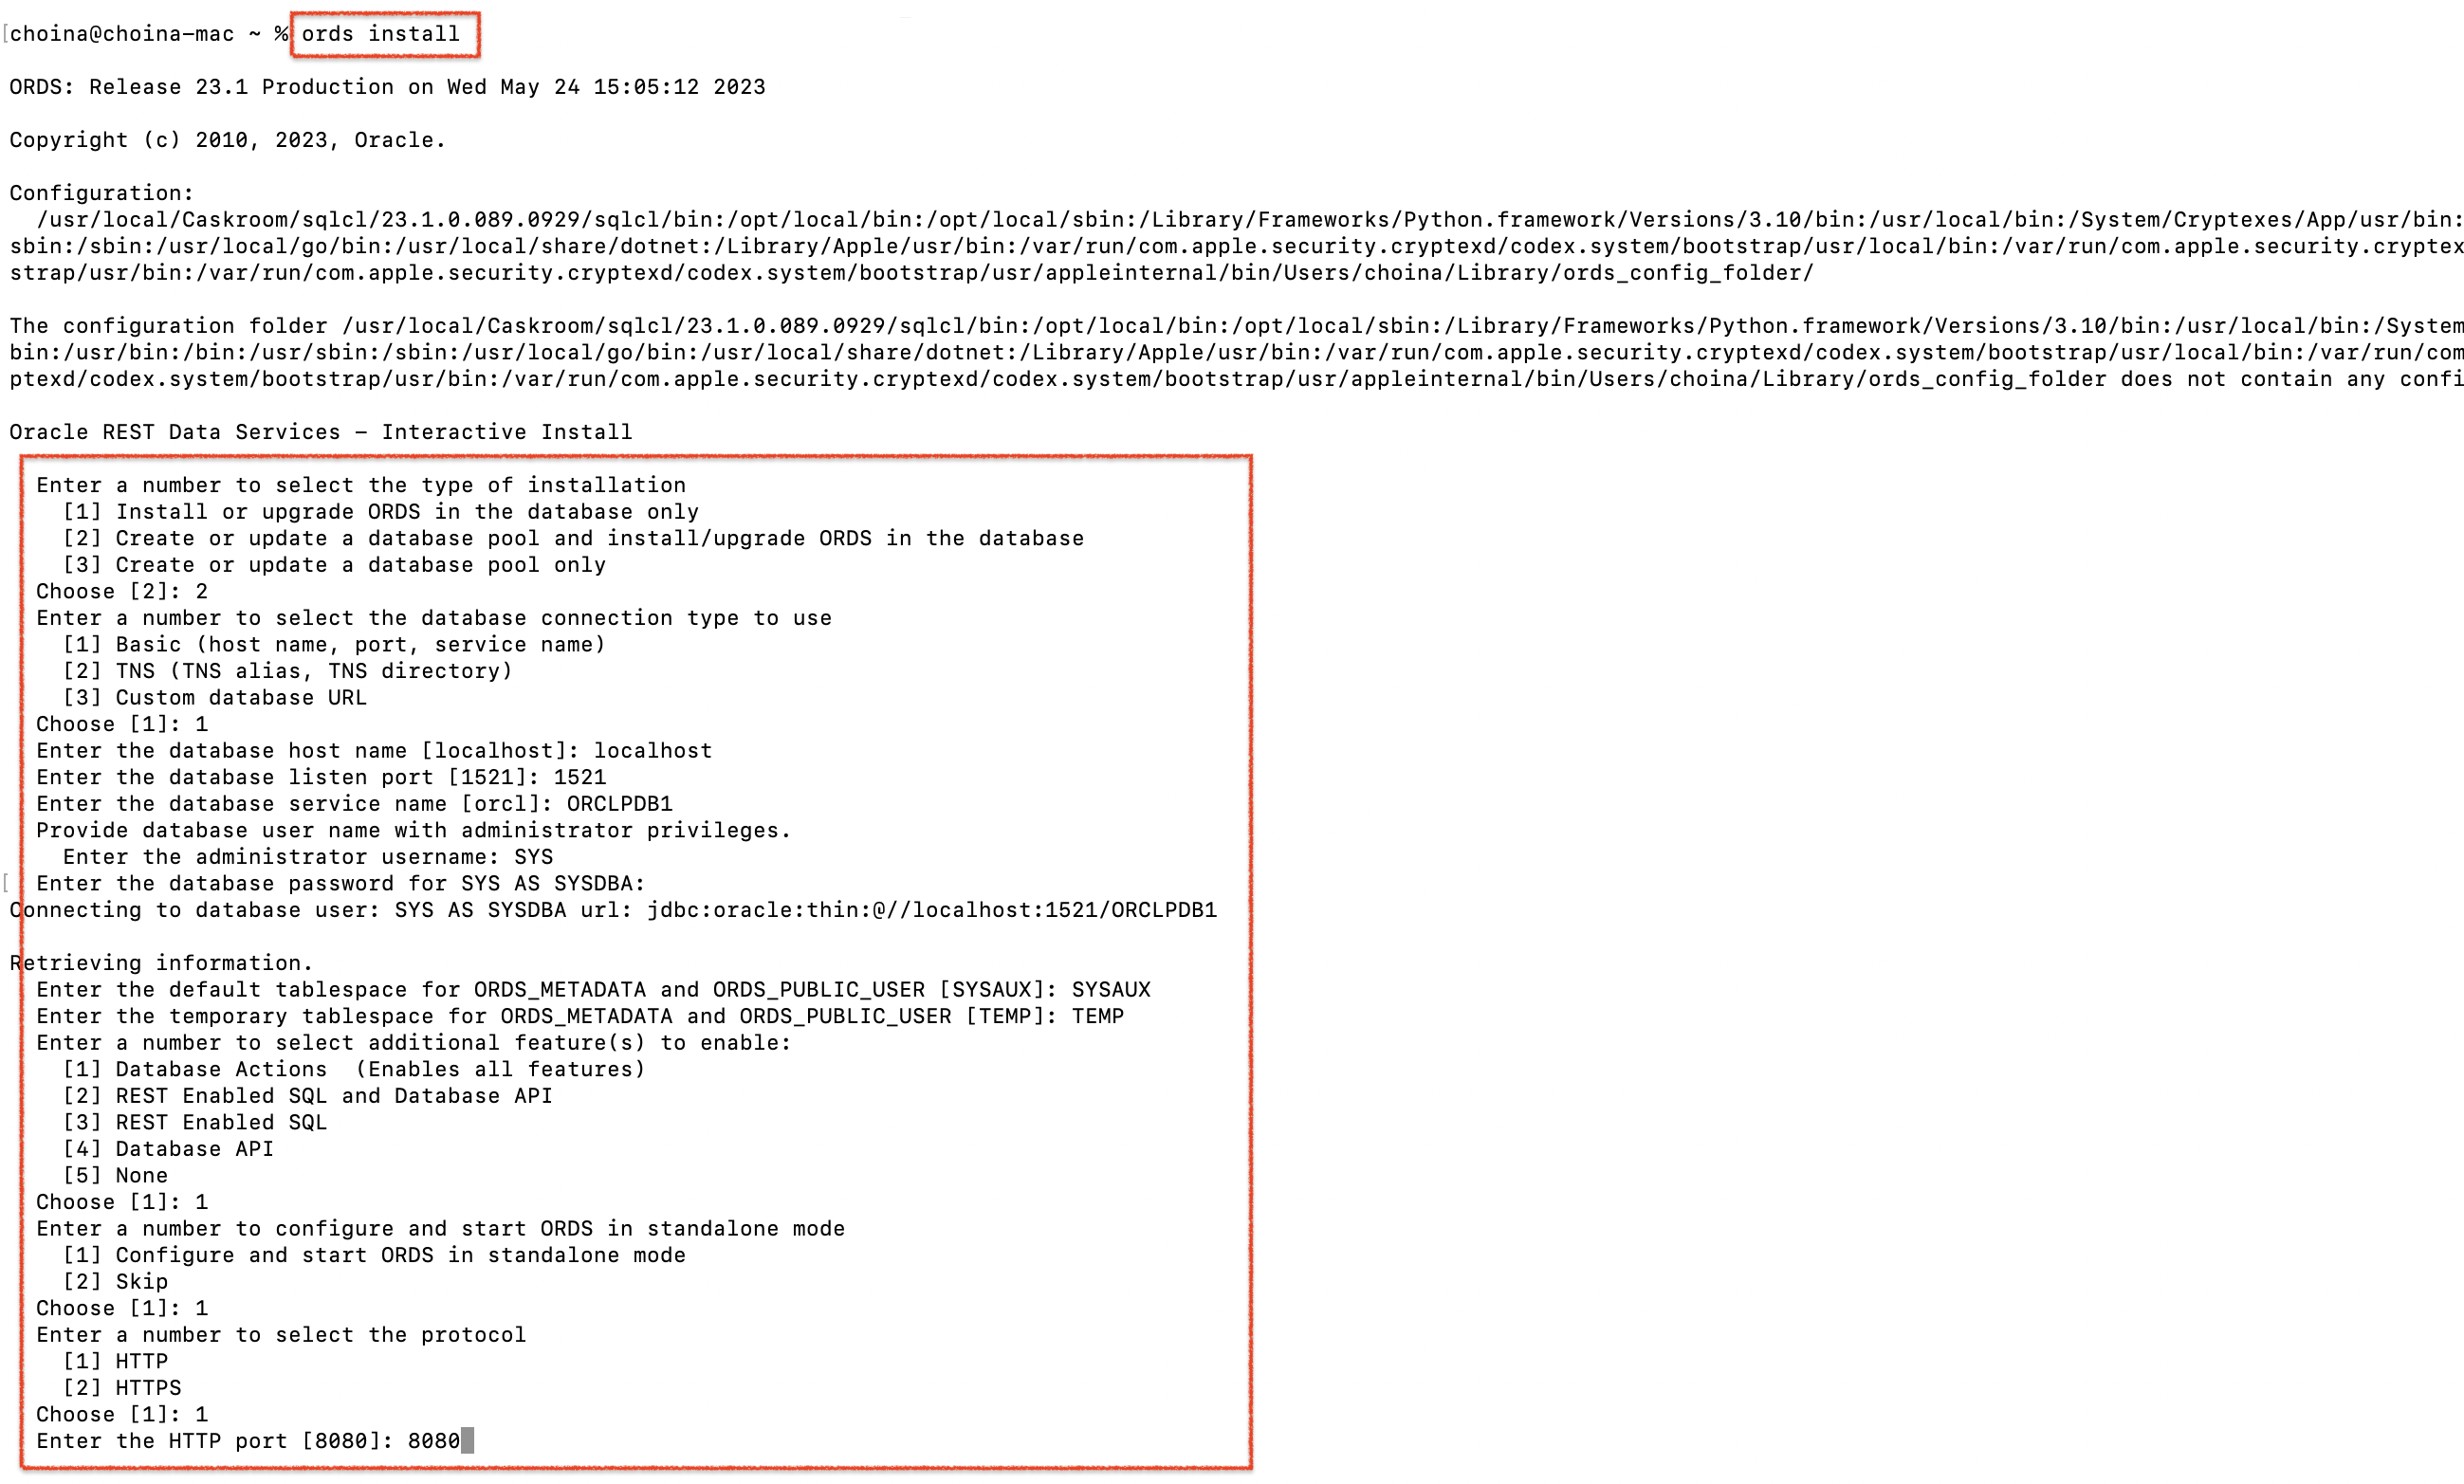
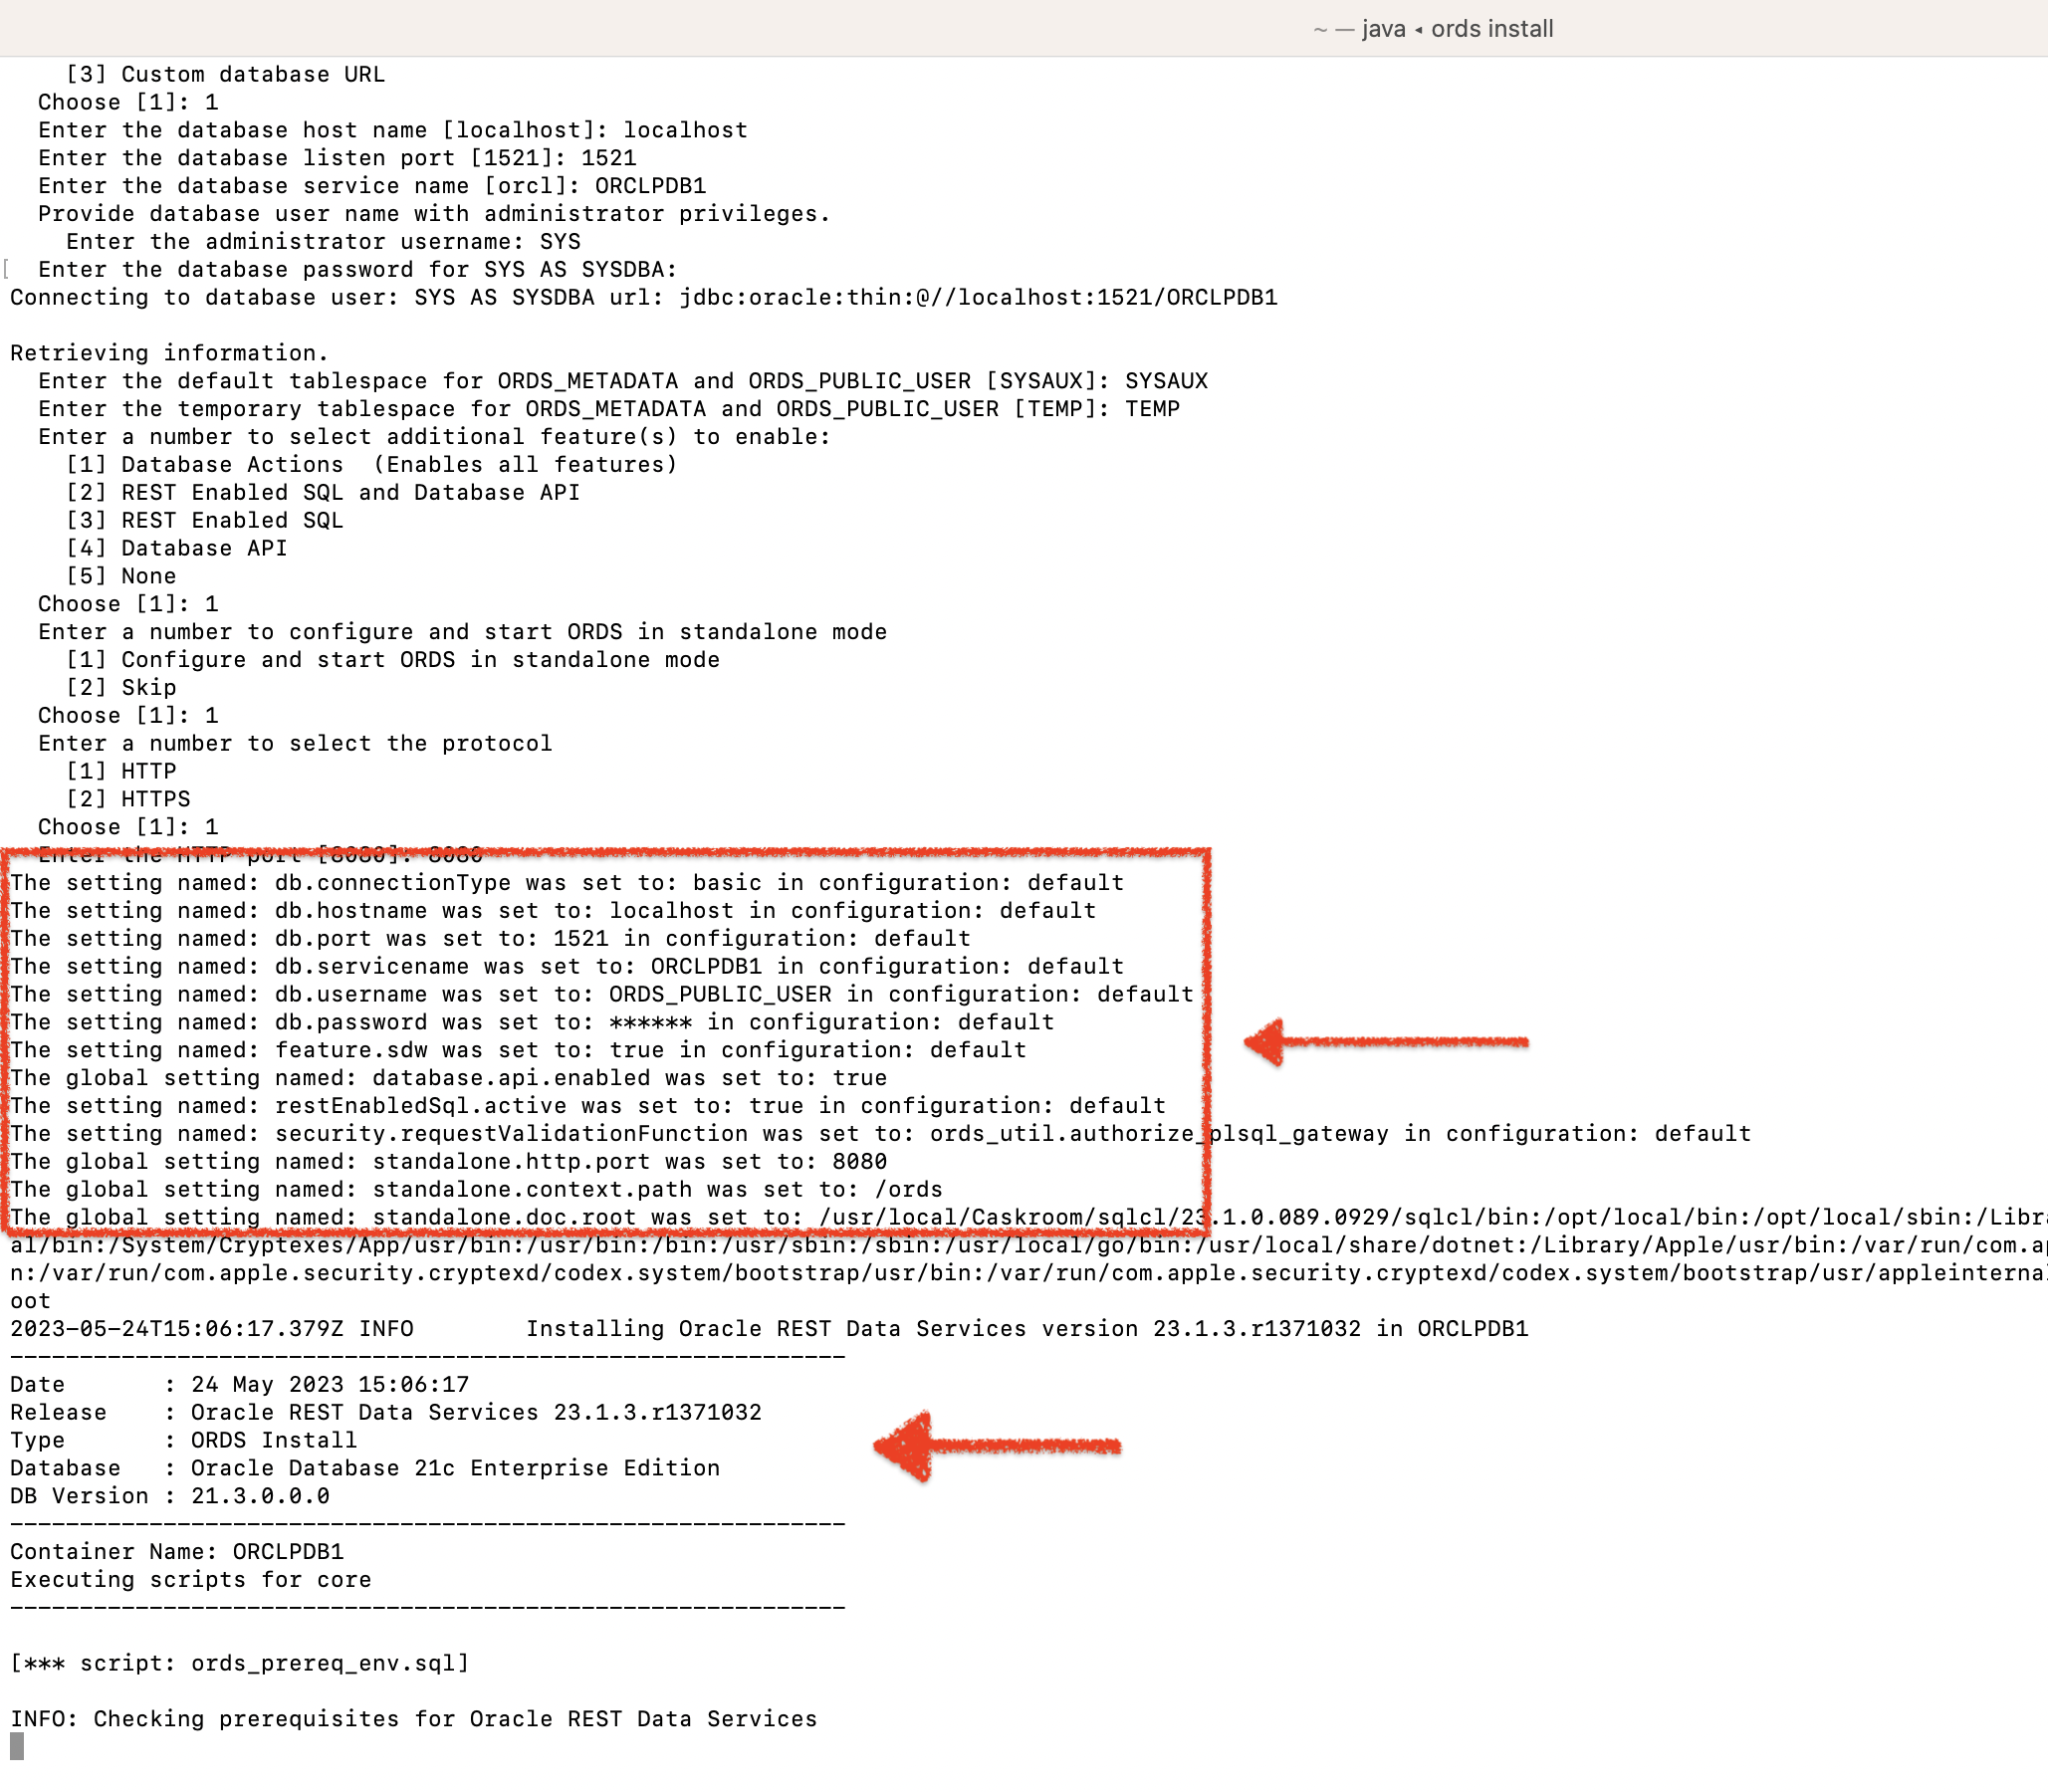
The rest of the installation is largely unremarkable. You will notice a few things, though:
- The paths we’ve pointed to for the
configandbinfolders - The “settings” names(no action required by you, it’s just cool to see)
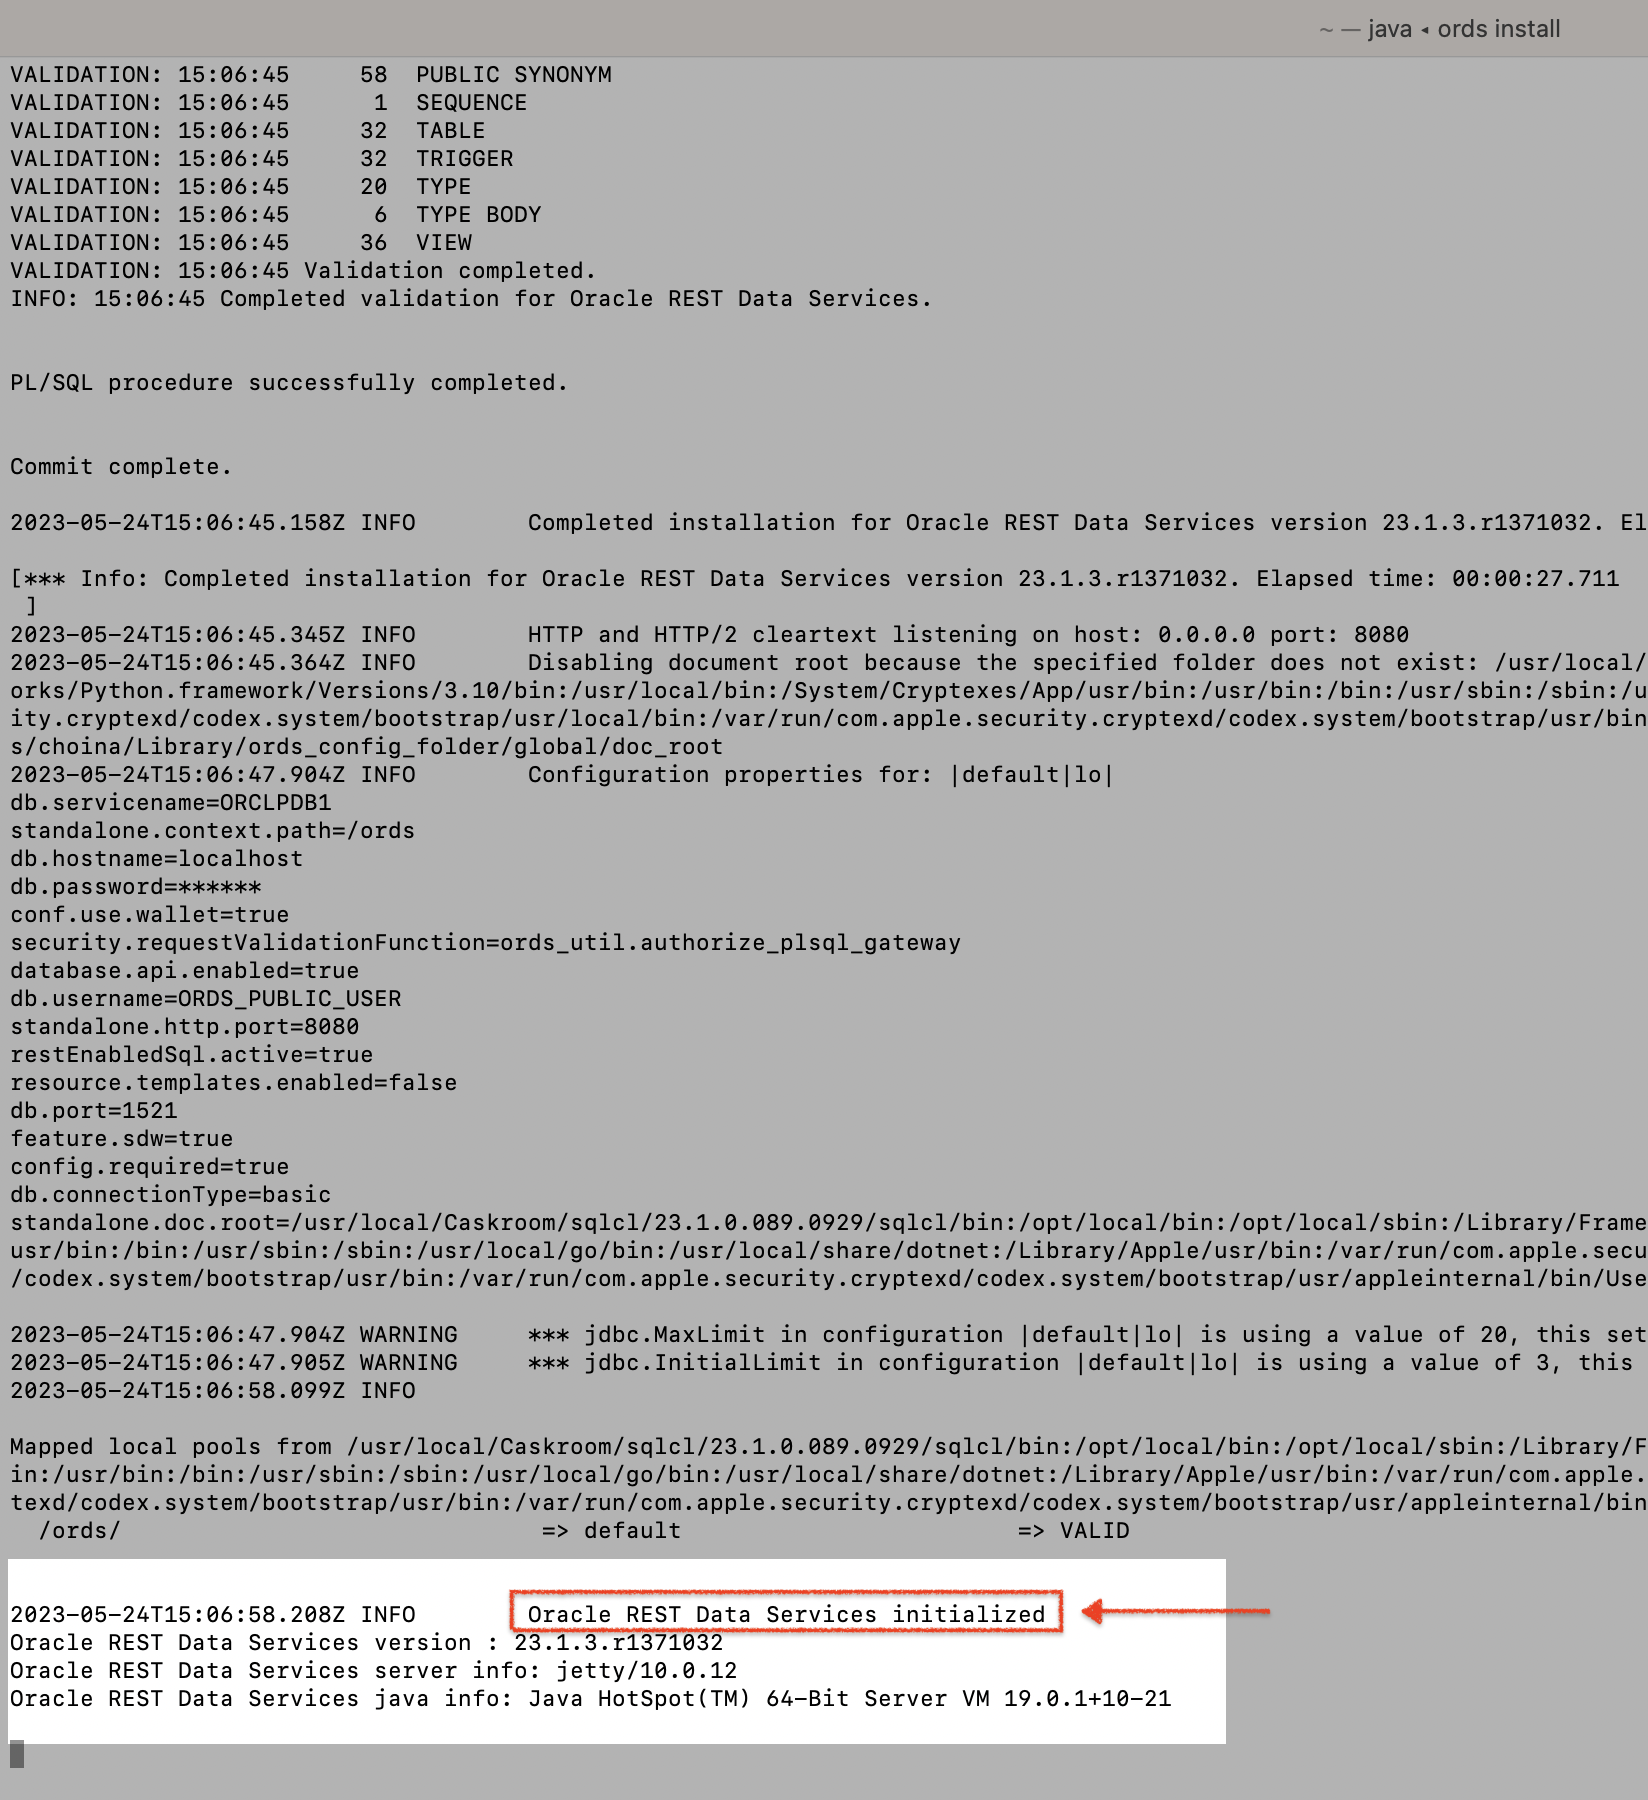
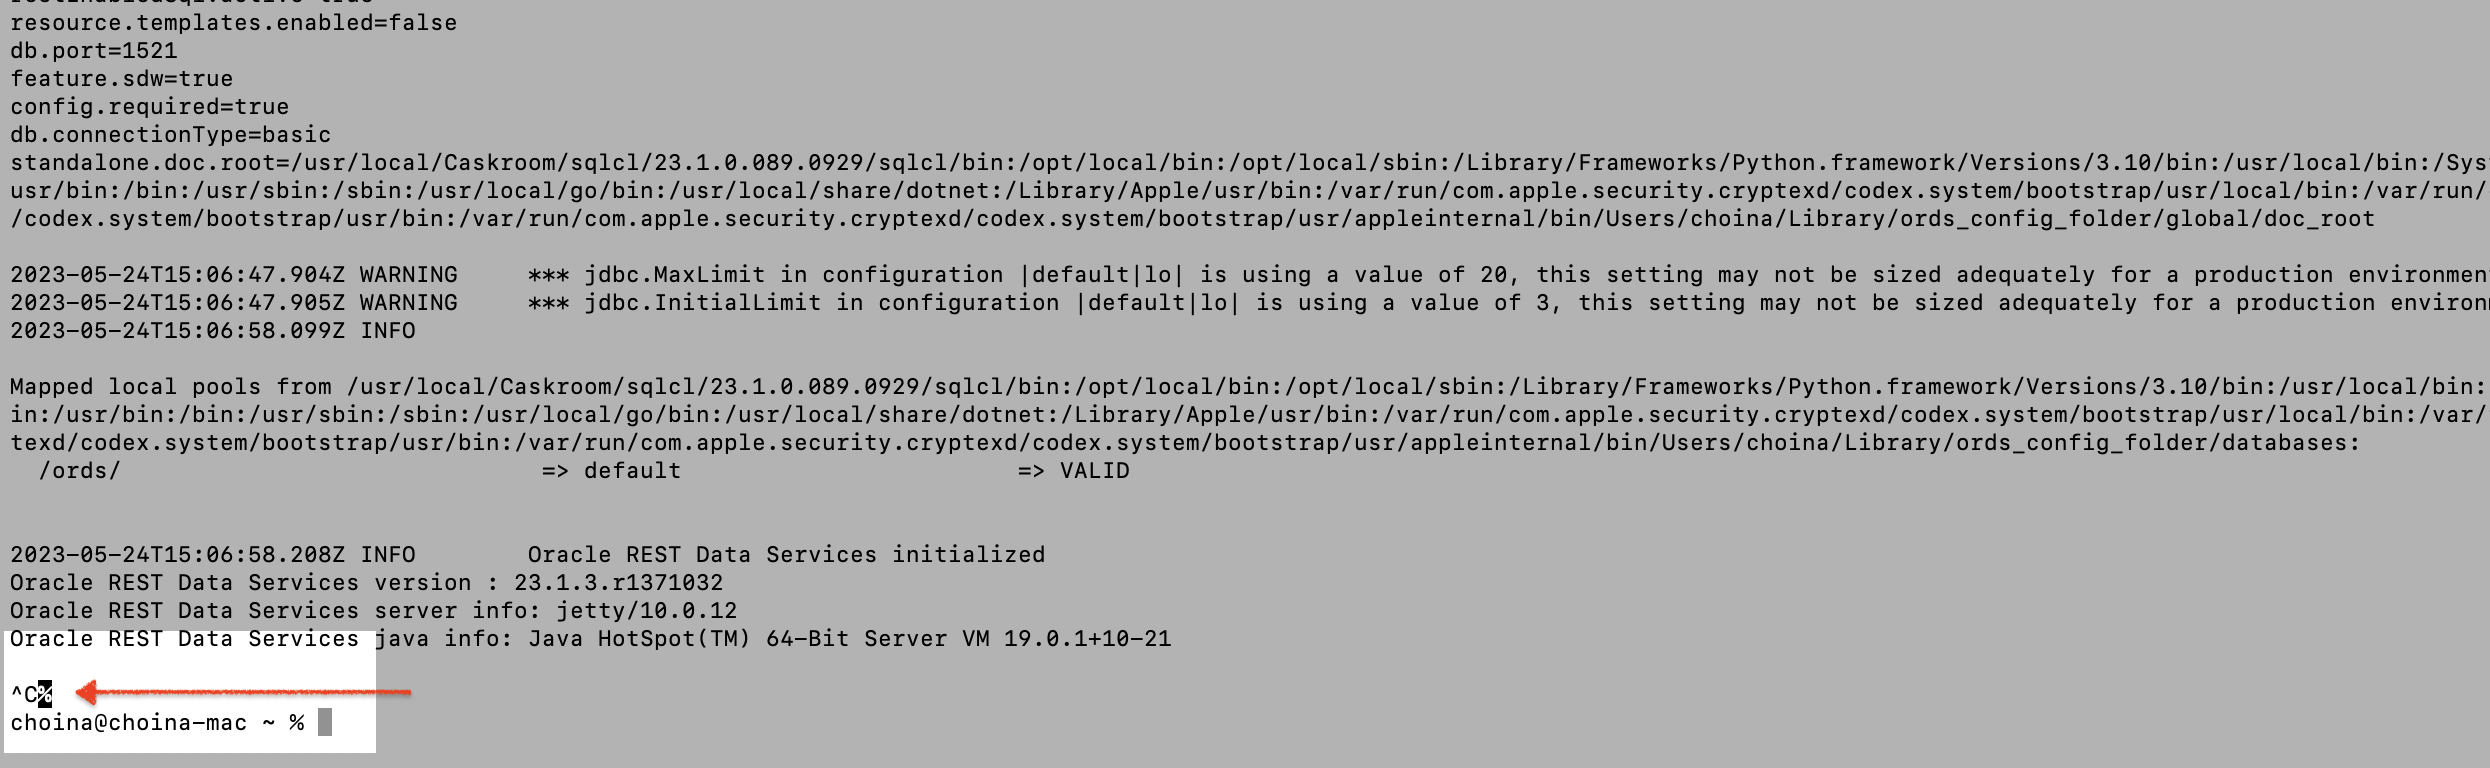
- once the installation finishes, the text “Oracle REST Data Services initialized” will appear
That final image confirms that ORDS is now running in standalone mode. You can visit the following:
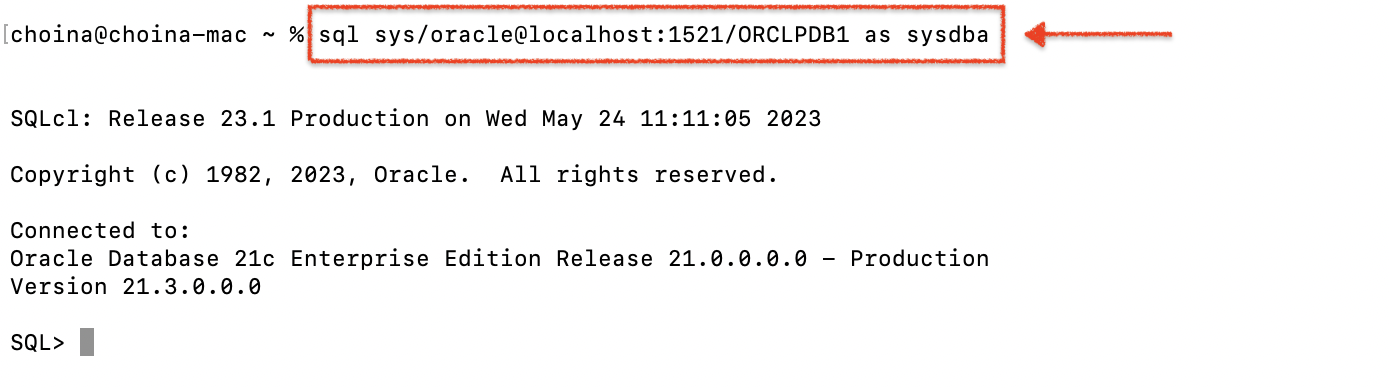
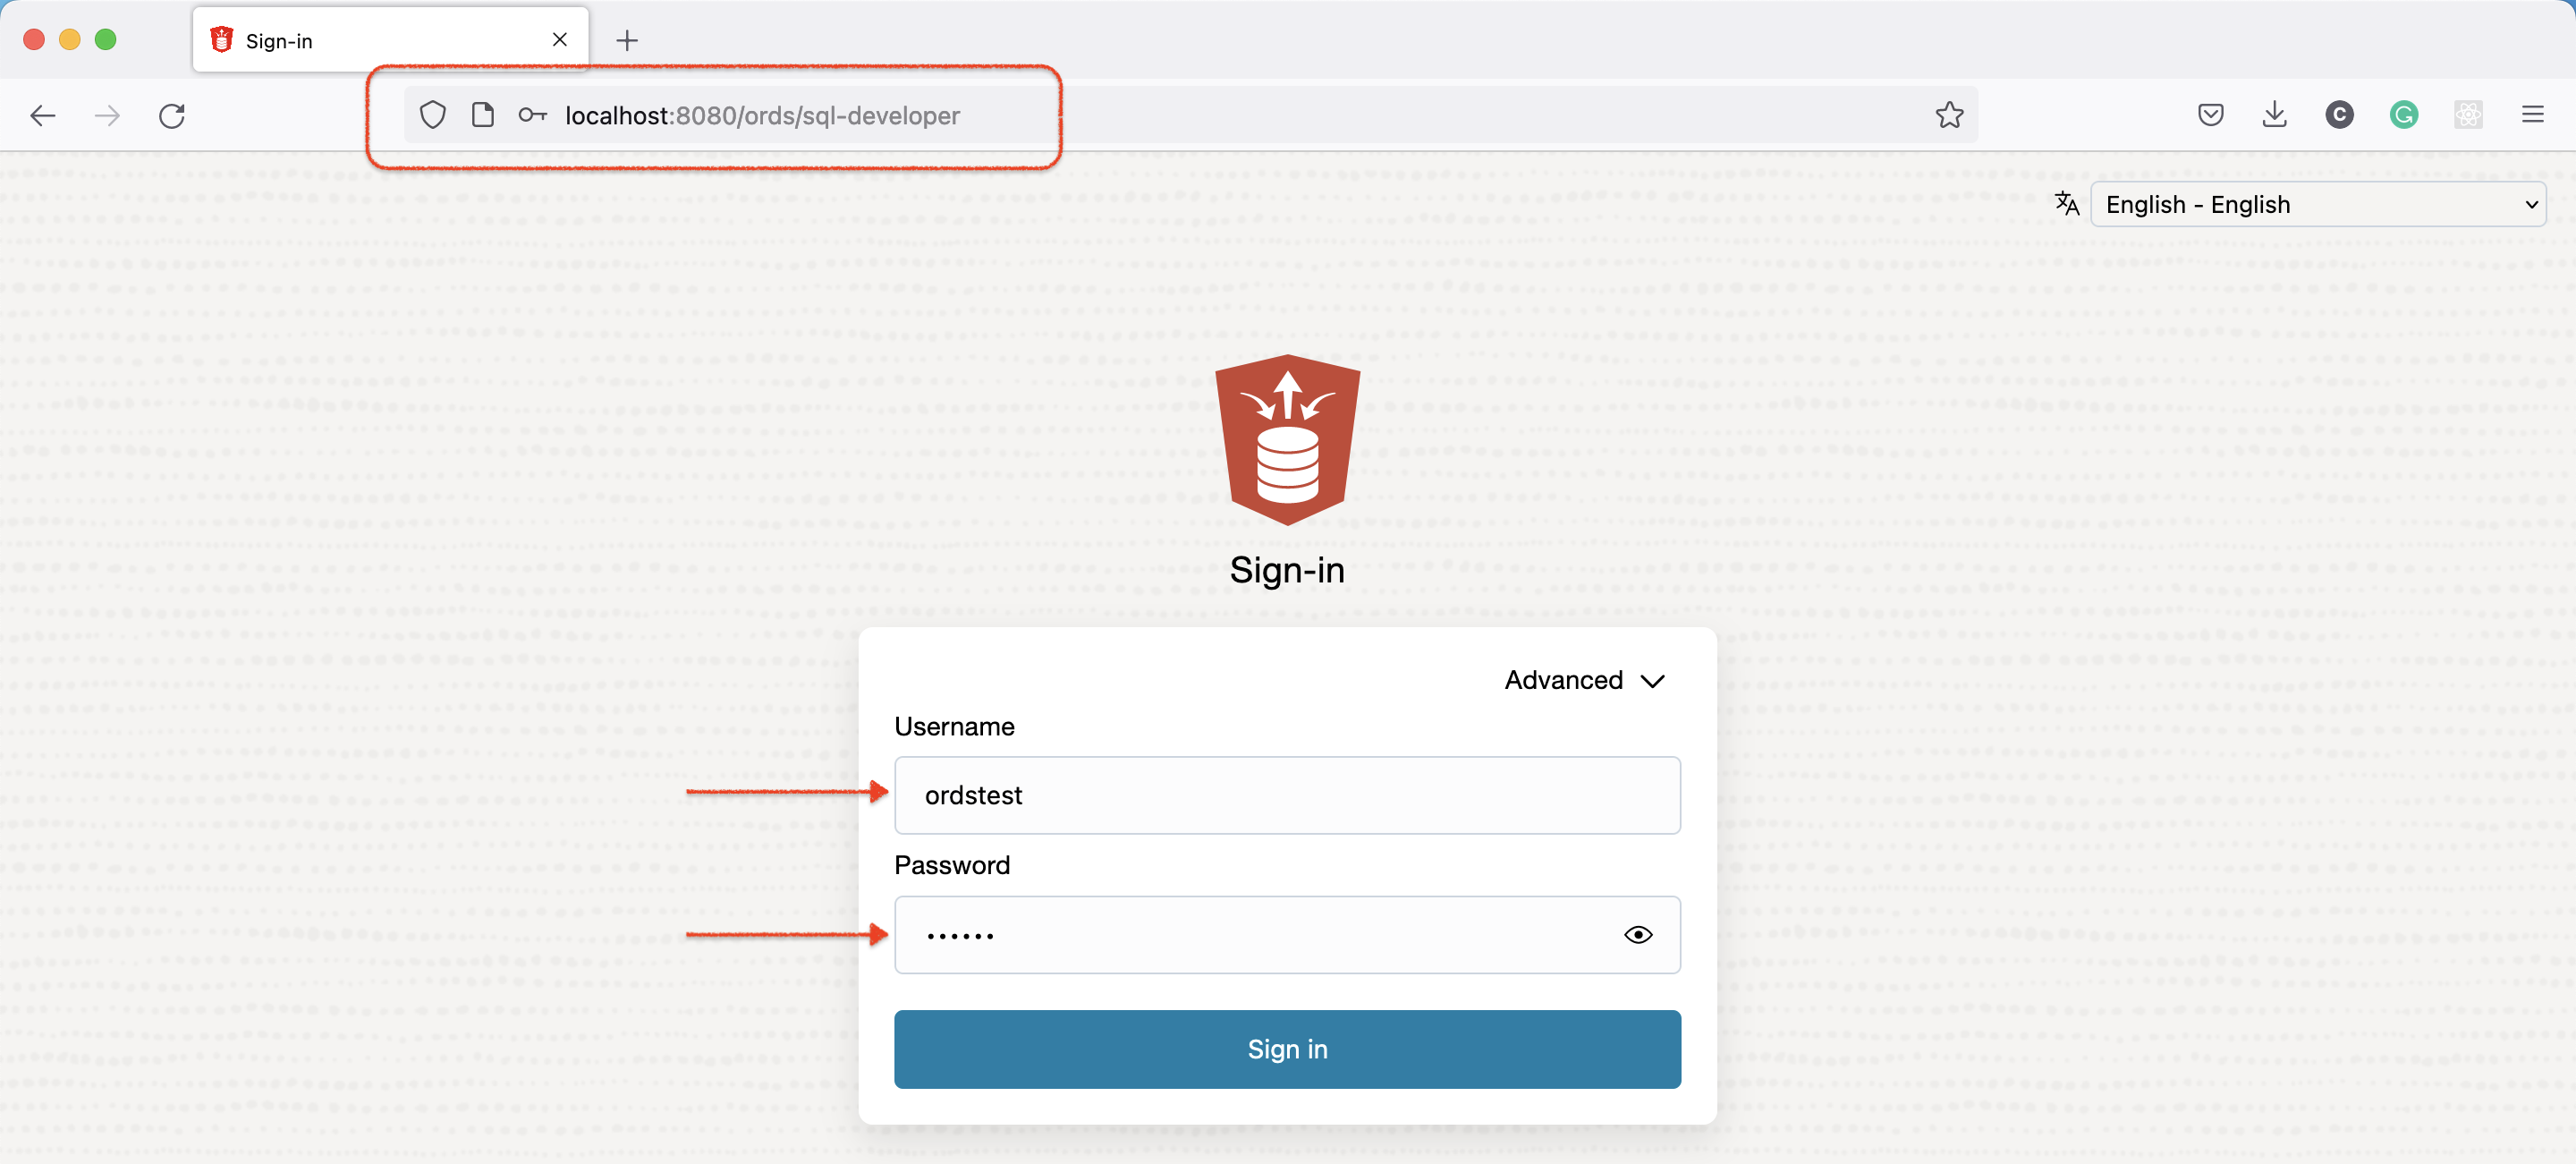
localhost:8080/ords/sql-developerLogging into the SQL Worksheet, the first attempt
And try to log in with the SYS credentials.
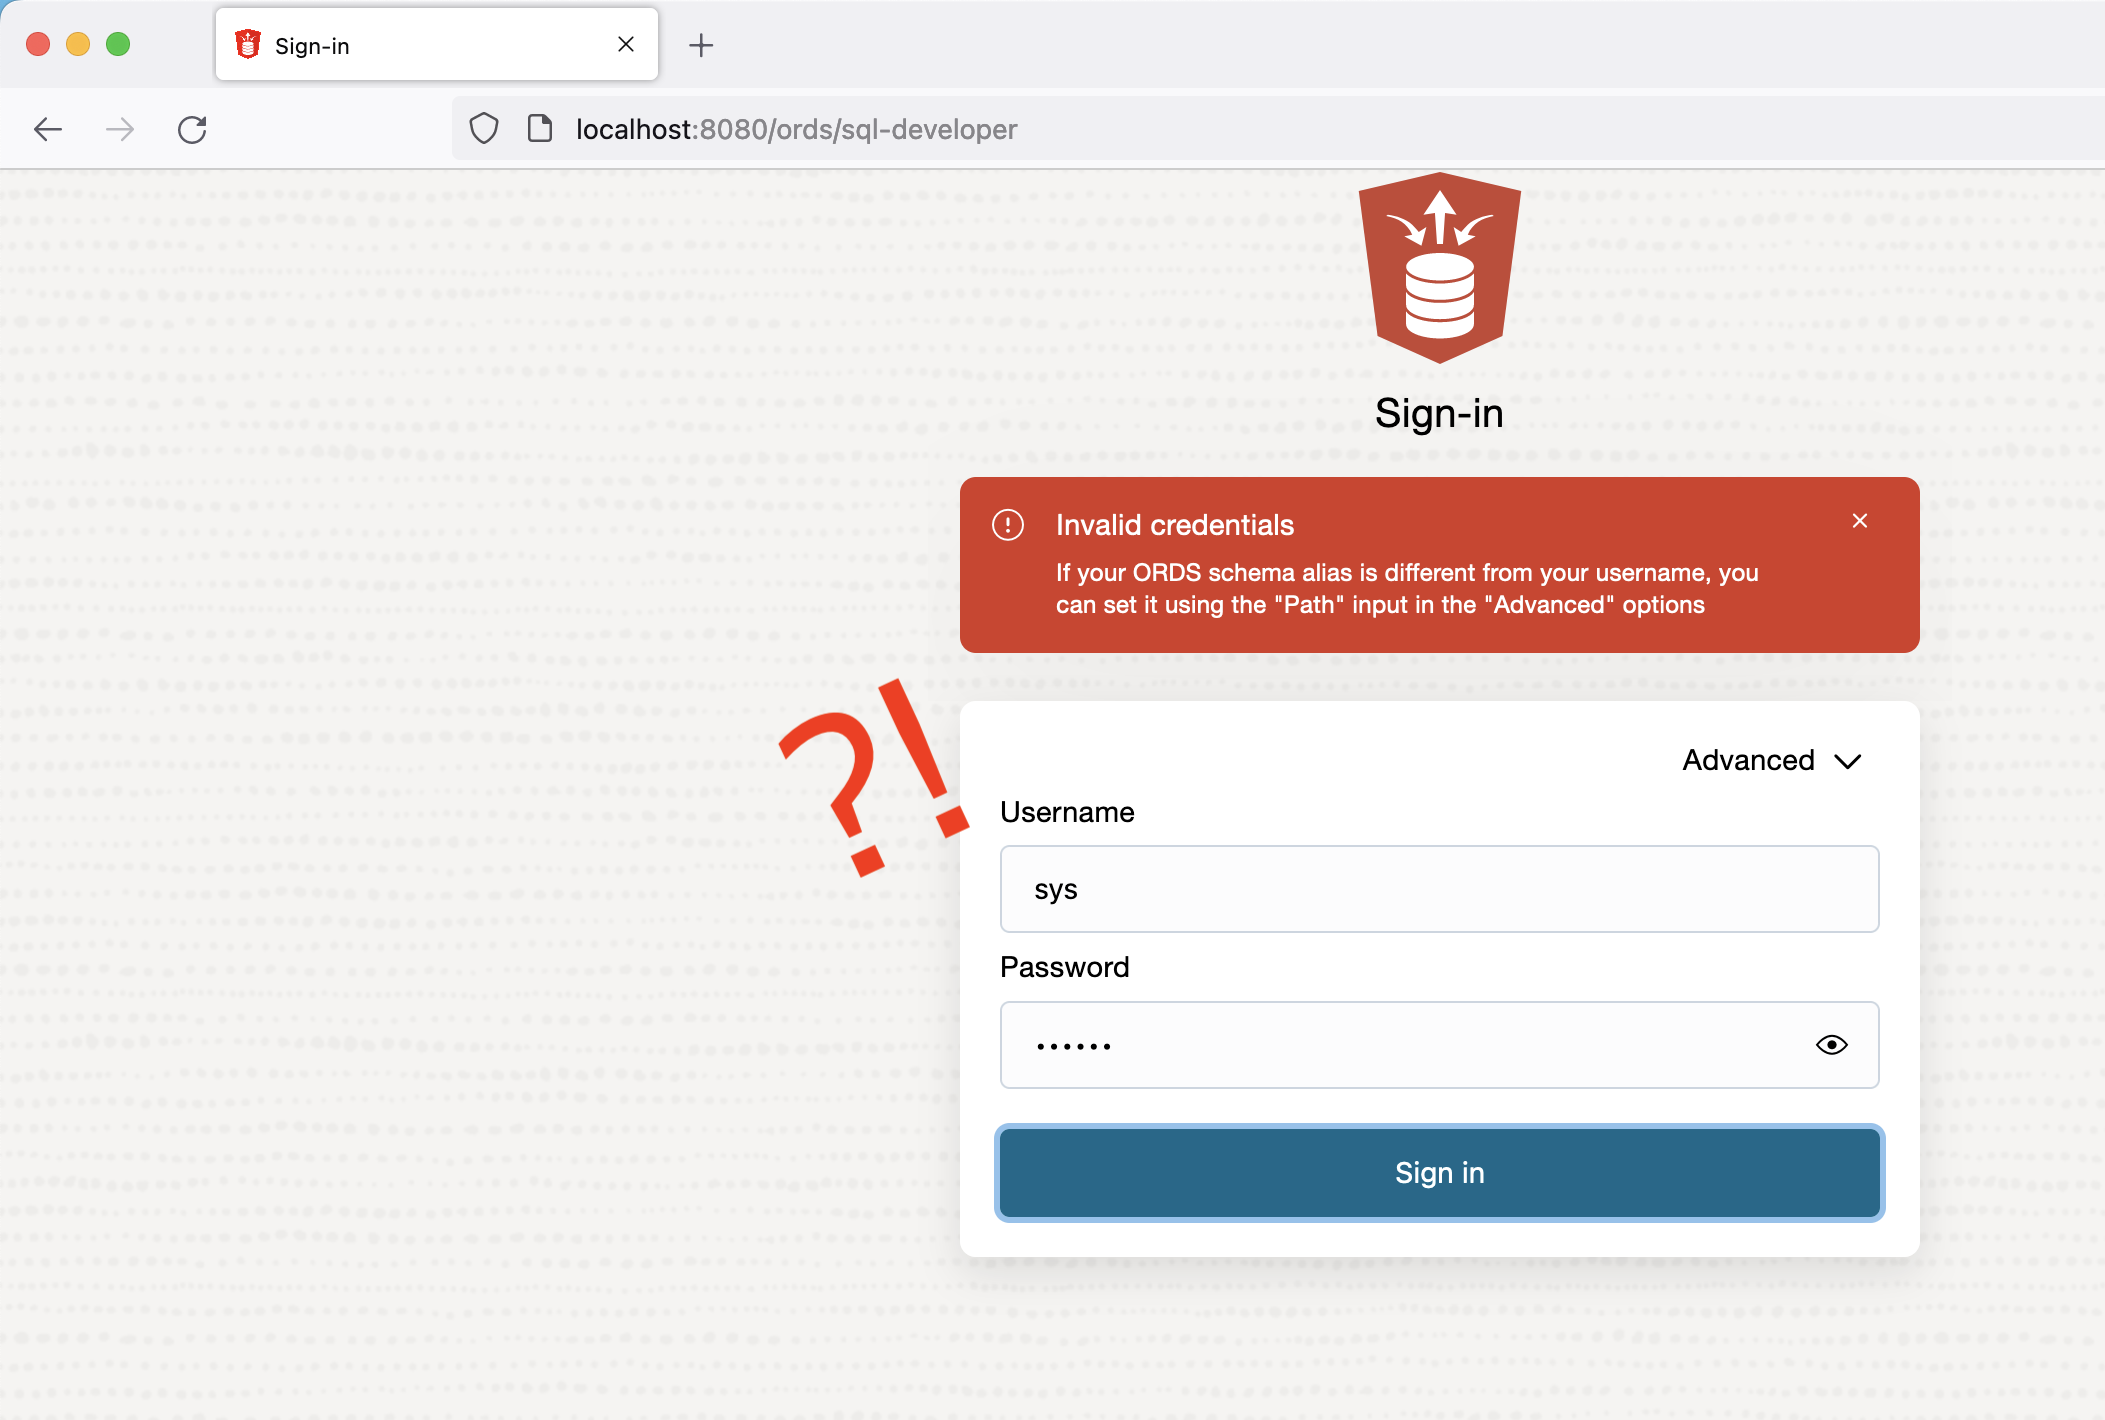
SPOILER ALERT: You can't 😕! Muahahahahaha!
That was a dirty trick. While ORDS is installed in ORCLPDB1, we must first create and REST-enable a user. I will make up for this dirty trick by sharing one of my favorite cheat codes for learning SQL and PL/SQL.
🗒️ NOTE: You cannot REST-enable the SYSTEM or SYS user.
If lucky enough, you have an Oracle Cloud Free Tier account with at least one Autonomous database provisioned.
CORPORATE SHILL ALERT: You can sign up for one here 😘.
Code cheating with the Autonomous database
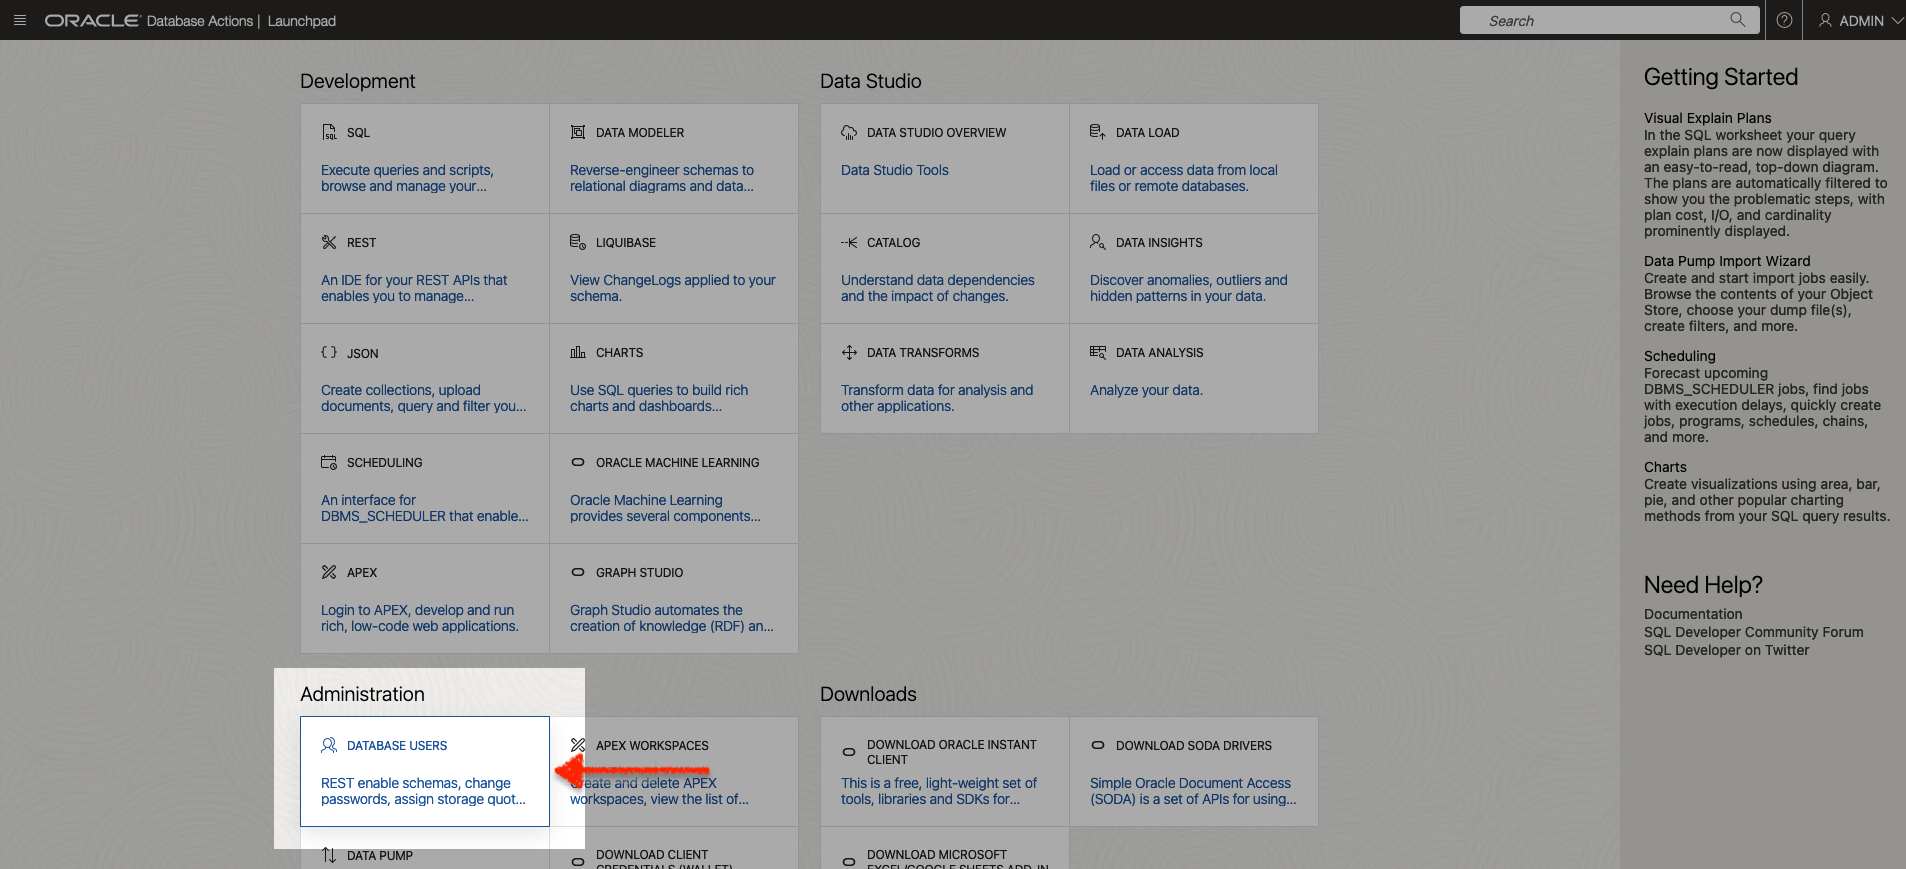
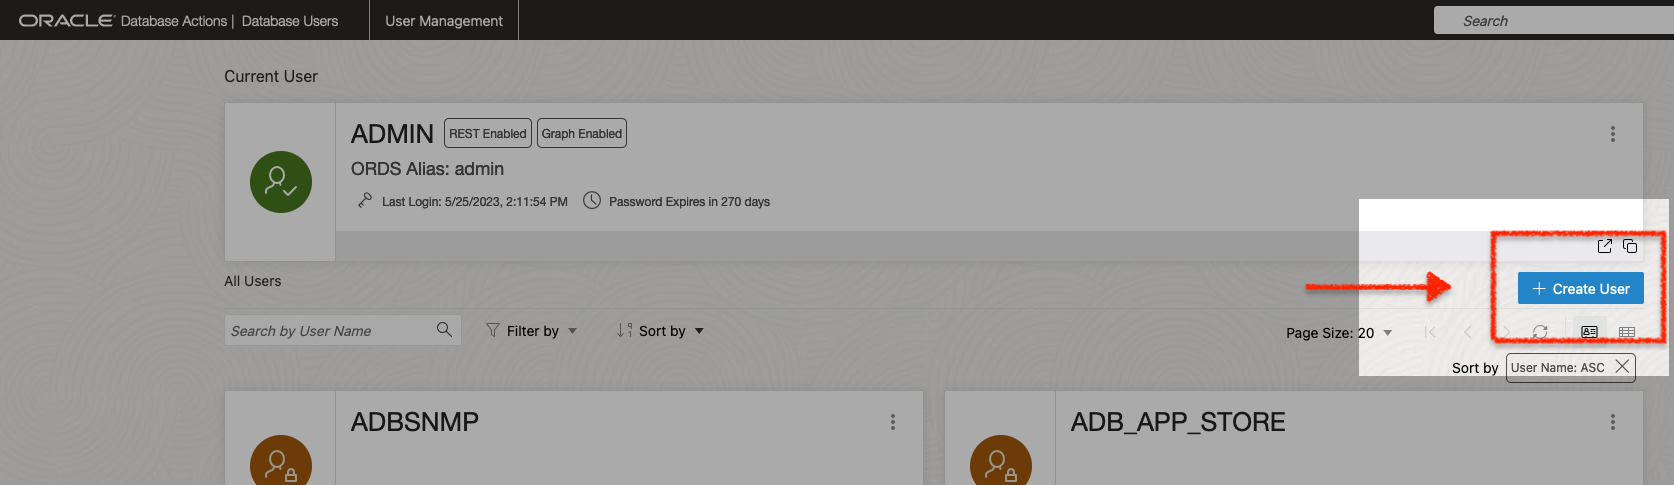
Login to Database Actions as the Administrator. Navigate to User Management. In that dashboard, select the + Create User button.
When the slider appears, enter the information for the ORDSTEST user (like you see in the image here).
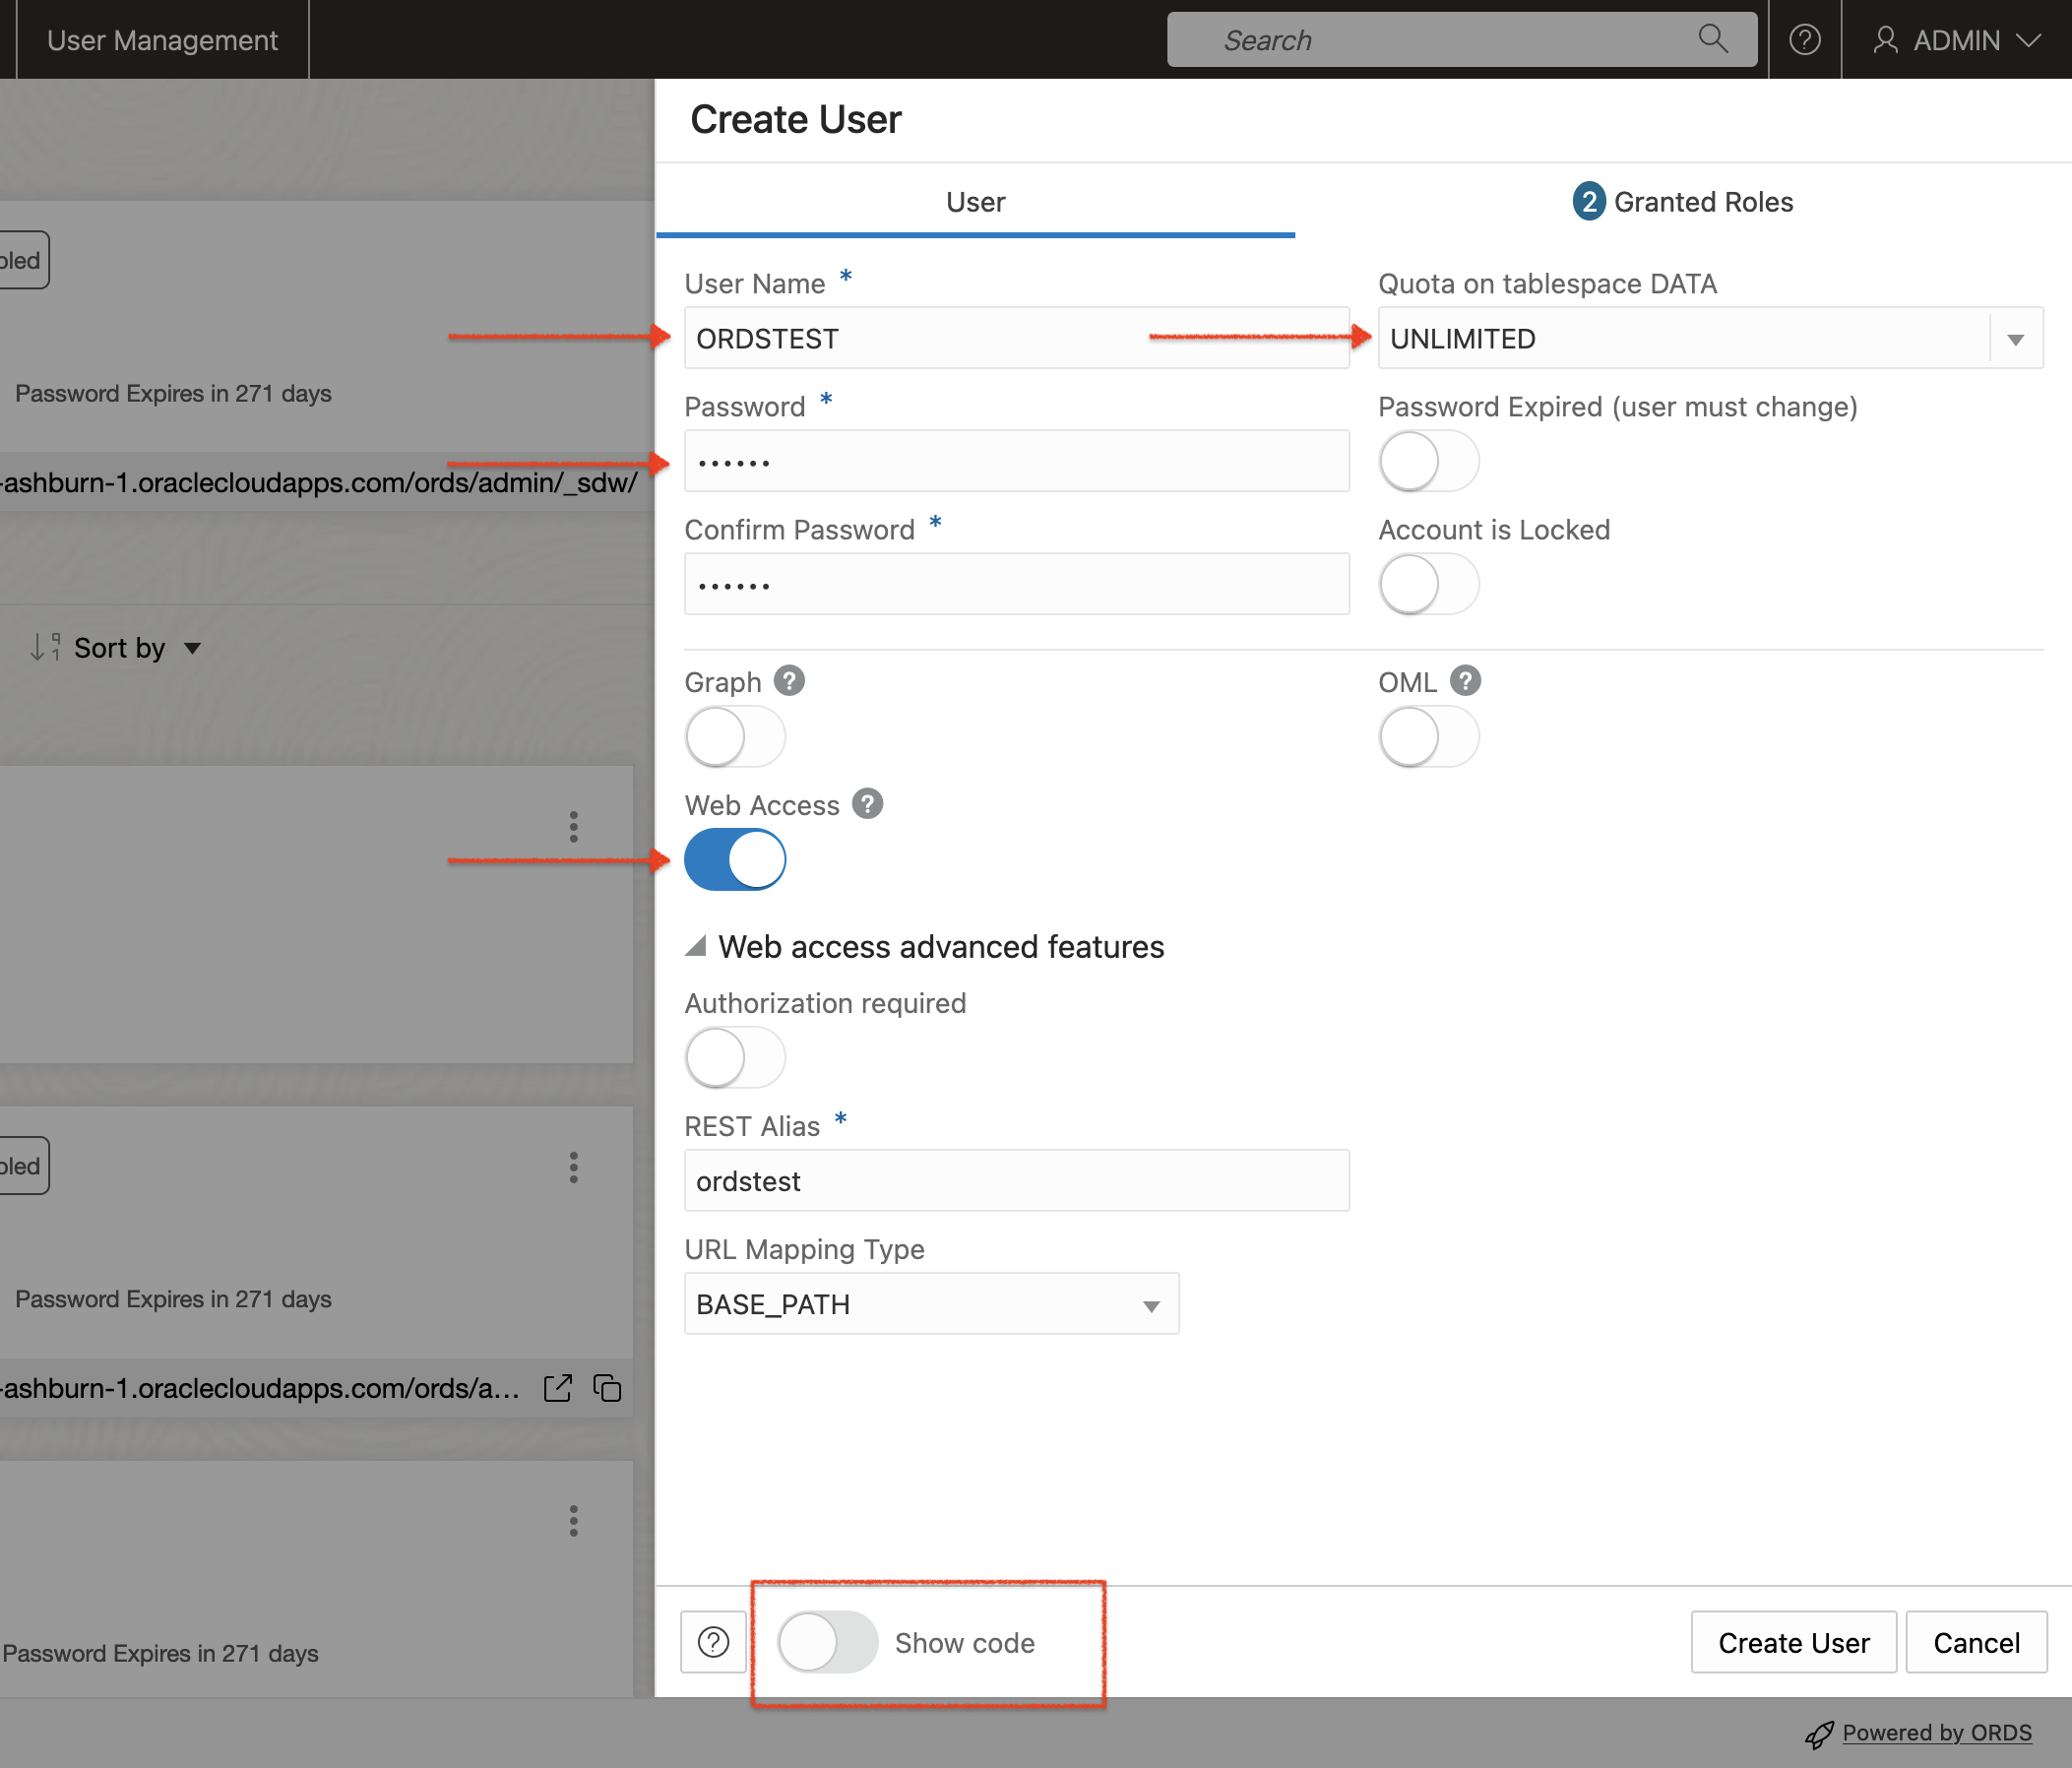
You’ll need to enable “Web Access” for this user. When you do this (click the switch), two things will happen:
- The
CONNECTandRESOURCEroles will be automatically selected for you - The Authorization required toggle will be enabled – shut this off for now
Once you’ve done that, you can select the “Show code” switch at the bottom of the slider. This will reveal the actual code that is being executed should you click the “Create User” button (which you will most certainly NOT!).
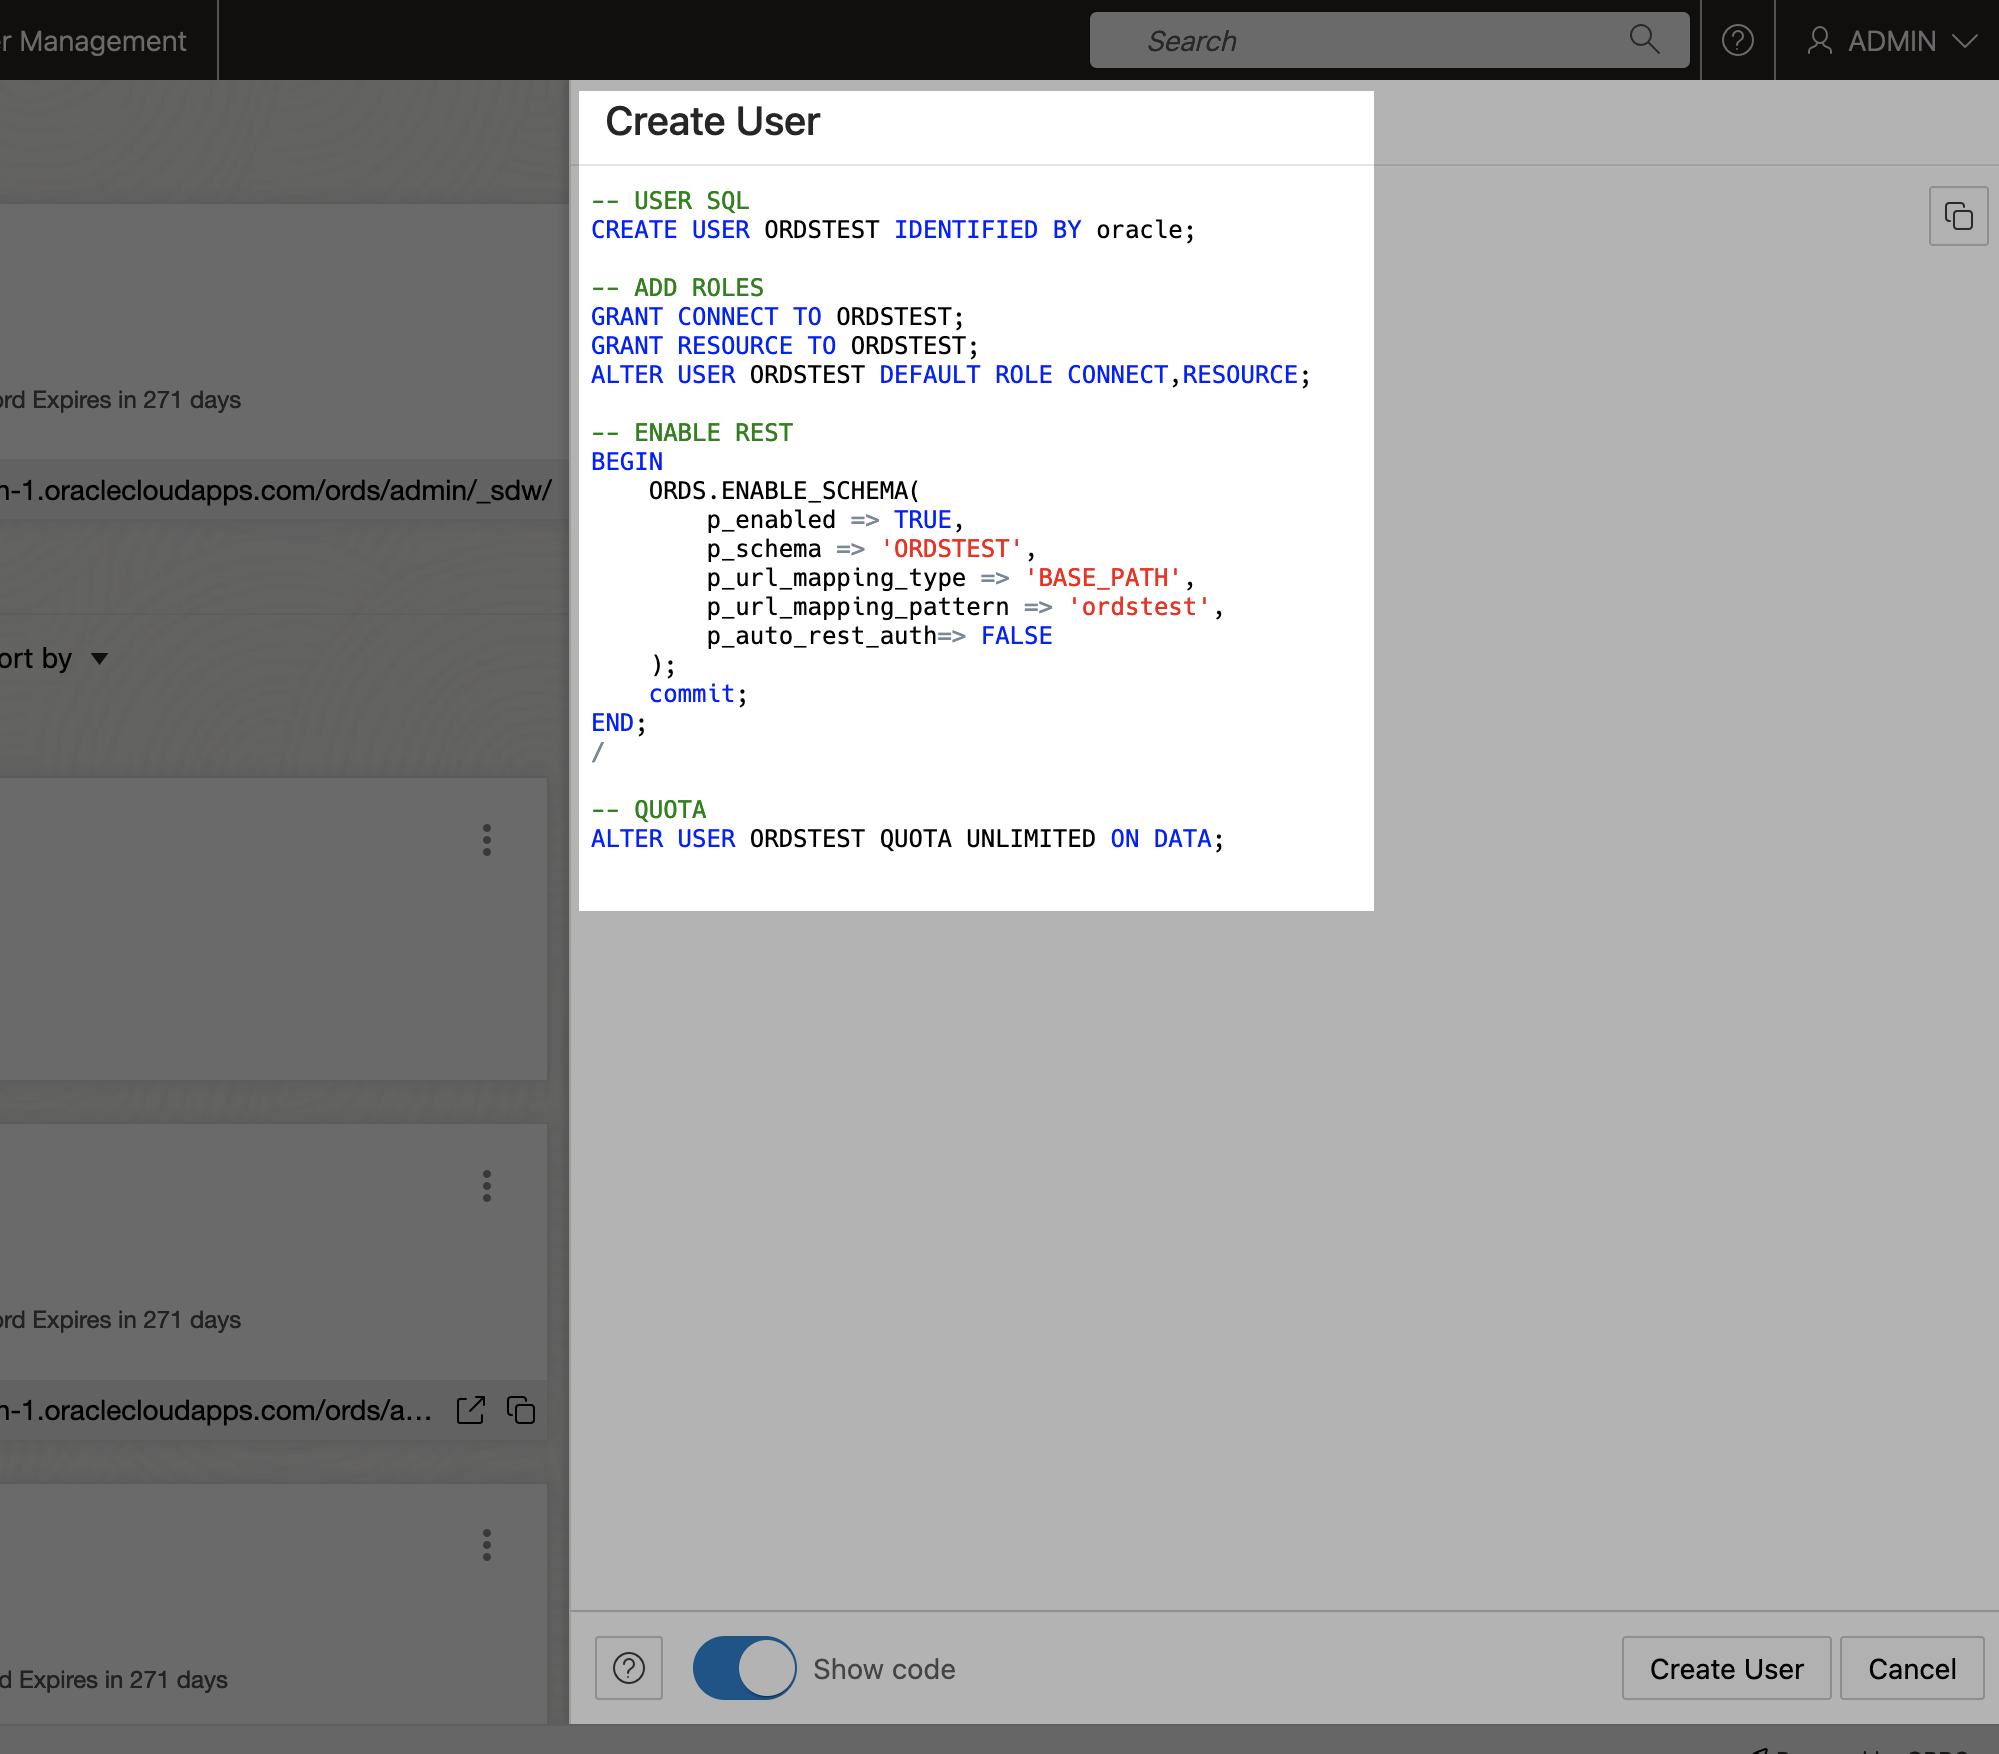
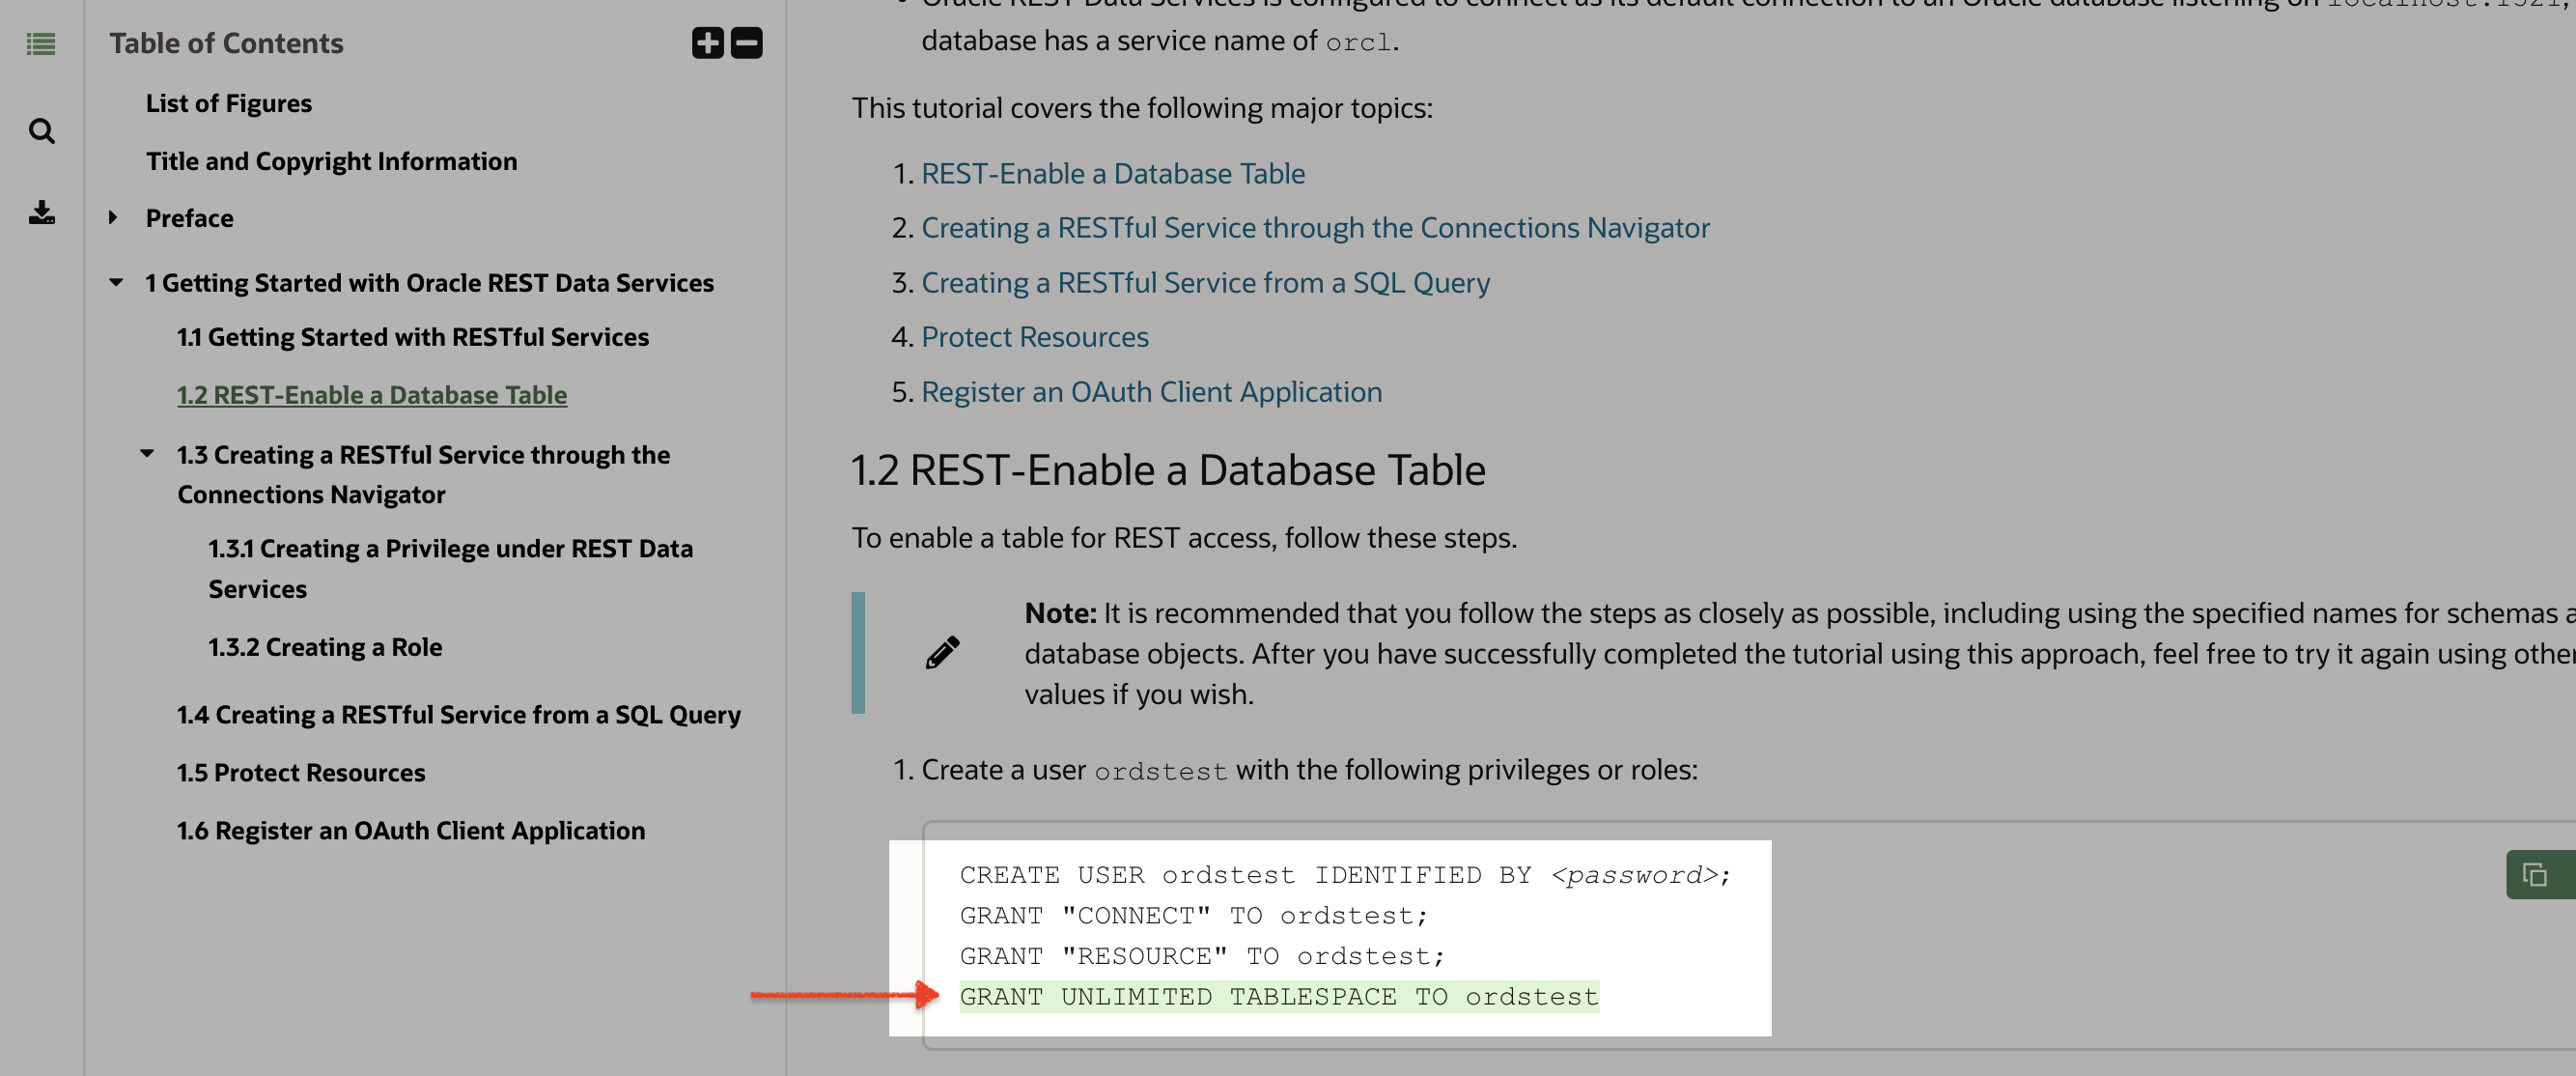
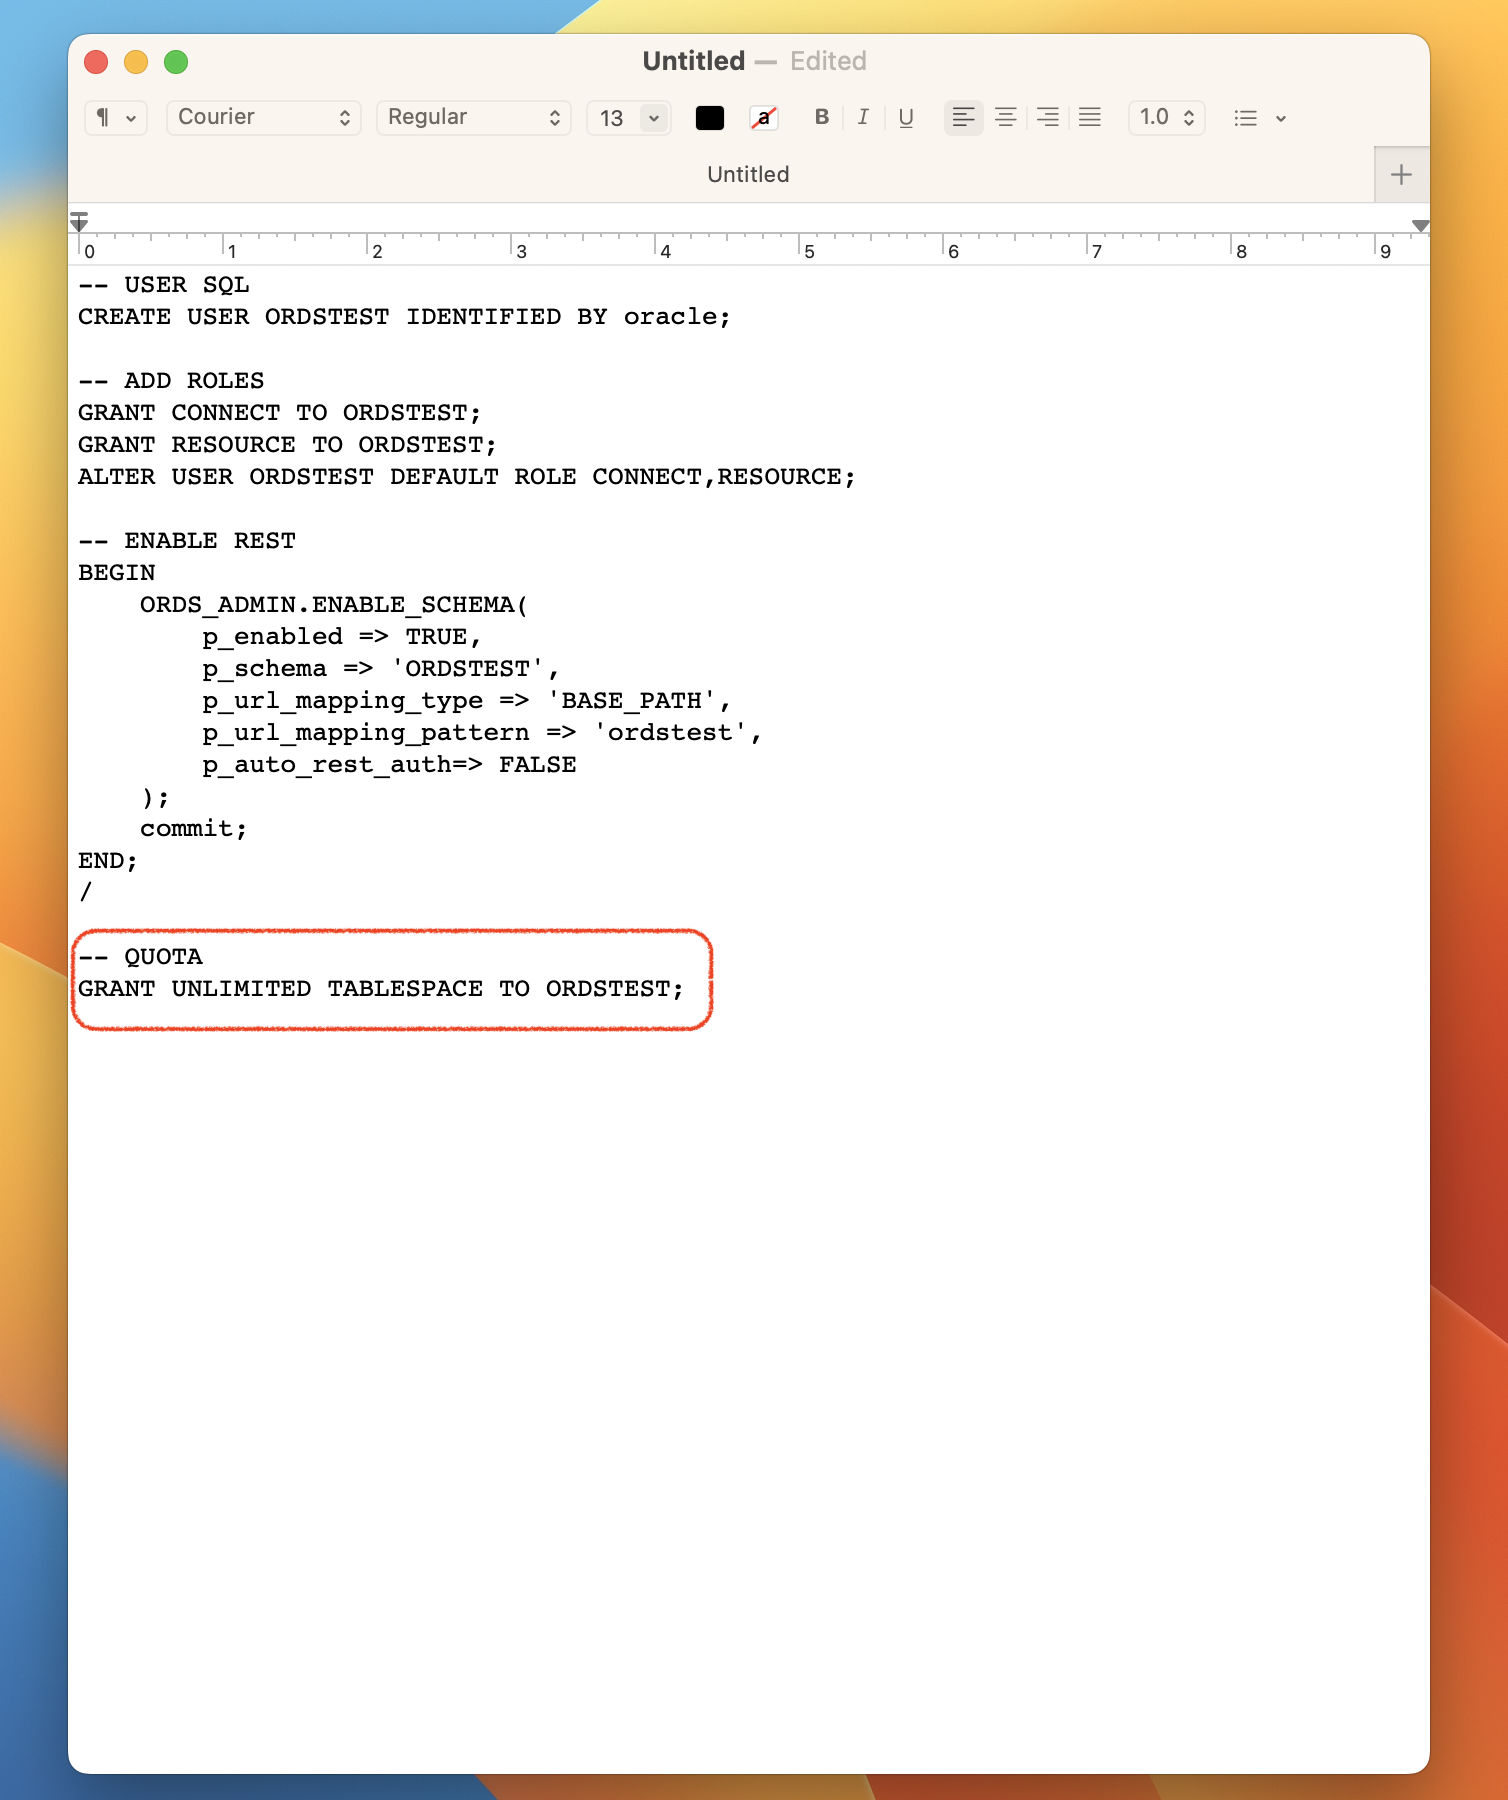
I copied this code and placed it into a text editor. I made one small change to the QUOTA line (at the bottom of the script).
Then I headed back to my Terminal and opened a new tab. I’ll execute this code in the database (remember, it’s in that Podman container running idle in the background this entire time) using SQLcl.
Forgot your connection string?
IF YOU FORGET the connection string format for logging in, have no fear! That Jeff Smith recently showed me the history command. I also have a couple of shorts on how I used the command:
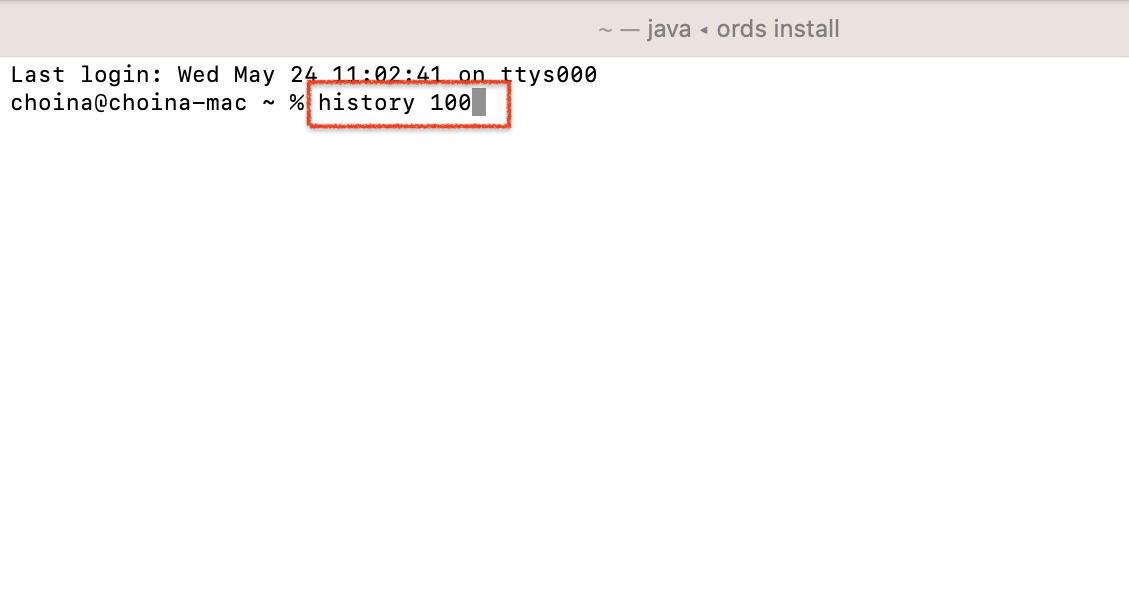
history + the number of your choice.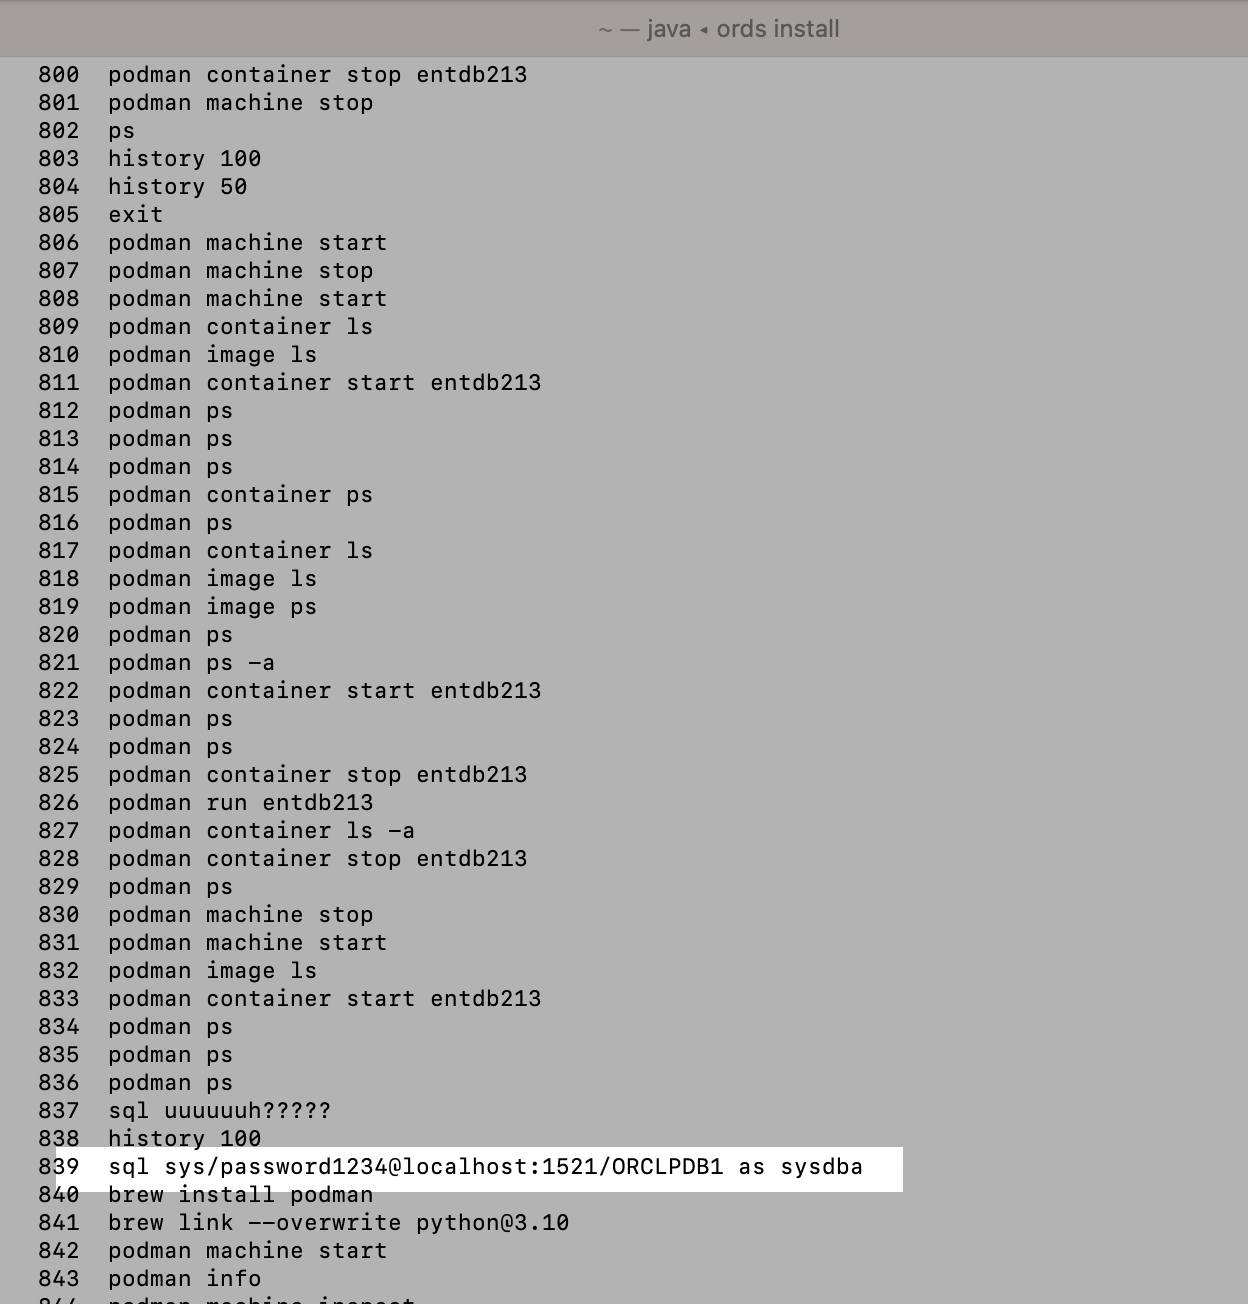
SQLcl.Using SQLcl to REST-enable a user
Now that I have the proper format for the connection string, I’ll adjust it so the password is correct. Then I’ll execute the code in SQLcl to create a new database user and REST-enable that user’s schema.
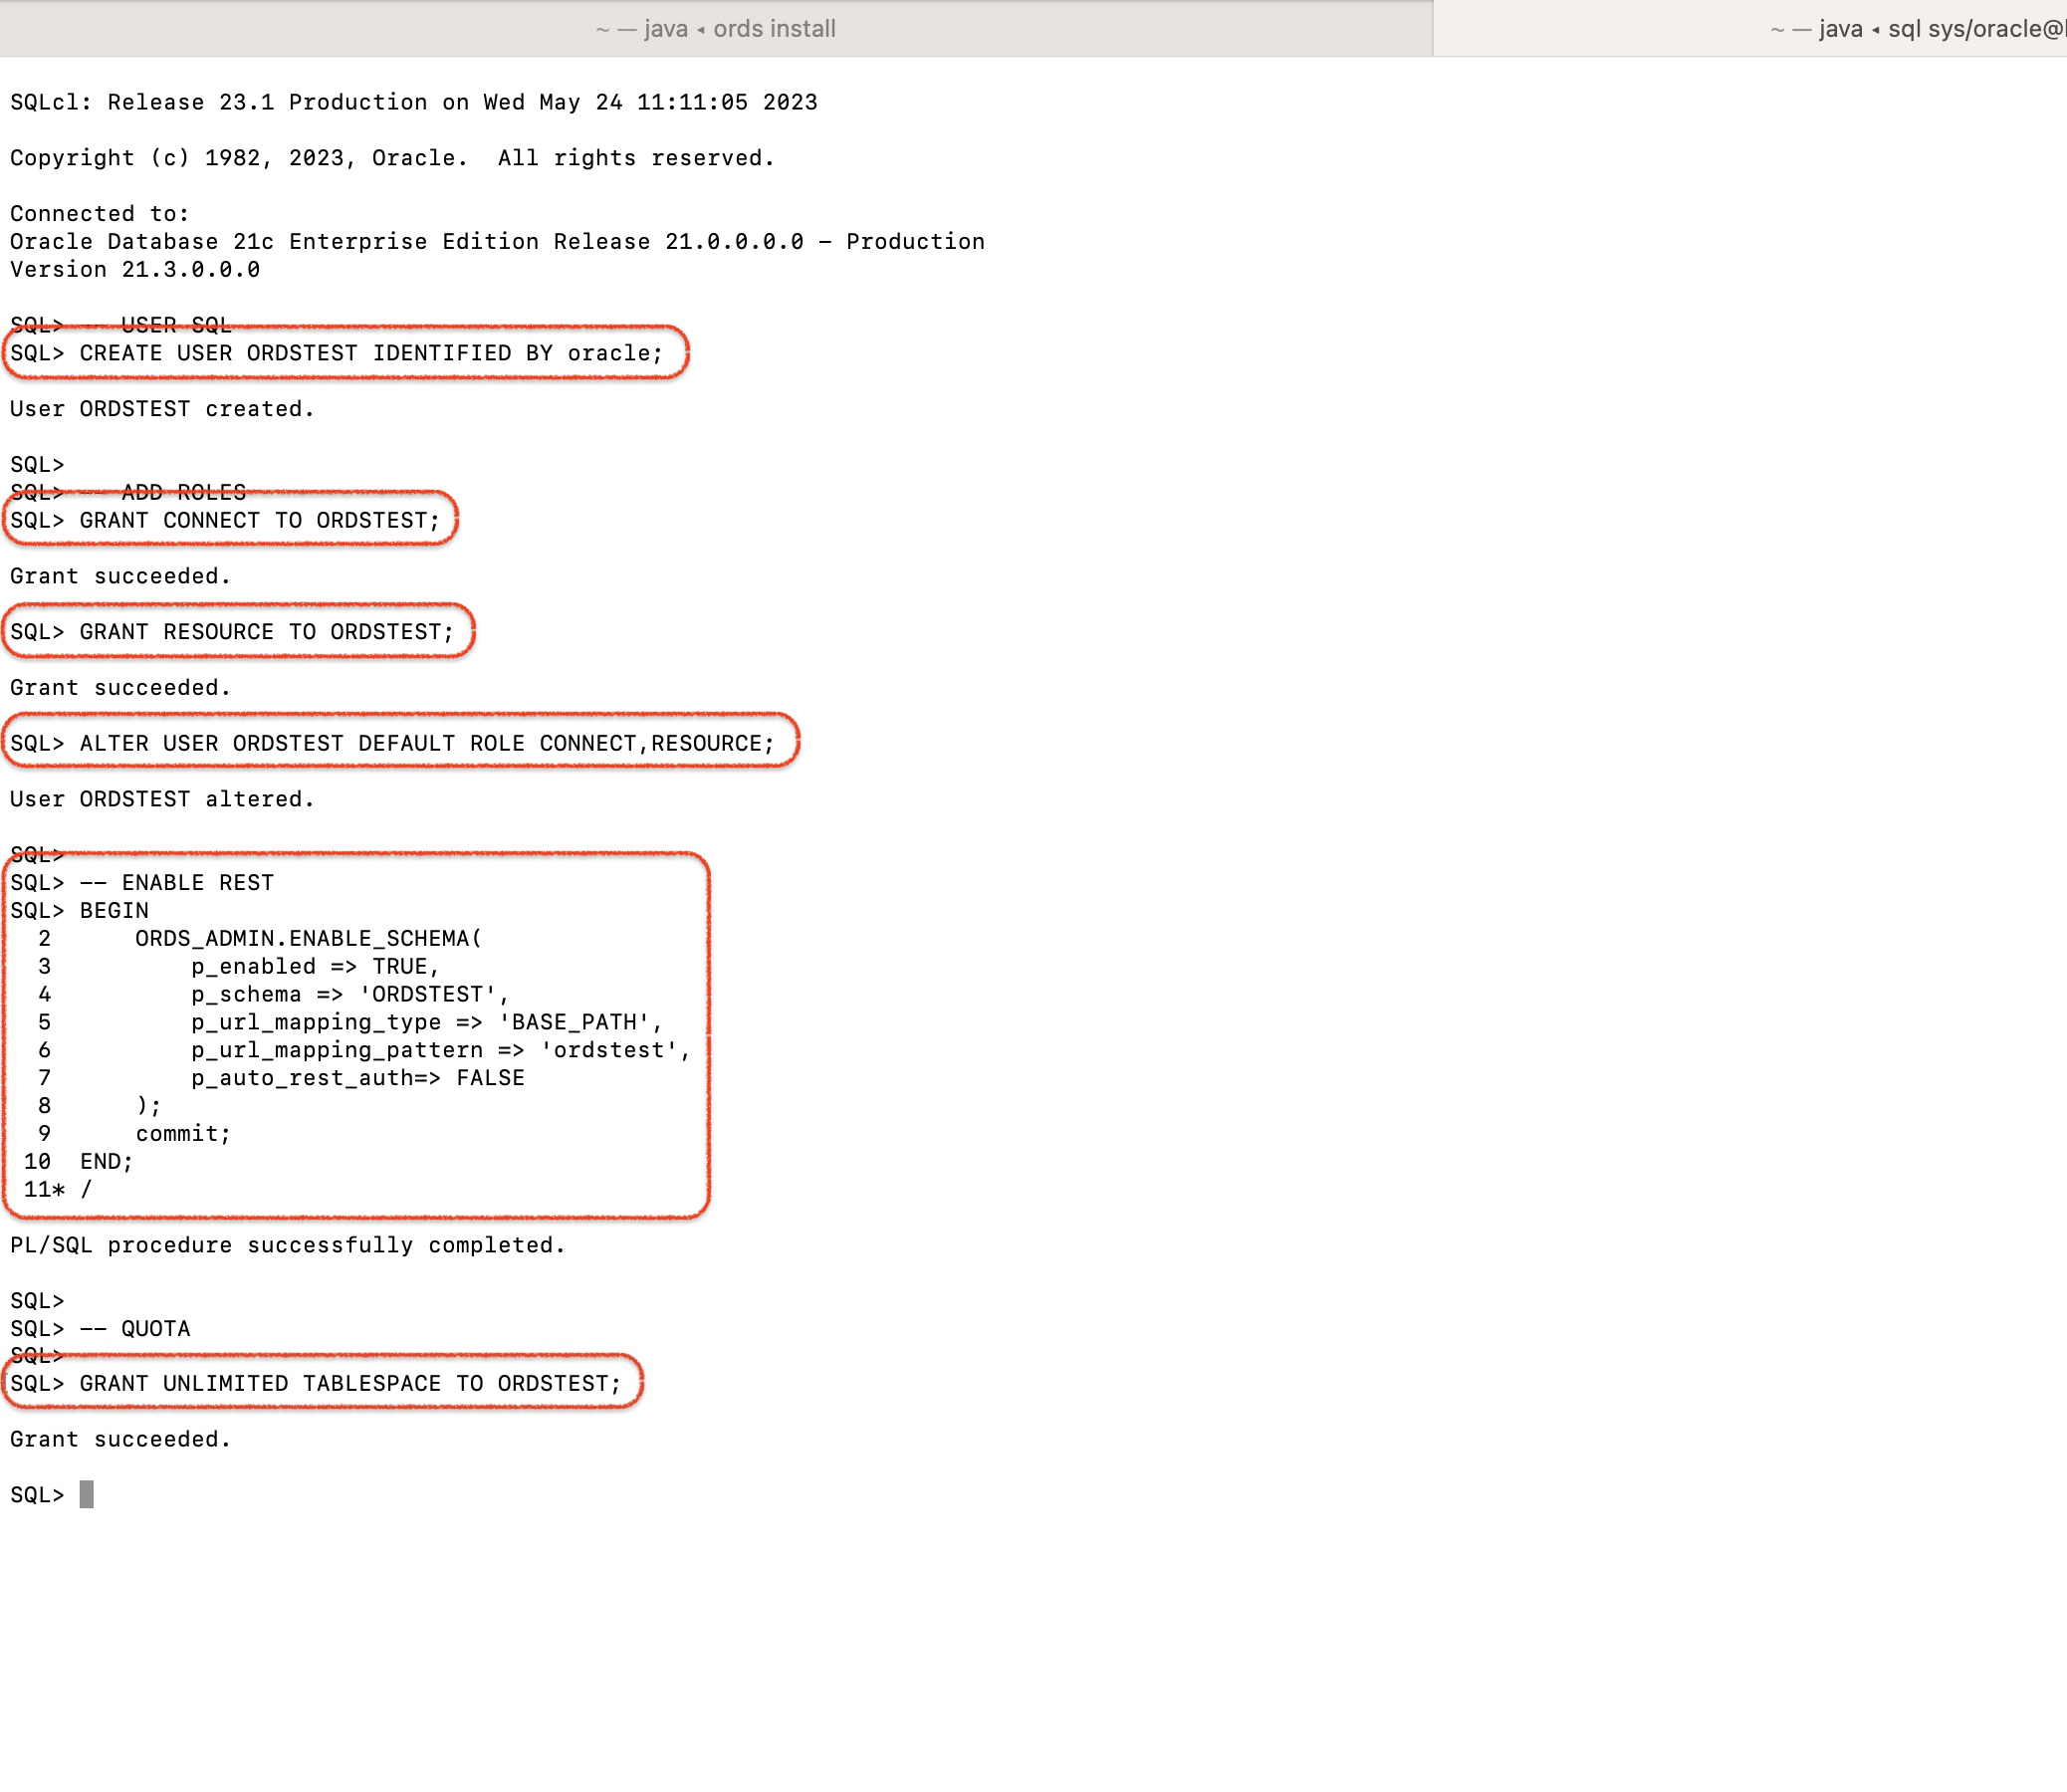
Cheat code with PL/SQL in SQLcl
I’ve just learned you can REST-enable yourself by logging into SQLcl (i.e., connecting to the database in the Podman container) and issuing the following command:
EXECUTE ORDS.ENABLE_SCHEMA;This command assumes that you have already been granted the CONNECT and RESOURCE roles but have yet to REST-enable your schema (what allows ORDS to act as the intermediary between the database and the rest of the web).
The command will employ the procedure’s default parameters, which are:
ORDS.ENABLE_SCHEMA(
p_enabled IN boolean DEFAULT TRUE,
p_schema IN ords_schemas.parsing_schema%type DEFAULT NULL,
p_url_mapping_type IN ords_url_mappings.type%type DEFAULT 'BASE_PATH',
p_url_mapping_pattern IN ords_url_mappings.pattern%type DEFAULT NULL,
p_auto_rest_auth IN boolean DEFAULT NULL);
Here is what a sample output would look like, if I were signed in as the HR user:
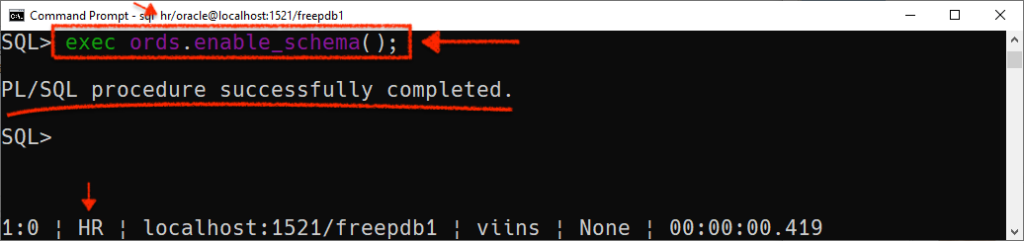
HR user.🛑 FYI: This above image is just a sample, and not related to the rest of the images in this article. Be sure to pay attention to the connection string (sql hr/oracle@localhost:1521/freepdb1). This is if theHRuser is logging into SQLcl and REST-enabling their own schema. That's why you see references toHRthroughout. I don't want anybody to get confused!
Logging into the SQL Worksheet, for real this time
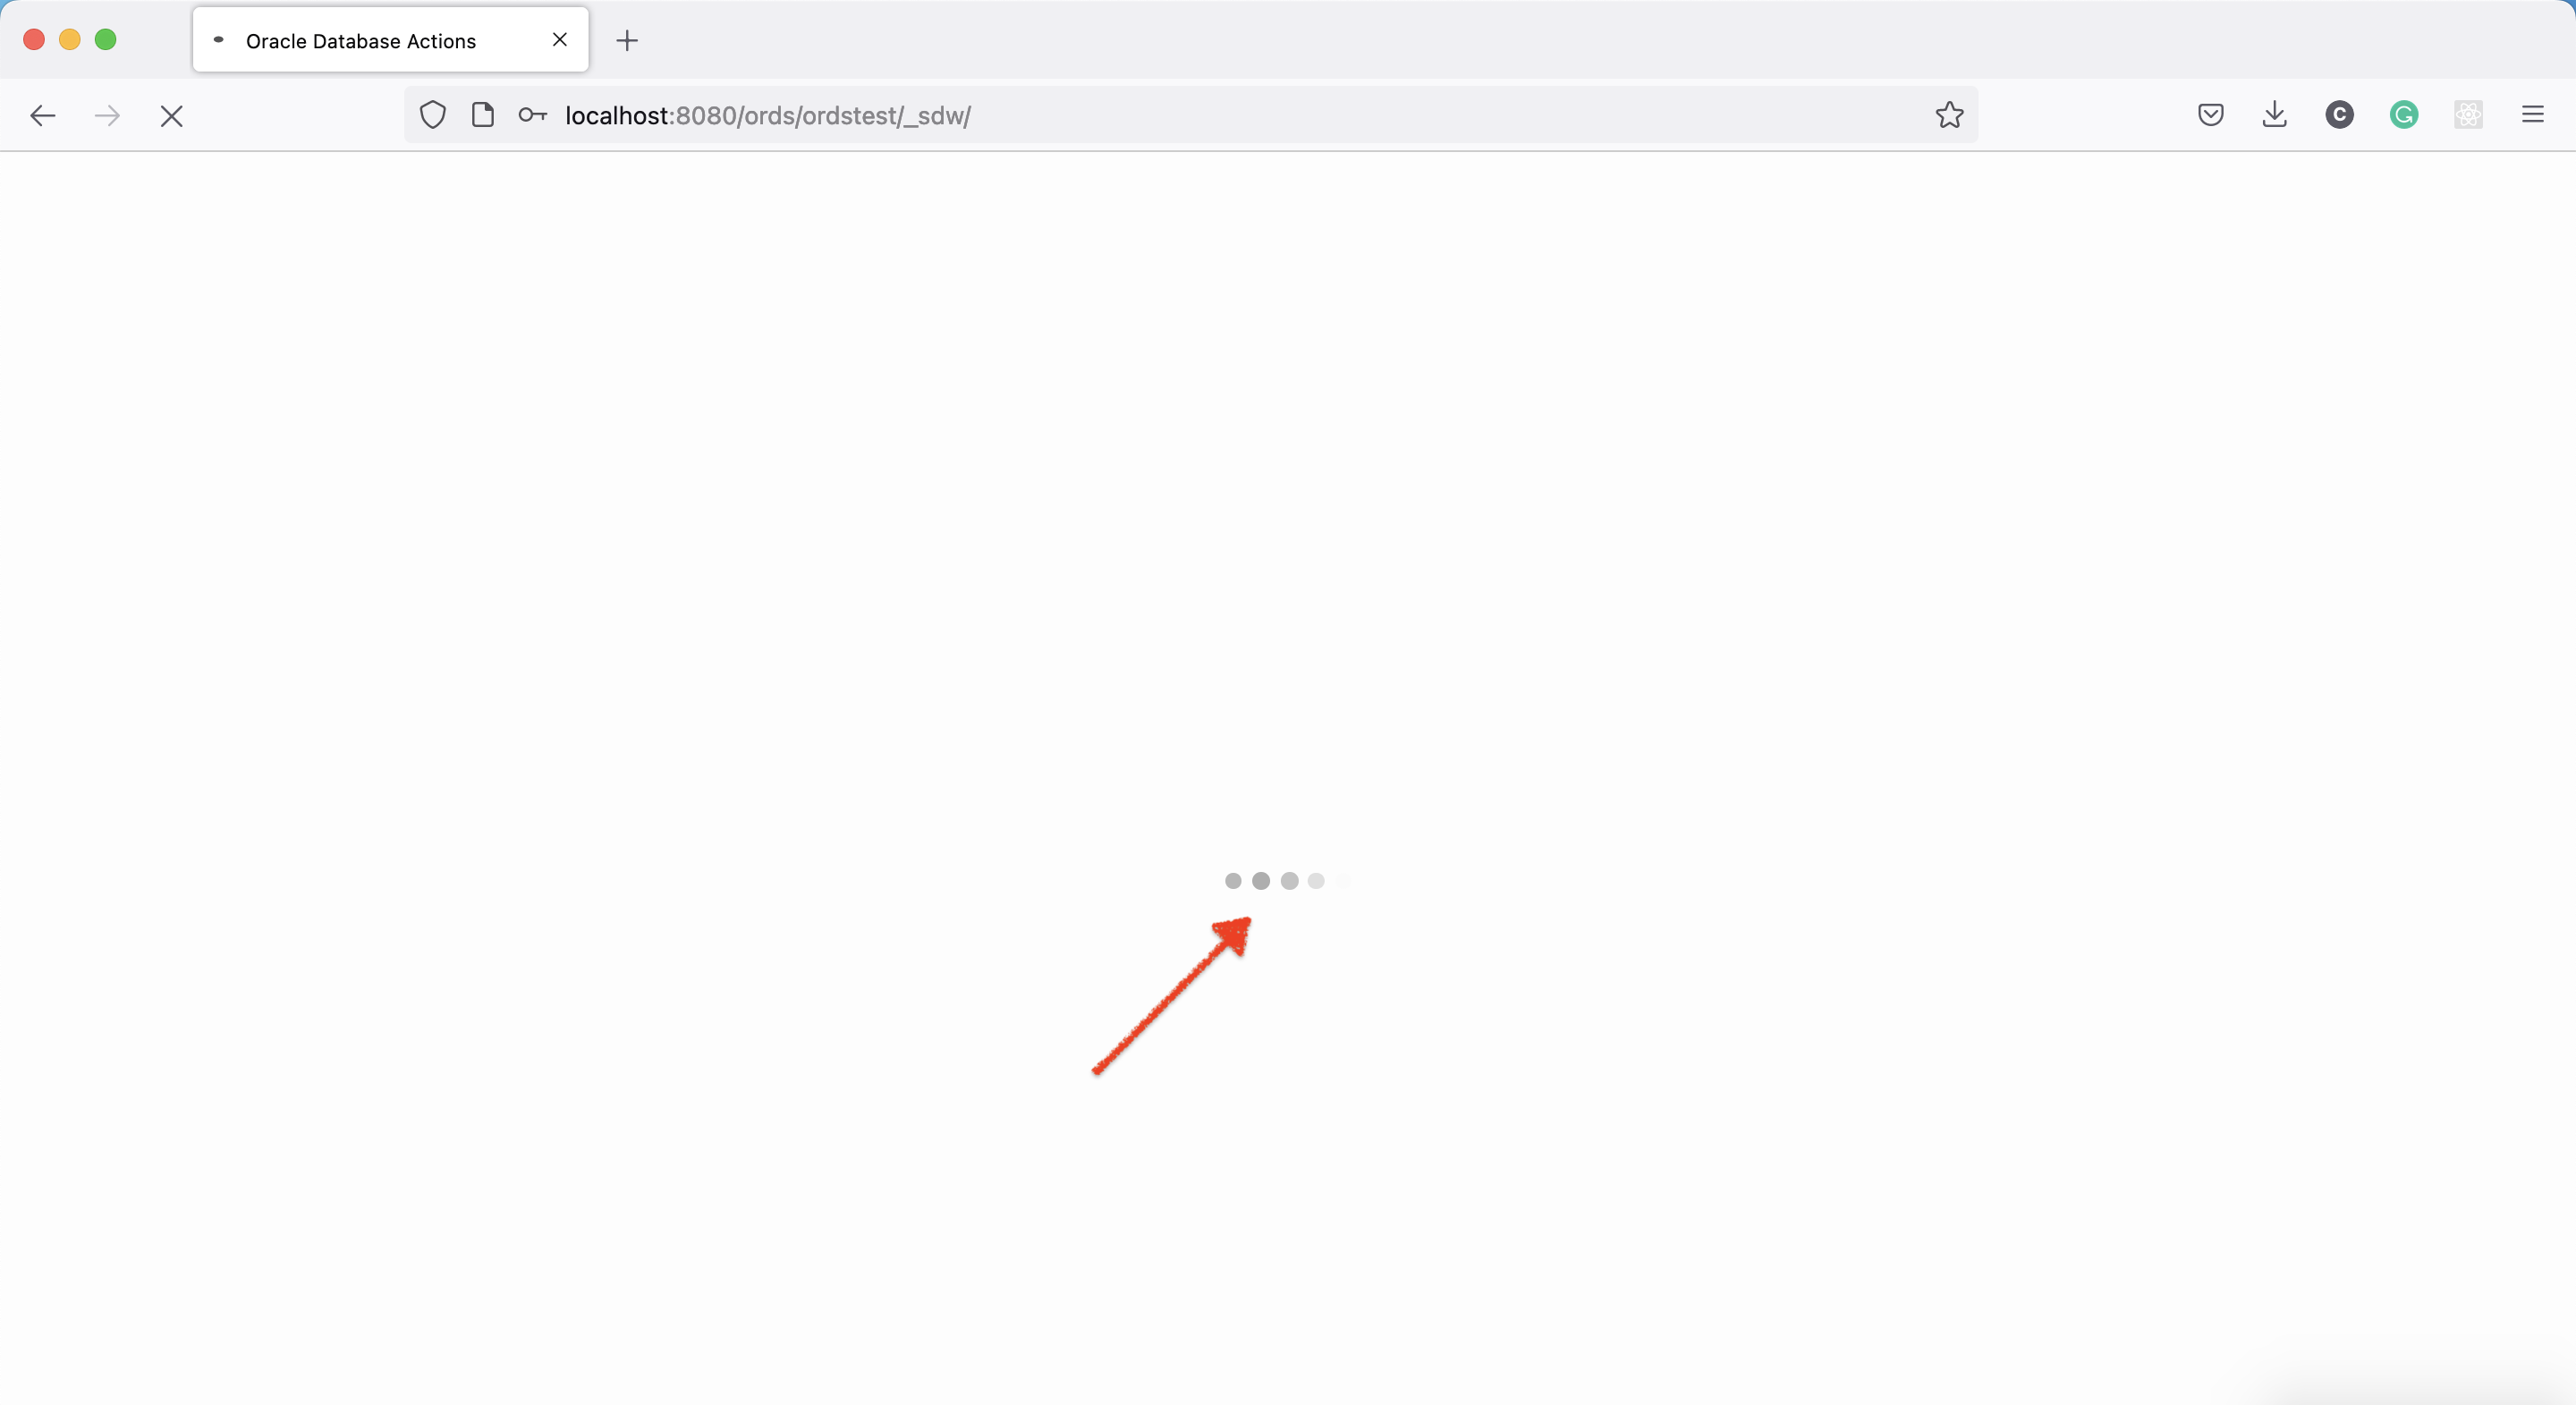
With all this code executed, I can NOW go back to the SQL Worksheet (remember, we’re on localhost:8080/ords/sql-developer) and log in as the newly created ORDSTEST user.
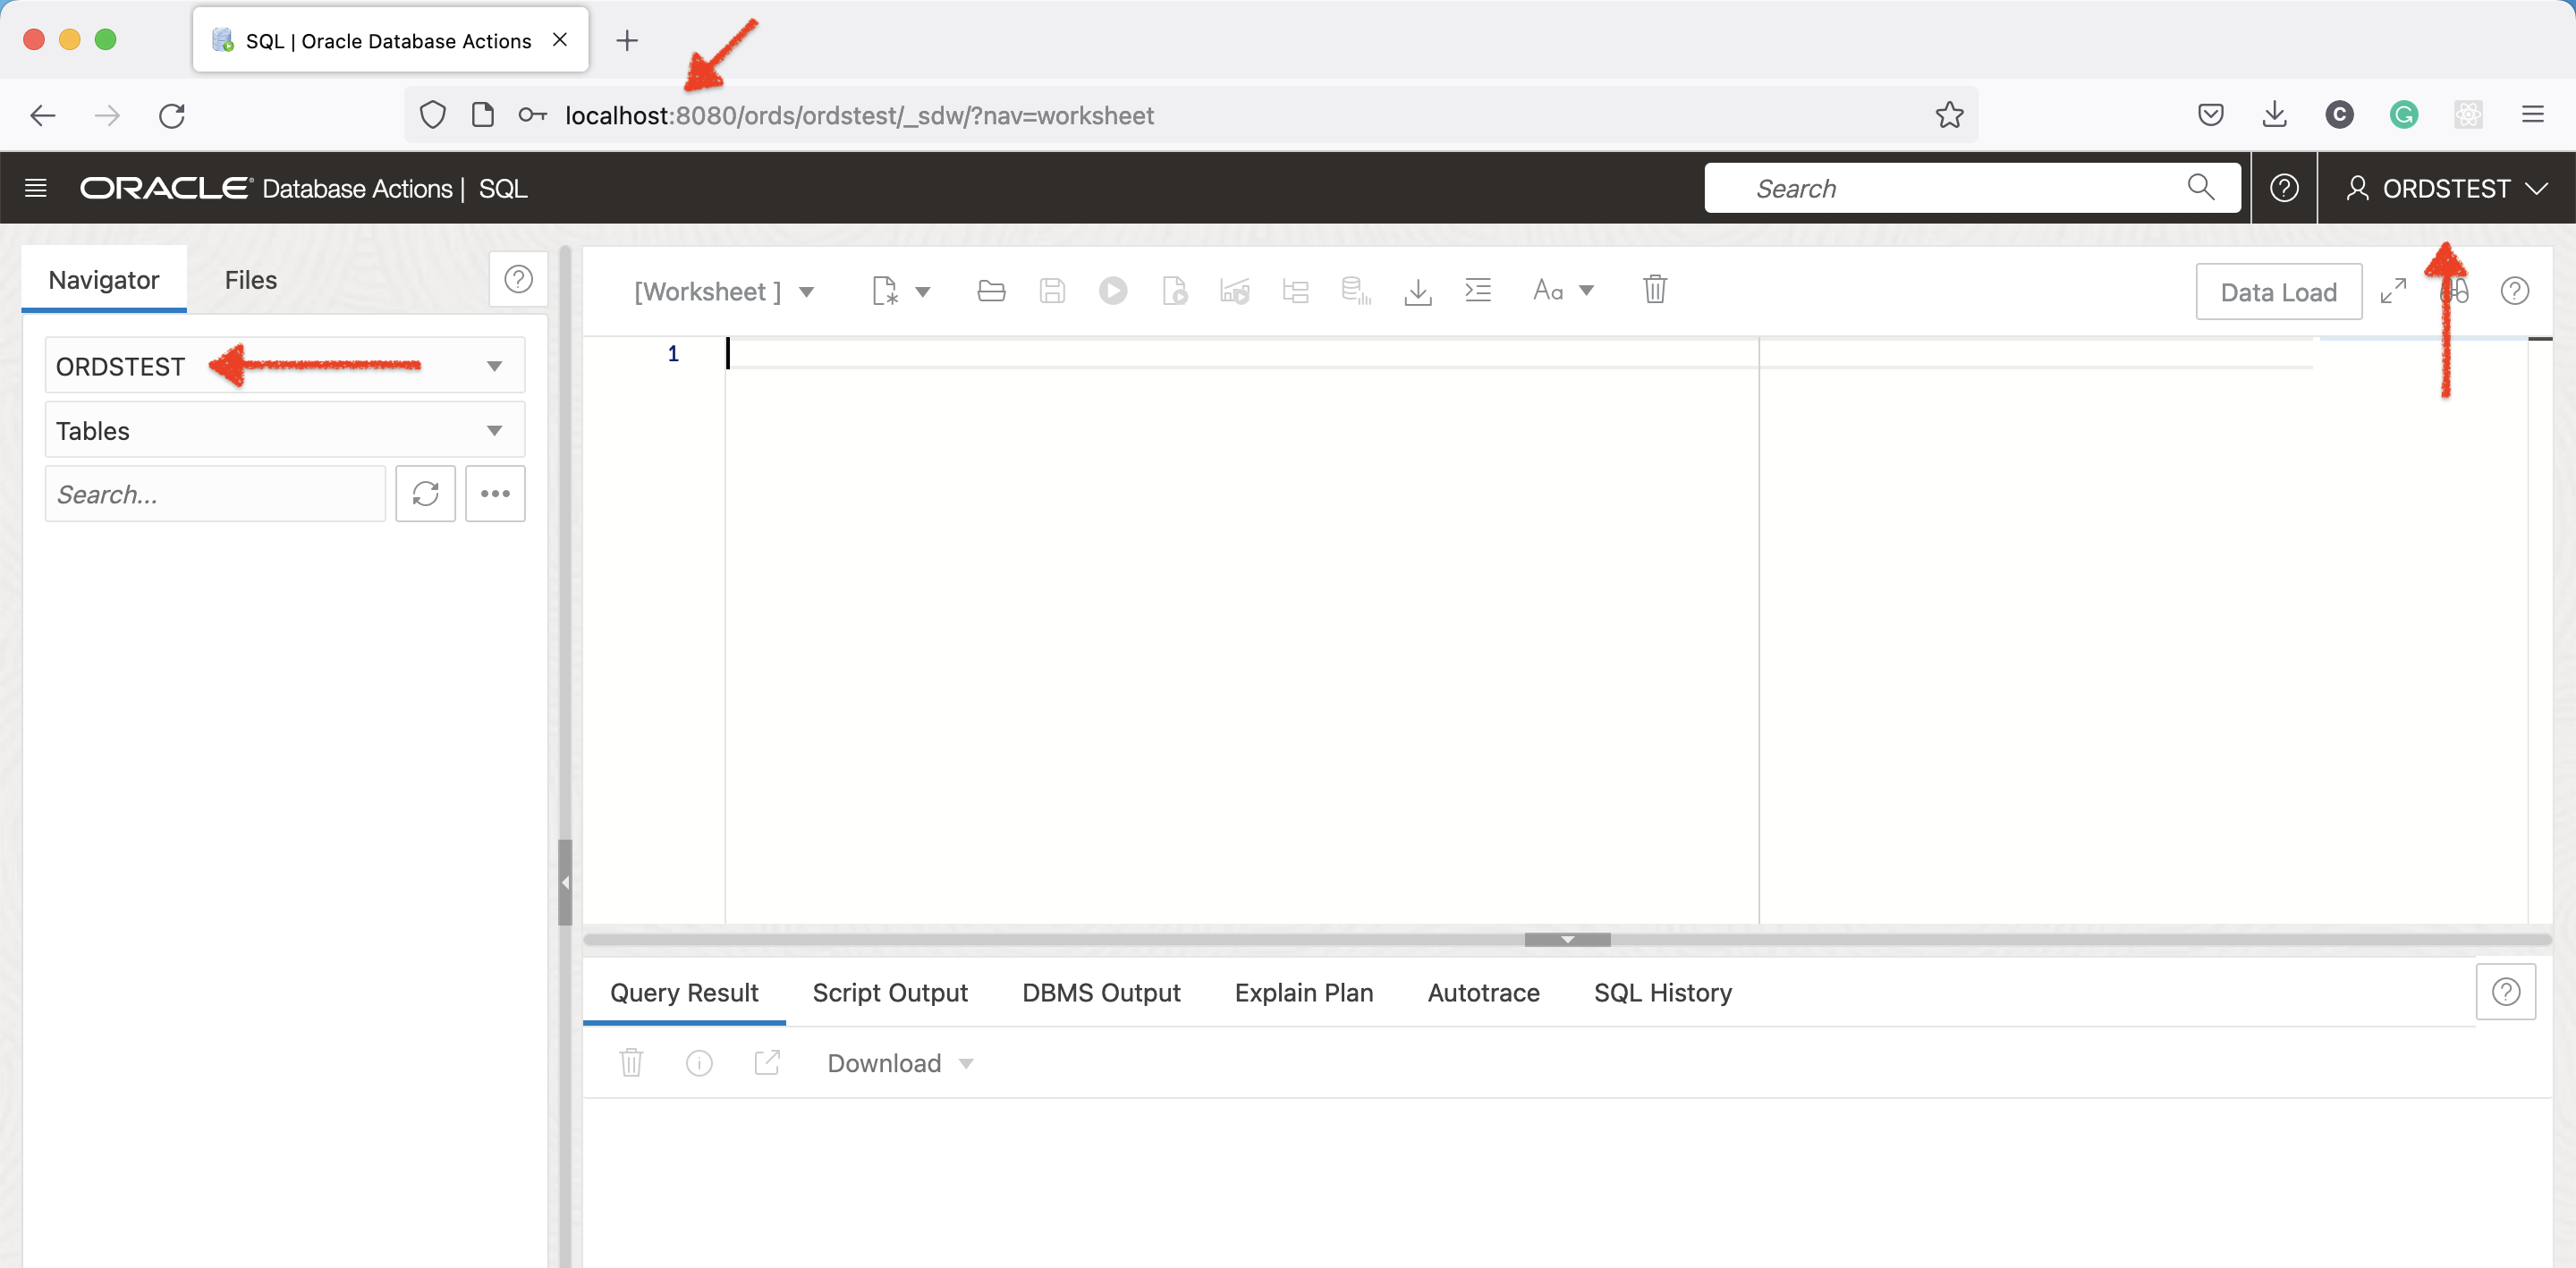
And once you’re in, you’ll notice the SQL Worksheet is no different than what you might expect in the Oracle Autonomous database. So if you made it this far, go forth and CREATE, DELETE, INSERT, SELECT, and Query away, friends!
Shutting it all down
Once you are done playing and tinkering, you can log out of the SQL Worksheet, stop the ORDS process with CTL + C (on Mac, at least), stop the Podman container, and shut down the Podman virtual machine.


And since we set this all up with a volume (so….so long ago, I know; we called it entdb213vol), you can start the container later on, and all your work will still be there (i.e., It shall persist!).
The end
Congrats, we made it! What do you think? Did I miss anything? If so, comment, and I’ll respond and update this post as needed. And if you think this could be useful for others, do share!
Leave a Reply