
The plan was to create an ORACLE REST endpoint and then POST a CSV file to that auto-REST enabled table (you can see how I did that here, in section two of my most recent article). But, instead of doing this manually, I wanted to automate this POST request using Apple’s Automator application…
Me…two paragraphs from now
Follow along with the video
The plan
I did it. I went so far down the rabbit hole, I almost didn’t make it back alive. I don’t know when this ridiculous idea popped into my head, but it’s been well over a year. Until now, I either hadn’t had the time or the confidence to really tackle it.
The plan was to create an ORACLE REST endpoint and then POST a CSV file to that auto-REST enabled table (you can see how I did that here, in section two of my most recent article). But, instead of doing this manually, I wanted to automate this POST request using Apple’s Automator application.
The use case I made up was one where a person would need to periodically feed data into a table. The data doesn’t change, nor does the target table. Here is an example of the table I’m using:
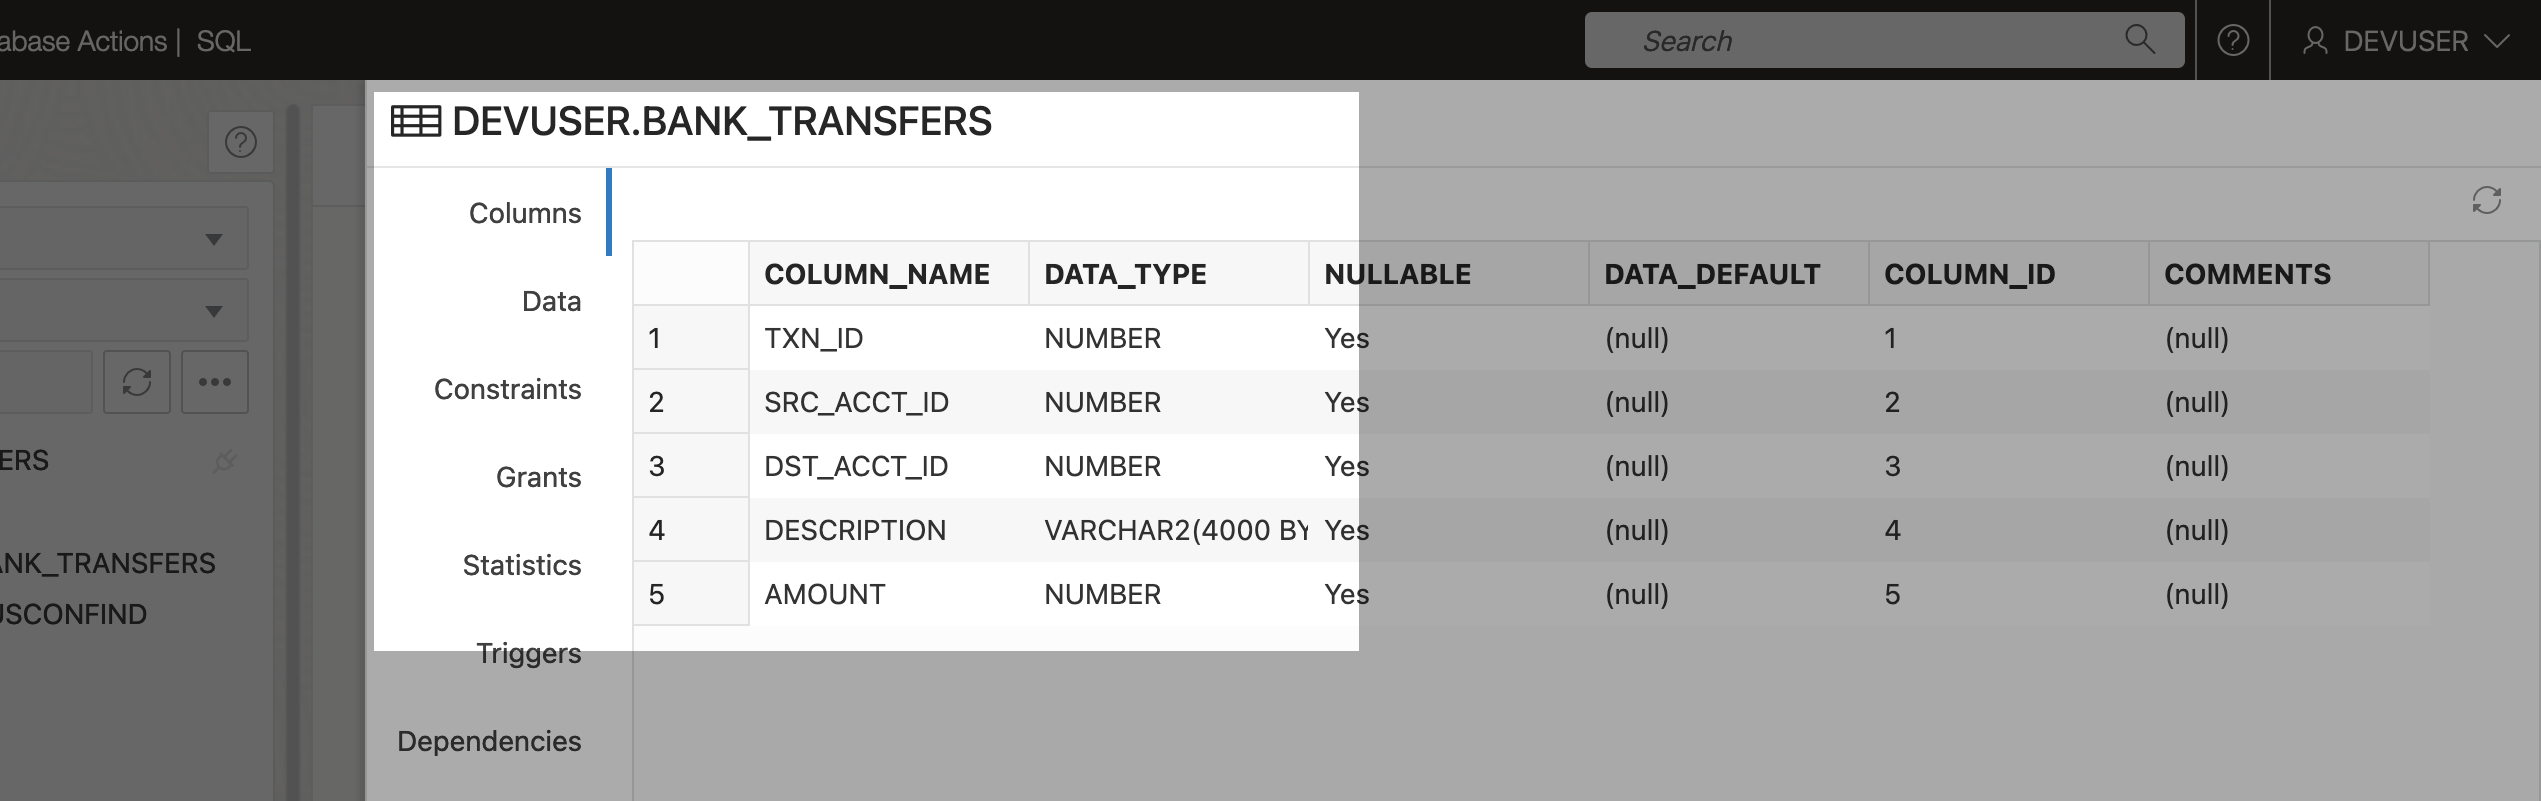
Bank Transfers tableAnd the DDL, should there be any interest:
CREATE TABLE ADMIN.BANK_TRANSFERS
(TXN_ID NUMBER ,
SRC_ACCT_ID NUMBER ,
DST_ACCT_ID NUMBER ,
DESCRIPTION VARCHAR2 (4000) ,
AMOUNT NUMBER
)
TABLESPACE DATA
LOGGING
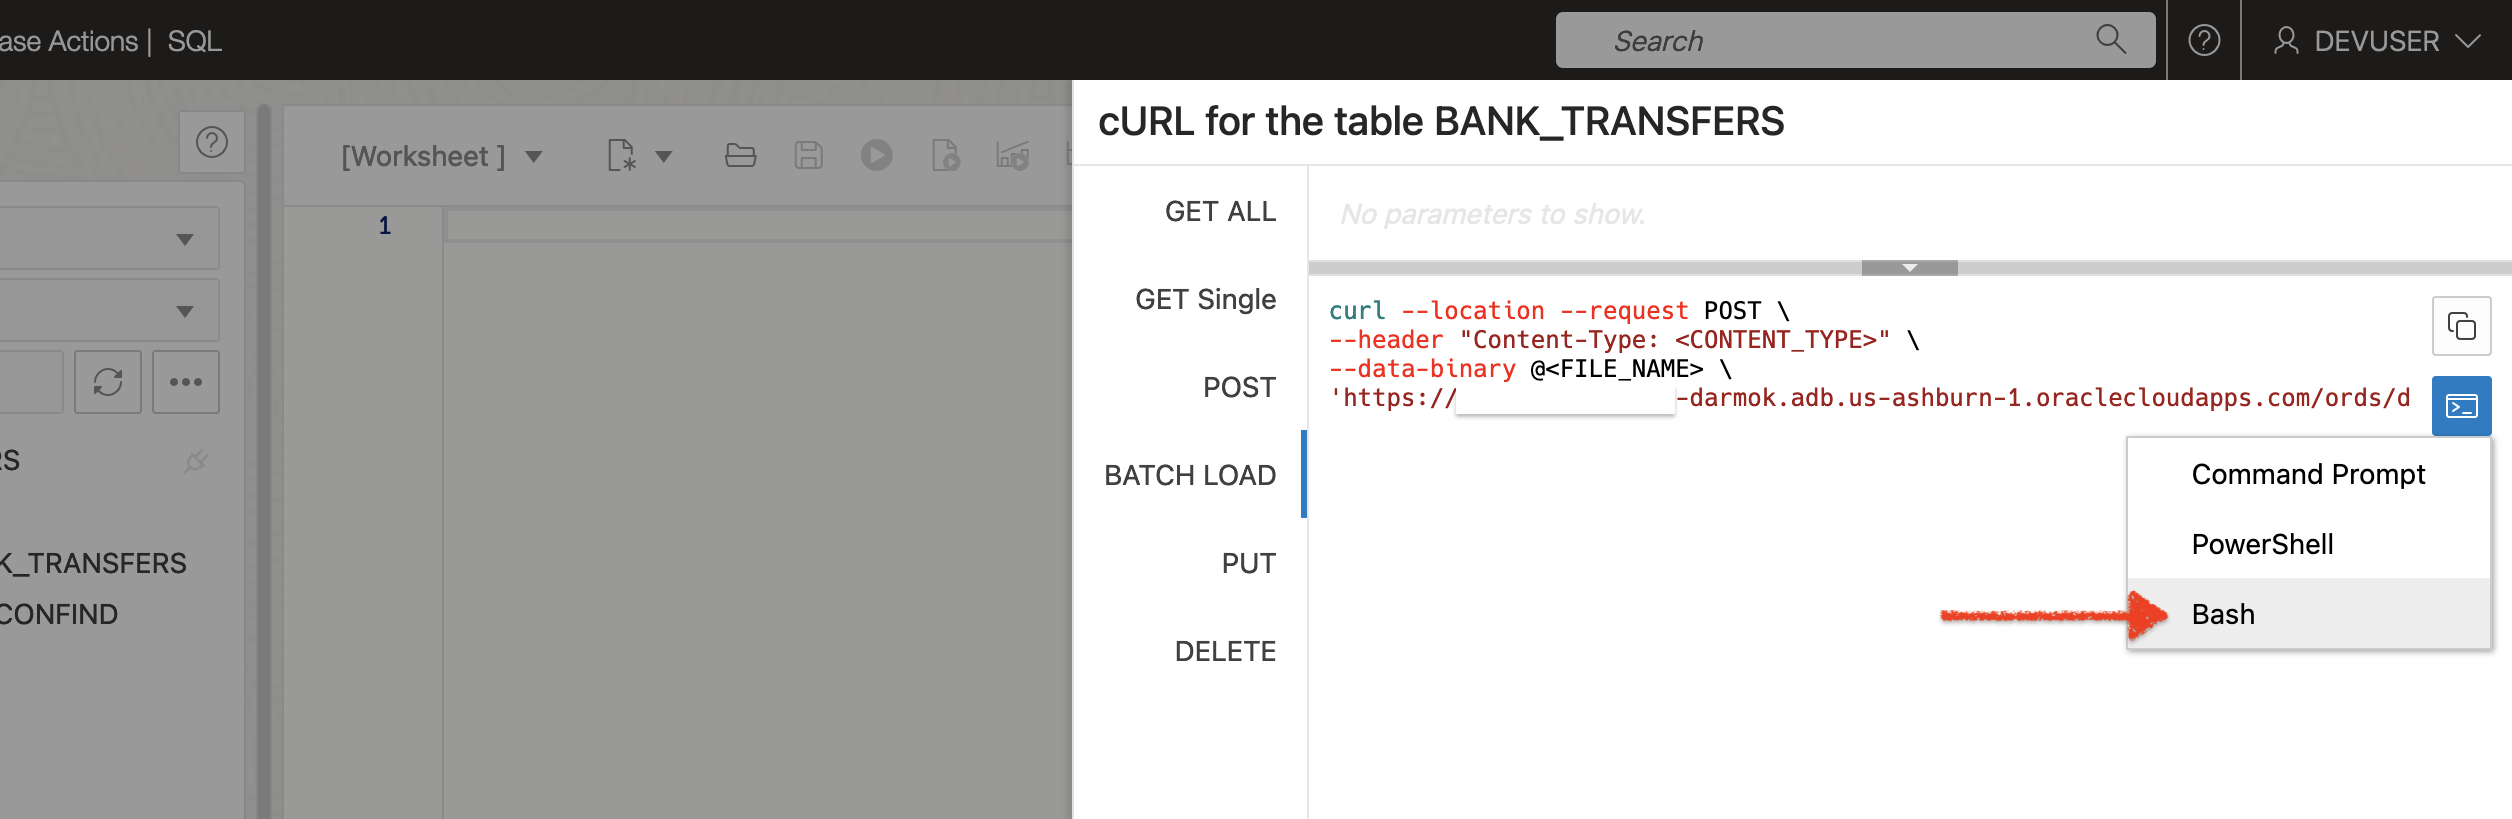
;Once this table was created, I auto-REST enabled the table and retrieved the complete cURL Command for performing a Batch Load request. Remember, we have three examples for cURL Commands now, I chose Bash since I’m on a Mac:
Batch Load cURL CommandOnce I grabbed the cURL Command, I would temporarily save it to a clipboard (e.g. VS Code, TextEdit, etc.). I’d then create a new folder on my desktop.

ords_curl_post folderHow I actually did it
I’d then search via Spotlight for the Automator application. Once there, I’d choose Folder Action.
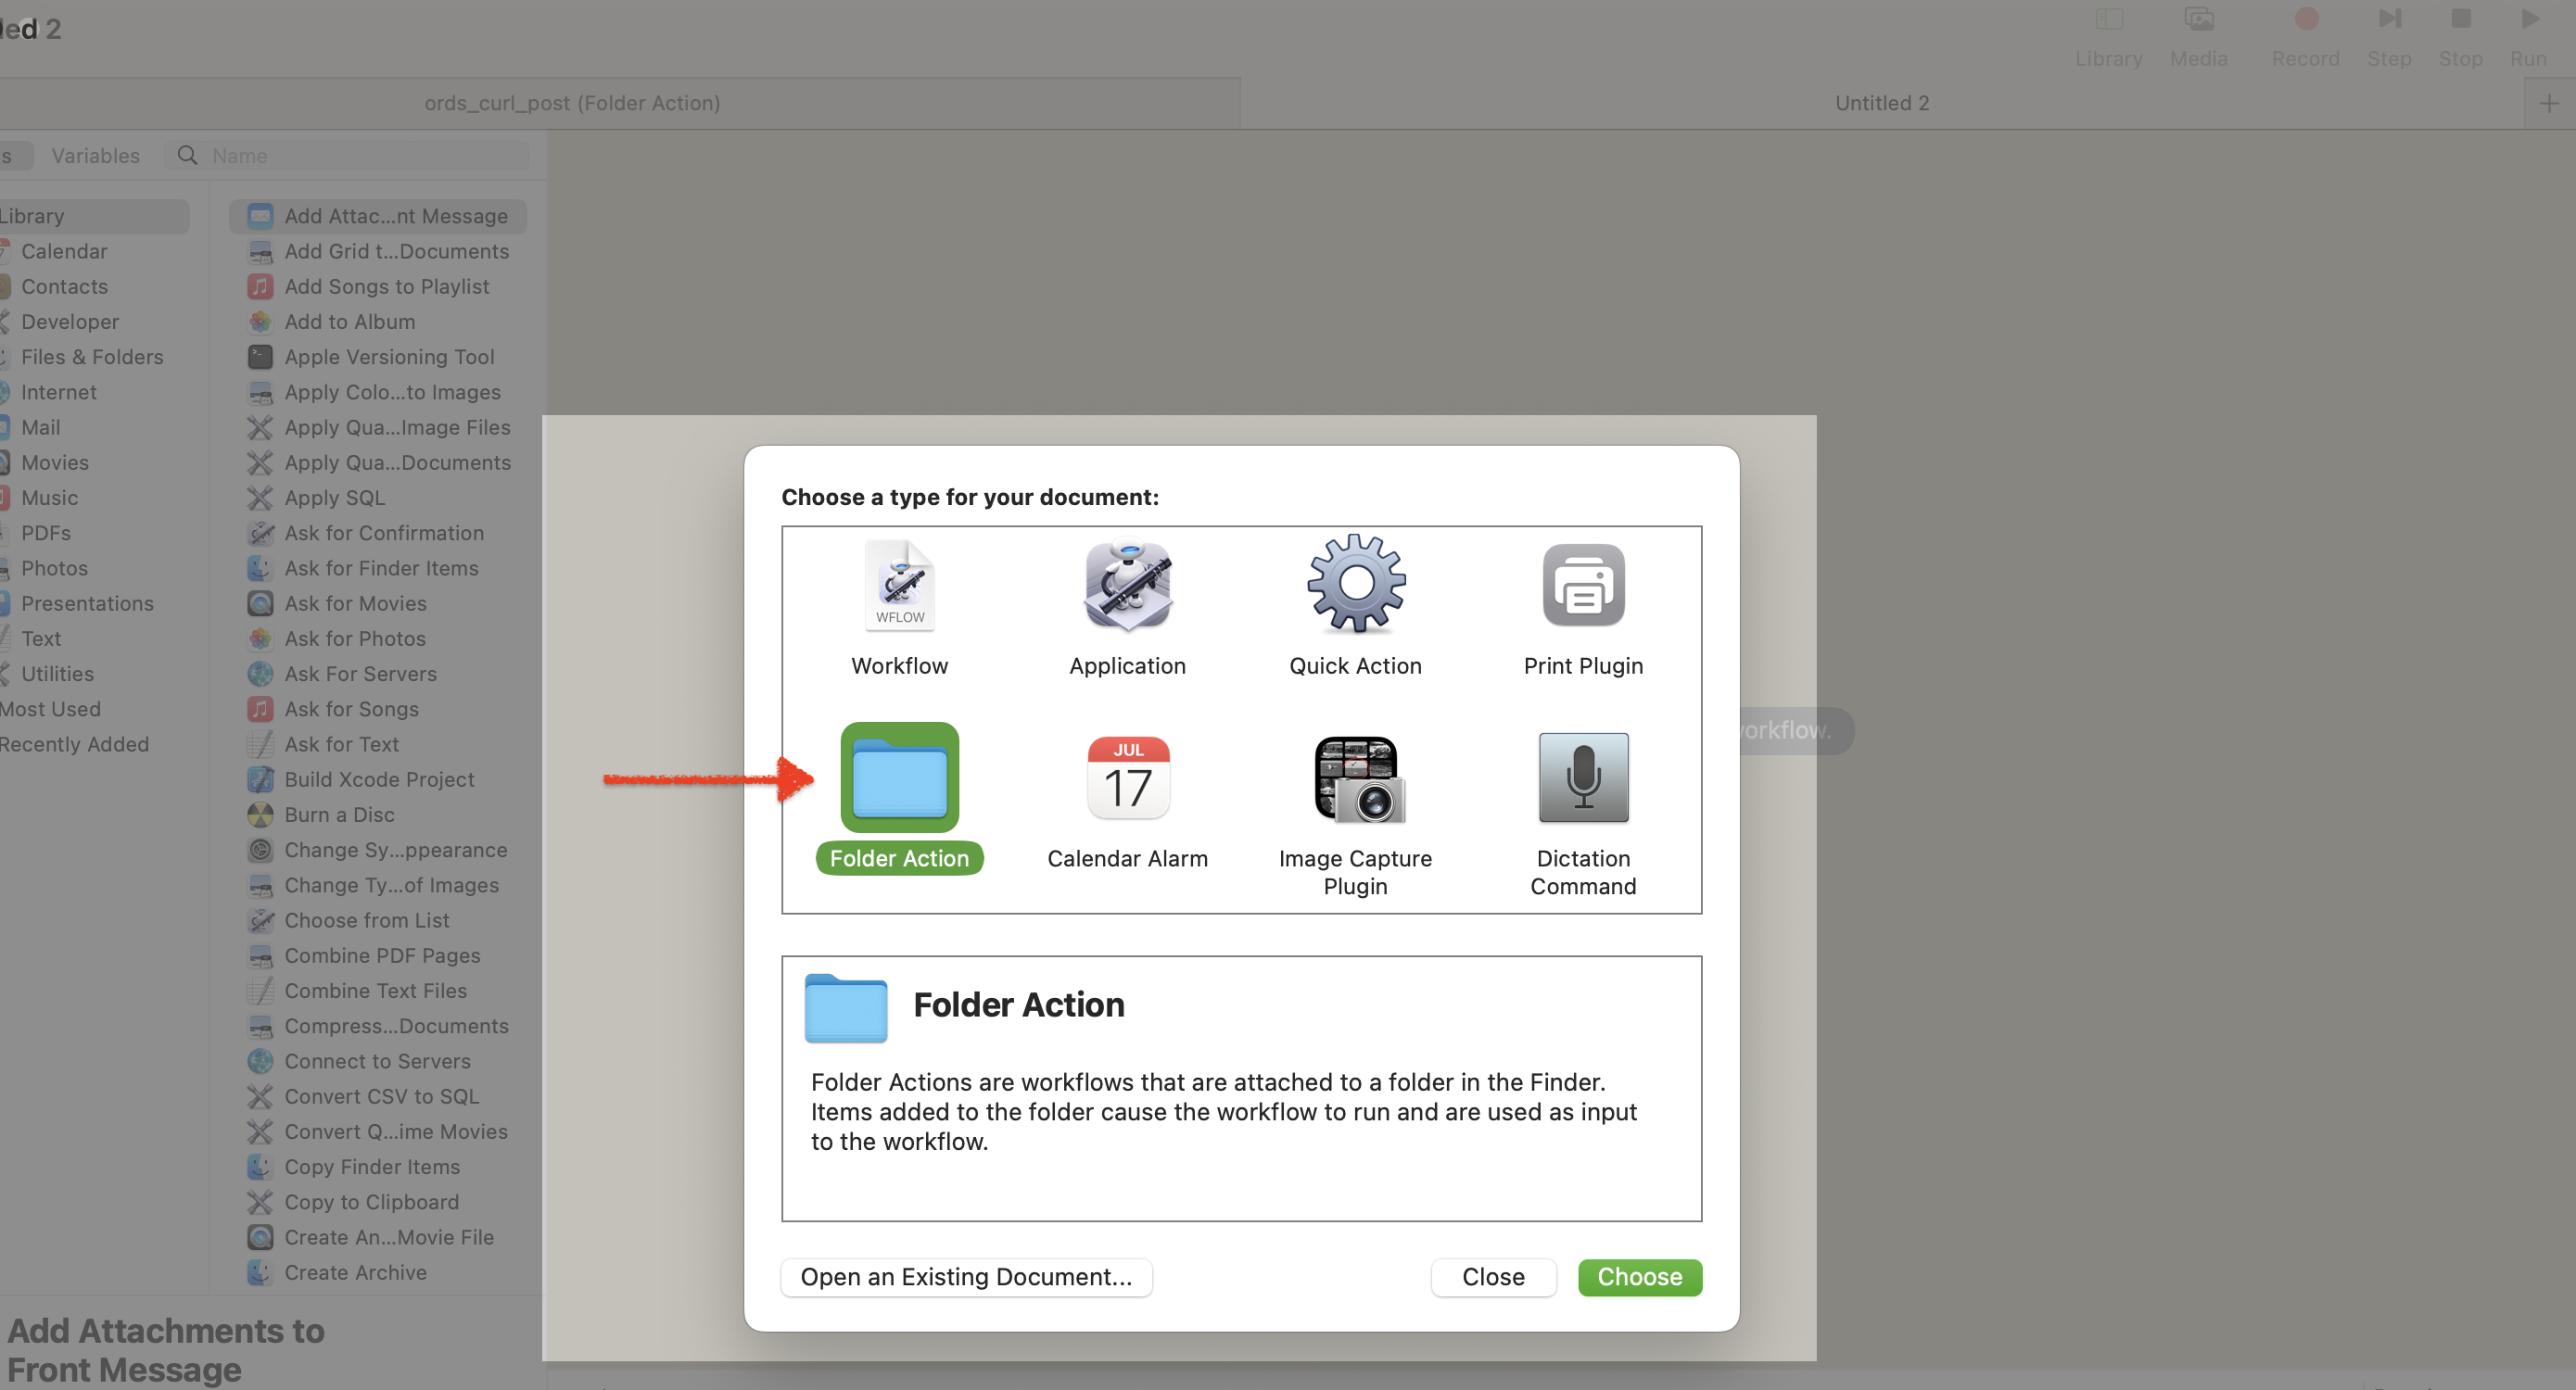
Folder Action for this automationHEY!! README: I'm going to breeze through this. And it may seem like I am well-aquainted with this application. I am not. I spent hours debugging, reading through old StackExchange forums, and Apple documentation so I could share this with you. There is a ton more work to do. But bottom line, this thing works, and its something that is FREE and accessible for a lot of people. You could have a TON of fun with this stuff, so keep reading!
There’s no easy way to get around this, but to get really good at this, you’ll just need to tinker. Luckily, most of these automation modules are very intuitive. And there is a ton of information online on how to piece them all together.
Automator 🤖
All of these modules are drag-and-drop, so it makes it easy to create an execution path for your Folder Action application. Eventually, I ended up with this (don’t worry, I’ll break it down some, a video is in the works for a more detailed overview):
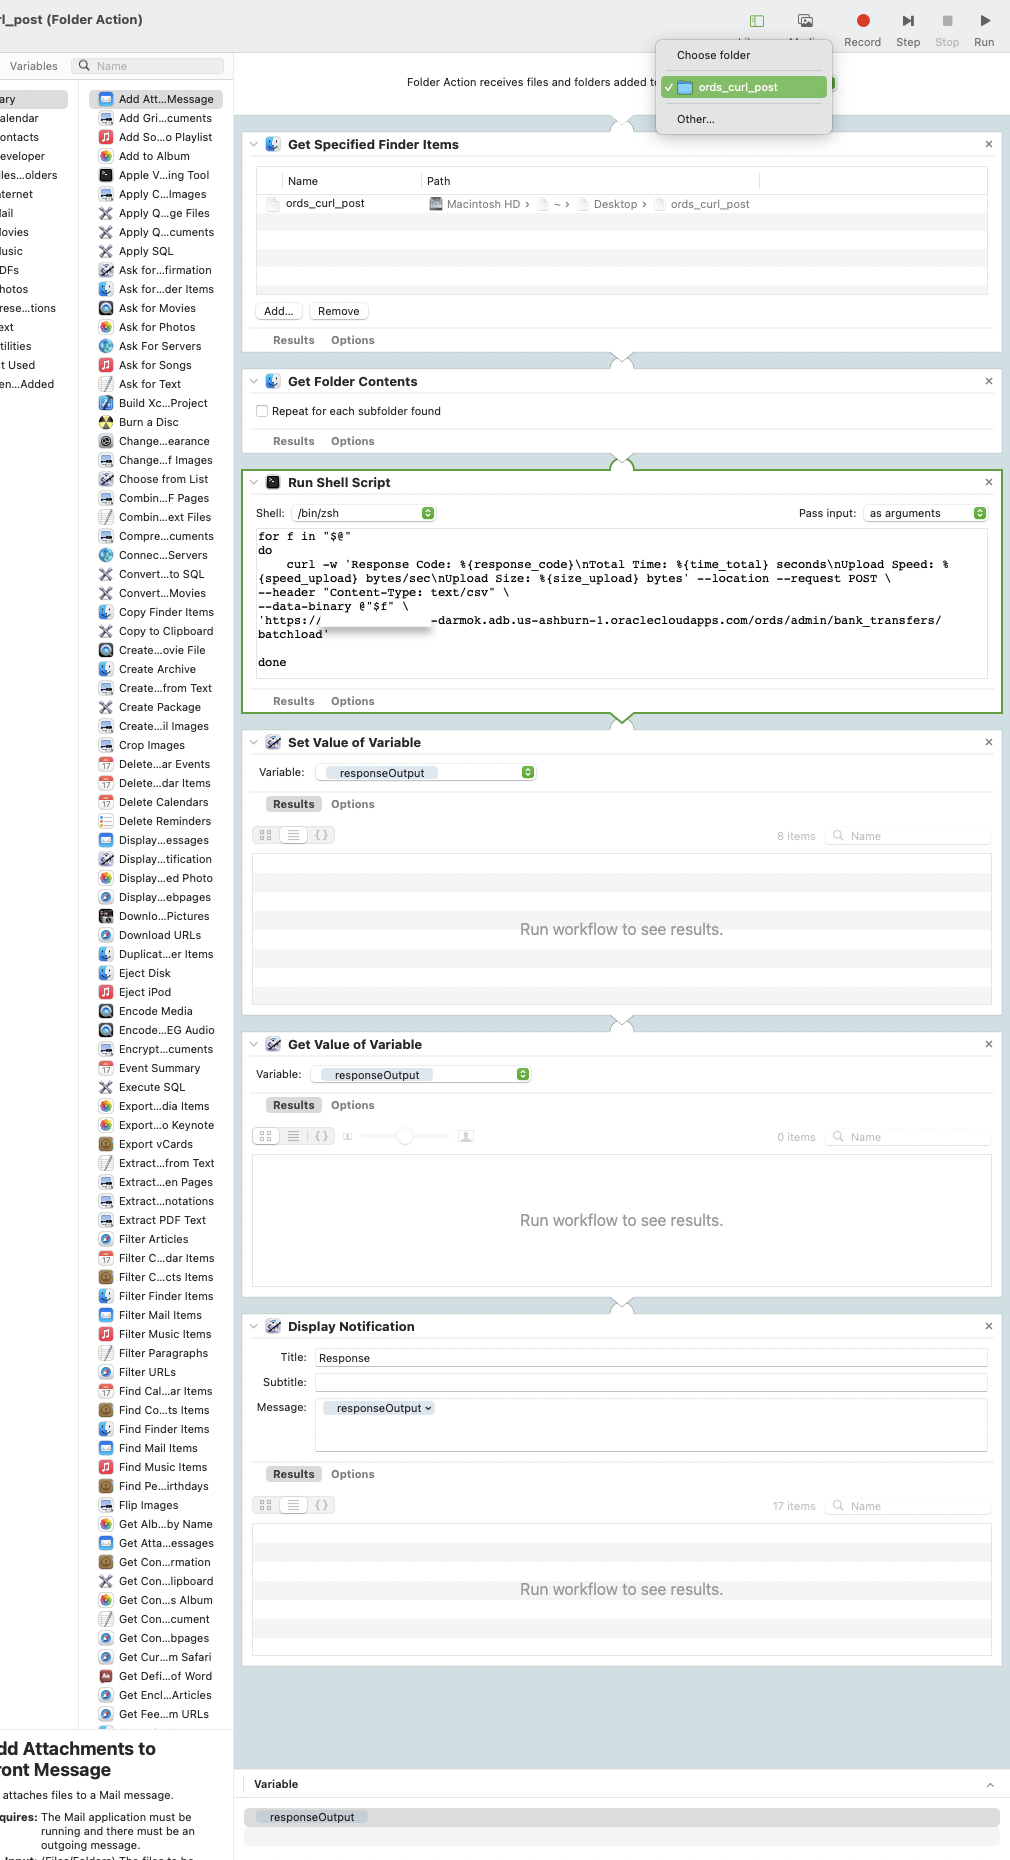
Batch Load requestThe modules
The modules I’m using are:
- Get Specified Finder Items
- Get Folder Contents
- Run Shell Script (for a zsh shell, the default for this MacBook)
- Set Value of Variable
- Get Value of Variable
- Display Notification
You can see at the very top, that I have to choose a target folder since this is a folder action. I chose the folder I created; ords_curl_post.
Get Specified Finder Items and Get Folder Contents
The first two modules are pretty straightforward. You get the specified finder items (from that specific folder). And then get the contents from that folder (whatever CSV file I drop in there). That will act as a trigger for running the shell script (where the filename/s serve as the input for the cURL Command).
PAUSE: I must confess, I had essentially ZERO experience in shell scripting prior to this, and I got it to work. Its probably not the prettiest, but damn if I'm not stoked that this thing actually does what it is supposed to do.
The only main considerations on this shell script are that you’ll want to stay with zsh and you’ll want to choose “as arguments” in the “Pass input” dropdown menu. Choosing “as arguments” allows you to take that file name and apply it to the For Loop in the shell script. I removed the echo "$f" because all it was doing was printing out the file name (which makes sense since it was the variable in this script).
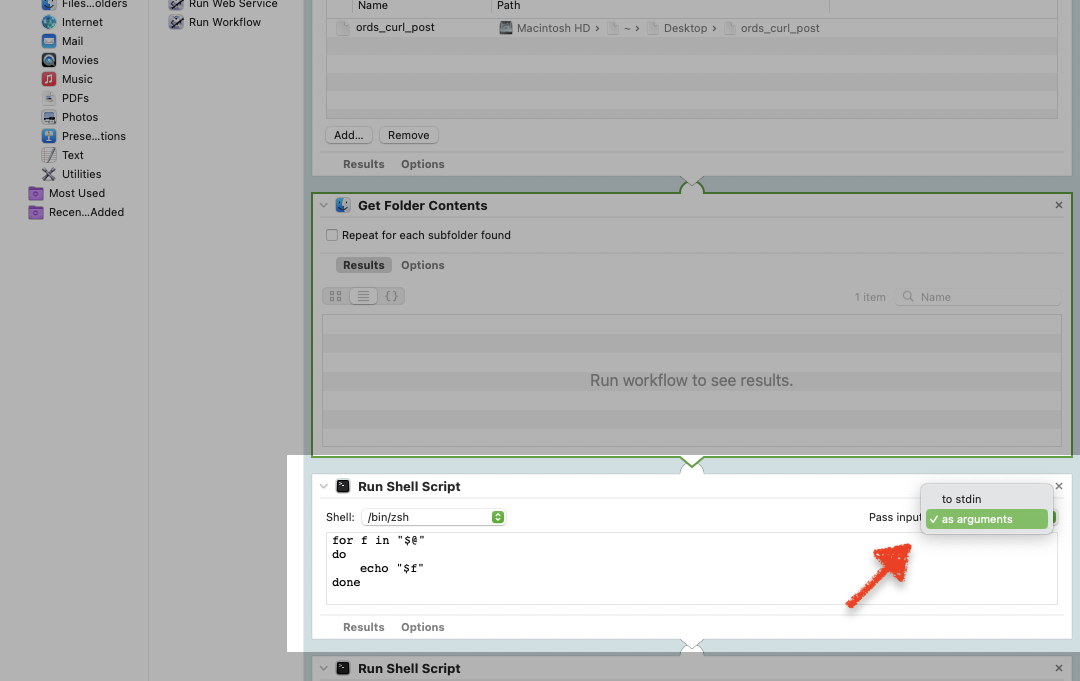
as arguments“The Shell Script
That cURL Command I copied from earlier looks like this:
curl --location --request POST \
--header "Content-Type: <CONTENT_TYPE>" \
--data-binary @<FILE_NAME> \
'https://abcdefghi1234567-darmok.adb.us-ashburn-1.oraclecloudapps.com/ords/admin/bank_transfers/batchload'
I made some modifications though. I made sure Content-Type was text/csv. And then I added some fancy options for additional information (more details on this here, go nuts) when I get a response from the database.
REMINDER: I didn't know how to do this until about 30 mins before I got it to work. I'm emphasizing this because I want to drive home the point that with time and some trial-and-error, you too can get something like this to work!
With my changes, the new cURL Command looks like this:
curl -w 'Response Code: %{response_code}\nTotal Time: %{time_total} seconds\nUpload Speed: %{speed_upload} bytes/sec\nUpload Size: %{size_upload} bytes' --location --request POST \
--header "Content-Type: text/csv" \
--data-binary @"$f" \
'https://abcdefghi1234567-darmok.adb.us-ashburn-1.oraclecloudapps.com/ords/admin/bank_transfers/batchload'
What a mess…That -w option stands for write-out. When I receive the response from the Batch Load request, I’ll want the following information:
- Response Code (e.g. like a 200 or 400)
- Total Upload Time
- Upload Speed
- Upload Size
All of that is completely optional. I just thought it would be neat to show it. Although, as you’ll see in a little bit, Apple notifications has some weird behavior at times so you don’t really get to see all of the output.
I then applied the cURL command to the shell script, (with some slight modifications to the For Loop), and it ended up looking like this:
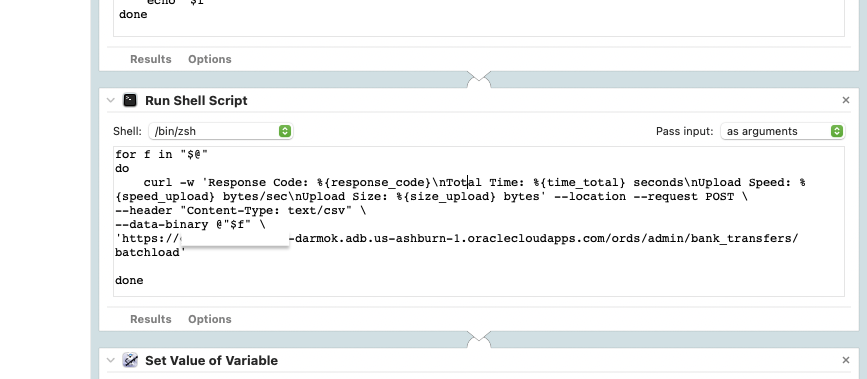
cURL commandHere is what the output looked like when I did a test run (with a sample CSV):
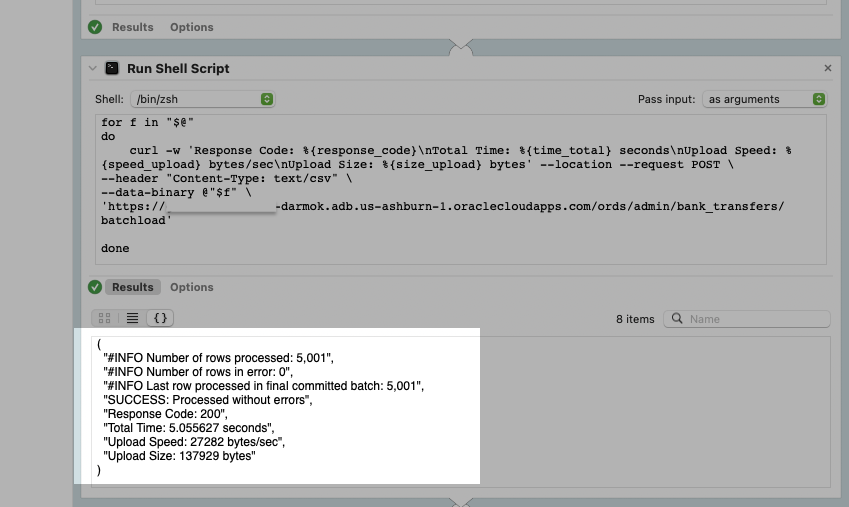
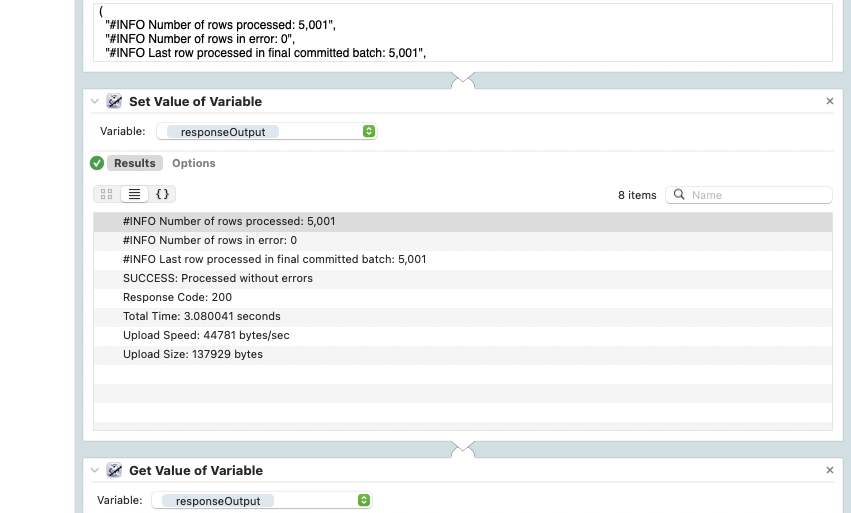
cURL commandSet Value of Variable
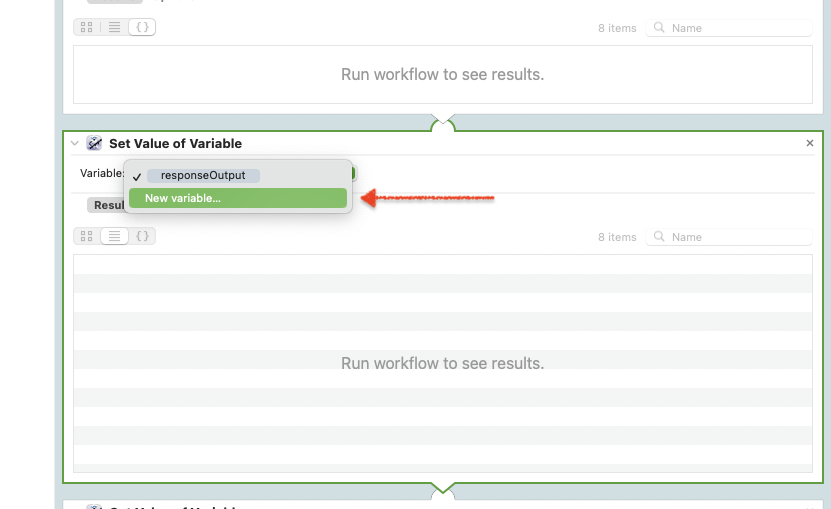
All of that output, referred to as “Results”, will then be set as a variable. That variable will be henceforth known as the responseOutput (Fun fact: that is called Camel casing…I learned that like 3-4 months ago). You’ll first need to create the variable, and once you run the folder action, it’ll apply the results to that variable. Like this:
Get Value of Variable and Display Notification
Those next two modules simply “GET” that value of the variable/results and then sends that value to the Display Notification module. This section is unremarkable, moving on.
And at this point, I was done. All I needed to do was save the script and then move on to the next step.
Folder Actions Setup
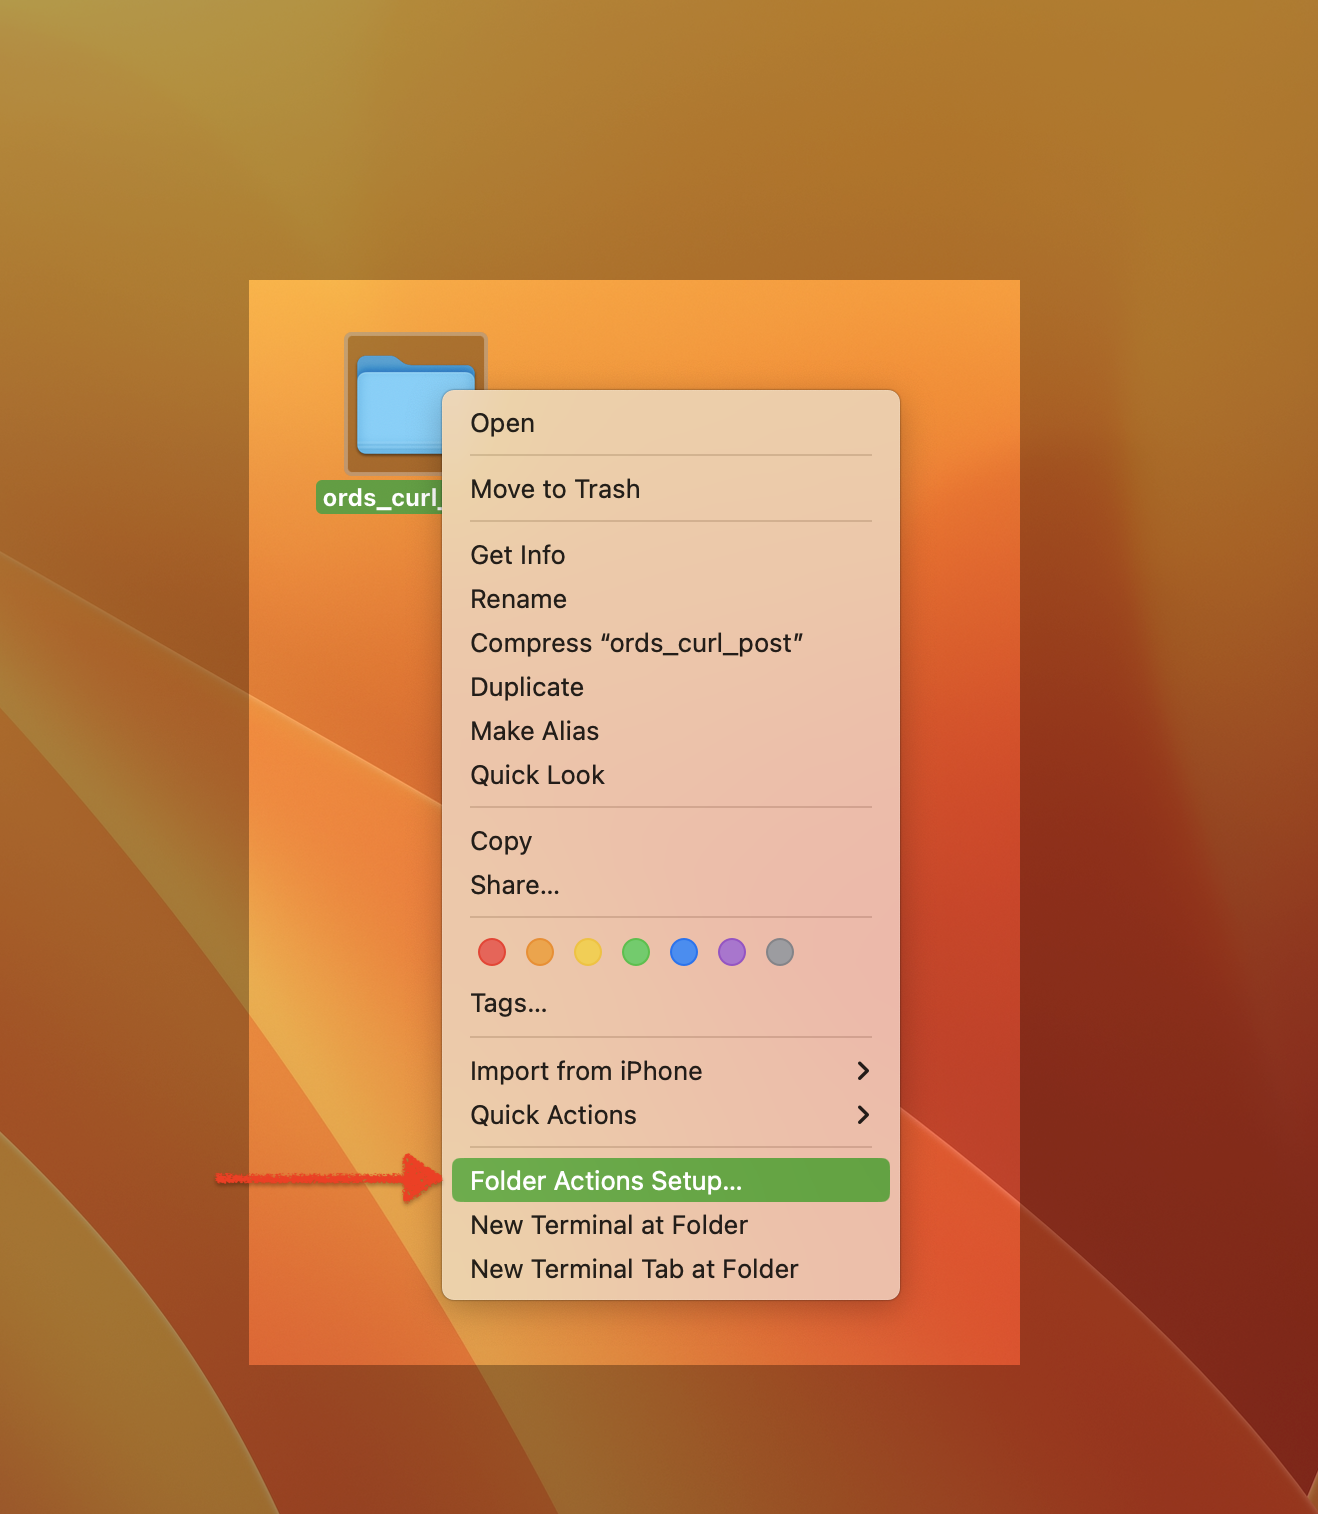
None of this will really work as intended until you perform one final step. I’ll right-click the target folder and select “Folder Actions Setup.” From there a dialog will appear; you’ll want to make sure both the folder and the script are checked.
Folder Actions Setup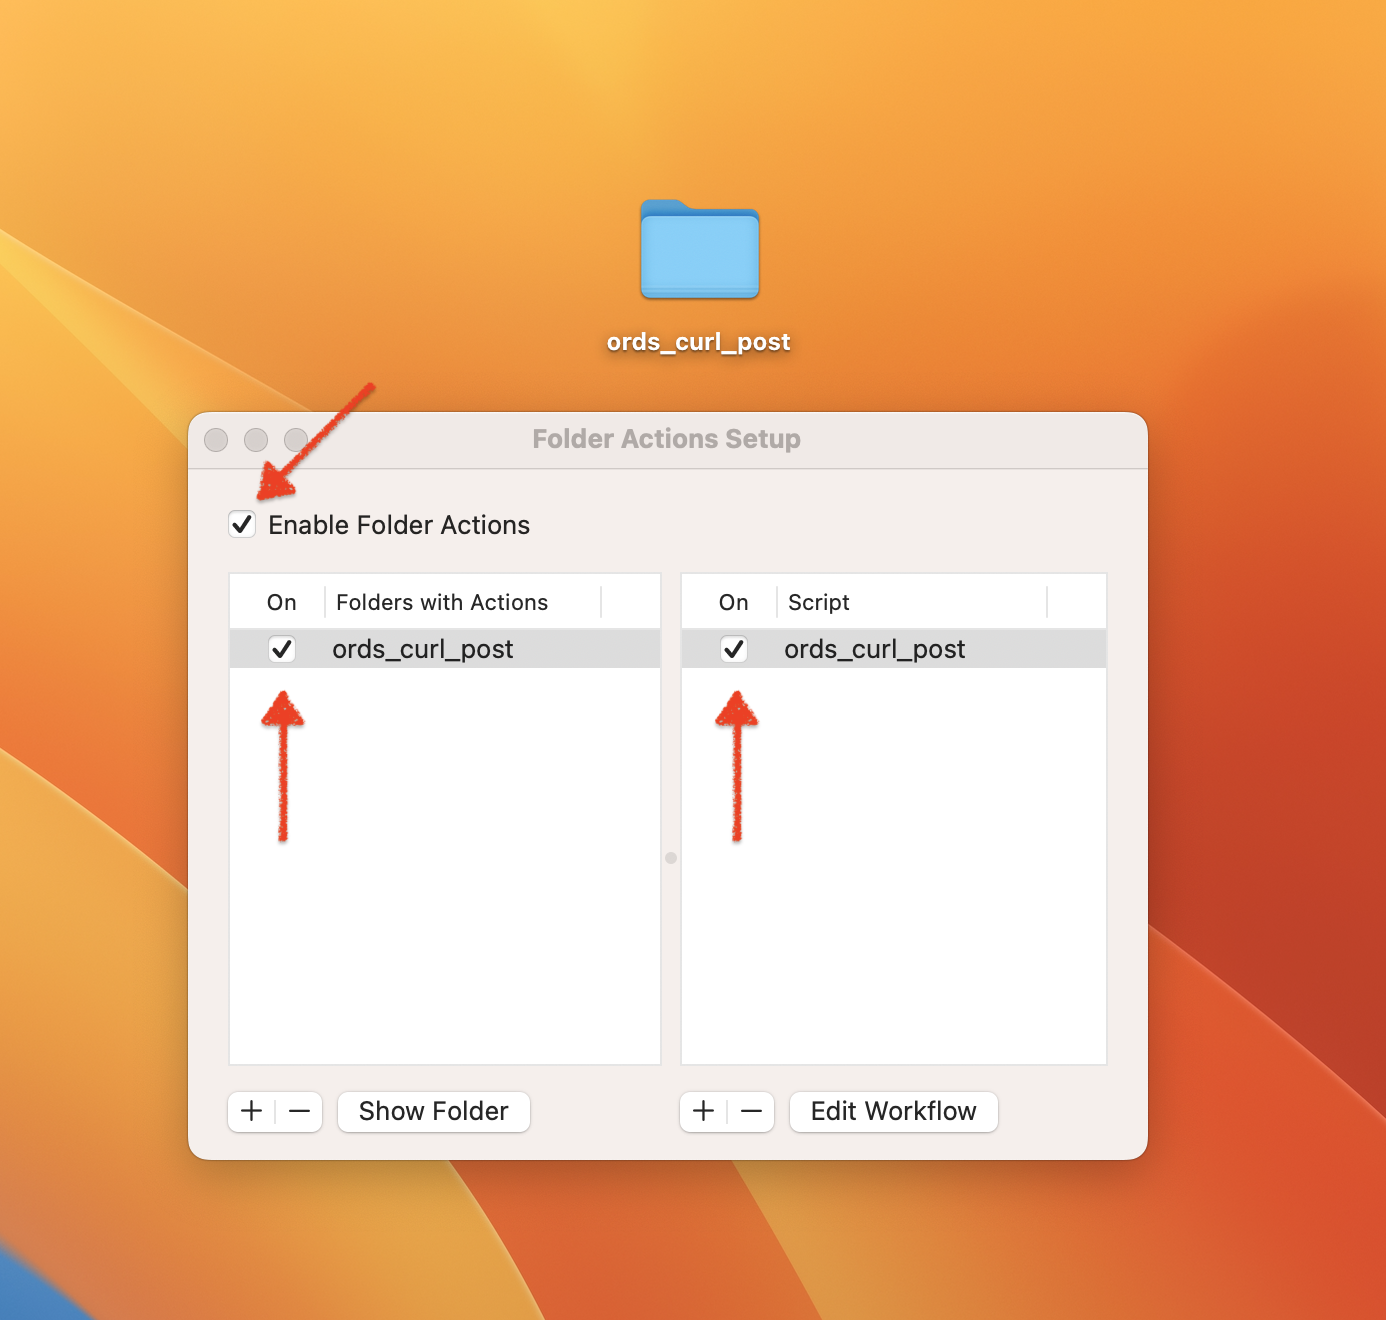
Trying it out
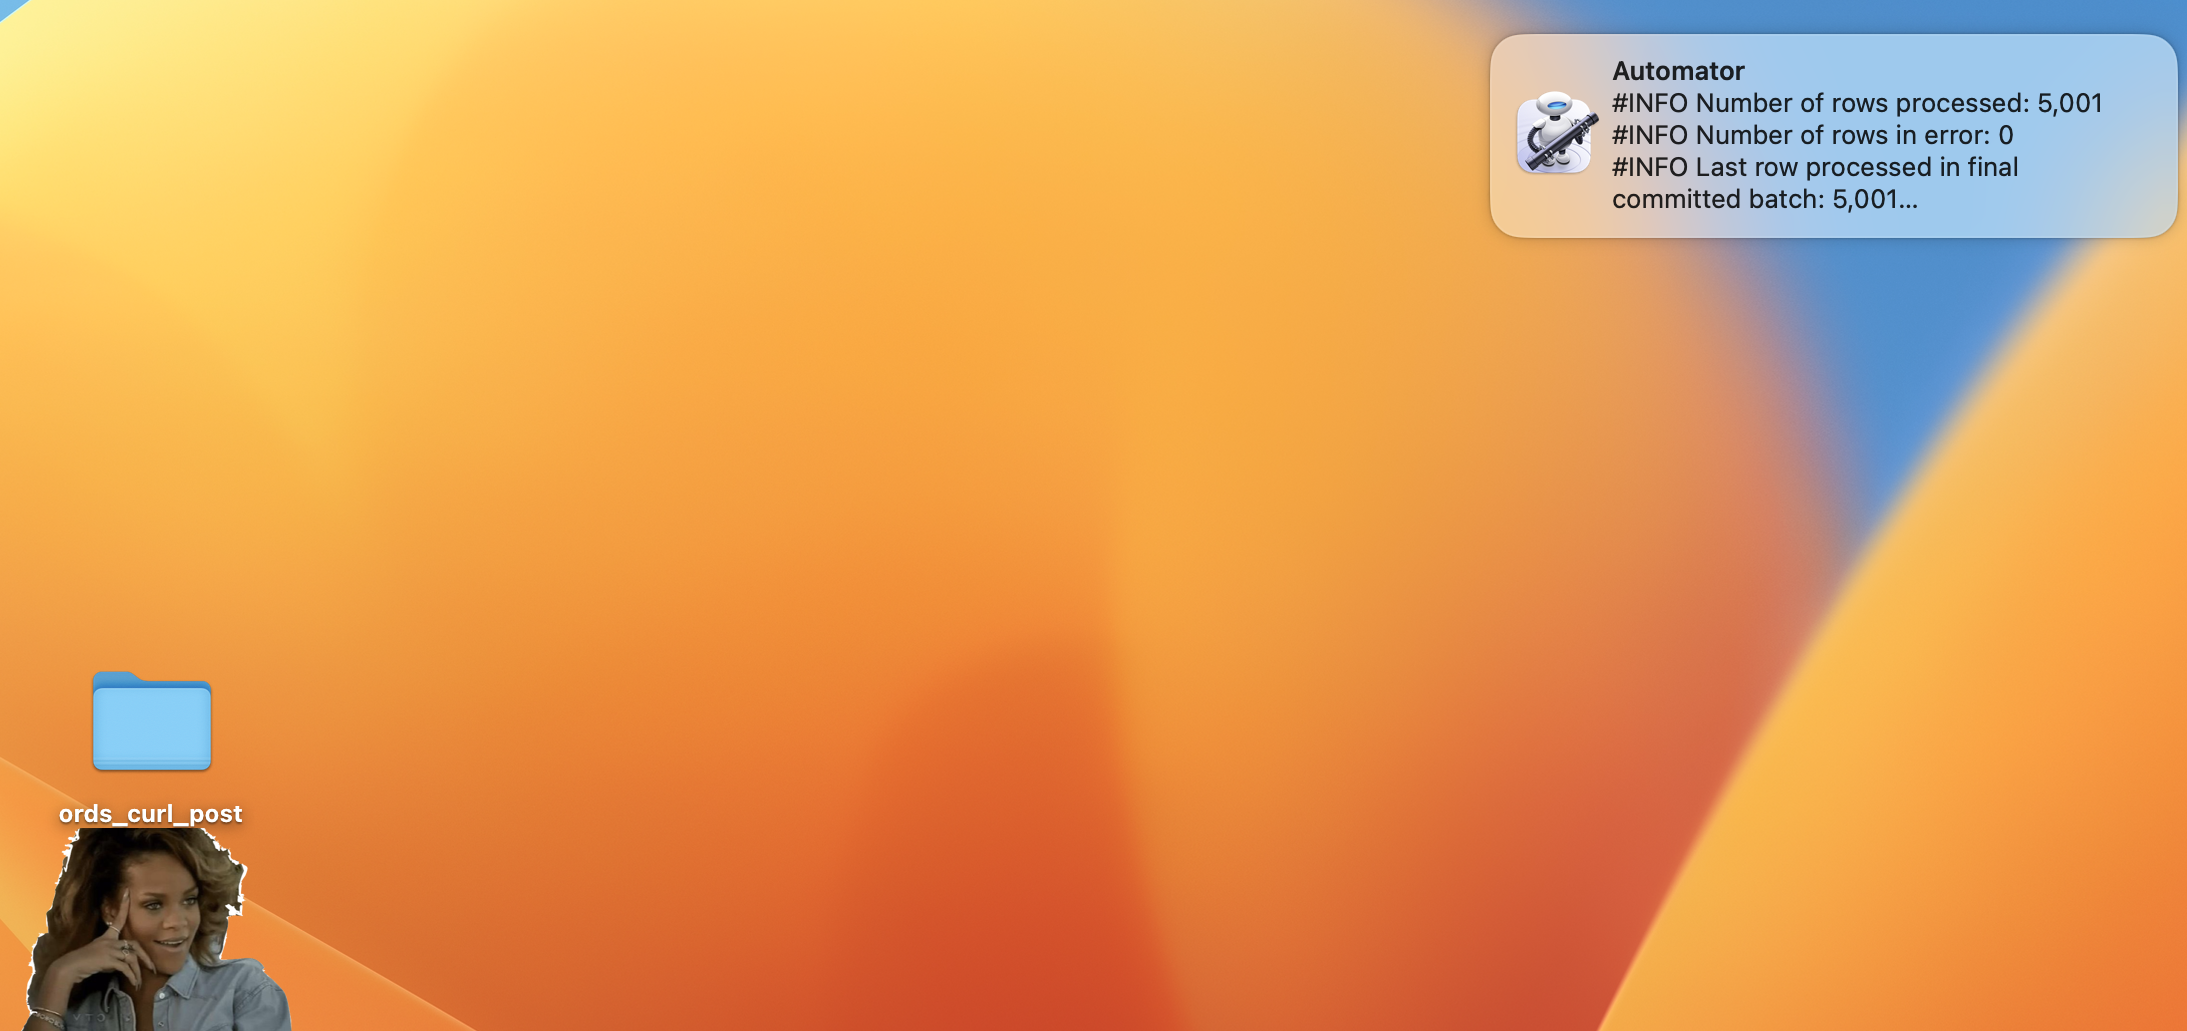
Next, I emptied the folder. Then I dropped in a 5000-row CSV file and let Folder Actions do its thing. This entire process is quick! I’m loving the notification, but the “Show” button simply does not work (I think that is a macOS quirk though). However, when I go back to my Autonomous Database, I can 100% confirm that this ORDS Batch Load worked.
Batch Load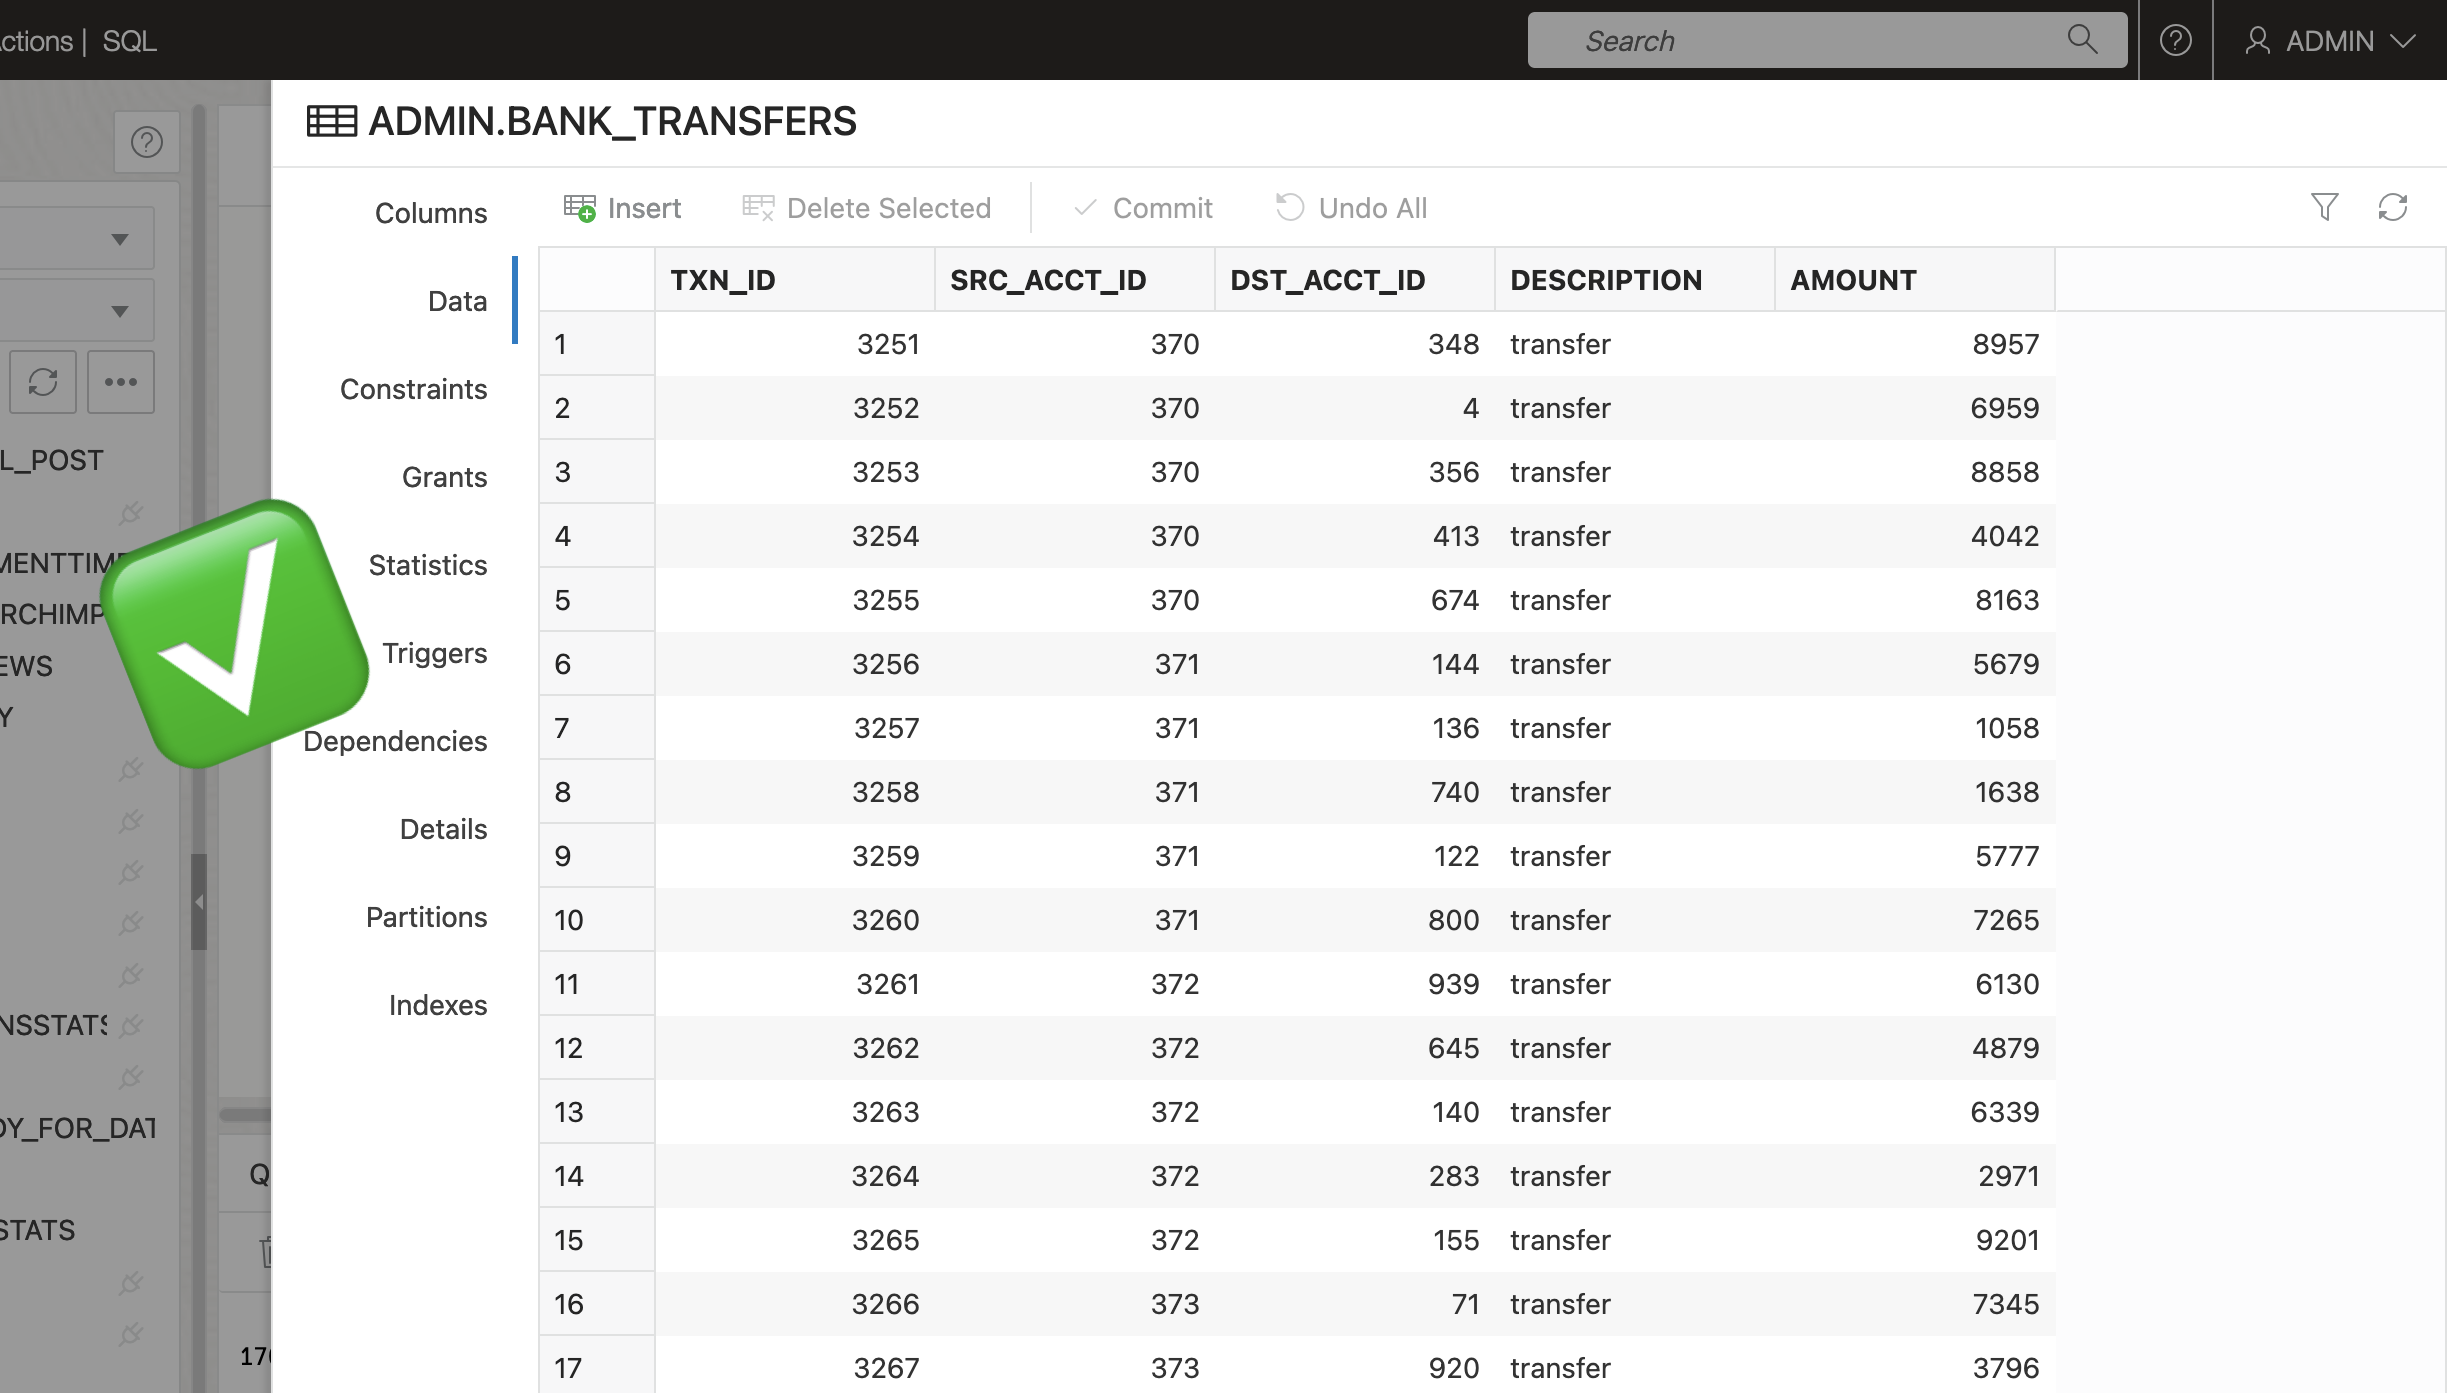
Final thoughts
This was relatively easy to do. In total, it took me about 3-4 days of research and trial and error to get this working. There is a lot I do not know about shell scripting. But even with a rudimentary understanding, you too can get this to work.
Next, I’d like to create a dialog window for the notification (the output from the cURL Command). I believe you can do that in AppleScript; I just don’t know how yet.
If you are reading this and can think of anything, please leave a message! If you want to try it out for yourself, I’ve shared the entire workbook on my GitHub repo; which can be found here.
I’ll also be doing an extended video review of this, where I’ll recreate the entire automation from start to finish. Be on the lookout for that too!
Leave a Reply