Tag: ADB
-
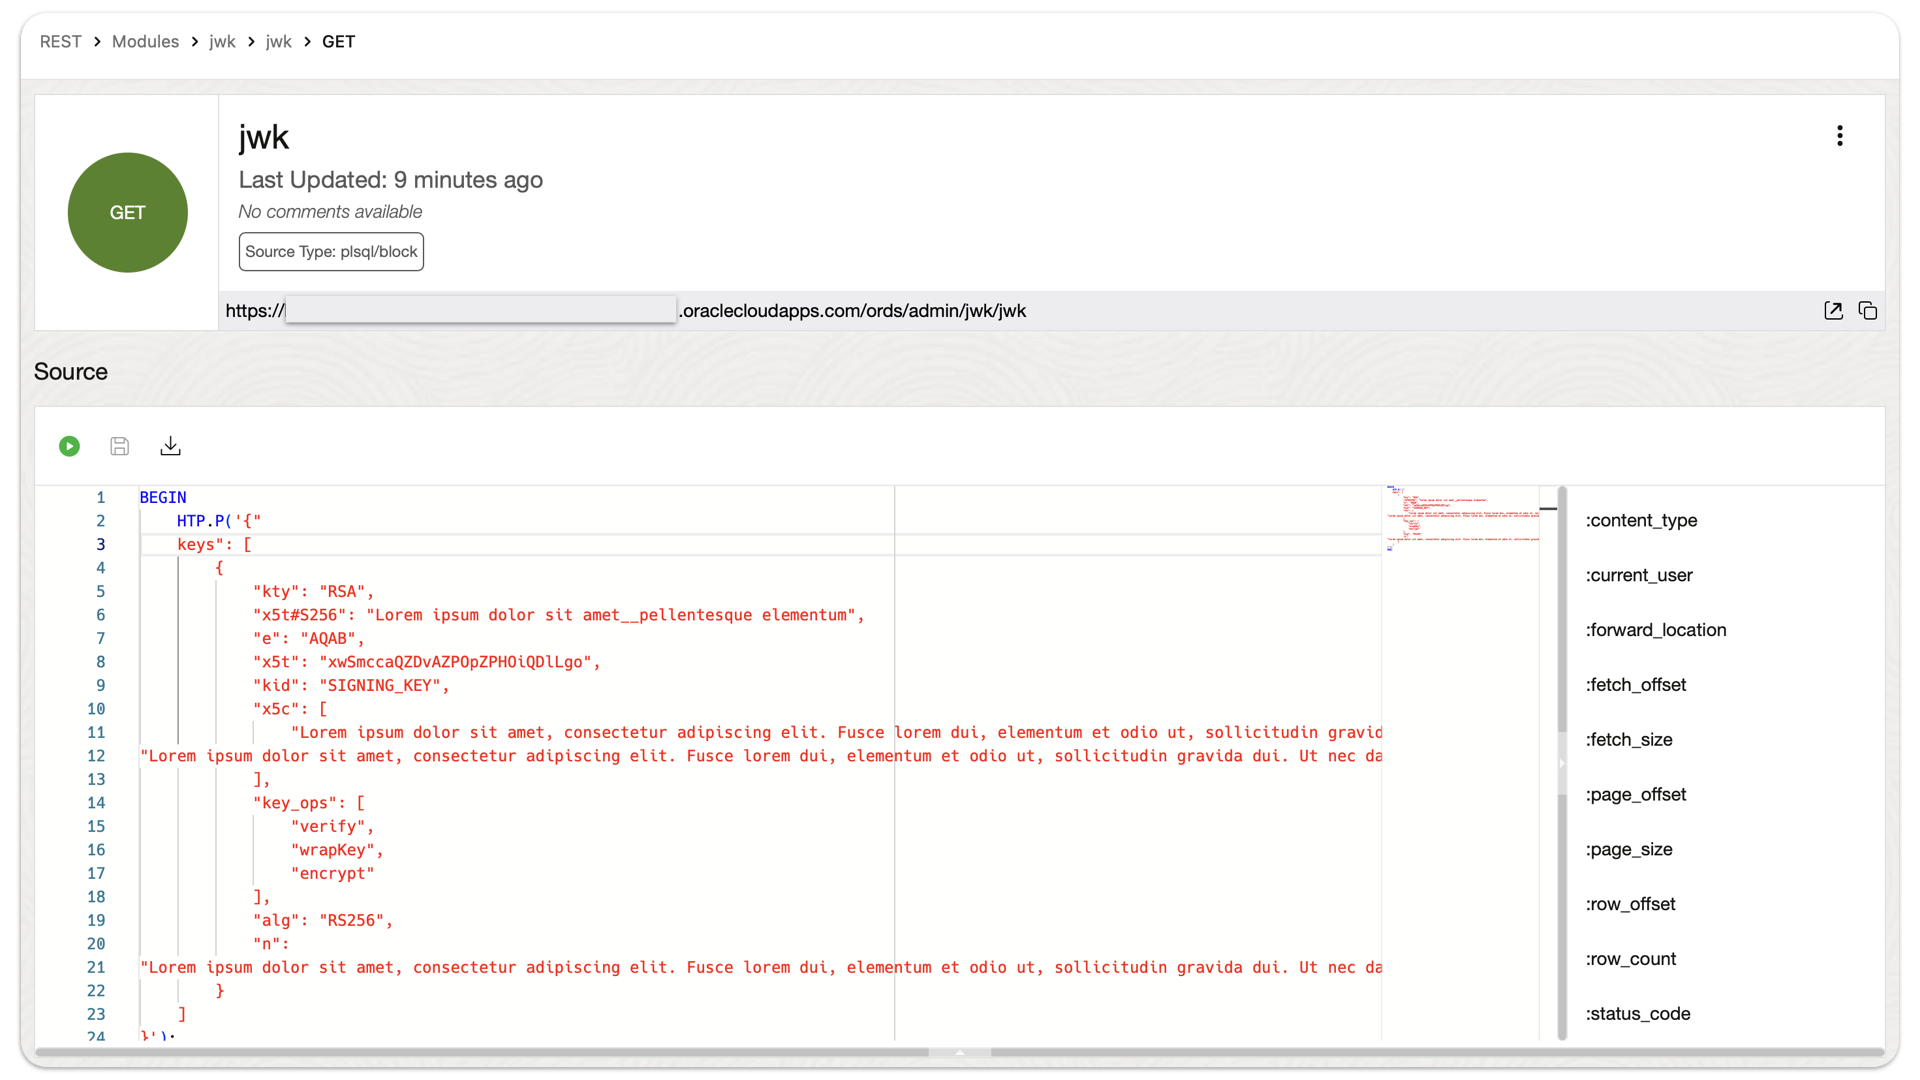
Example: an ORDS API that returns a user-configured JSON object
This actually came about from a Support Request. We were troubleshooting a JWT issue, that had ORDS in the mix. Ultimately, this is looking more and more like a networking issue (maybe something to do with routing rules between the load balancer and the backend server). But in the course of our troubleshooting, we wanted…
Written by
-
ORDS as a JotForm webhook: An actual customer use case
Recently, we (one of our Support engineers and I) worked with a customer who had integrated various ORDS POST APIs with a web-based form application called JotForm. JotForm offers integrations for numerous workflows, some official and others you can create independently. That’s where we come in. In this example, a user would enter information into…
Written by
-
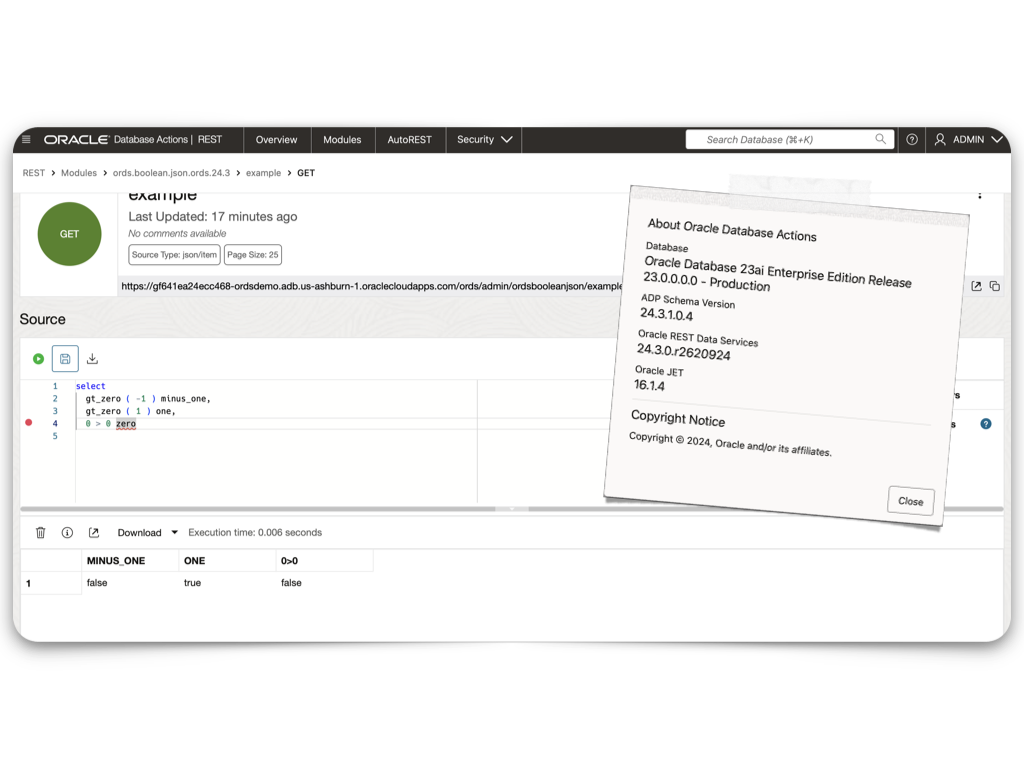
ORDS 24.3 Release Highlights
Overview There’s plenty to talk about in this release. However, I’m most excited about the performance improvements, ORDS sample applications, and documentation changes. Read on to get the whole story. Enhancements API Performance REST API responses from either AutoREST or customer based modules could see as much as a 30% improvement in response times. About…
Written by
-
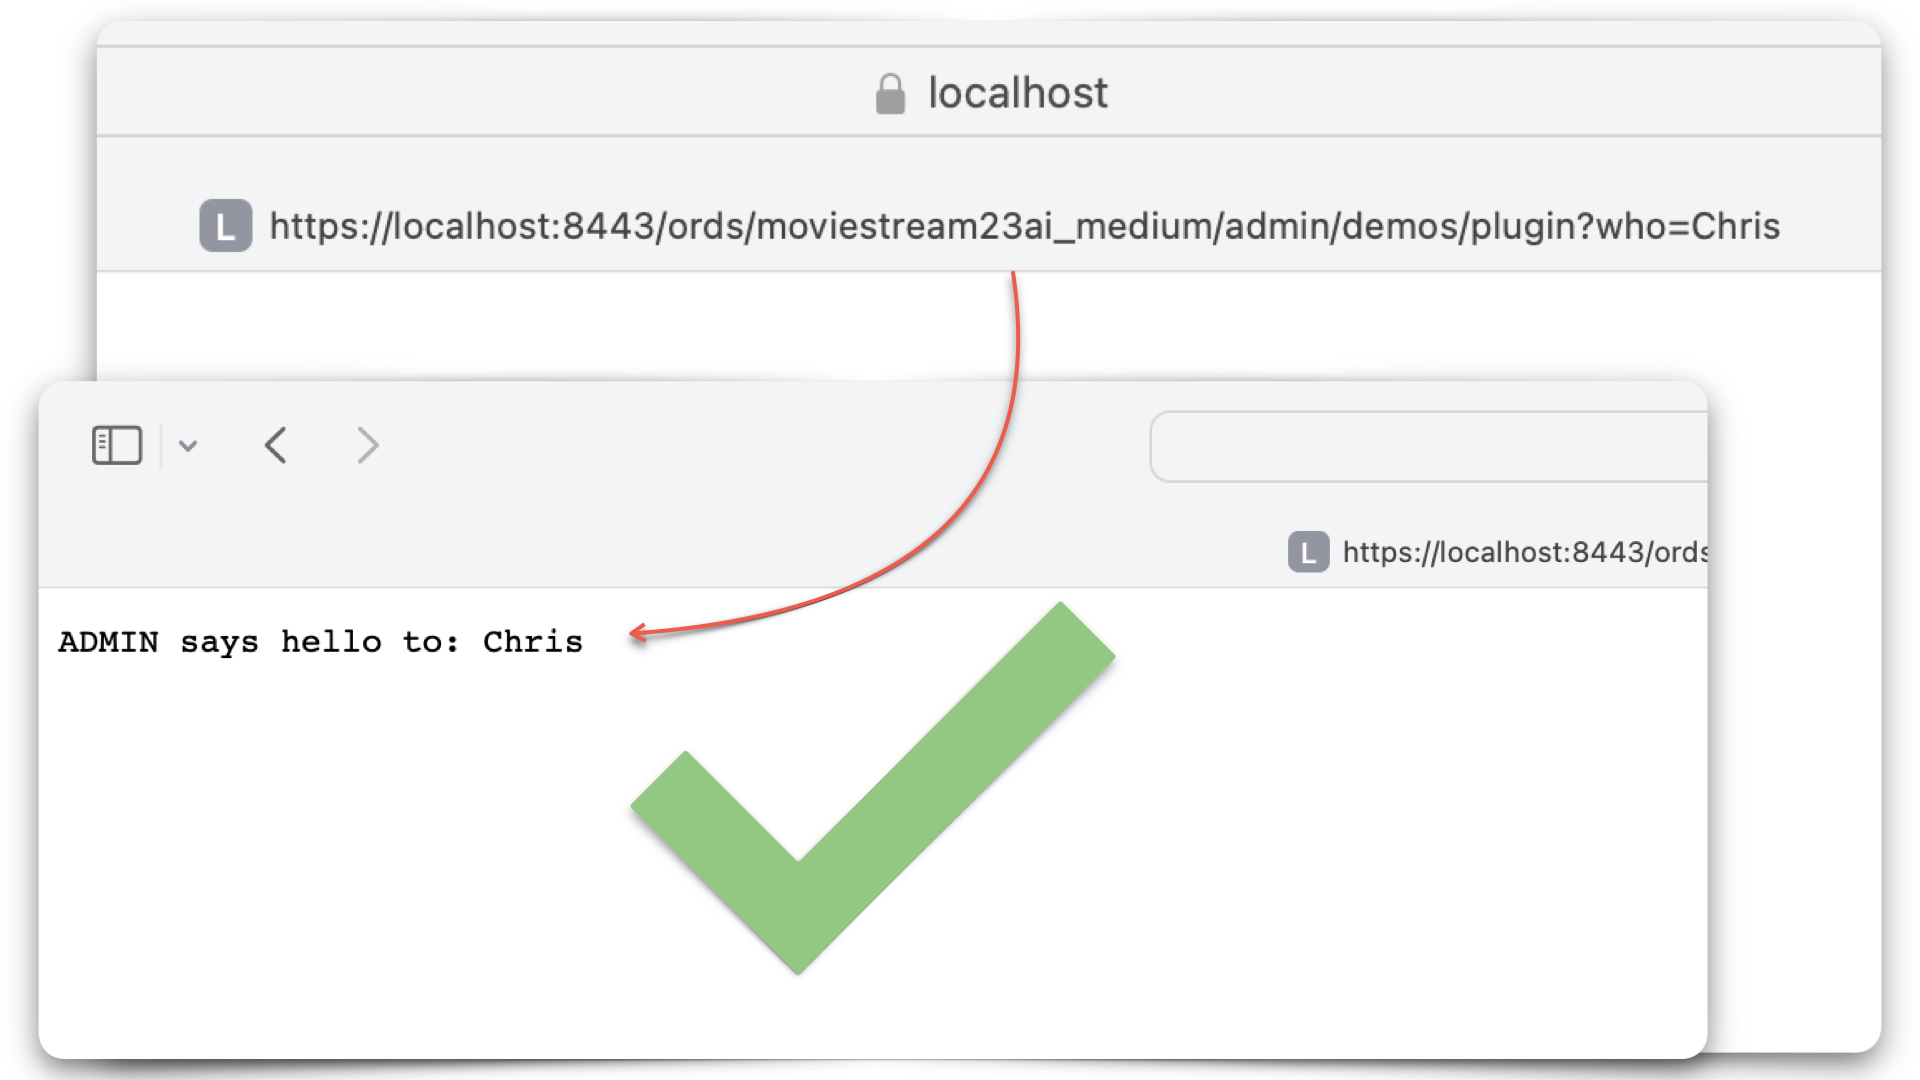
Extending ORDS with a Java plugin
About this article This article is a walkthrough and overview of setting up the example Java plugin that ships with ORDS. These plugins allow you to add functionalities and capabilities above what is possible with a standard ORDS configuration. In this example, the plugin allows you to use a name as a query parameter in an HTTP…
Written by
-
ORDS 24.2 Release Highlights
NOTE: This can be thought of as a “companion piece” to the official ORDS release notes 🤓. What is new in Oracle REST Data Services 24.2? New HTTPS Response Status Codes In response to various support requests and internal feedback, we’ve expanded on the existing ORDS Status Codes (the current list can be found here)!…
Written by

-
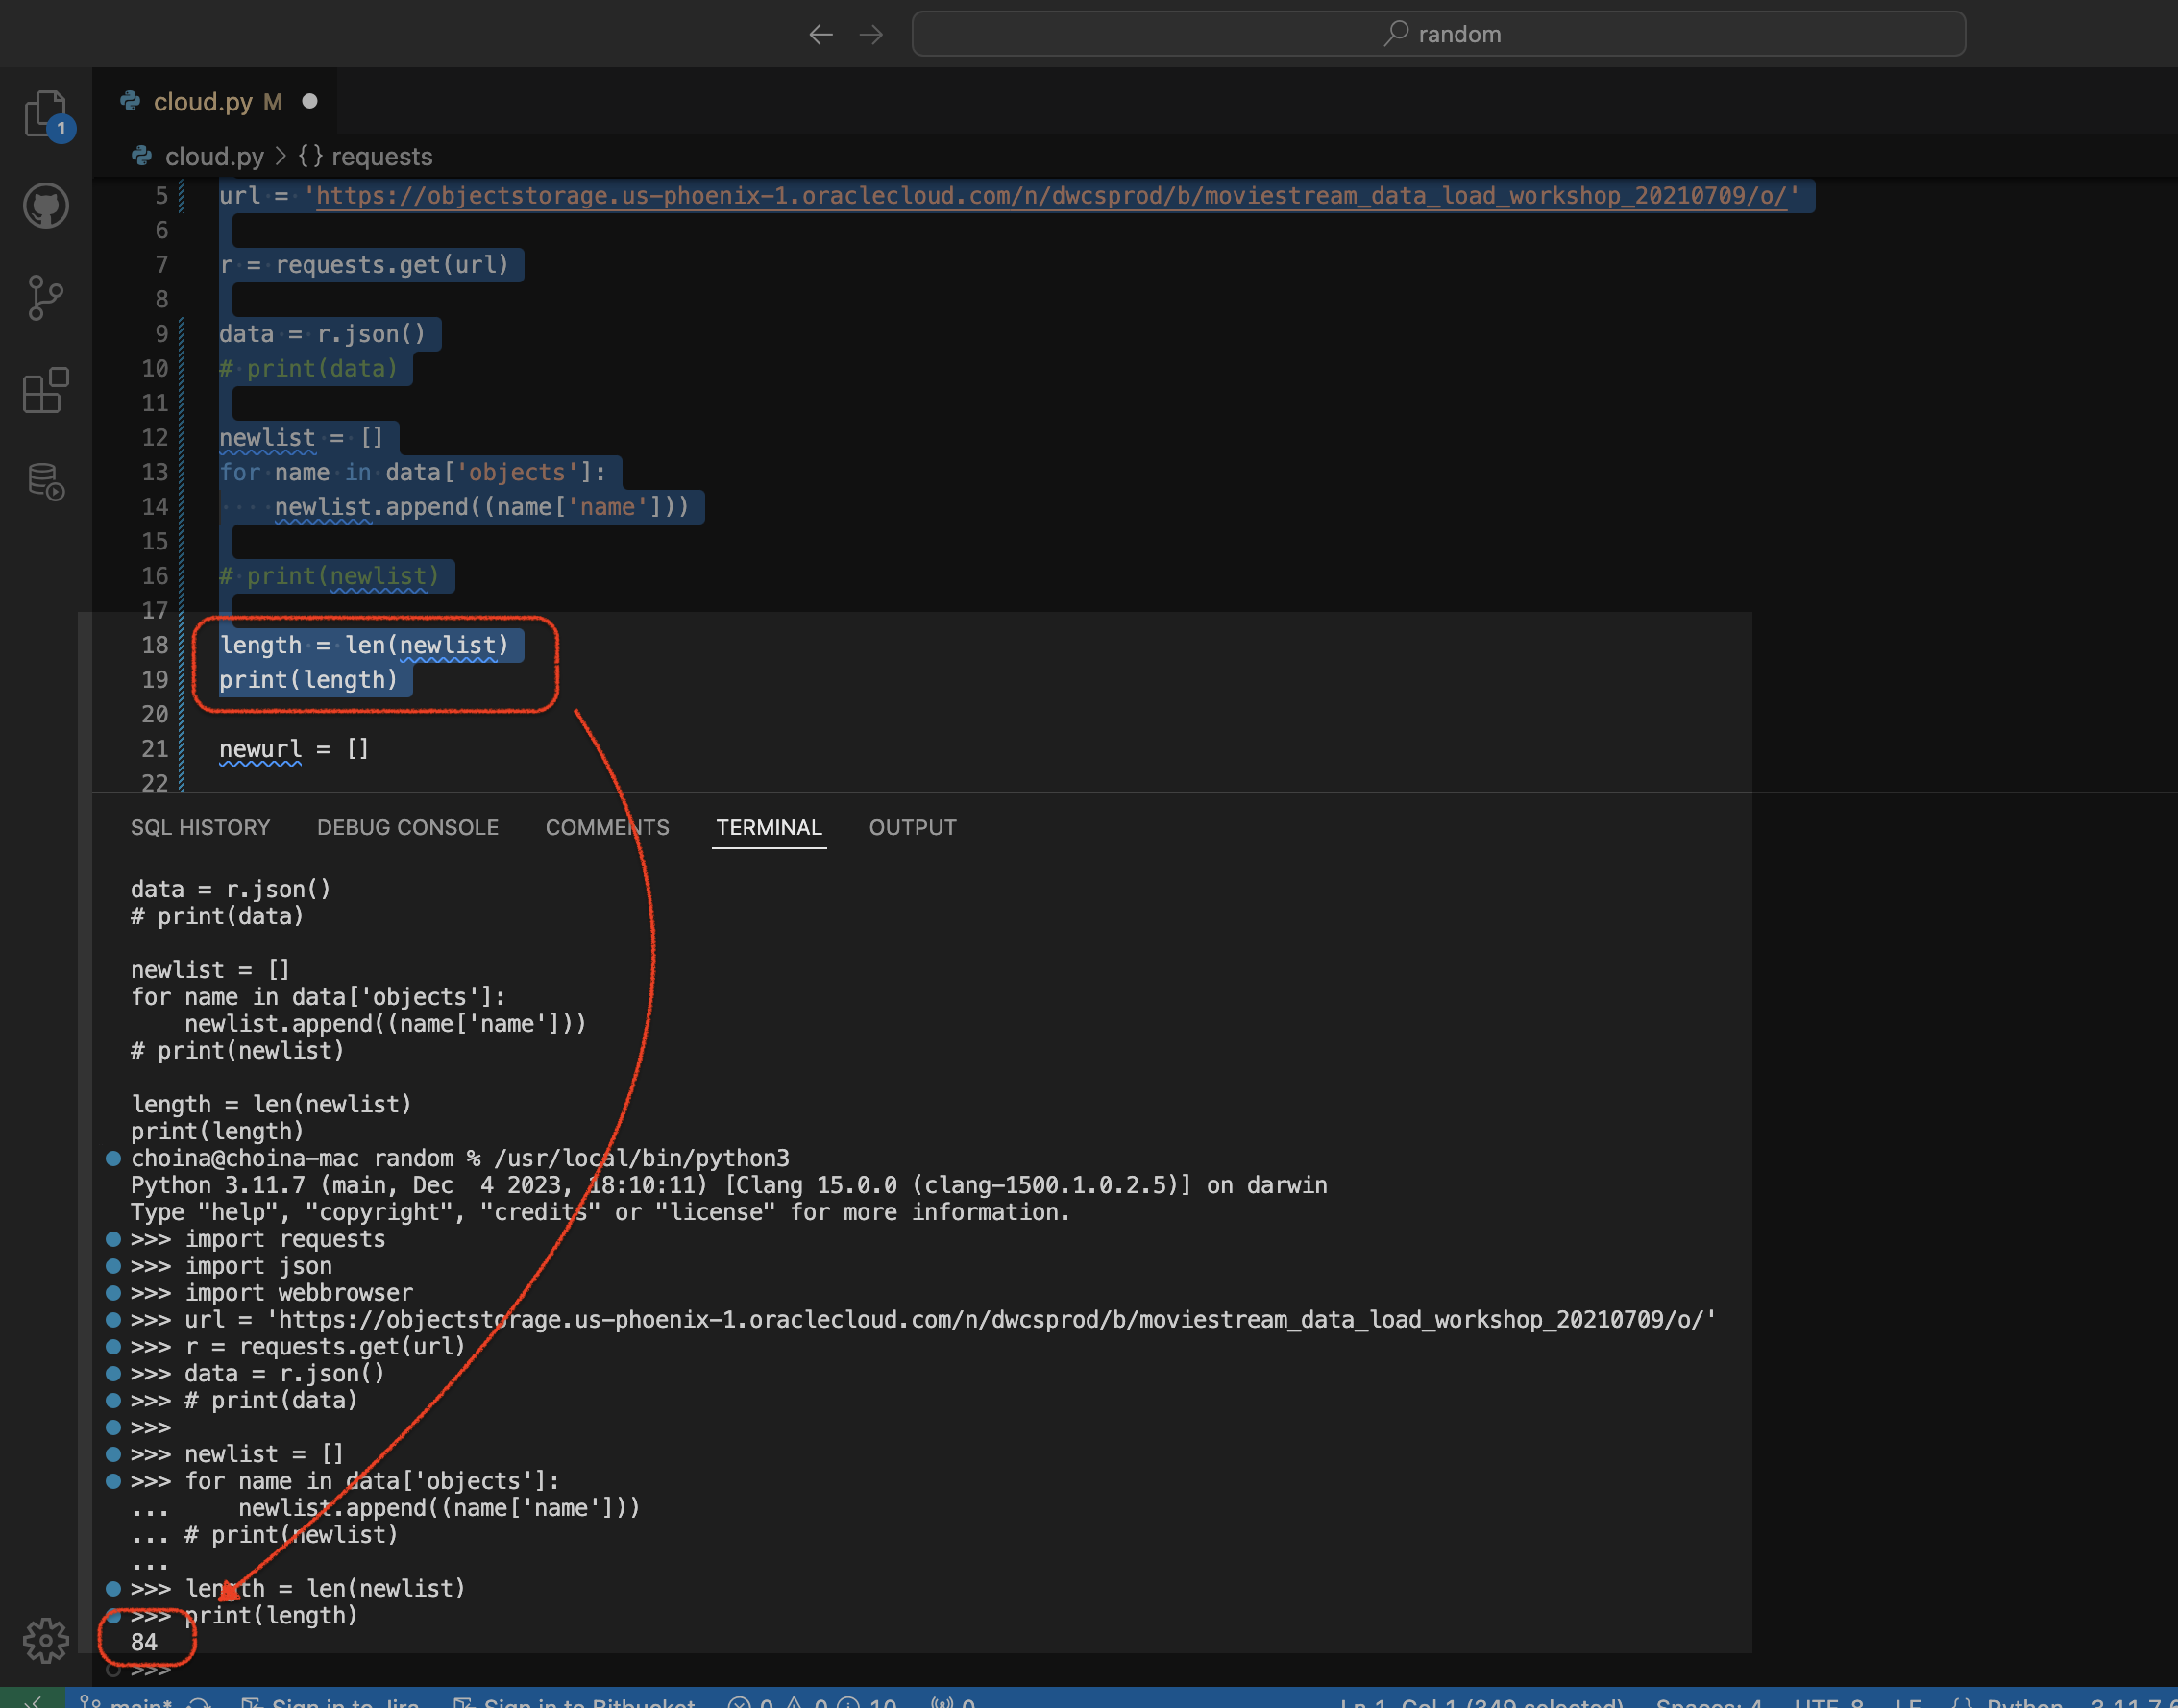
Python script to retrieve objects from Oracle Cloud Bucket
For…reasons, I needed a way to retrieve all the .CSV files in a regional bucket in Oracle Cloud Object Storage, located at this address: https://objectstorage.us-phoenix-1.oraclecloud.com/n/dwcsprod/b/moviestream_data_load_workshop_20210709/o You can visit it; we use it for one of our LiveLabs (this one), so I’m sure it will stay live for a while 😘. Once there, you’ll see all…
Written by
-
Build an ORDS API Resource Module, GET request with JavaScript fetch, display in HTML
Really trying to optimize SEO with that title 👆🏼! Recap 💡 All the code you’ll see in this post can be found in my moviestreamjs github repository.💡 This post is a continuation of a previous one, which can be found here. In this post, I’ll: If you are coming from the previous related post, then…
Written by
-
Create a view from a JSON Collection and REST-enable it with ORDS
The DBMS_CLOUD PL/SQL Package You can use this PL/SQL procedure (in the DBMS_CLOUD package) along with the file_uri_list URL (seen in the code below) to create and then add JSON documents to a JSON Collection (good info on JSON Collections in the Oracle database). In this example, we call this collection Movie_Collection. 👆🏻 This is…
Written by
-
Oracle Database REST APIs and Apple Automator Folder Actions
The plan was to create an ORACLE REST endpoint and then POST a CSV file to that auto-REST enabled table (you can see how I did that here, in section two of my most recent article). But, instead of doing this manually, I wanted to automate this POST request using Apple’s Automator application… Me…two paragraphs…
Written by

-
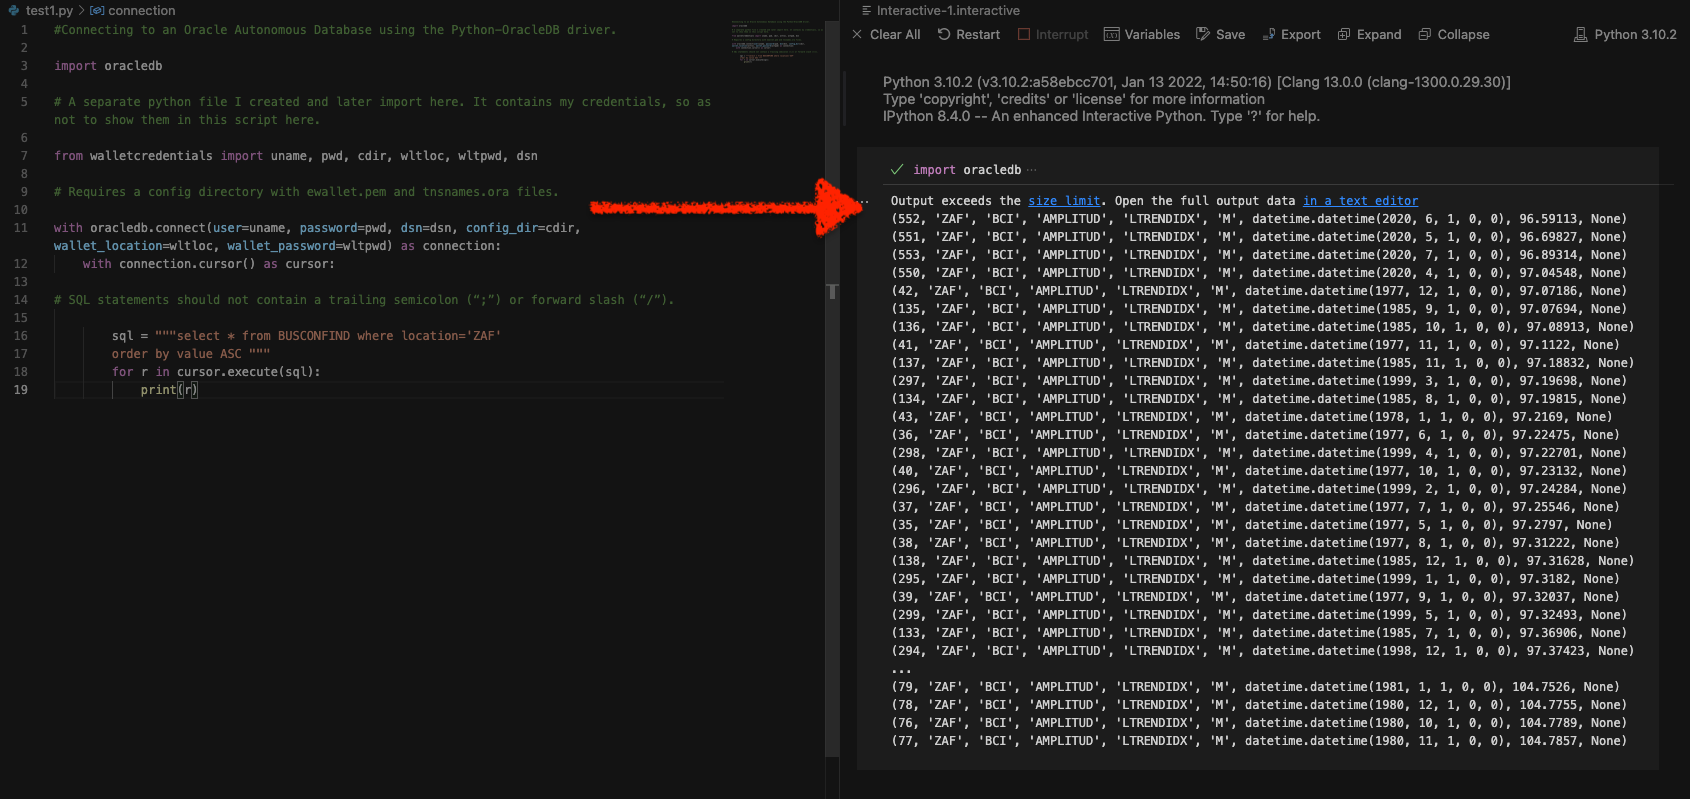
Python and the Oracle Autonomous Database: Three Ways to Connect
Watch the deep dive videos: Part I Part II Part III Welcome back I finally had a break in my PM duties to share a small afternoon project [I started a few weeks ago]. I challenged myself to a brief Python coding exercise. I wanted to develop some code that allowed me to connect to…
Written by