Category: SQL
-
From one API to another: Using ORDS Auto-REST to update a table
I think in this new age of AI/LLMs it is important to understand prompting. Eventually, whether we like it or not, we’ll all need to become “prompt engineers.” And as you’ll see in that thread, you actually have to know what you are doing to be able to ask the right questions and to challenge…
Written by

-
Build an ORDS API Resource Module, GET request with JavaScript fetch, display in HTML
Really trying to optimize SEO with that title 👆🏼! Recap 💡 All the code you’ll see in this post can be found in my moviestreamjs github repository.💡 This post is a continuation of a previous one, which can be found here. In this post, I’ll: If you are coming from the previous related post, then…
Written by
-
Tinkering: a SQL script for the ORDS_ADMIN.ENABLE_SCHEMA procedure
Post-ORDS installation Once you’ve installed ORDS, you need to REST-enable your schema before taking advantage of ORDS (I used to forget this step, but now it’s like second nature). RESOURCES: I’ve discussed ORDS installation here and here. I’d check both pages if you’re unfamiliar with it or want a refresher. ORDS.ENABLE_SCHEMA / ADMIN_ORDS.ENABLE_SCHEMA While logged into your…
Written by
-
HELP!! parse error: Invalid numeric literal at line x, column x?! It’s not your Oracle REST API!!
A while back (yesterday), I penned a blog post highlighting the ORDS REST-Enabled SQL Service. And in that blog, I displayed the output of a cURL command. A cURL command I issued to an ORDS REST-Enabled SQL Service endpoint. Unfortunately, it was very messy and very unreadable. I mentioned that I would fix it later.…
Written by
-
A quick ORDS REST-Enabled SQL Service example
I promise this post will connect back to an overarching theme. But for now, I want to show how you can take a SQL query and use that in combination with the ORDS REST-Enabled SQL Service to request data from a database table. The SQL query Here is the SQL query I’m using: The SQL…
Written by
-
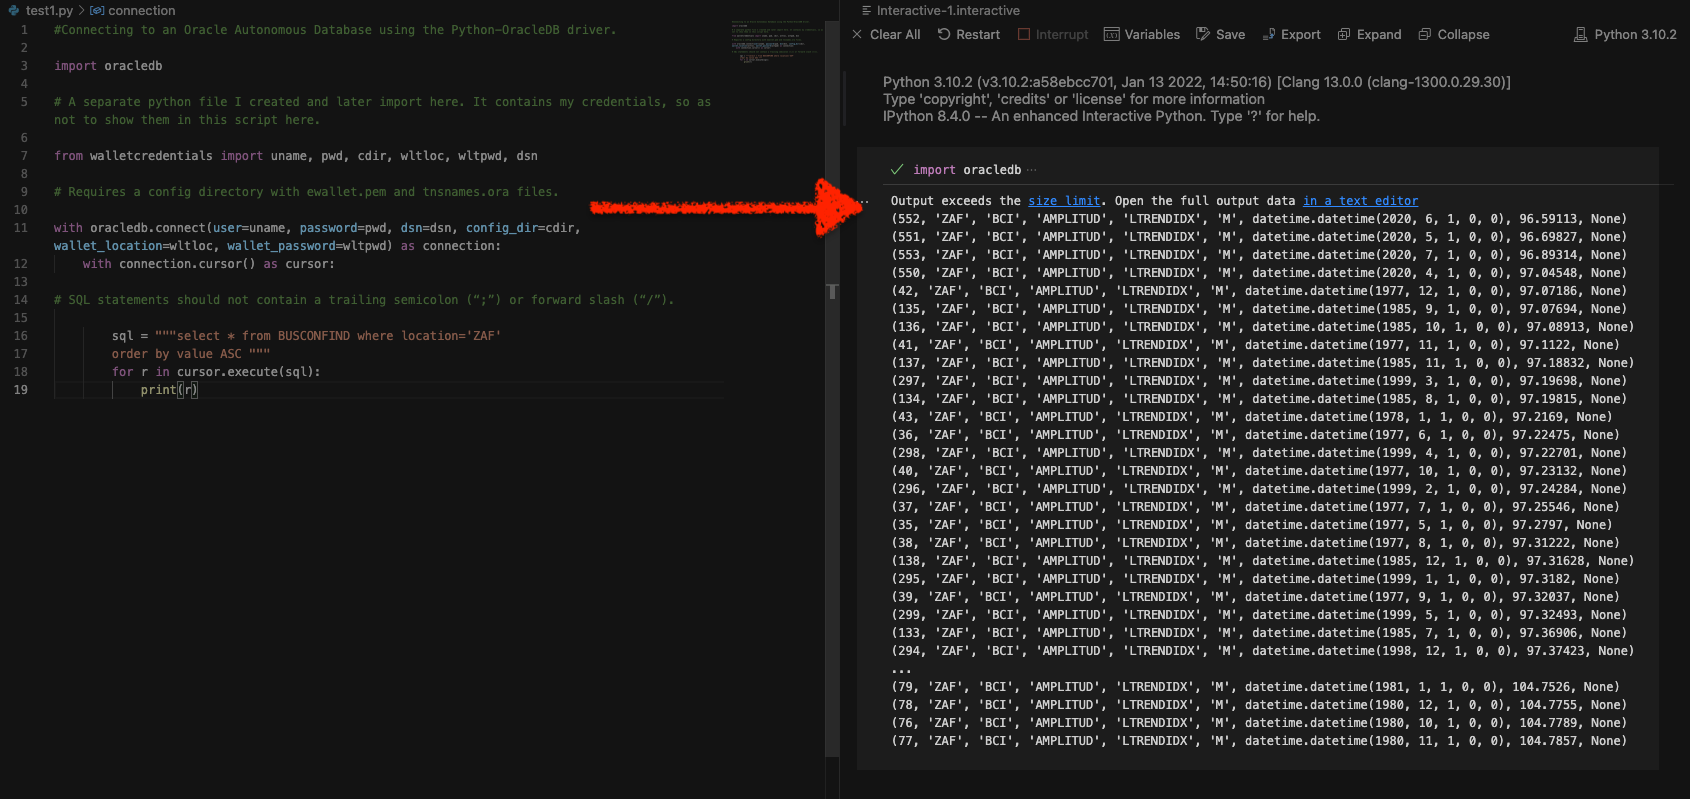
Python and the Oracle Autonomous Database: Three Ways to Connect
Watch the deep dive videos: Part I Part II Part III Welcome back I finally had a break in my PM duties to share a small afternoon project [I started a few weeks ago]. I challenged myself to a brief Python coding exercise. I wanted to develop some code that allowed me to connect to…
Written by
-
Podman, Oracle Container Registry, and SQLcl
Containers are kind of like terrariums.
Written by

-
Where to learn SQL: a Slack message
What follows is a response I sent via Slack to one of our newest UX Designers. She comes to us by way of another sister business unit within Oracle. She was looking for some resources on where to learn/get better acquainted with SQL (Which for a UX and/or UI designer, I think is a really…
Written by
-
An intro to using Oracle SQLcl on Mac
Did you know you can use Homebrew to install Oracle’s SQLcl on Mac? I just realized this about a week ago (always the bridesmaid, never the bride…amirite??). Homebrew First you’ll need to install Homebrew (I’m sure there are other ways to install SQLcl, but installing through Homebrew was a breeze). You can install Homebrew on…
Written by
-
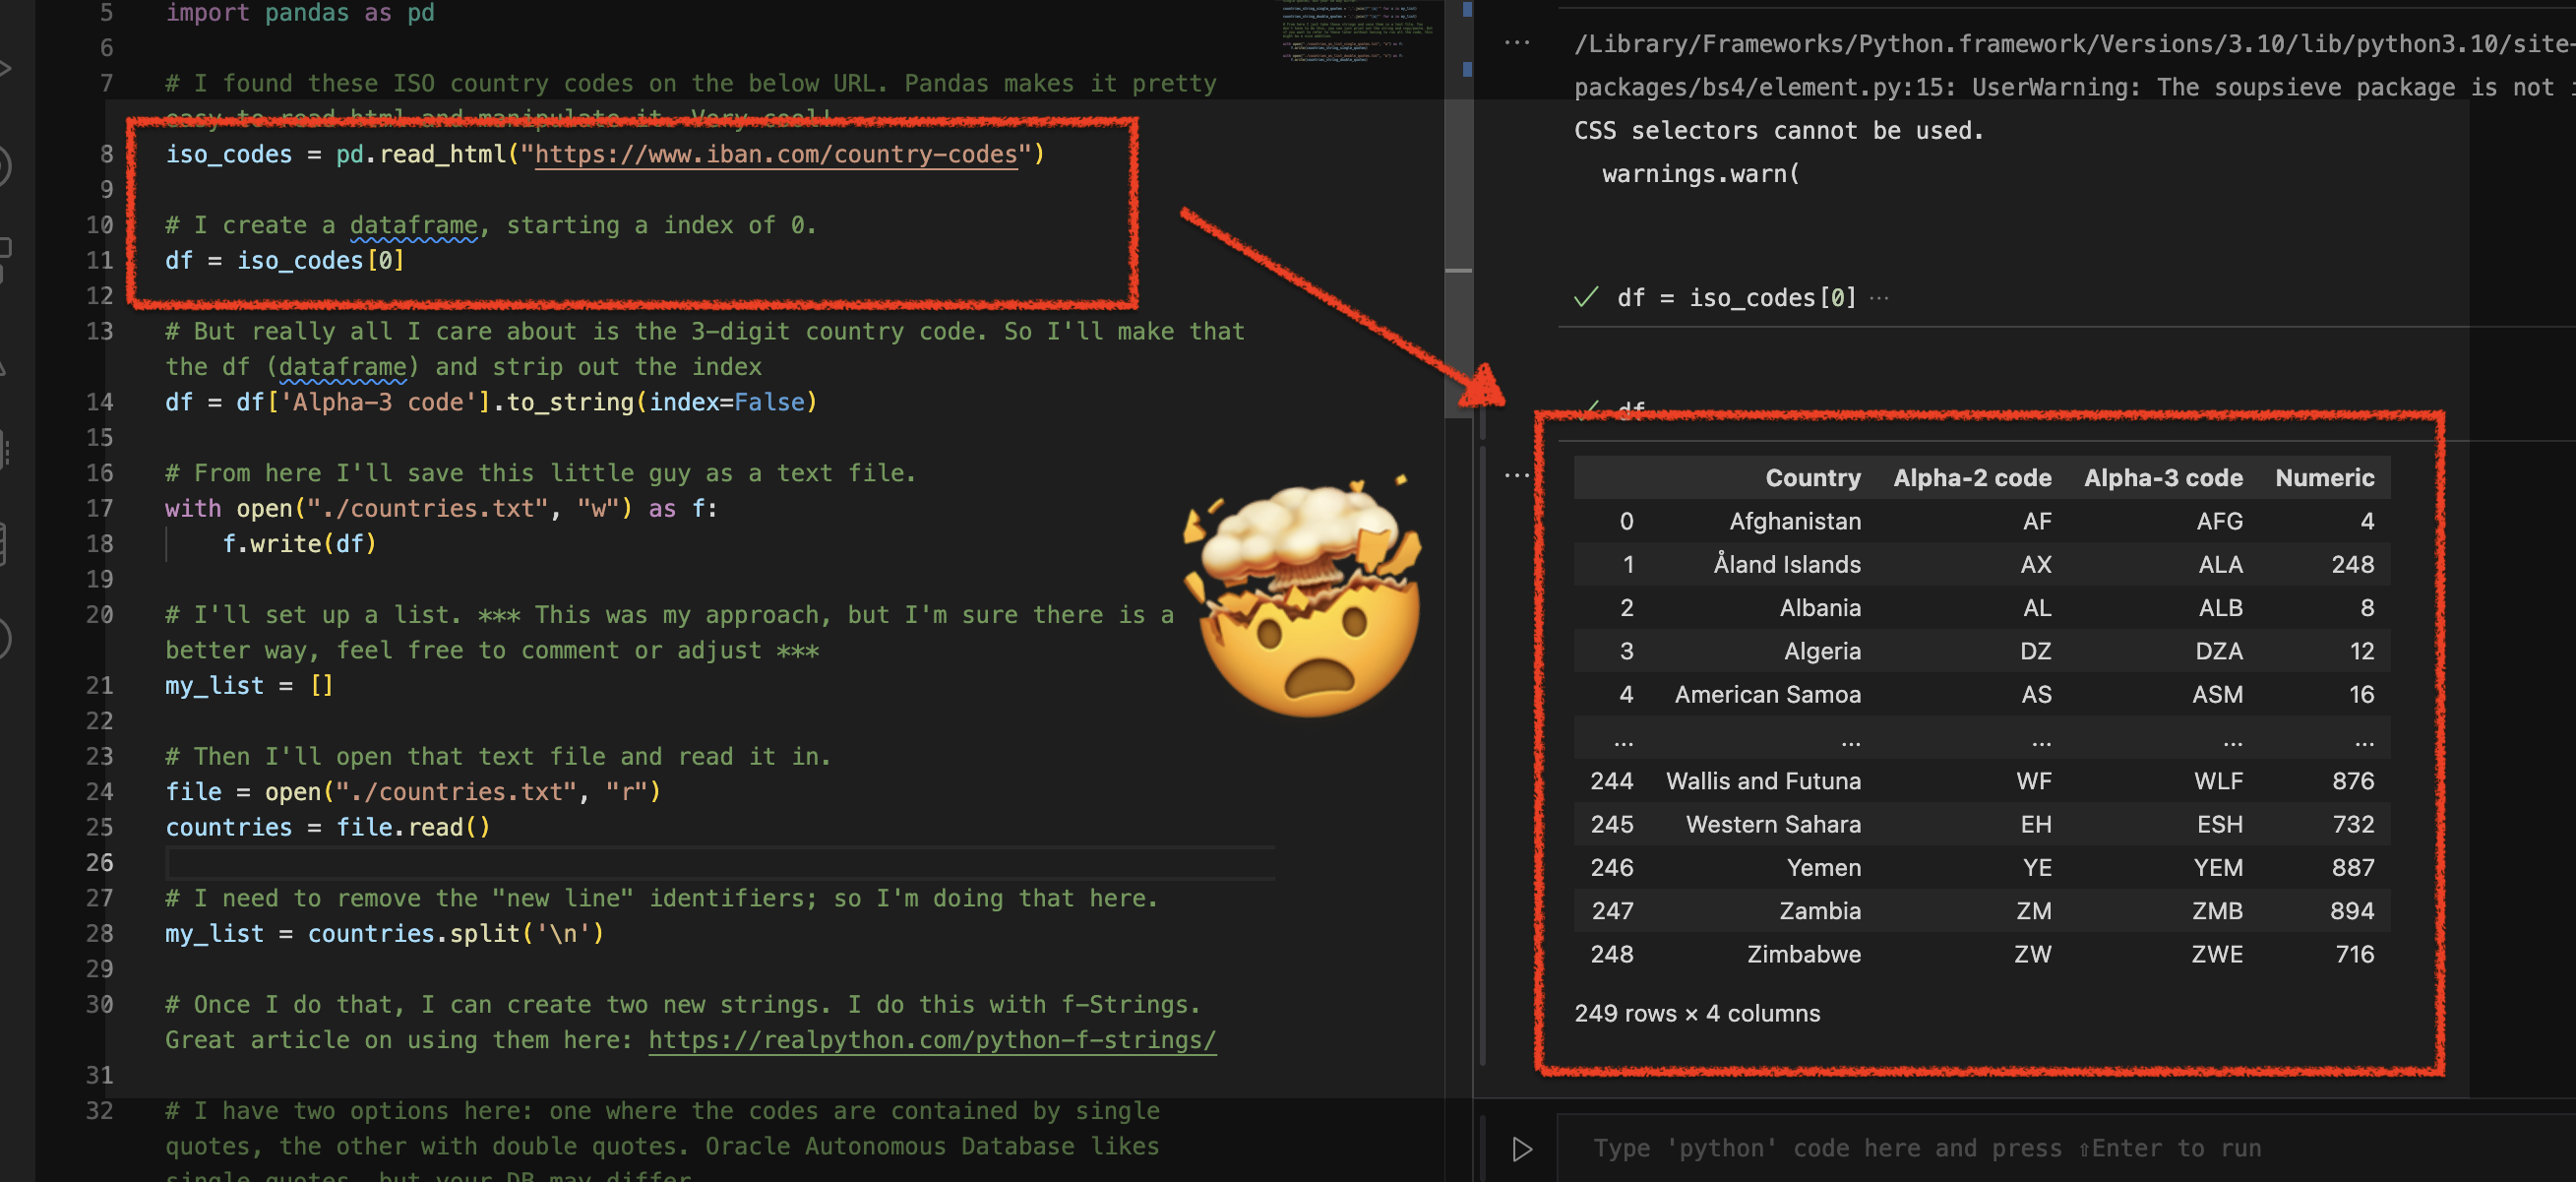
Using Python Pandas to turn ISO Country Codes into a string to use as values for a SQL Query
Summary, code, resources Problem While querying a table (based on this dataset) with SQL, you realize one of your columns uses 3-character ISO Country Codes. However, some of these 3-character codes aren’t countries but geographical regions or groups of countries, in addition to the actual country codes. How can you filter out rows so you are left…
Written by