Tag: Database
-
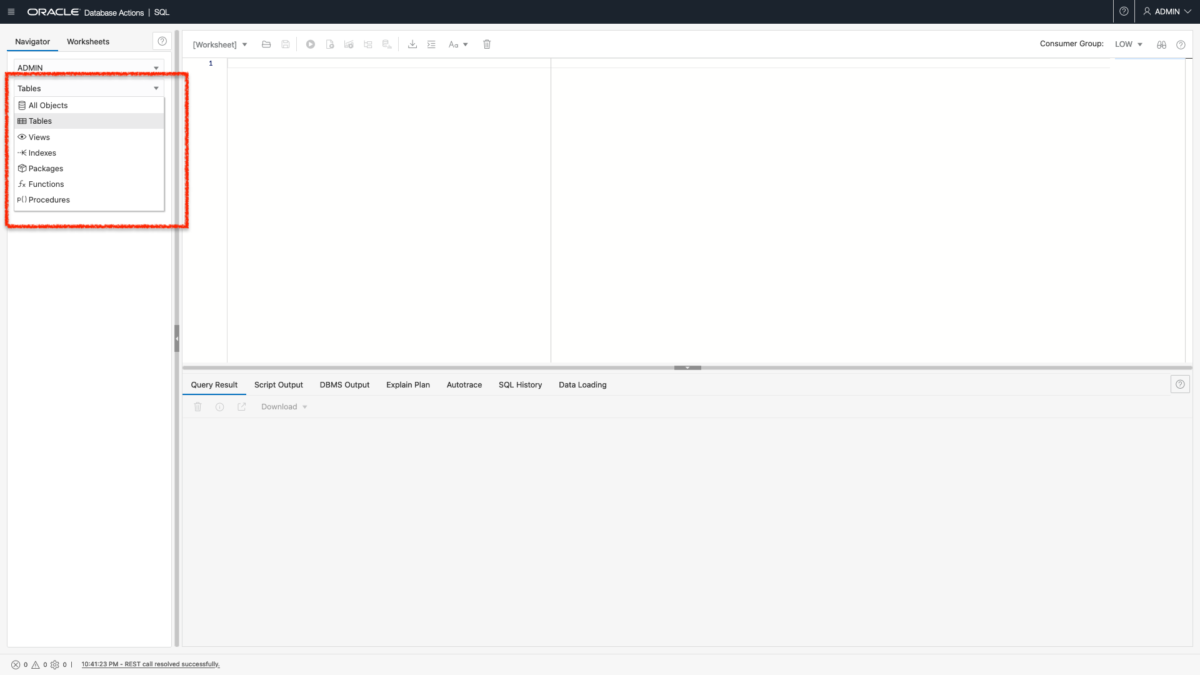
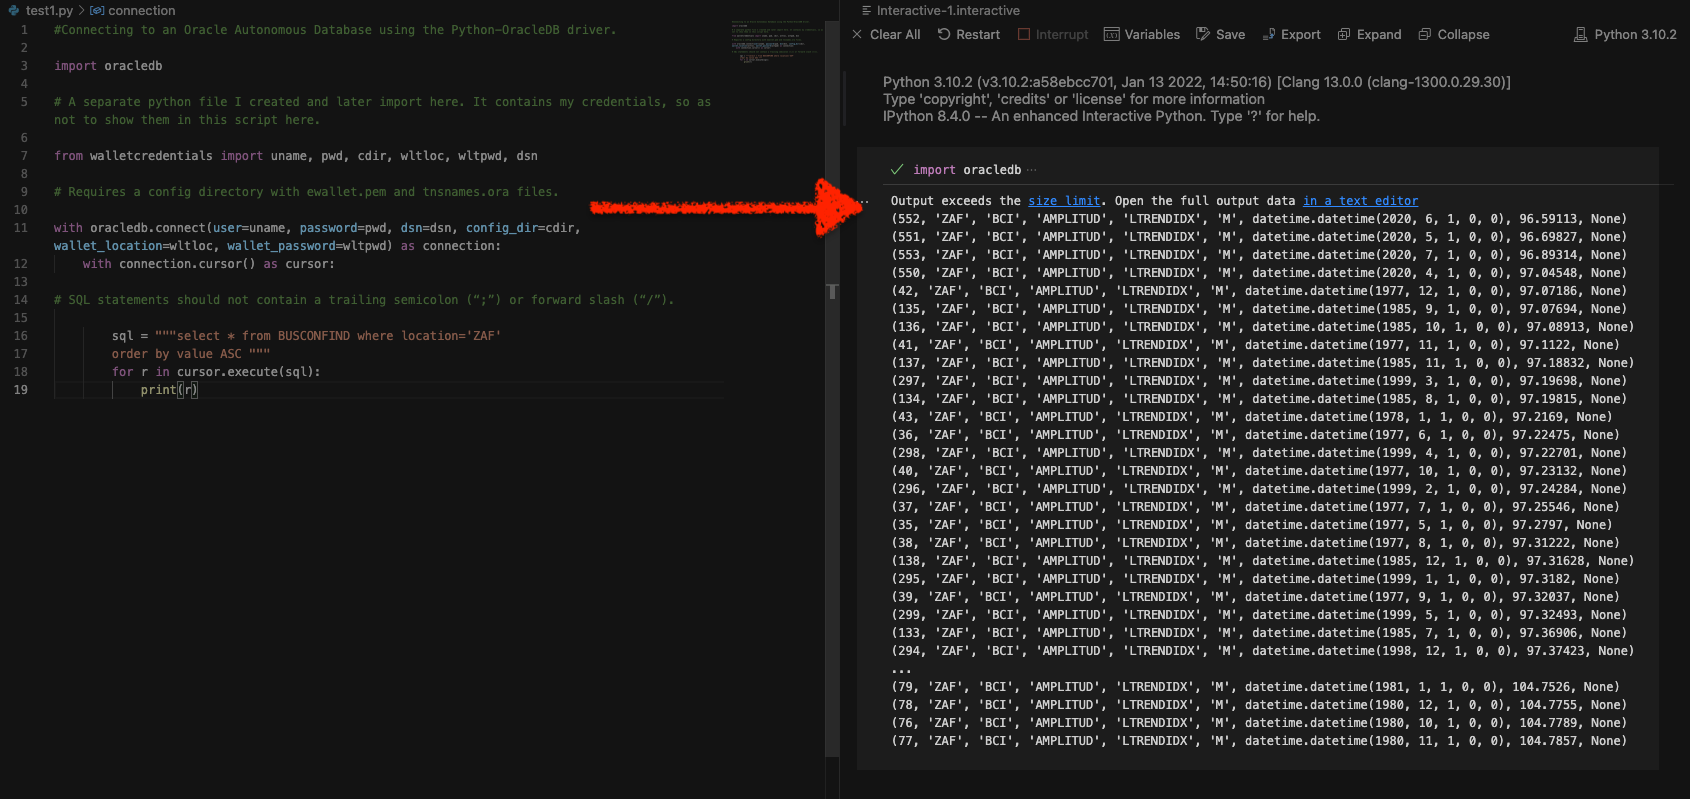
Python and the Oracle Autonomous Database: Three Ways to Connect
Watch the deep dive videos: Part I Part II Part III Welcome back I finally had a break in my PM duties to share a small afternoon project [I started a few weeks ago]. I challenged myself to a brief Python coding exercise. I wanted to develop some code that allowed me to connect to…
Written by
-
Podman, Oracle Container Registry, and SQLcl
Containers are kind of like terrariums.
Written by

-
Where to learn SQL: a Slack message
What follows is a response I sent via Slack to one of our newest UX Designers. She comes to us by way of another sister business unit within Oracle. She was looking for some resources on where to learn/get better acquainted with SQL (Which for a UX and/or UI designer, I think is a really…
Written by
-
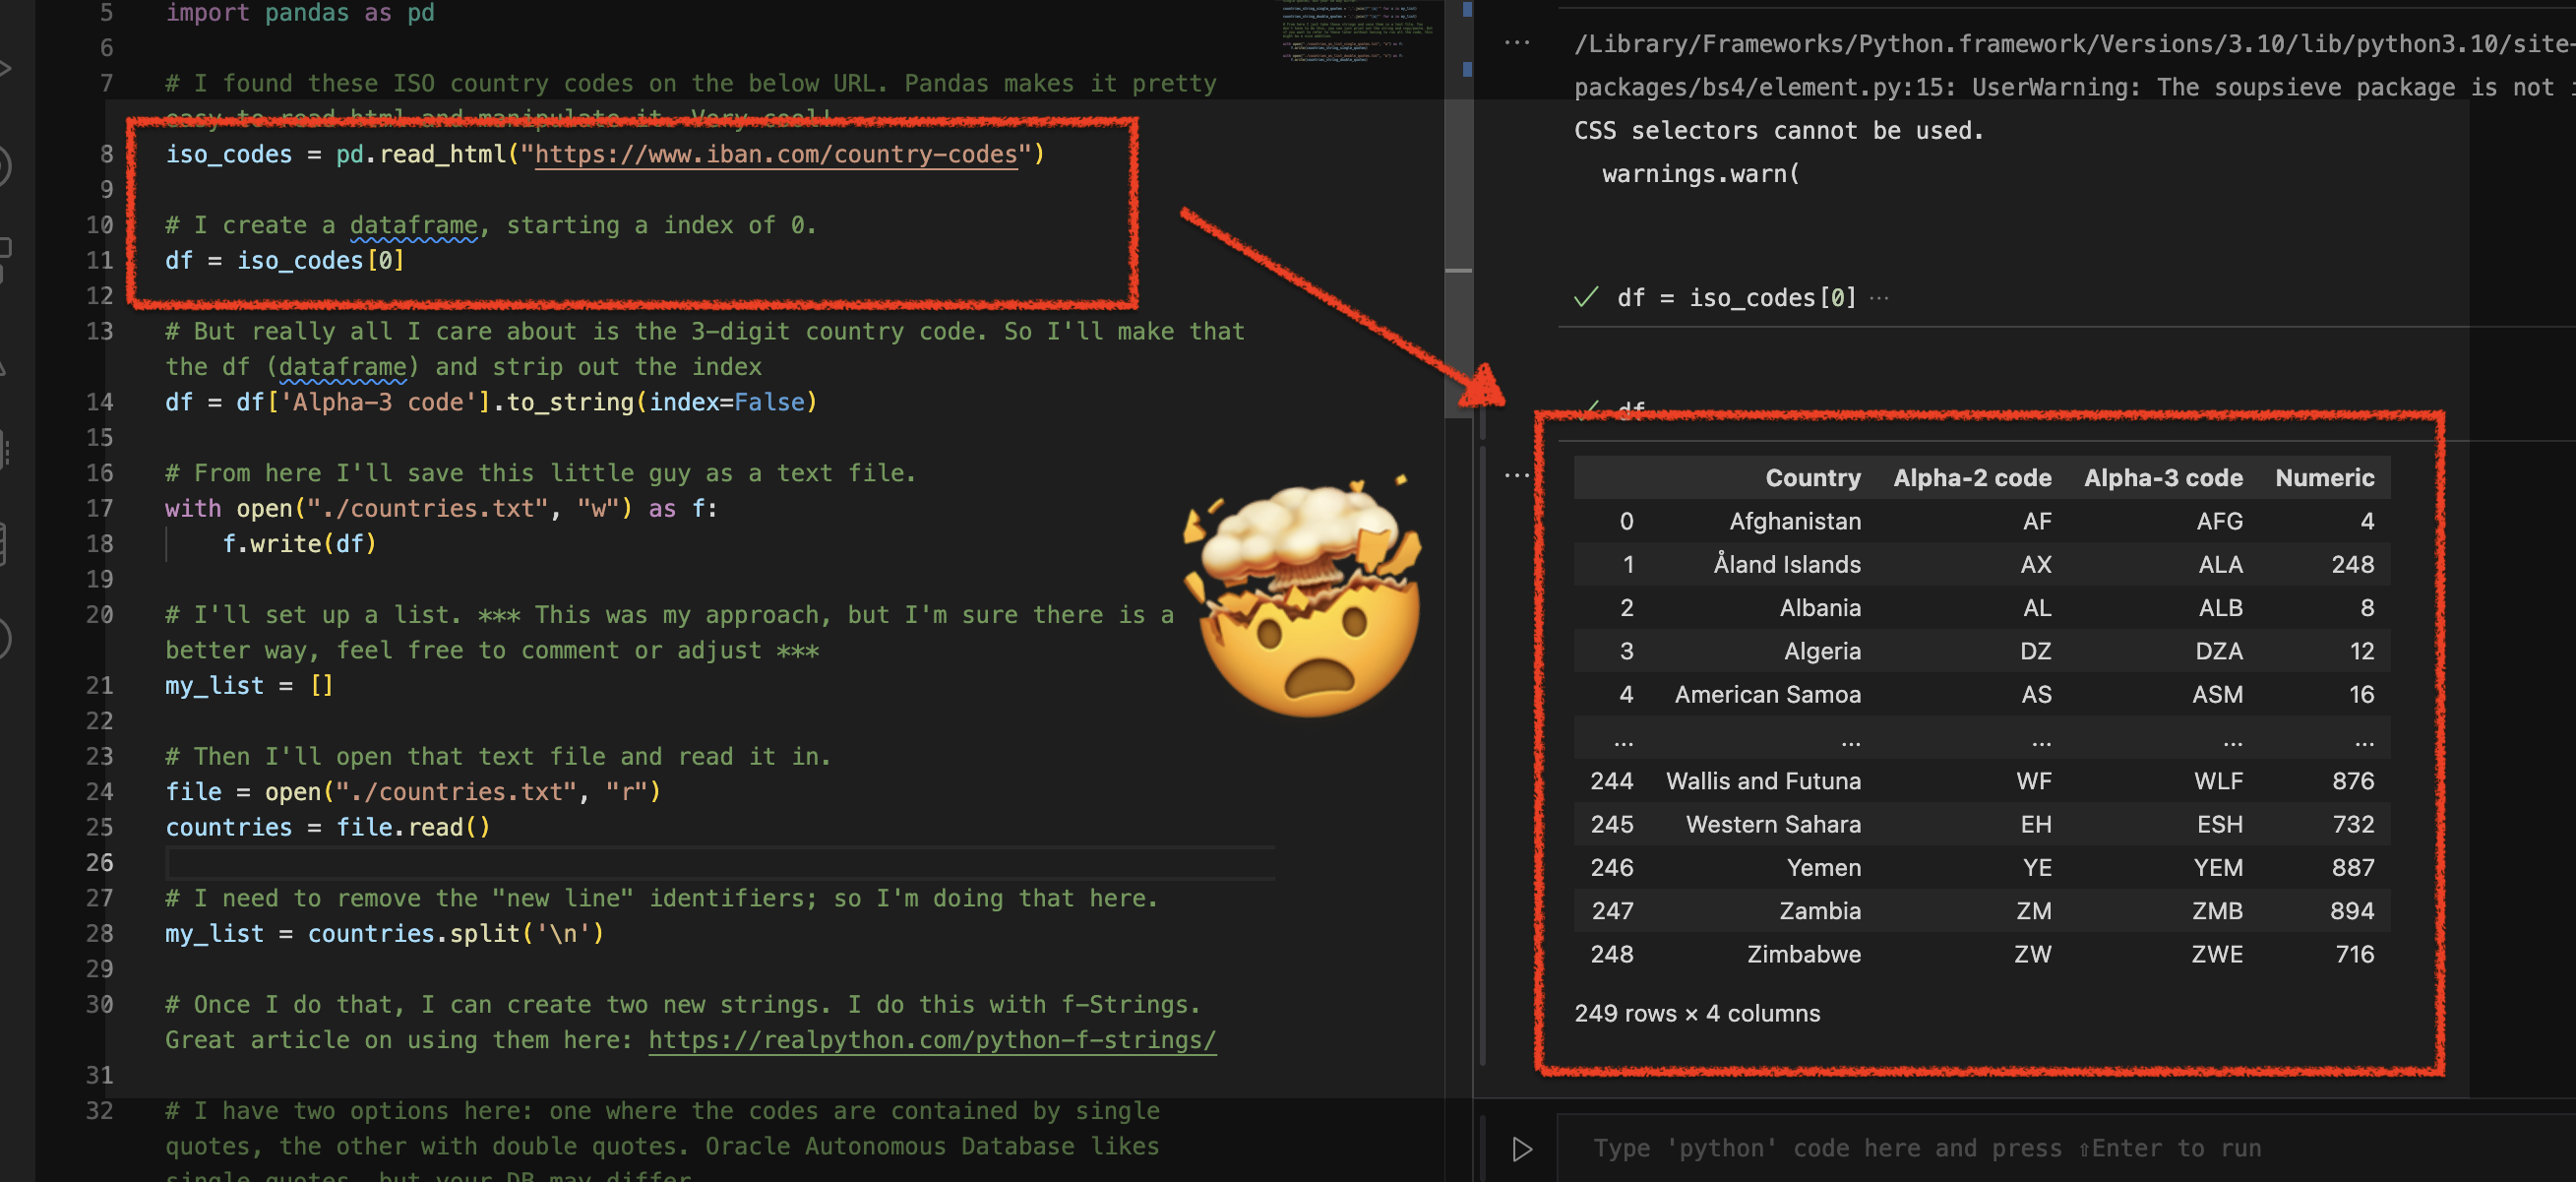
Using Python Pandas to turn ISO Country Codes into a string to use as values for a SQL Query
Summary, code, resources Problem While querying a table (based on this dataset) with SQL, you realize one of your columns uses 3-character ISO Country Codes. However, some of these 3-character codes aren’t countries but geographical regions or groups of countries, in addition to the actual country codes. How can you filter out rows so you are left…
Written by
-
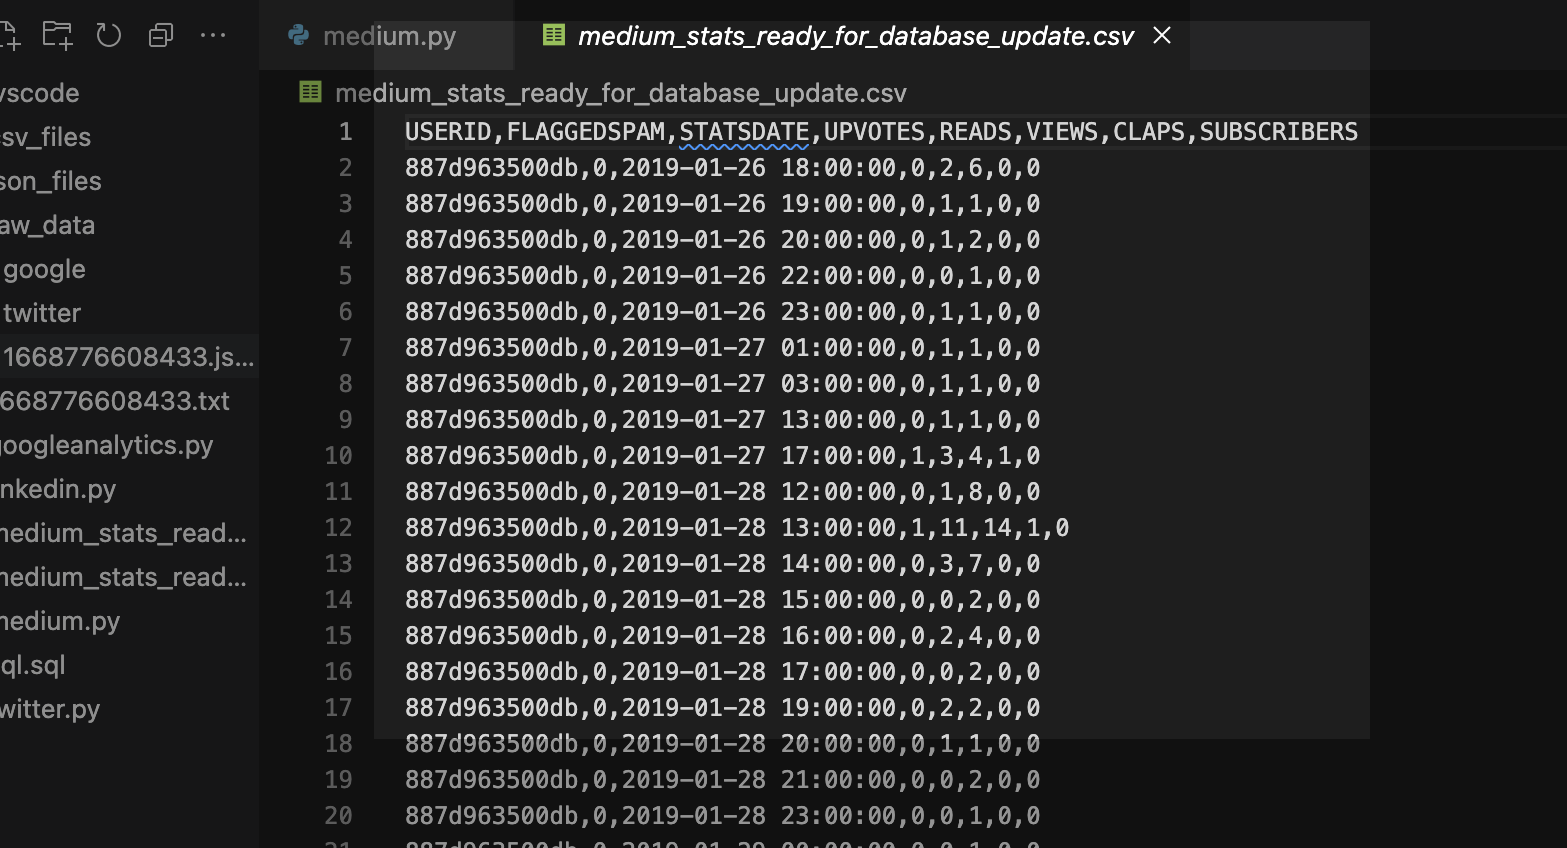
More fun with Medium story stats, JSON, Python, Pandas, and Oracle SQL Developer Web
That’s right; I’m back again for yet another installment of this ongoing series dedicated to working with Medium.com story stats. I first introduced this topic in a previous post. Maybe you saw it. If not, you can find it here. Recap My end goal was to gather all story stats from my Medium account and…
Written by
-
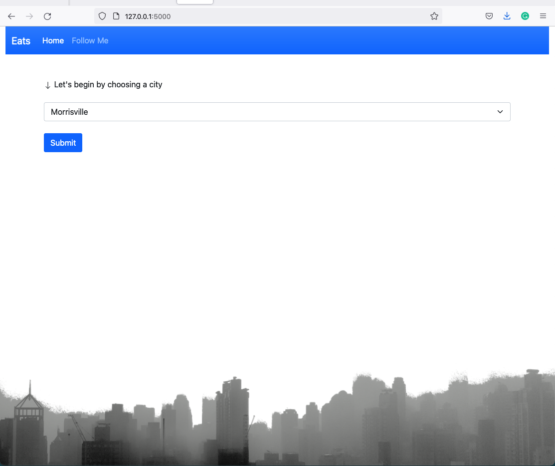
Flask, Python, ORDS, and Oracle CloudWorld 2022
Python, Flask, and ORDS Restaurants Web Application update If you’ve been following along, then you are probably aware of the python/flask/ORDS journey that I’ve embarked on. If not, you can read up on the overview here. The idea was to take local restaurant health inspection scores (aka Sanitary grades) and present the data to a…
Written by

-
Working with WTForms and Oracle REST Database Services (ORDS) APIs
Welcome Back The title pretty much speaks for itself, and if you’ve been following along, you’d know that I’m working on a demo application that uses Flask (a web application microframework) connected to my Oracle Autonomous Database (ADB) via Oracle REST Data Services (ORDS) APIs. One of Flask’s strengths is that it allows you to…
Written by
-
Clean up a .CSV file with Regular Expressions, Pandas, and Python
I want to load data via Database Actions in my Oracle Autonomous Database, but first I need to clean up some Dates and Times. Python is my language of choice, and I’ve heard about Regular Expressions, but I’m scared…
Written by

-
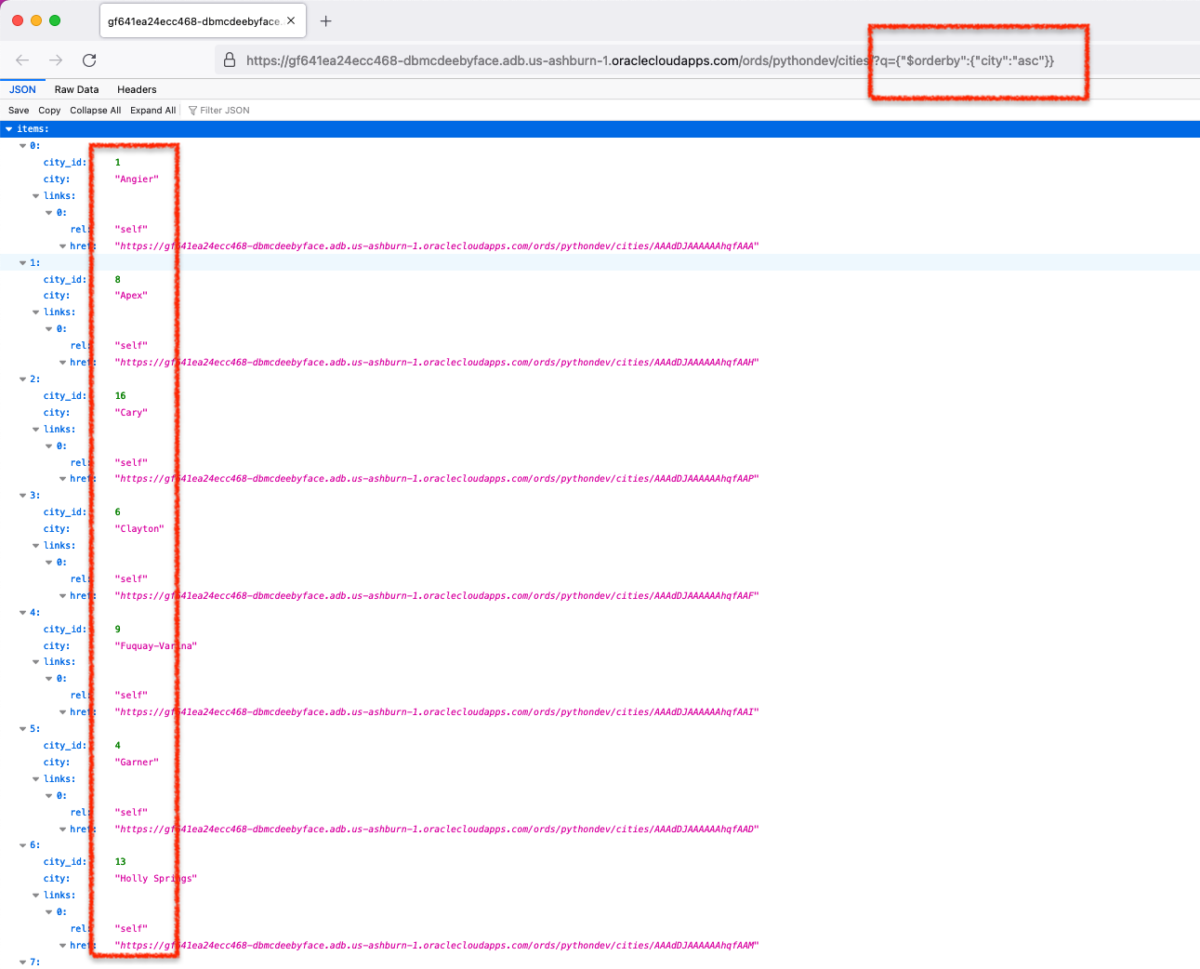
GET requests with Python, ORDS, and the Oracle Autonomous Database
I needed an approach that would make me question my life decisions. Something that would force me to rethink what it meant to be human.
Written by