Tag: Podman
-
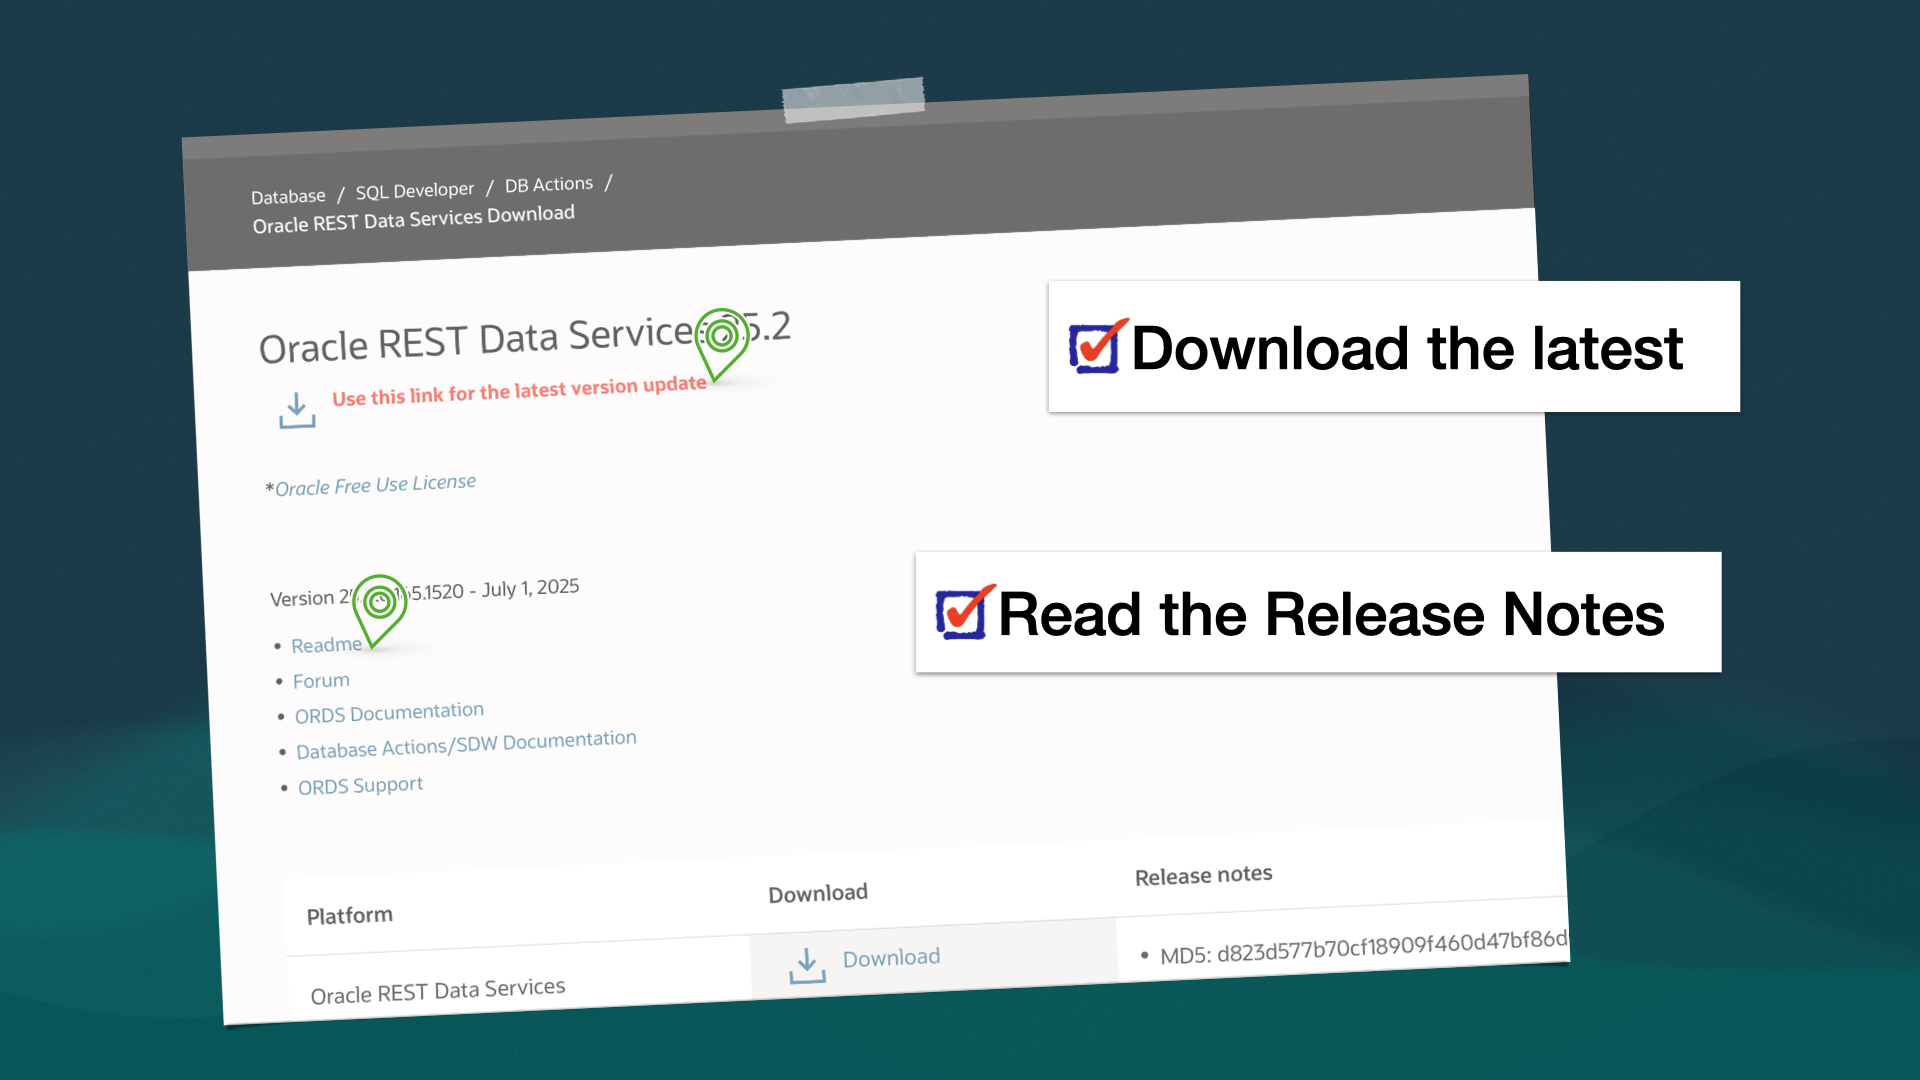
ORDS 25.2 Release Highlights
As always, the complete, official list of enhancements and fixes can be found here. Contained in this brief post are some of the highlights from this latest release. My top enhancements Of the new features the team has published, I’d say these next two are probably going to be the “most sought after” for folks.…
Written by
-
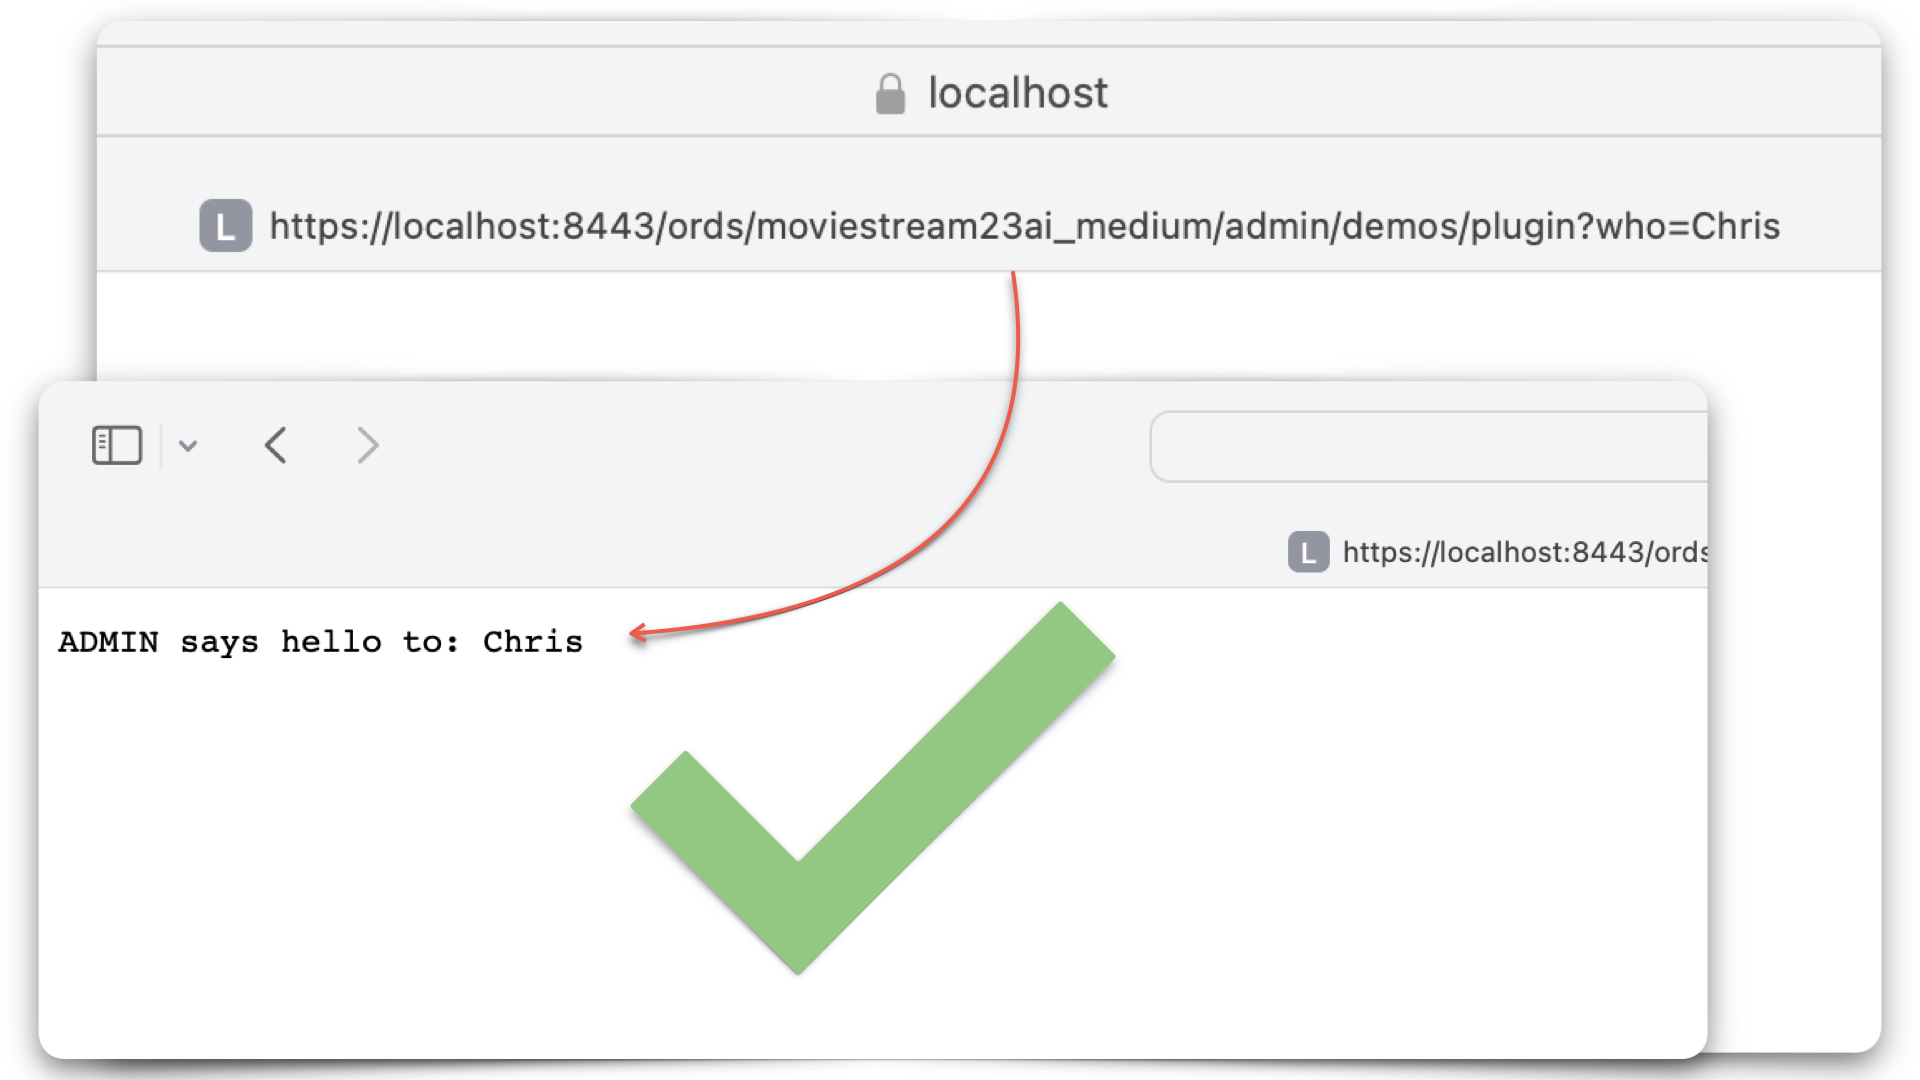
Extending ORDS with a Java plugin
About this article This article is a walkthrough and overview of setting up the example Java plugin that ships with ORDS. These plugins allow you to add functionalities and capabilities above what is possible with a standard ORDS configuration. In this example, the plugin allows you to use a name as a query parameter in an HTTP…
Written by
-
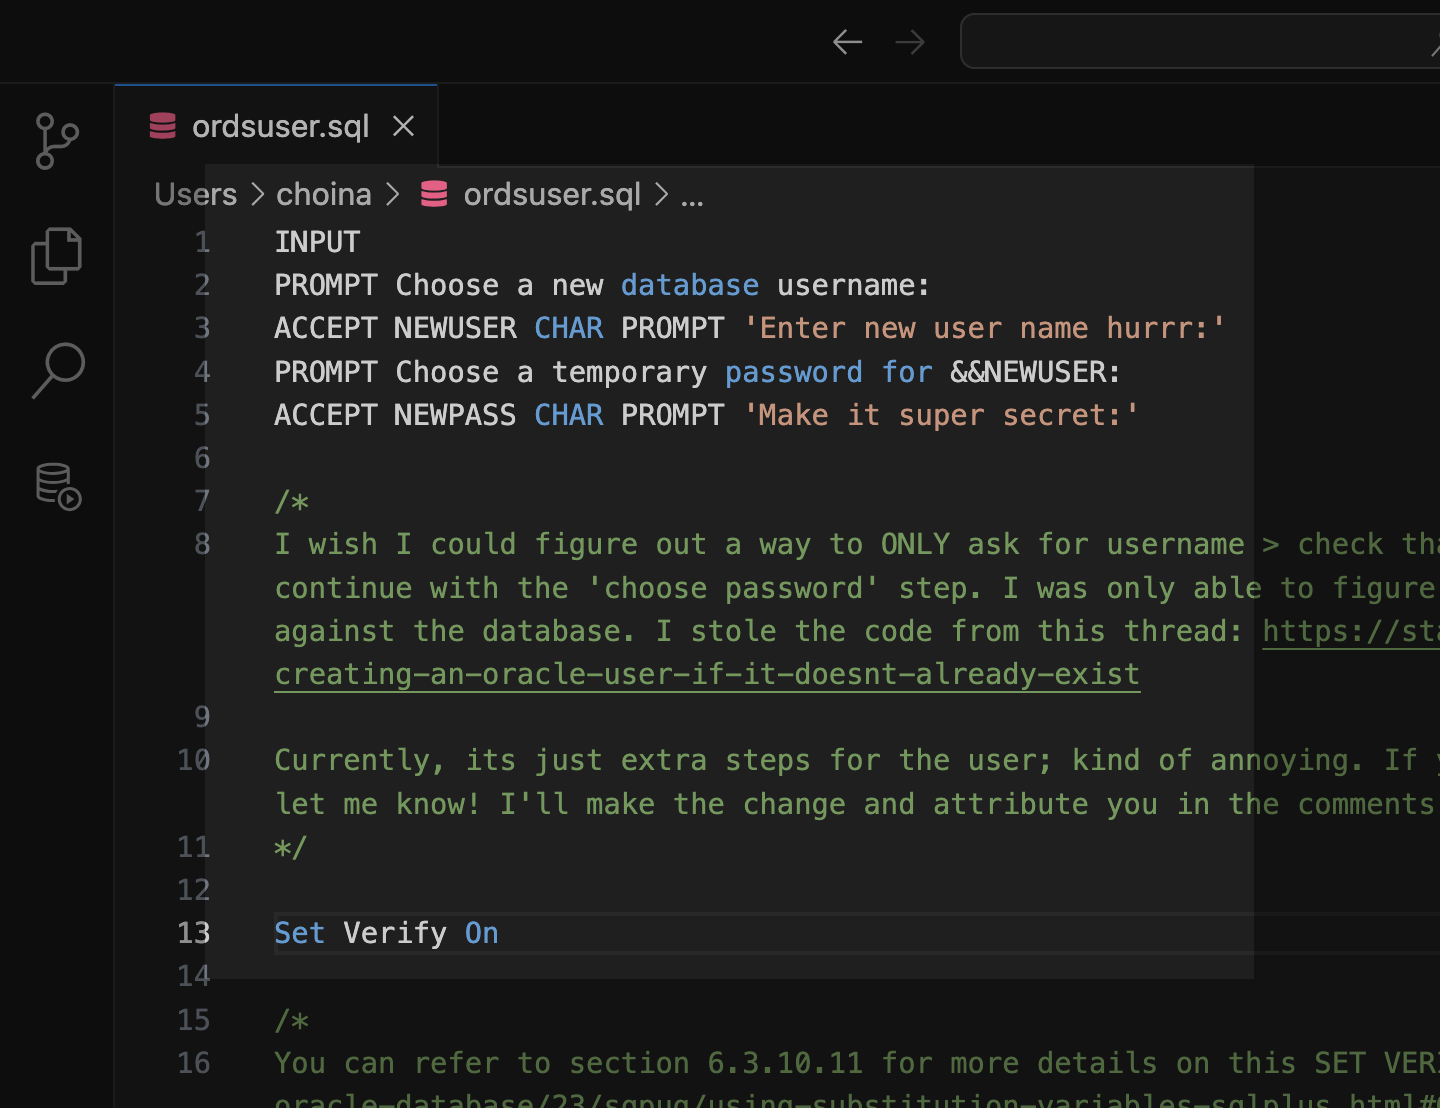
Tinkering: a SQL script for the ORDS_ADMIN.ENABLE_SCHEMA procedure
Post-ORDS installation Once you’ve installed ORDS, you need to REST-enable your schema before taking advantage of ORDS (I used to forget this step, but now it’s like second nature). RESOURCES: I’ve discussed ORDS installation here and here. I’d check both pages if you’re unfamiliar with it or want a refresher. ORDS.ENABLE_SCHEMA / ADMIN_ORDS.ENABLE_SCHEMA While logged into your…
Written by
-
ORDS install considerations: choosing the correct host, port, service name, and pluggable database when the database is in a podman container
The other day, I wrote about how I had to start from scratch on my podman containers 😢. I’m now at the step where I need to reinstall ORDS in these two new database containers (21c and 23c). And since I’m doing this install yet again, I figured I would point out some things I’ve…
Written by
-
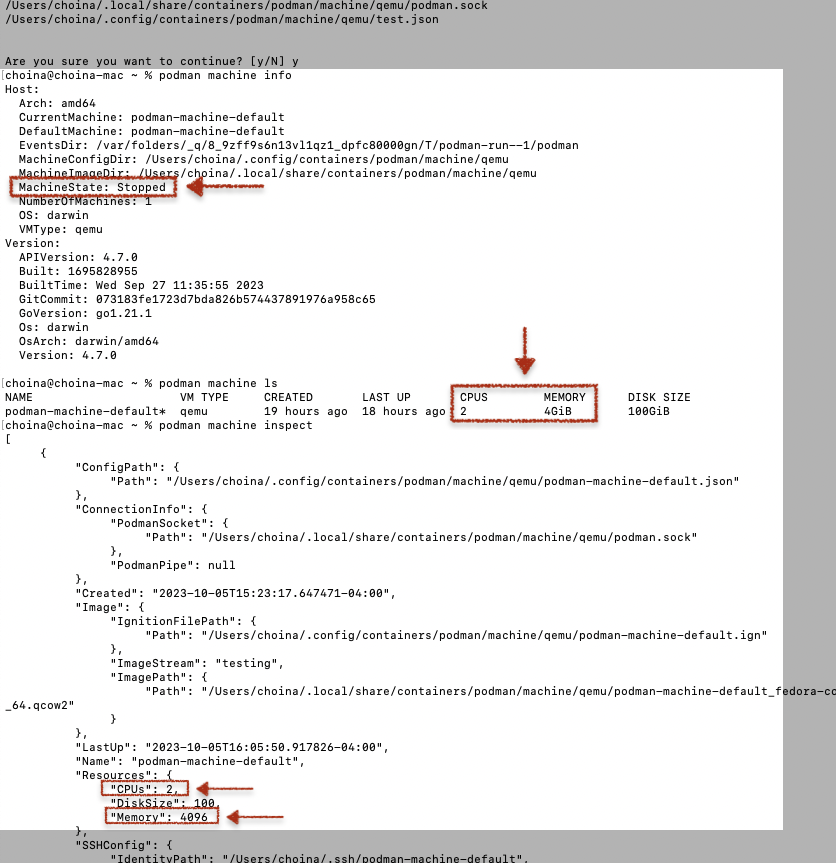
Podman container is unhealthy with Oracle database images
Problem Description You’re working with podman containers (maybe like me – the ones from the Oracle Container Registry), and when you execute the podman ps command, you see something like this in the standard output: In this case, I already had another container with an Oracle 21c database; that one was healthy. I previously wrote up a…
Written by
-
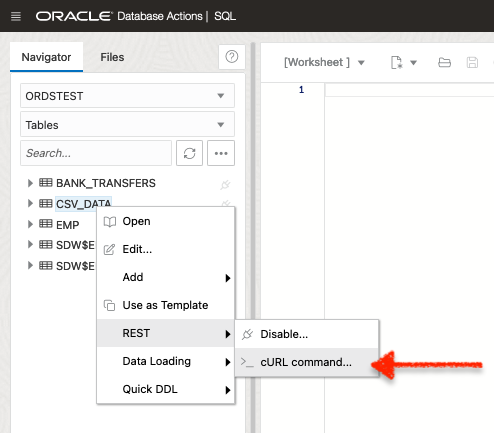
ETags and Oracle REST APIs
About this post I explore ETags and how they can be used in cURL commands when interacting with Oracle REST APIs. I also discuss some of the performance benefits of using ETags. This is not exhaustive, but I hope it introduces you to ETags or reminds you of their existence! But first… LATE-BREAKING NEWS!! A…
Written by
-
User Guide: Oracle database in a Podman container, install ORDS locally, and access a SQL Worksheet on localhost
Summary The title says it all. I’ve run through this about ten times now. But I’ll show you how to start a Podman container (with a volume attached) and install ORDS on your local machine. And then, once installed, we’ll create and REST-enable a user so that the user can take full advantage of Oracle…
Written by
-
Podman, Oracle Container Registry, and SQLcl
Containers are kind of like terrariums.
Written by