Tag: Oracle Cloud Infrastructure
-
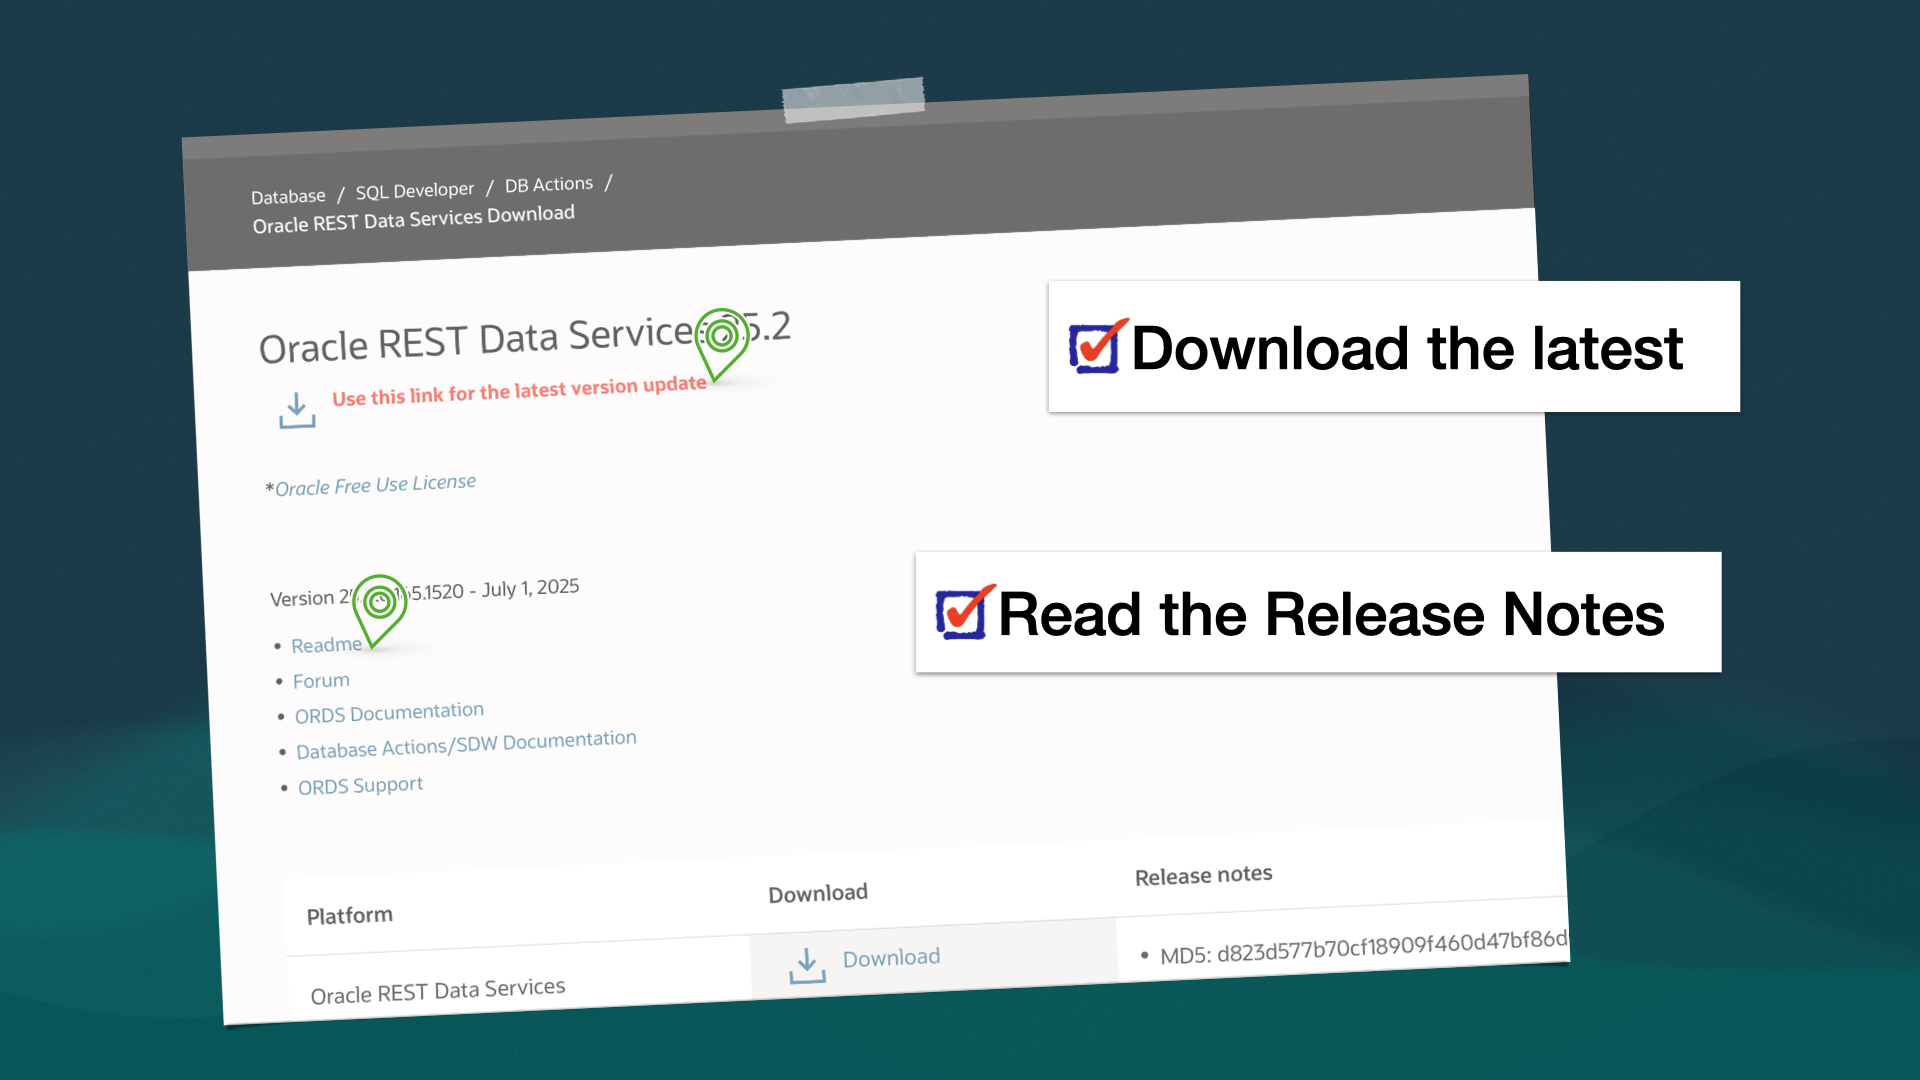
ORDS 25.2 Release Highlights
As always, the complete, official list of enhancements and fixes can be found here. Contained in this brief post are some of the highlights from this latest release. My top enhancements Of the new features the team has published, I’d say these next two are probably going to be the “most sought after” for folks.…
Written by
-
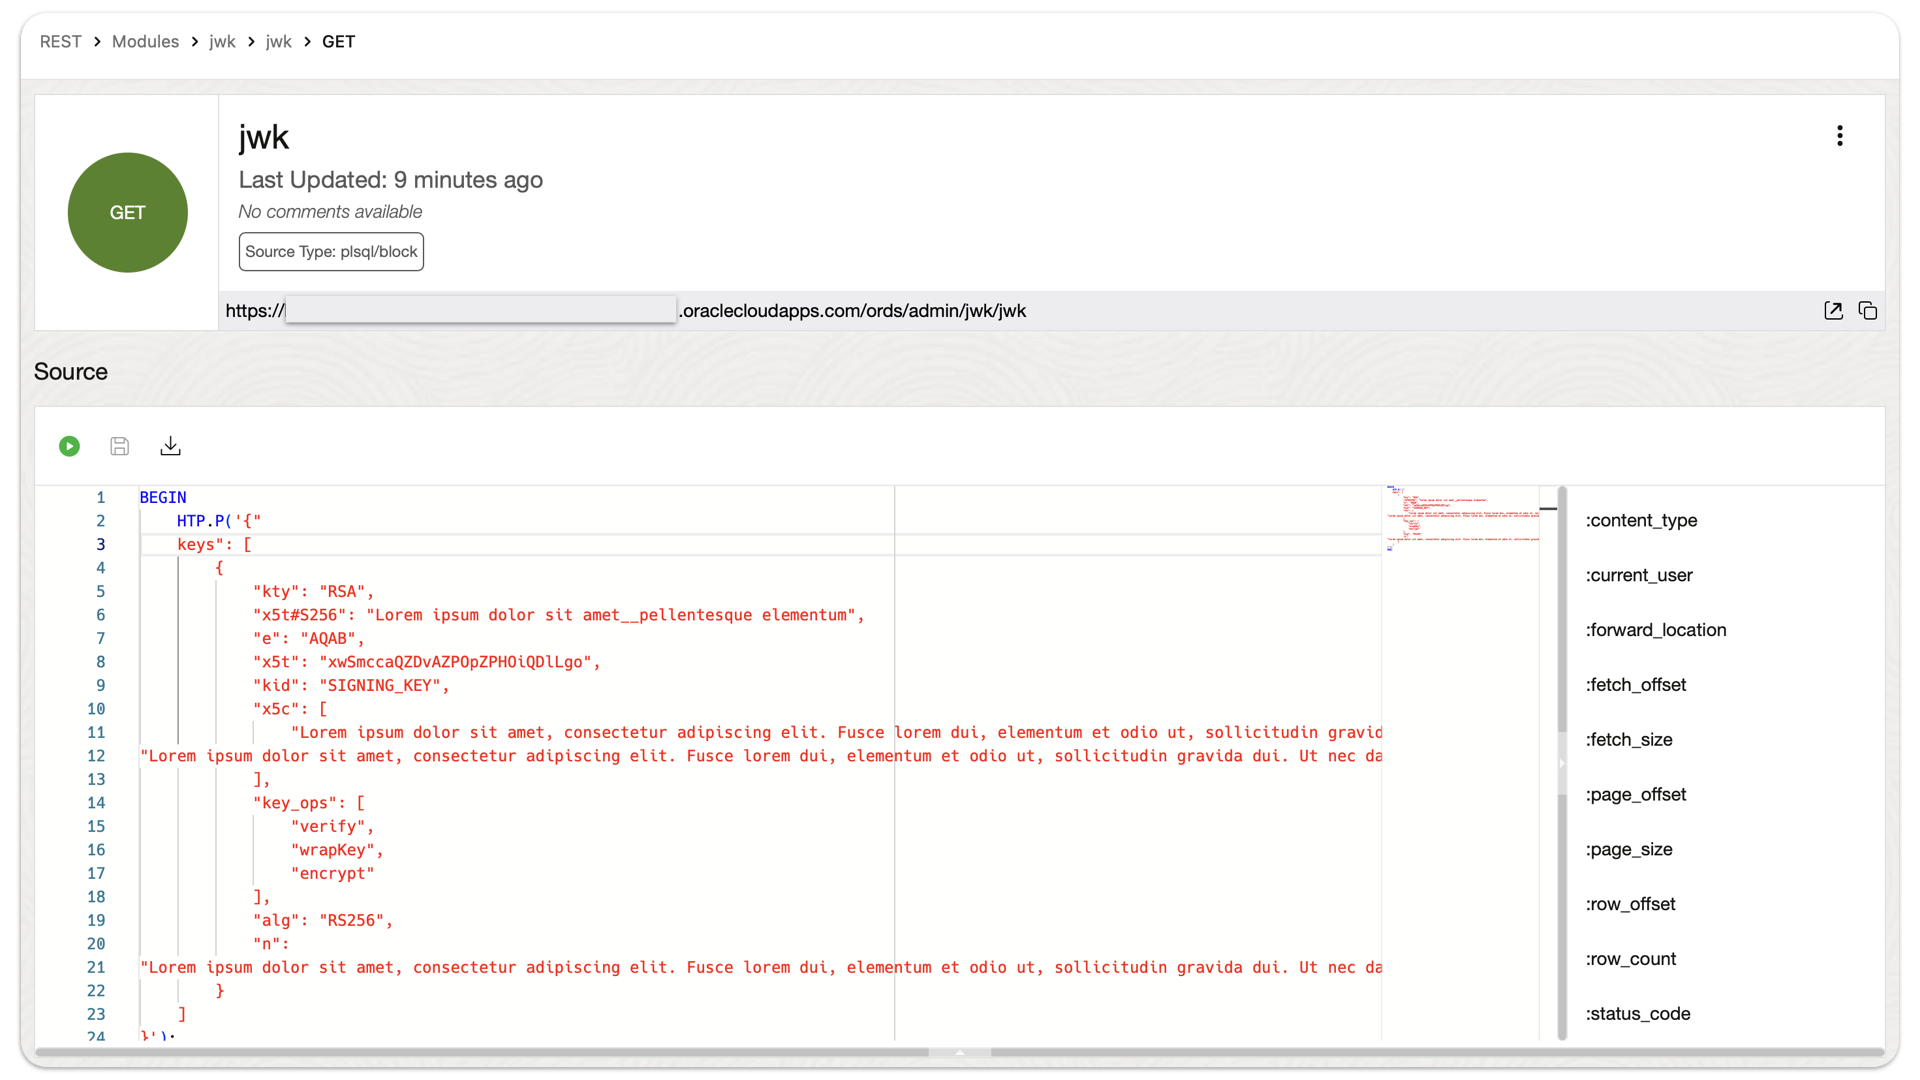
Example: an ORDS API that returns a user-configured JSON object
This actually came about from a Support Request. We were troubleshooting a JWT issue, that had ORDS in the mix. Ultimately, this is looking more and more like a networking issue (maybe something to do with routing rules between the load balancer and the backend server). But in the course of our troubleshooting, we wanted…
Written by
-
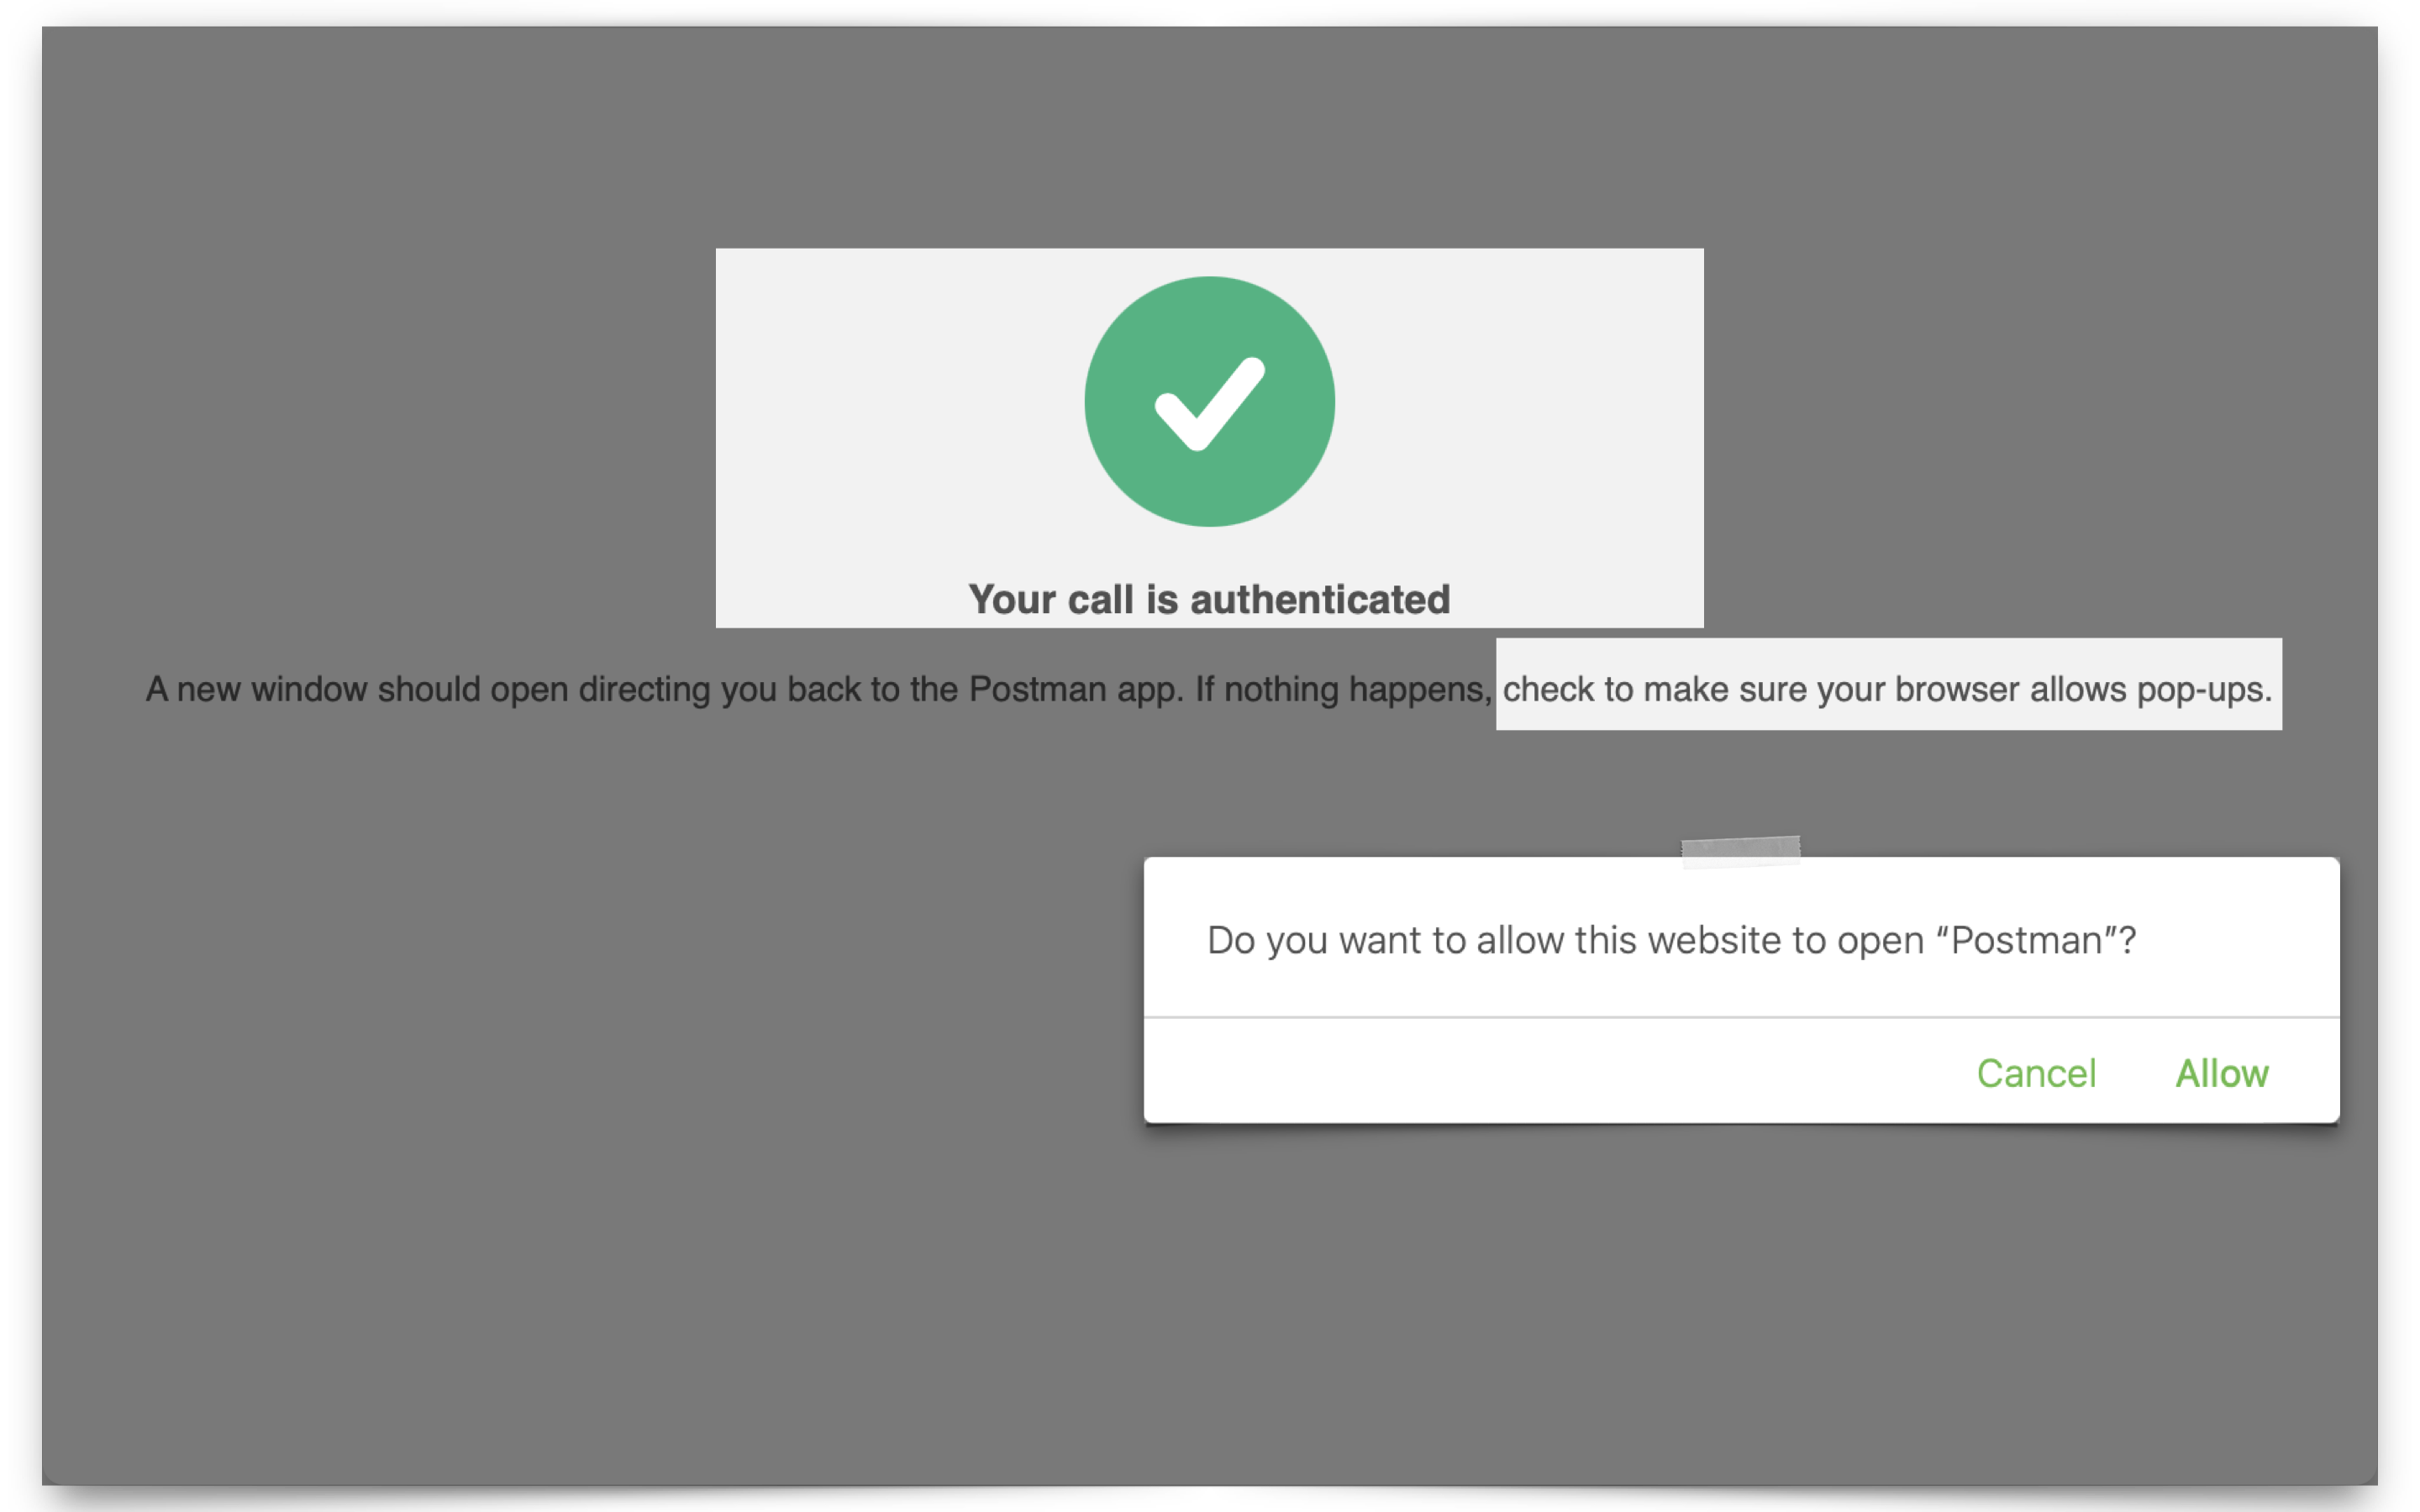
Configuring OCI IAM Domain JWTs to use with ORDS OAuth2.0 protected APIs
Table of Contents Intended Audience/Purpose Does this describe you? Creating a Domain Configure Client Access Adding an Integrated Application to the Domain Adding the application Configuring OAuth Resource server configuration Client Configuration Issuing a POST request to obtain a JWT Gathering the required values for the request Setting up Postman Requesting the JWT ORDS configuration…
Written by
-
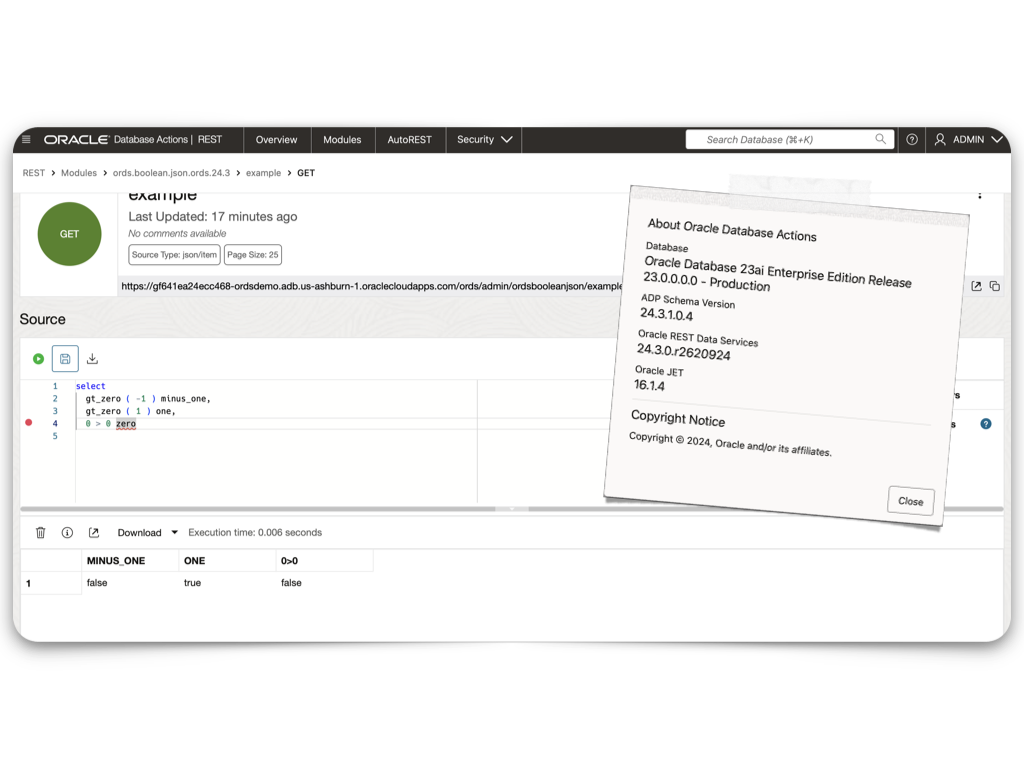
ORDS 24.3 Release Highlights
Overview There’s plenty to talk about in this release. However, I’m most excited about the performance improvements, ORDS sample applications, and documentation changes. Read on to get the whole story. Enhancements API Performance REST API responses from either AutoREST or customer based modules could see as much as a 30% improvement in response times. About…
Written by
-
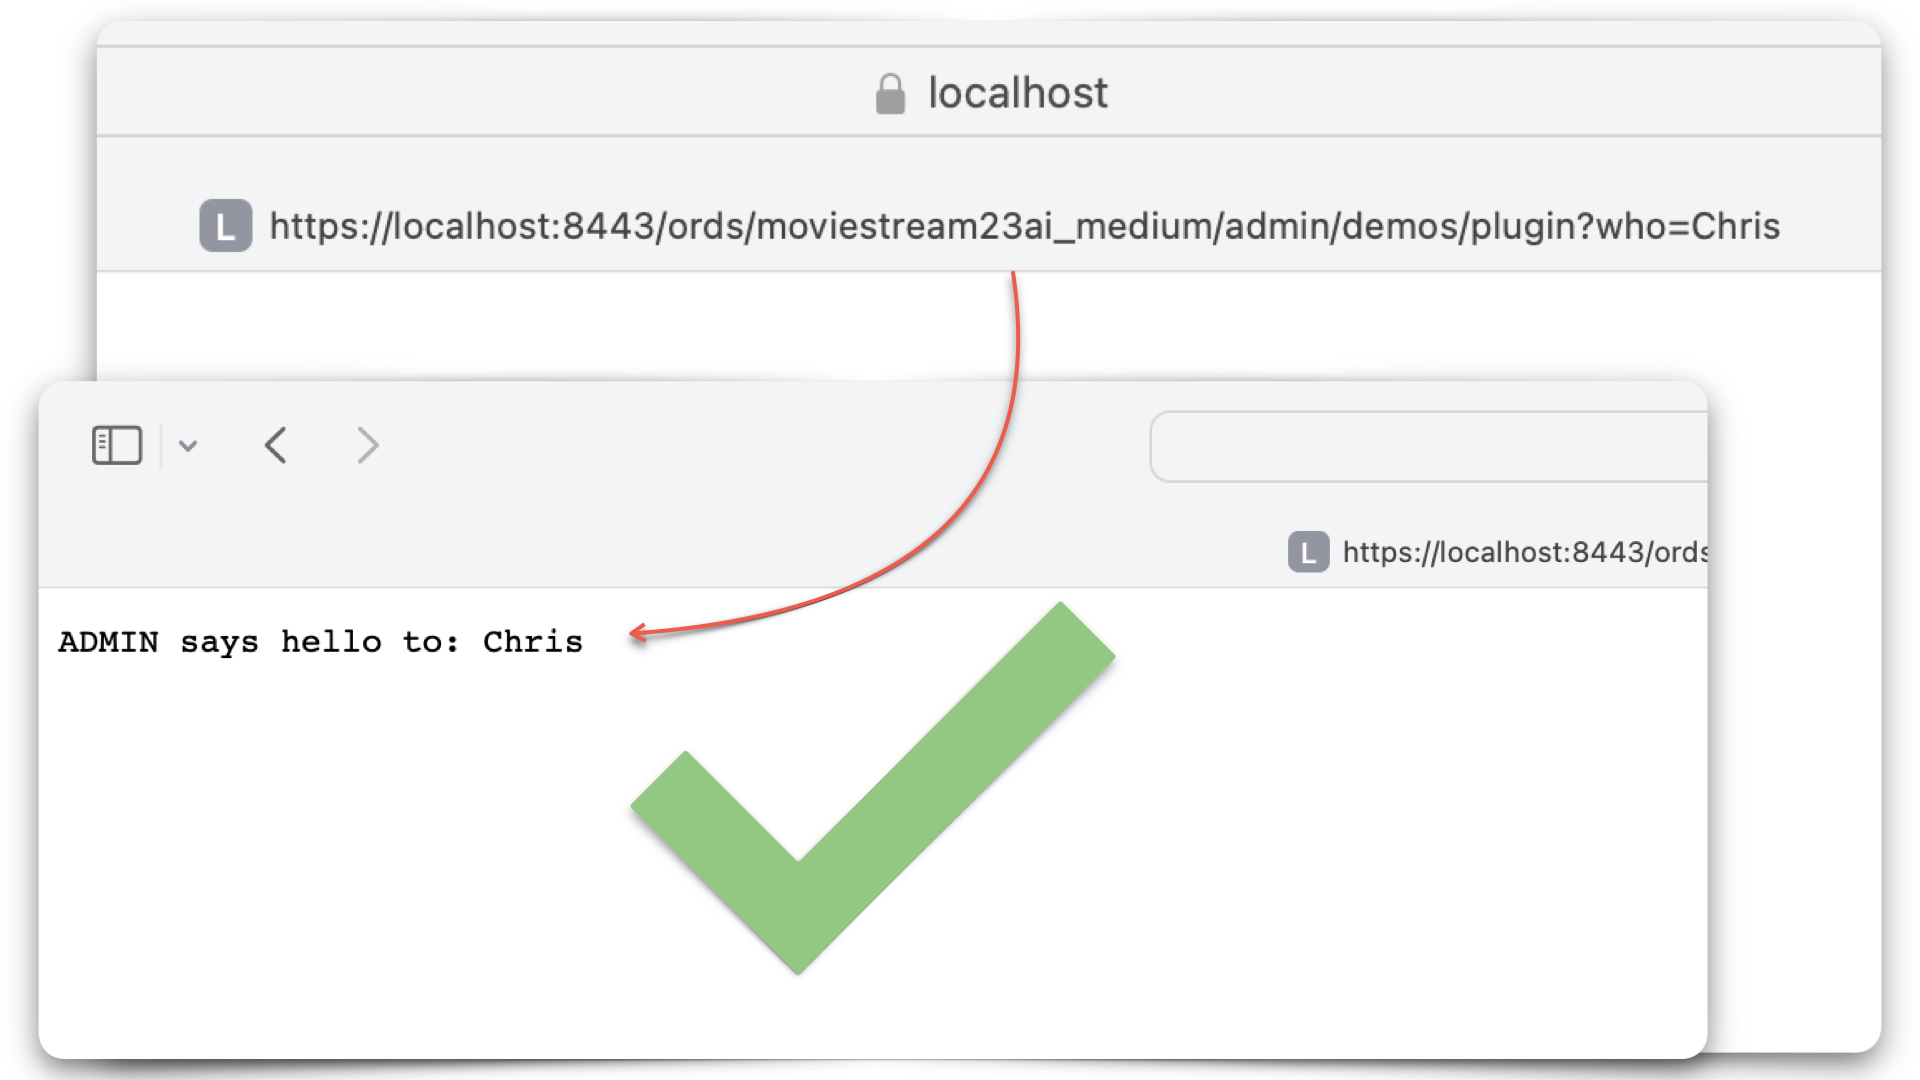
Extending ORDS with a Java plugin
About this article This article is a walkthrough and overview of setting up the example Java plugin that ships with ORDS. These plugins allow you to add functionalities and capabilities above what is possible with a standard ORDS configuration. In this example, the plugin allows you to use a name as a query parameter in an HTTP…
Written by
-
ORDS 24.2 Release Highlights
NOTE: This can be thought of as a “companion piece” to the official ORDS release notes 🤓. What is new in Oracle REST Data Services 24.2? New HTTPS Response Status Codes In response to various support requests and internal feedback, we’ve expanded on the existing ORDS Status Codes (the current list can be found here)!…
Written by

-
Setting up SSH to GitHub git clone into your Oracle Cloud Linux Ubuntu VM with VNC
I’m trying to be as succinct as possible. I just accomplished this but couldn’t find anything that explicitly walked me through how to do it. Here are some assumptions: REMINDER: You are signed in to a Linux machine! The commands you will follow (in GitHub or here) WILL NEED TO BE FOR LINUX! What happened?…
Written by

-
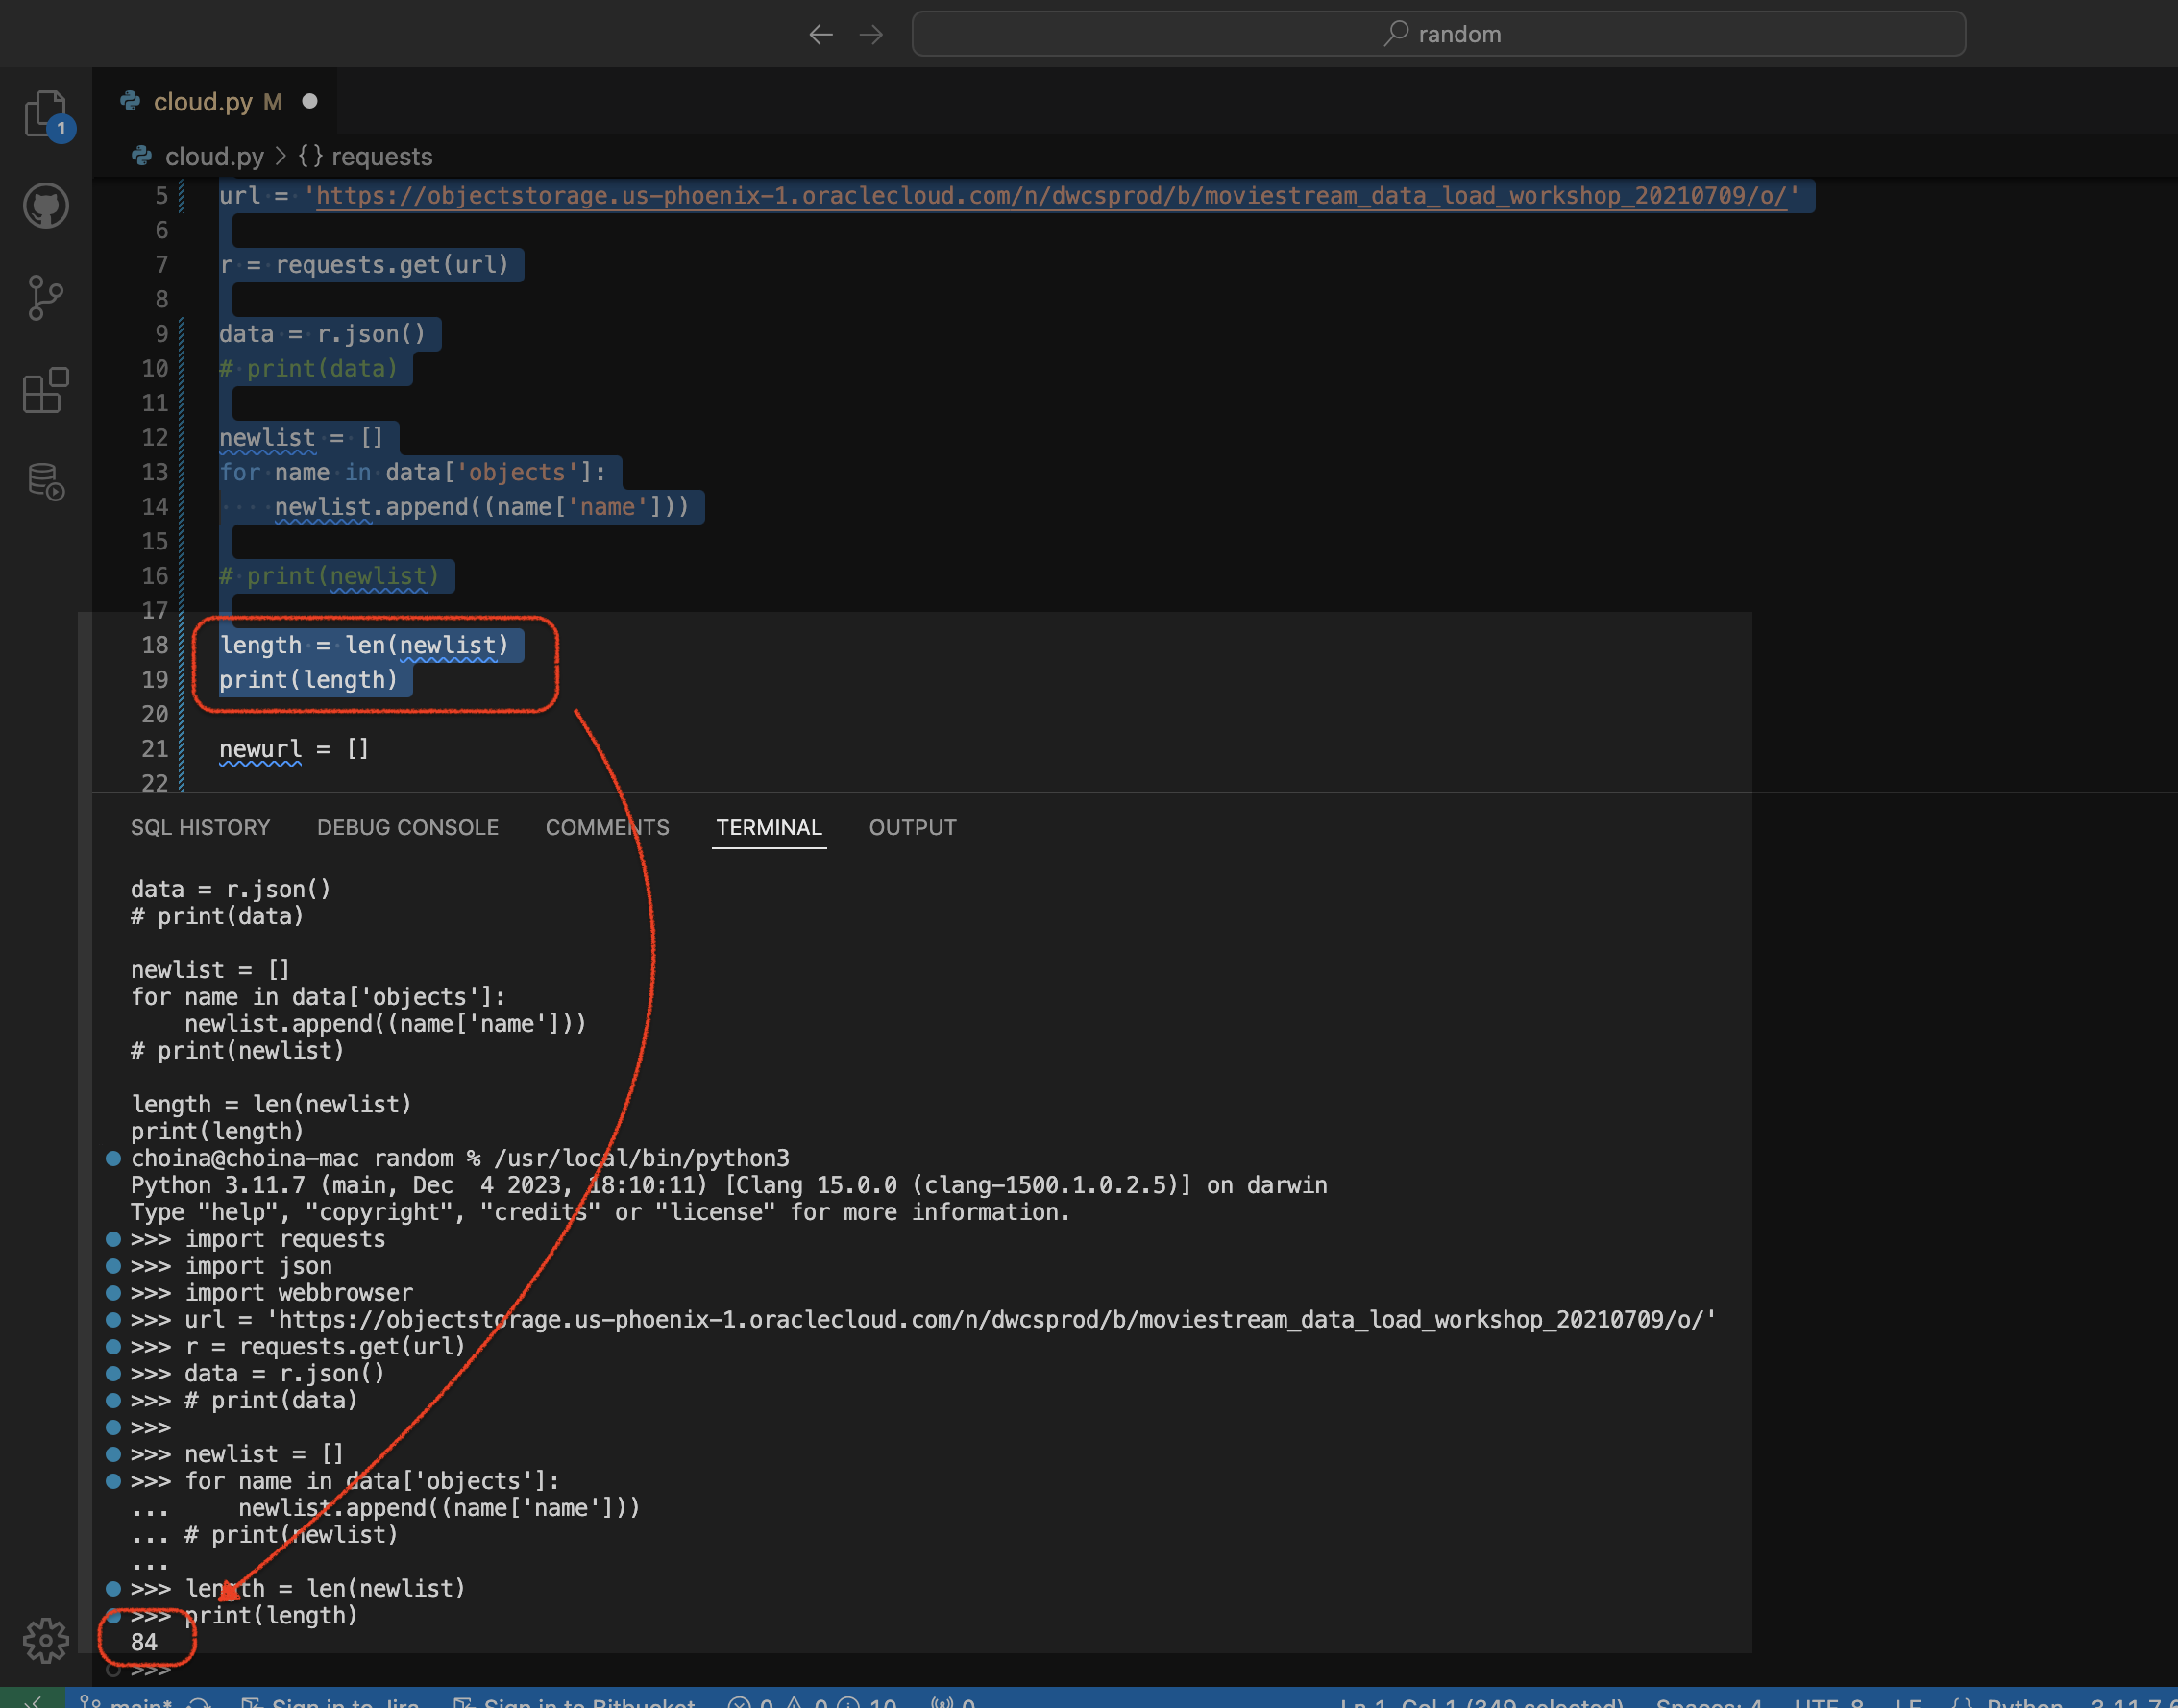
Python script to retrieve objects from Oracle Cloud Bucket
For…reasons, I needed a way to retrieve all the .CSV files in a regional bucket in Oracle Cloud Object Storage, located at this address: https://objectstorage.us-phoenix-1.oraclecloud.com/n/dwcsprod/b/moviestream_data_load_workshop_20210709/o You can visit it; we use it for one of our LiveLabs (this one), so I’m sure it will stay live for a while 😘. Once there, you’ll see all…
Written by
-
Create a view from a JSON Collection and REST-enable it with ORDS
The DBMS_CLOUD PL/SQL Package You can use this PL/SQL procedure (in the DBMS_CLOUD package) along with the file_uri_list URL (seen in the code below) to create and then add JSON documents to a JSON Collection (good info on JSON Collections in the Oracle database). In this example, we call this collection Movie_Collection. 👆🏻 This is…
Written by
-
ORDS, SQLcl, APEX via YUM and DNF
TL;DR BREAKING NEWS!! APEX packages with ORDS and SQLcl now available in Oracle Linux YUM servers and through ULN The deets Here is what you need to know. We are releasing three new APEX (a.k.a. “The Artist formerly known as Oracle Application Express”) packages for the following repositories: NoARCH RPMs One more update! These RPMs…
Written by