Category: Autonomous Database
-
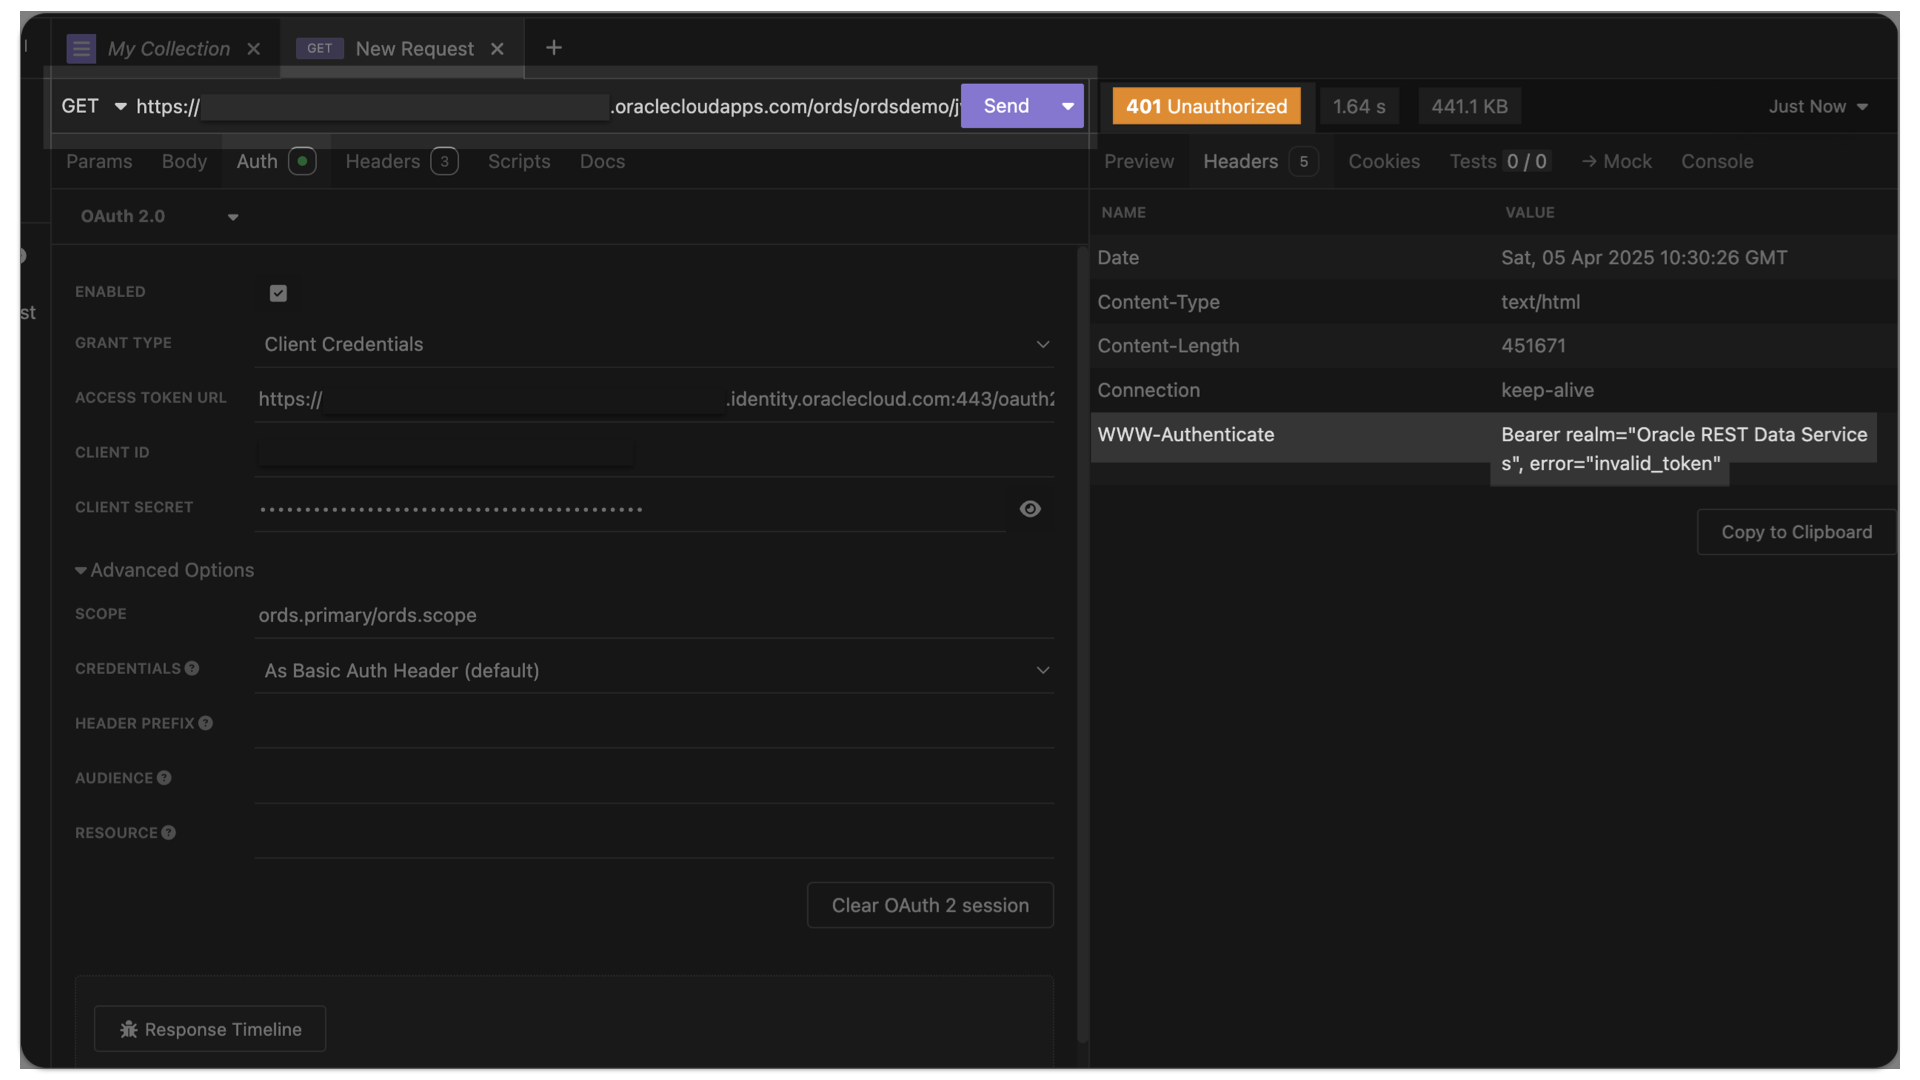
401 Unauthorized invalid_token – troubleshooting Oracle Cloud IAM JWTs with ORDS
Symptoms You are able to request an access token from OCI IAM. Yet, when you issue the subsequent request to your target resource (an ORDS endpoint), you receive the following message (error=”invalid_token”): Actions you’ve taken YET…you still receive this error=”invalid_token” message, it is quite possible that you have not made the JWK URL publically accessible in…
Written by
-
An ORDS GET request to retrieve CGI Environment variables from the PRINT_CGI_ENV PL/SQL procedure
ALERT: This is going to seem extremely out of context! But this post actually loosely relates to the ORDS Pre-hook functions section of our docs. I’m in the process of (1) working on a presentation and (2) updating this section of the docs as well (productivity trifecta for the win!), hence why we are here.…
Written by
-
ORDS 24.3 Release Highlights
Overview There’s plenty to talk about in this release. However, I’m most excited about the performance improvements, ORDS sample applications, and documentation changes. Read on to get the whole story. Enhancements API Performance REST API responses from either AutoREST or customer based modules could see as much as a 30% improvement in response times. About…
Written by
-
Build an ORDS API Resource Module, GET request with JavaScript fetch, display in HTML
Really trying to optimize SEO with that title 👆🏼! Recap 💡 All the code you’ll see in this post can be found in my moviestreamjs github repository.💡 This post is a continuation of a previous one, which can be found here. In this post, I’ll: If you are coming from the previous related post, then…
Written by
-
Create a view from a JSON Collection and REST-enable it with ORDS
The DBMS_CLOUD PL/SQL Package You can use this PL/SQL procedure (in the DBMS_CLOUD package) along with the file_uri_list URL (seen in the code below) to create and then add JSON documents to a JSON Collection (good info on JSON Collections in the Oracle database). In this example, we call this collection Movie_Collection. 👆🏻 This is…
Written by
-
Oracle Database REST APIs and Apple Automator Folder Actions
The plan was to create an ORACLE REST endpoint and then POST a CSV file to that auto-REST enabled table (you can see how I did that here, in section two of my most recent article). But, instead of doing this manually, I wanted to automate this POST request using Apple’s Automator application… Me…two paragraphs…
Written by

-
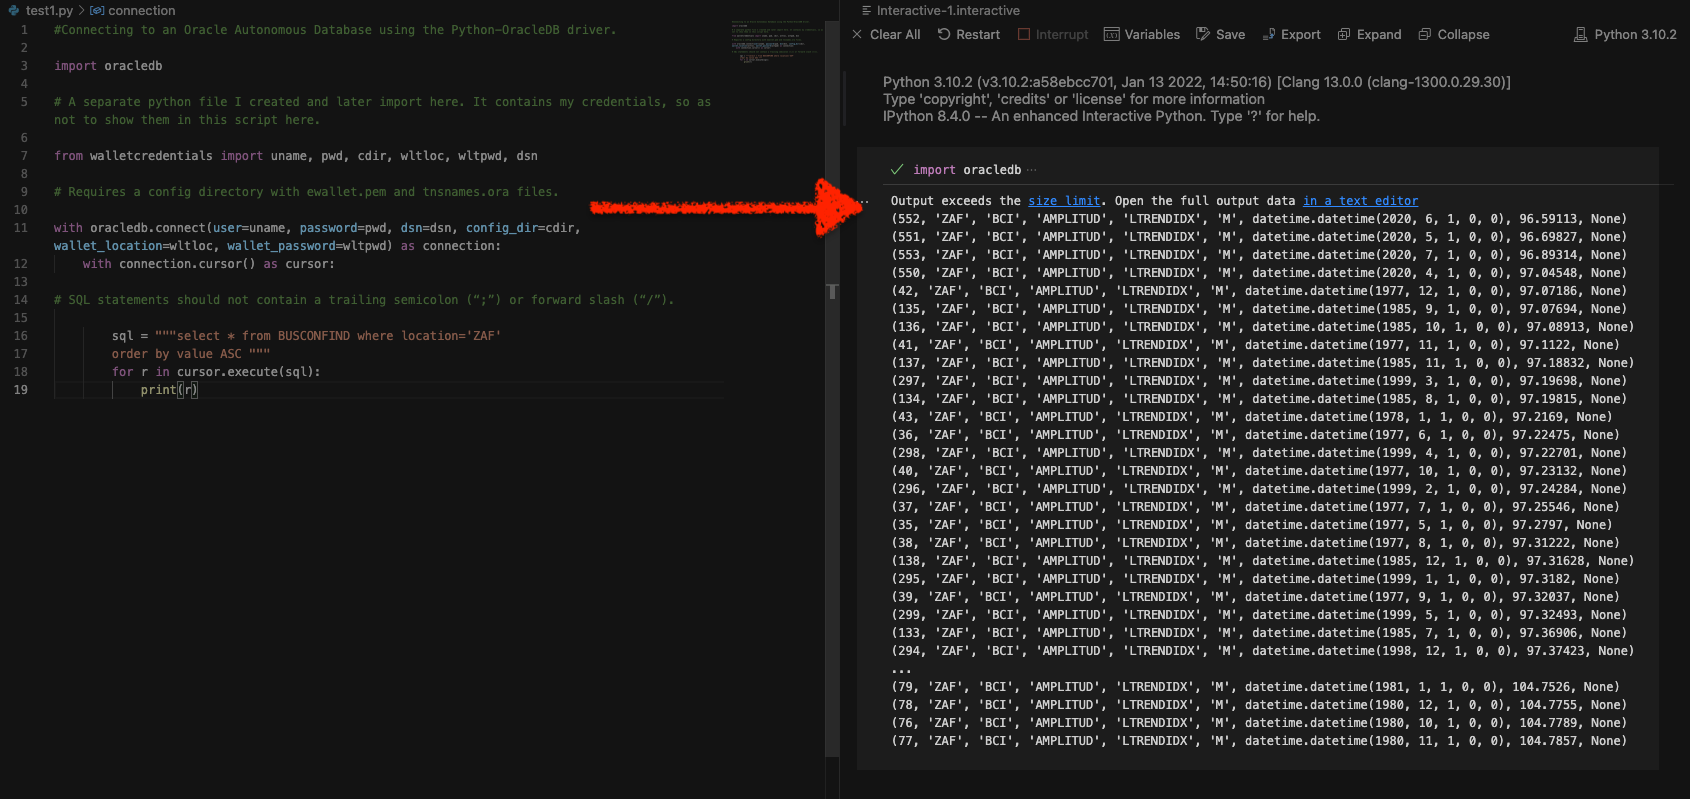
Python and the Oracle Autonomous Database: Three Ways to Connect
Watch the deep dive videos: Part I Part II Part III Welcome back I finally had a break in my PM duties to share a small afternoon project [I started a few weeks ago]. I challenged myself to a brief Python coding exercise. I wanted to develop some code that allowed me to connect to…
Written by
-
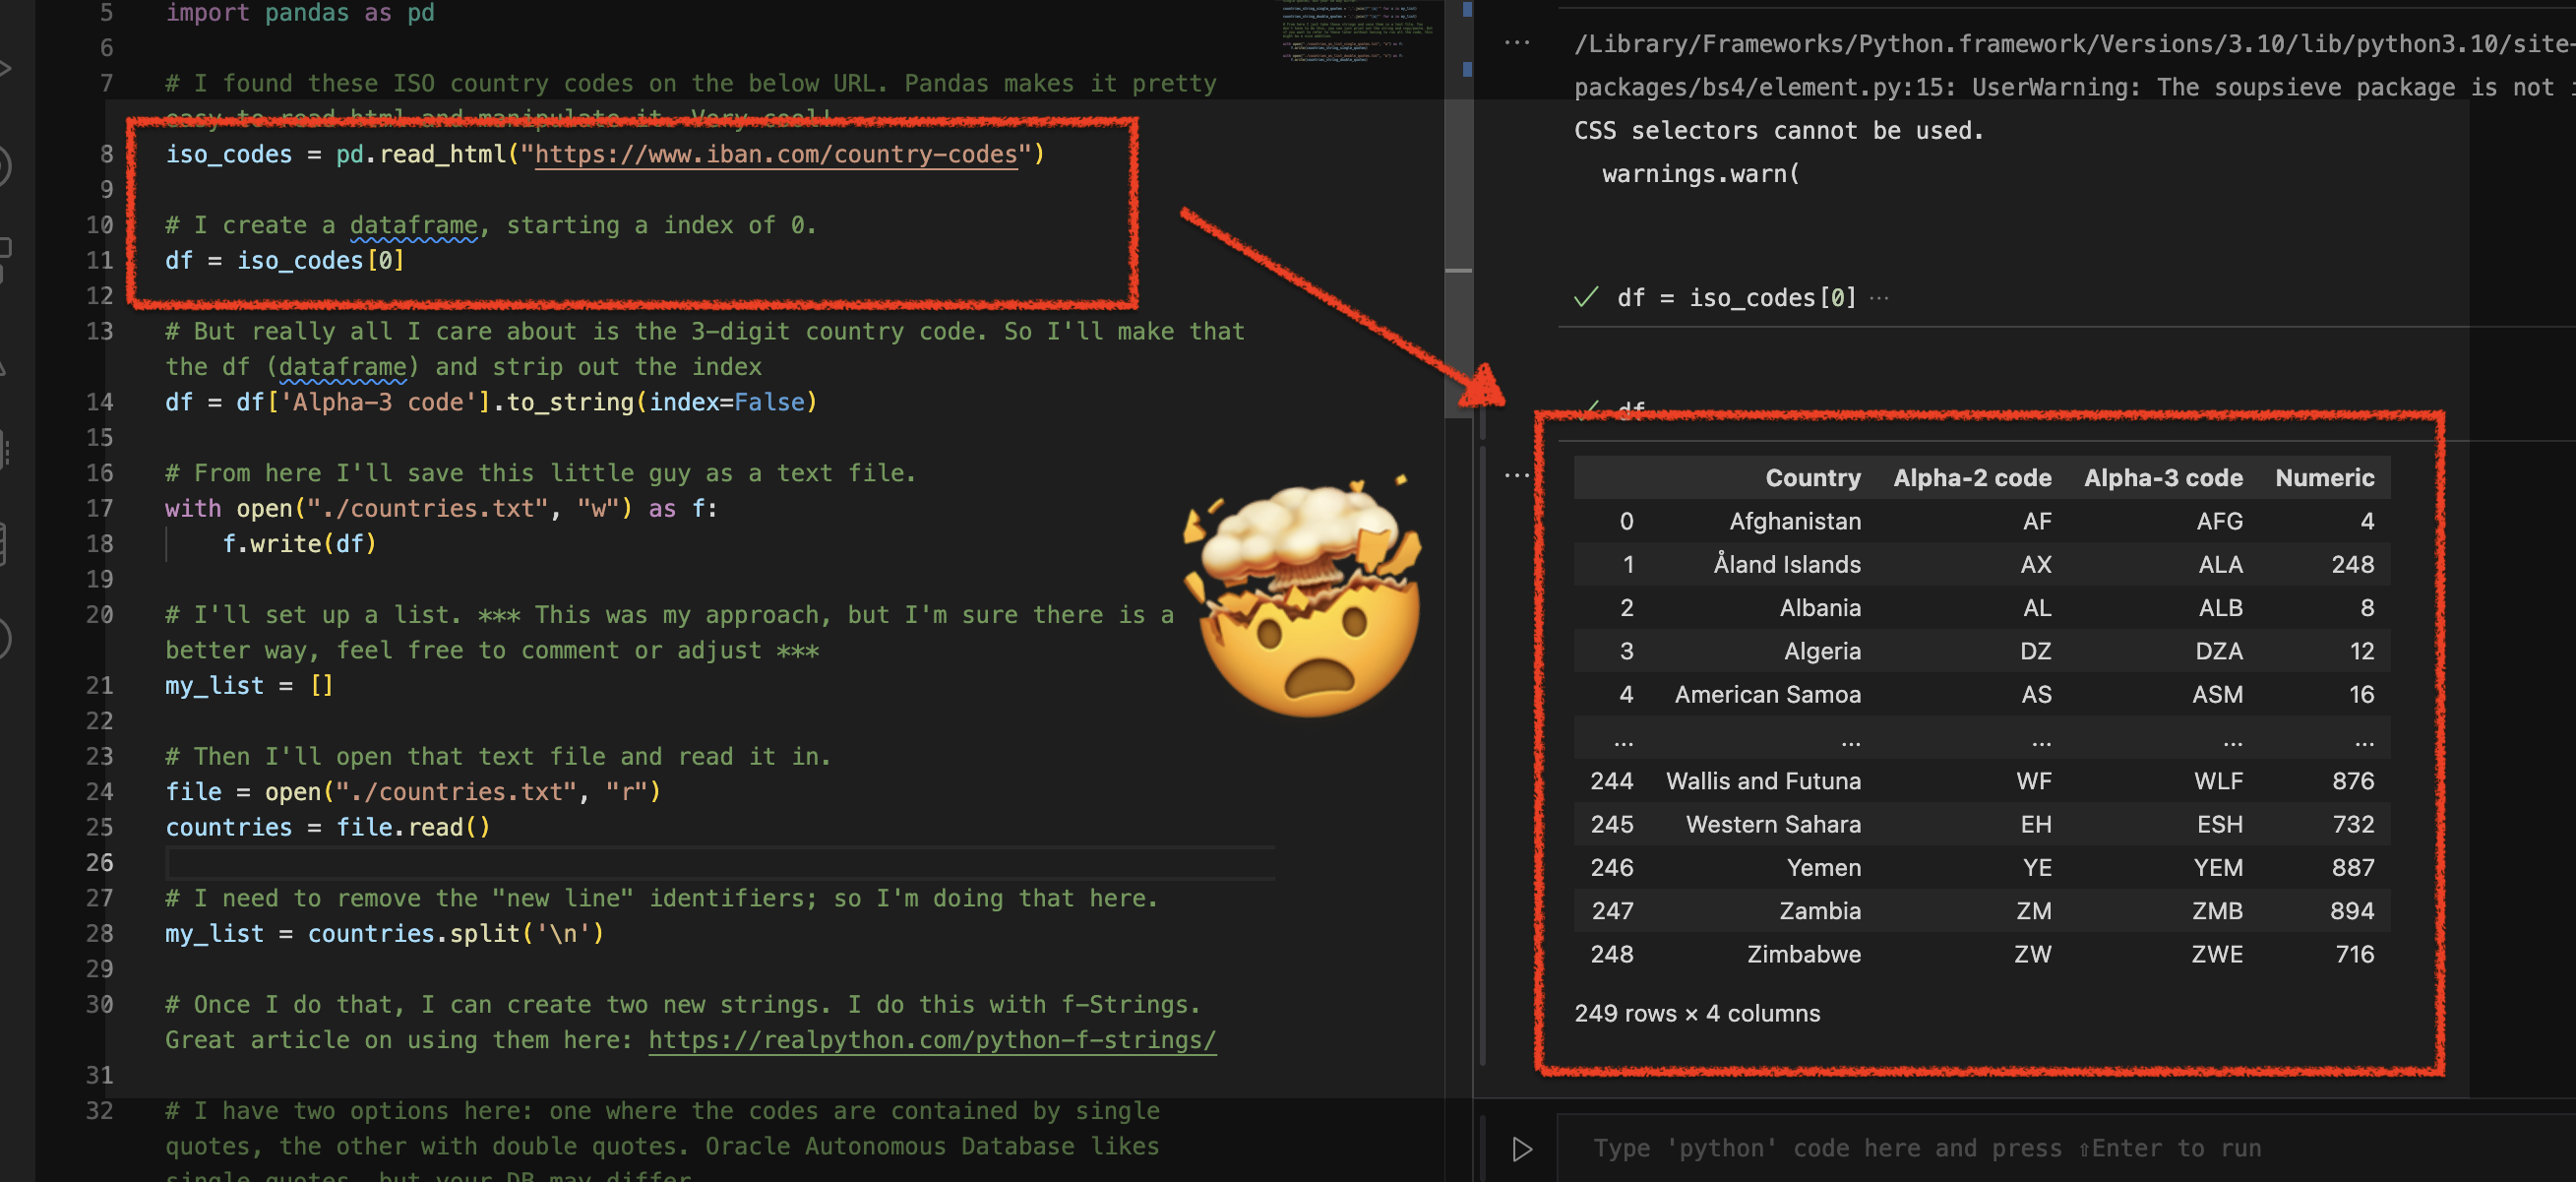
Using Python Pandas to turn ISO Country Codes into a string to use as values for a SQL Query
Summary, code, resources Problem While querying a table (based on this dataset) with SQL, you realize one of your columns uses 3-character ISO Country Codes. However, some of these 3-character codes aren’t countries but geographical regions or groups of countries, in addition to the actual country codes. How can you filter out rows so you are left…
Written by
-
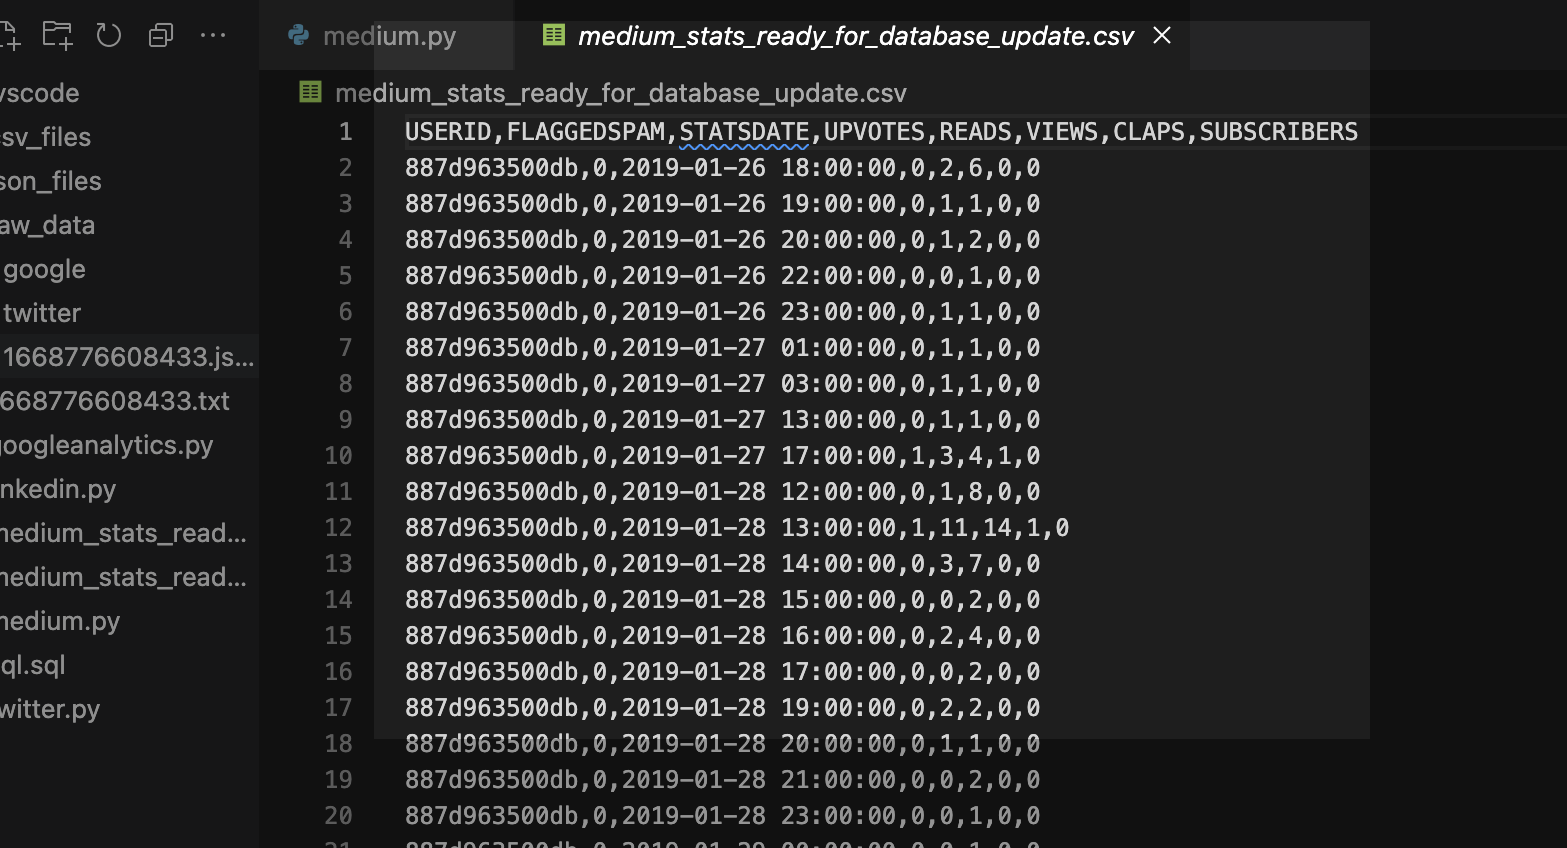
More fun with Medium story stats, JSON, Python, Pandas, and Oracle SQL Developer Web
That’s right; I’m back again for yet another installment of this ongoing series dedicated to working with Medium.com story stats. I first introduced this topic in a previous post. Maybe you saw it. If not, you can find it here. Recap My end goal was to gather all story stats from my Medium account and…
Written by
-
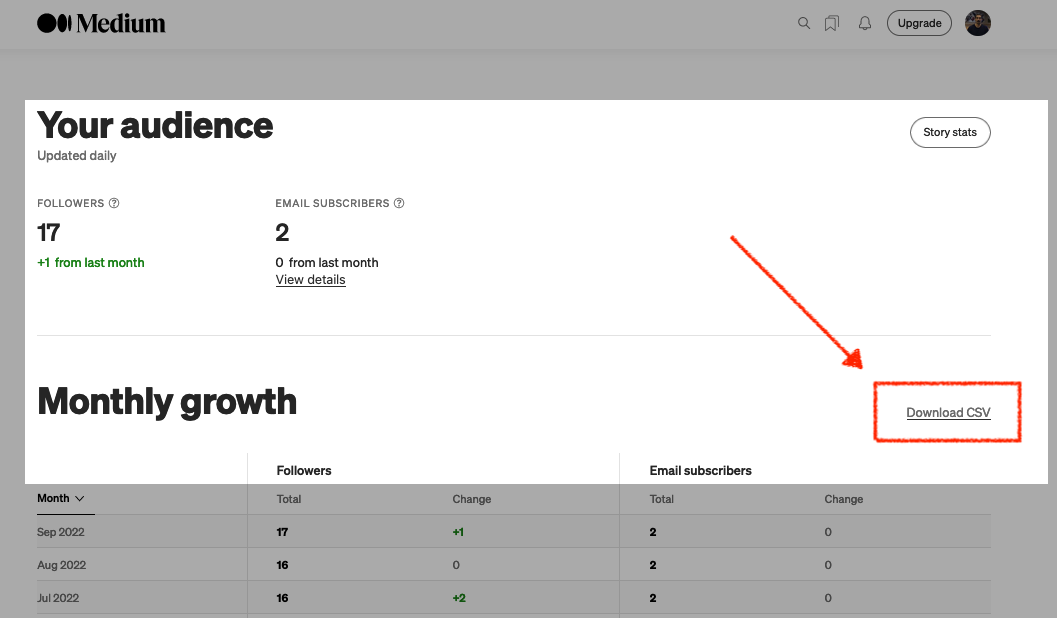
Fun with Python GET requests, Medium stats, and the Oracle Autonomous Database
I feel so silly for posting this because you’ll quickly realize that I will have to leave things unfinished for now. But I was so excited that I got something to work, that I had to share! If you’ve been following along, you know you can always find me here. But I do try my best…
Written by