Author: Chris
-
Oracle Database REST APIs and Apple Automator Folder Actions
The plan was to create an ORACLE REST endpoint and then POST a CSV file to that auto-REST enabled table (you can see how I did that here, in section two of my most recent article). But, instead of doing this manually, I wanted to automate this POST request using Apple’s Automator application… Me…two paragraphs…
Written by

-
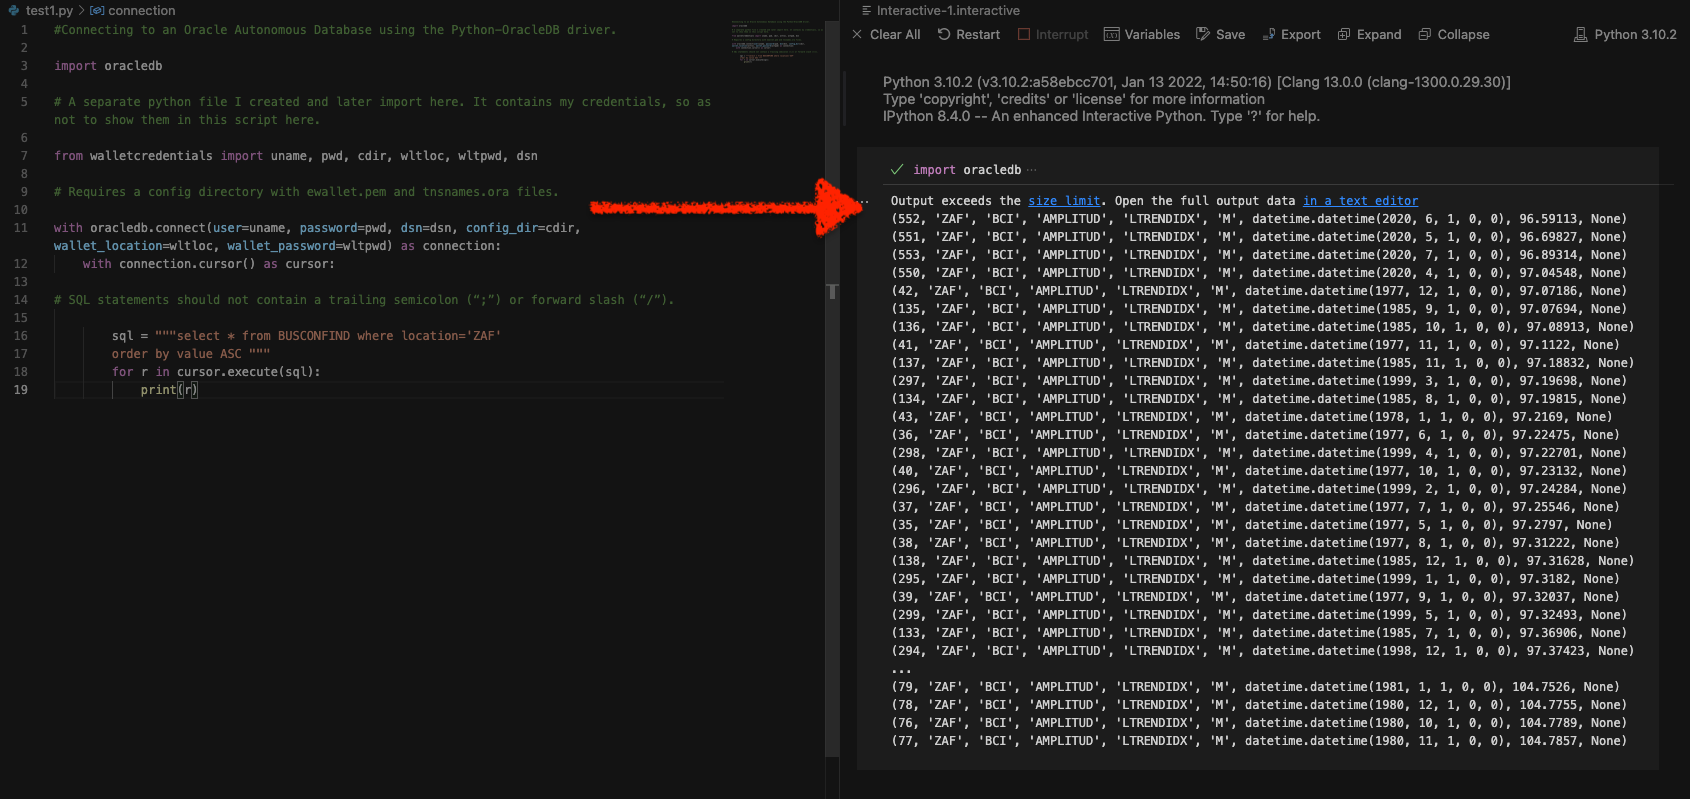
Python and the Oracle Autonomous Database: Three Ways to Connect
Watch the deep dive videos: Part I Part II Part III Welcome back I finally had a break in my PM duties to share a small afternoon project [I started a few weeks ago]. I challenged myself to a brief Python coding exercise. I wanted to develop some code that allowed me to connect to…
Written by
-
Podman, Oracle Container Registry, and SQLcl
Containers are kind of like terrariums.
Written by

-
Where to learn SQL: a Slack message
What follows is a response I sent via Slack to one of our newest UX Designers. She comes to us by way of another sister business unit within Oracle. She was looking for some resources on where to learn/get better acquainted with SQL (Which for a UX and/or UI designer, I think is a really…
Written by
-
An intro to using Oracle SQLcl on Mac
Did you know you can use Homebrew to install Oracle’s SQLcl on Mac? I just realized this about a week ago (always the bridesmaid, never the bride…amirite??). Homebrew First you’ll need to install Homebrew (I’m sure there are other ways to install SQLcl, but installing through Homebrew was a breeze). You can install Homebrew on…
Written by
-
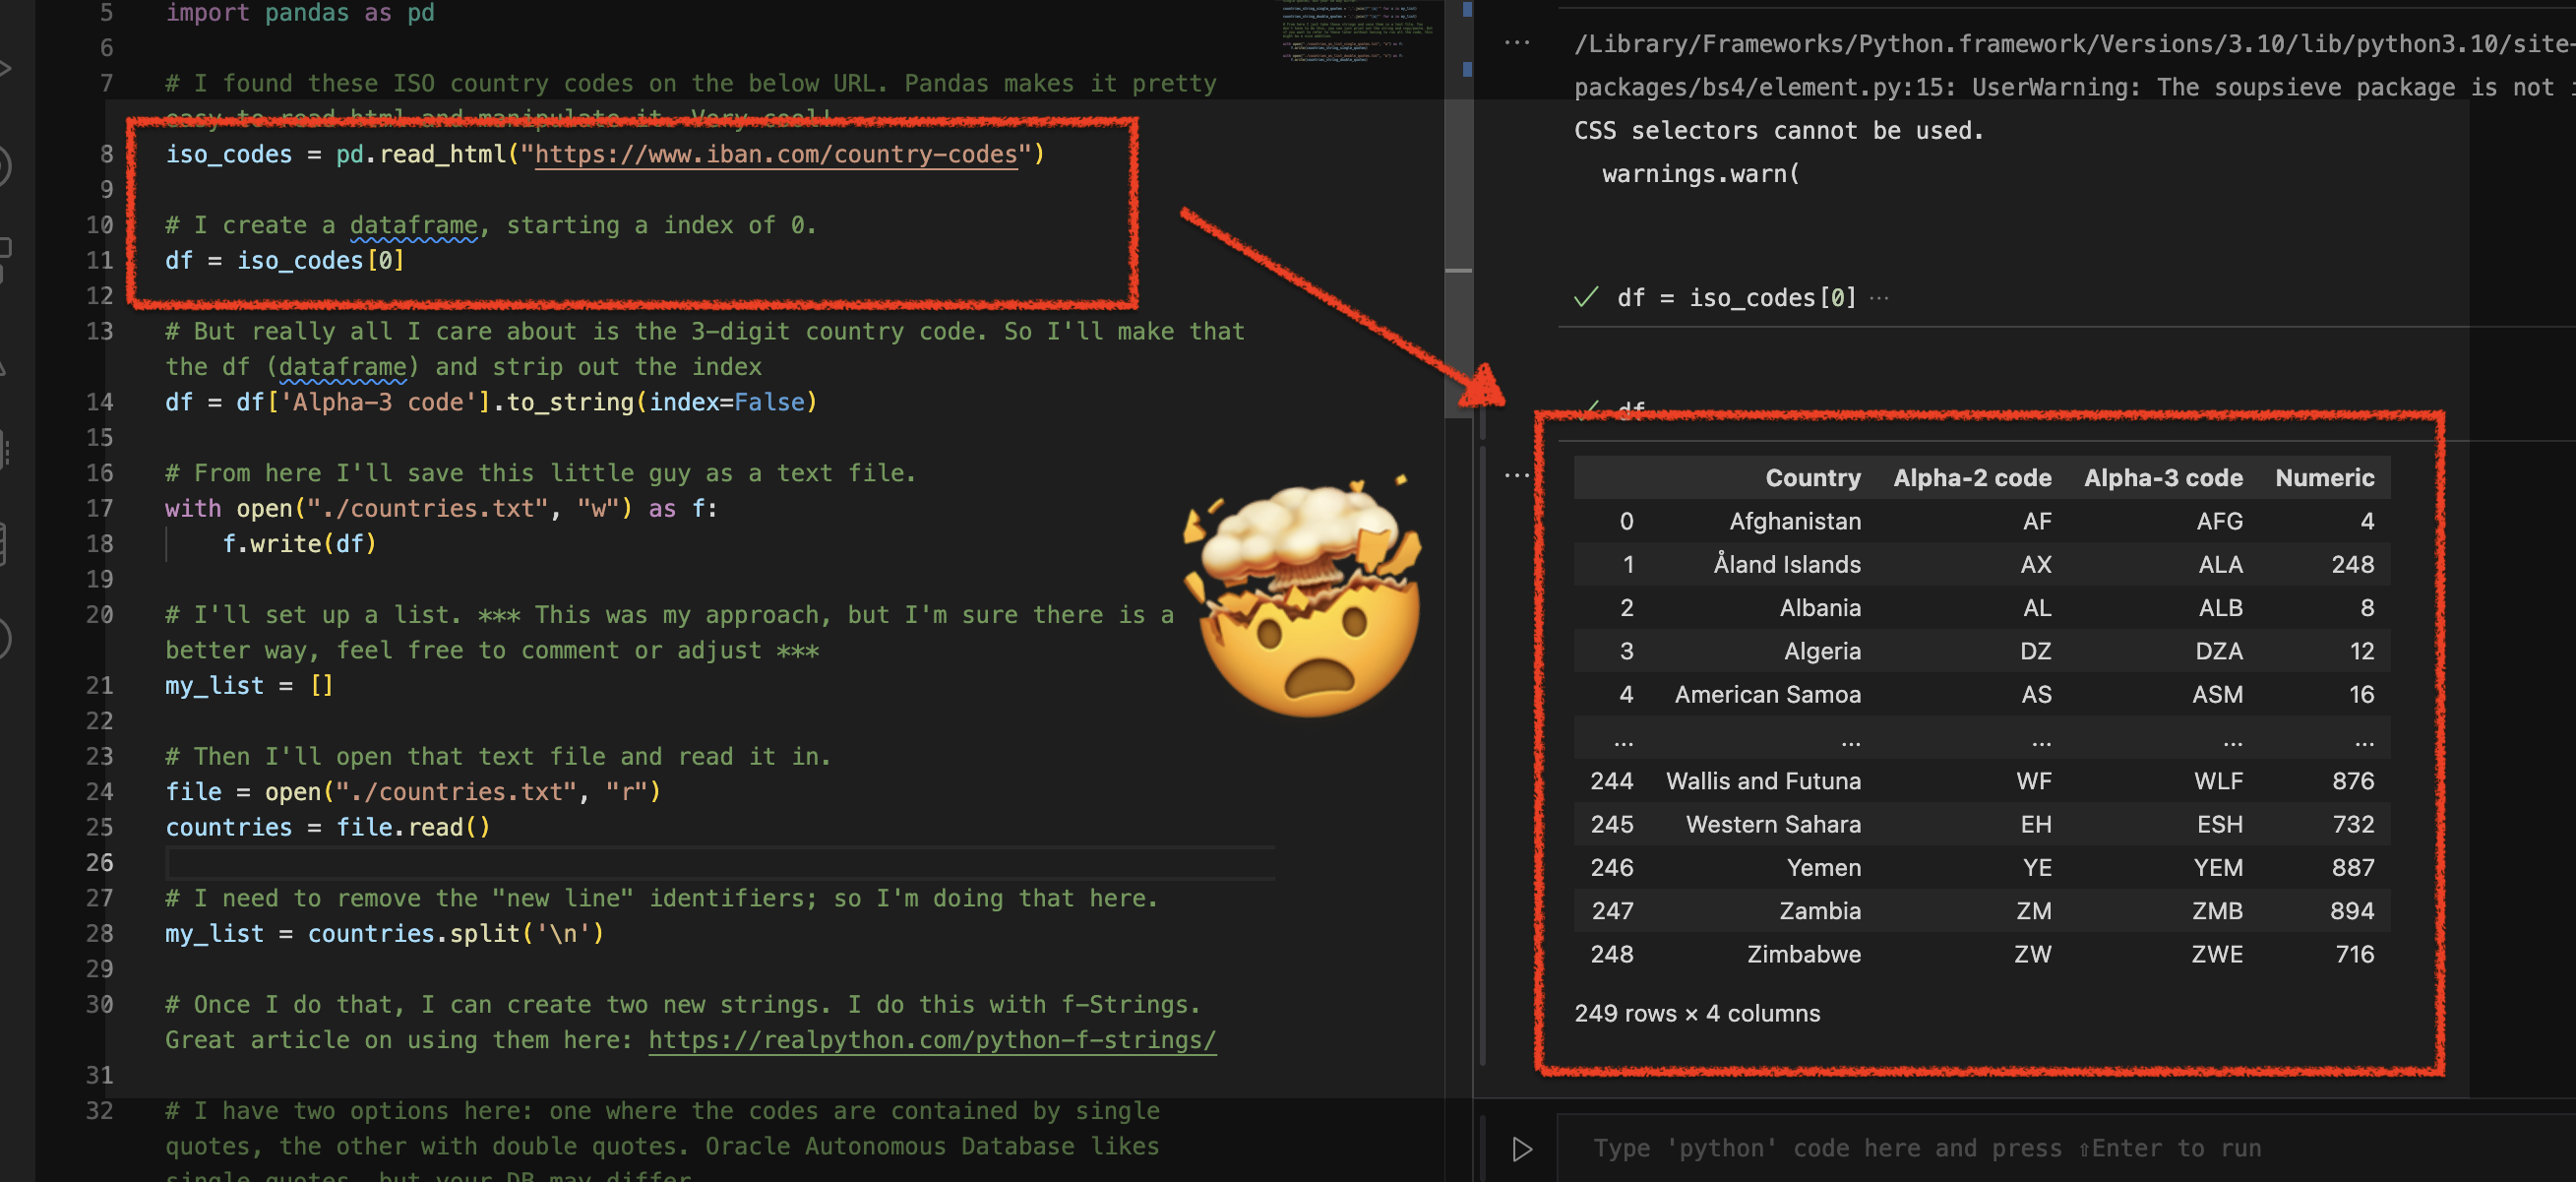
Using Python Pandas to turn ISO Country Codes into a string to use as values for a SQL Query
Summary, code, resources Problem While querying a table (based on this dataset) with SQL, you realize one of your columns uses 3-character ISO Country Codes. However, some of these 3-character codes aren’t countries but geographical regions or groups of countries, in addition to the actual country codes. How can you filter out rows so you are left…
Written by
-
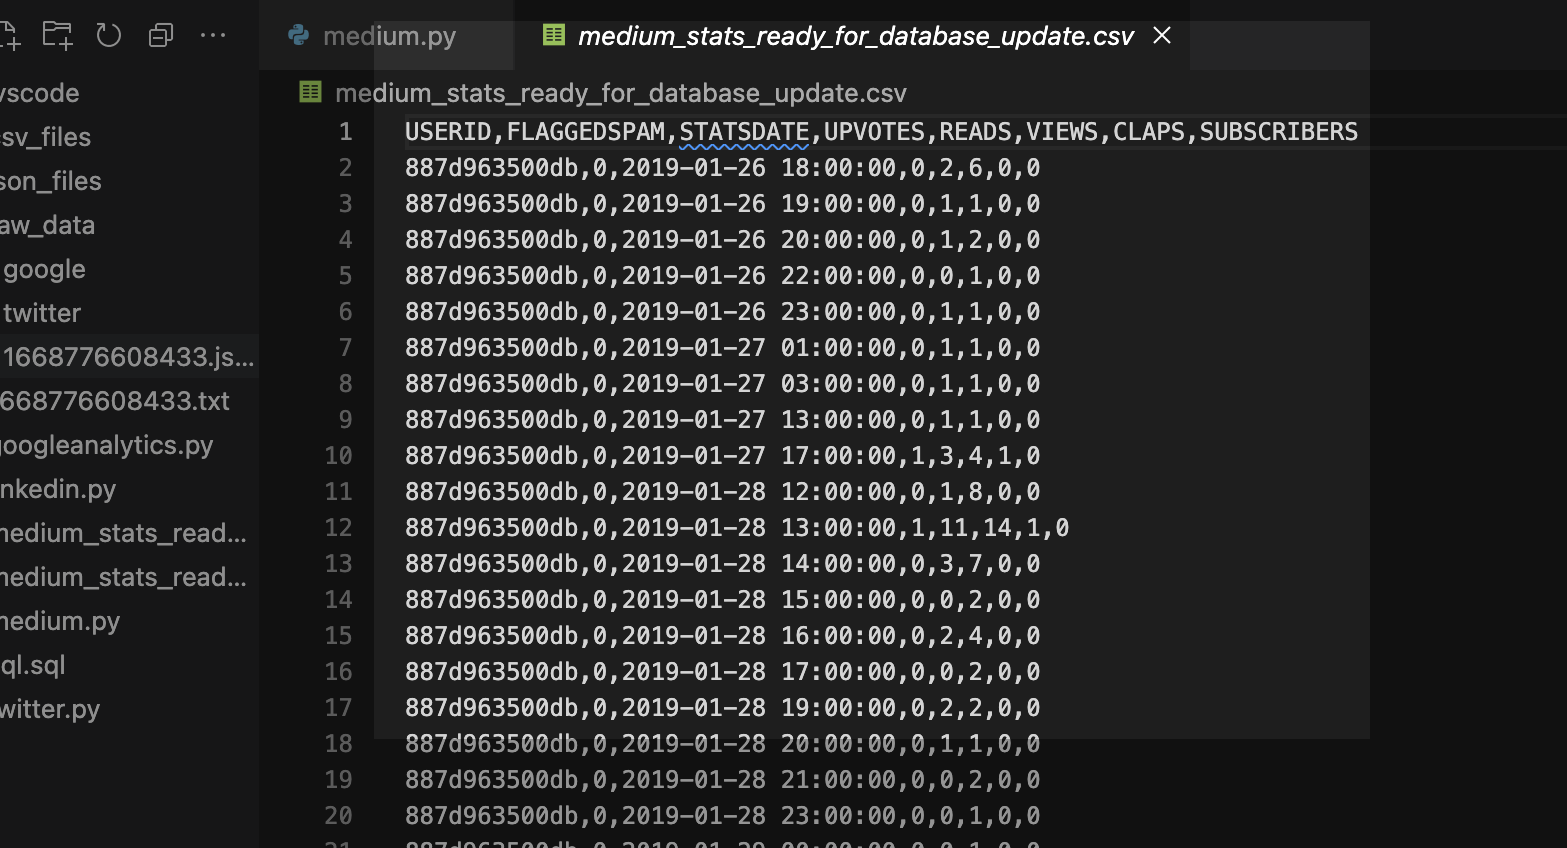
More fun with Medium story stats, JSON, Python, Pandas, and Oracle SQL Developer Web
That’s right; I’m back again for yet another installment of this ongoing series dedicated to working with Medium.com story stats. I first introduced this topic in a previous post. Maybe you saw it. If not, you can find it here. Recap My end goal was to gather all story stats from my Medium account and…
Written by
-
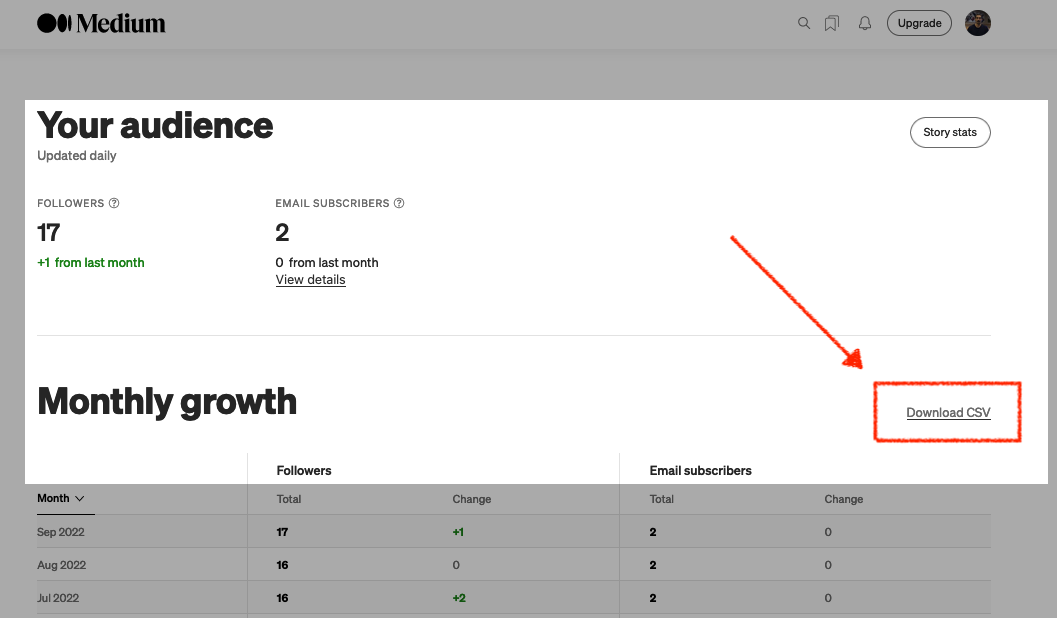
Fun with Python GET requests, Medium stats, and the Oracle Autonomous Database
I feel so silly for posting this because you’ll quickly realize that I will have to leave things unfinished for now. But I was so excited that I got something to work, that I had to share! If you’ve been following along, you know you can always find me here. But I do try my best…
Written by
-
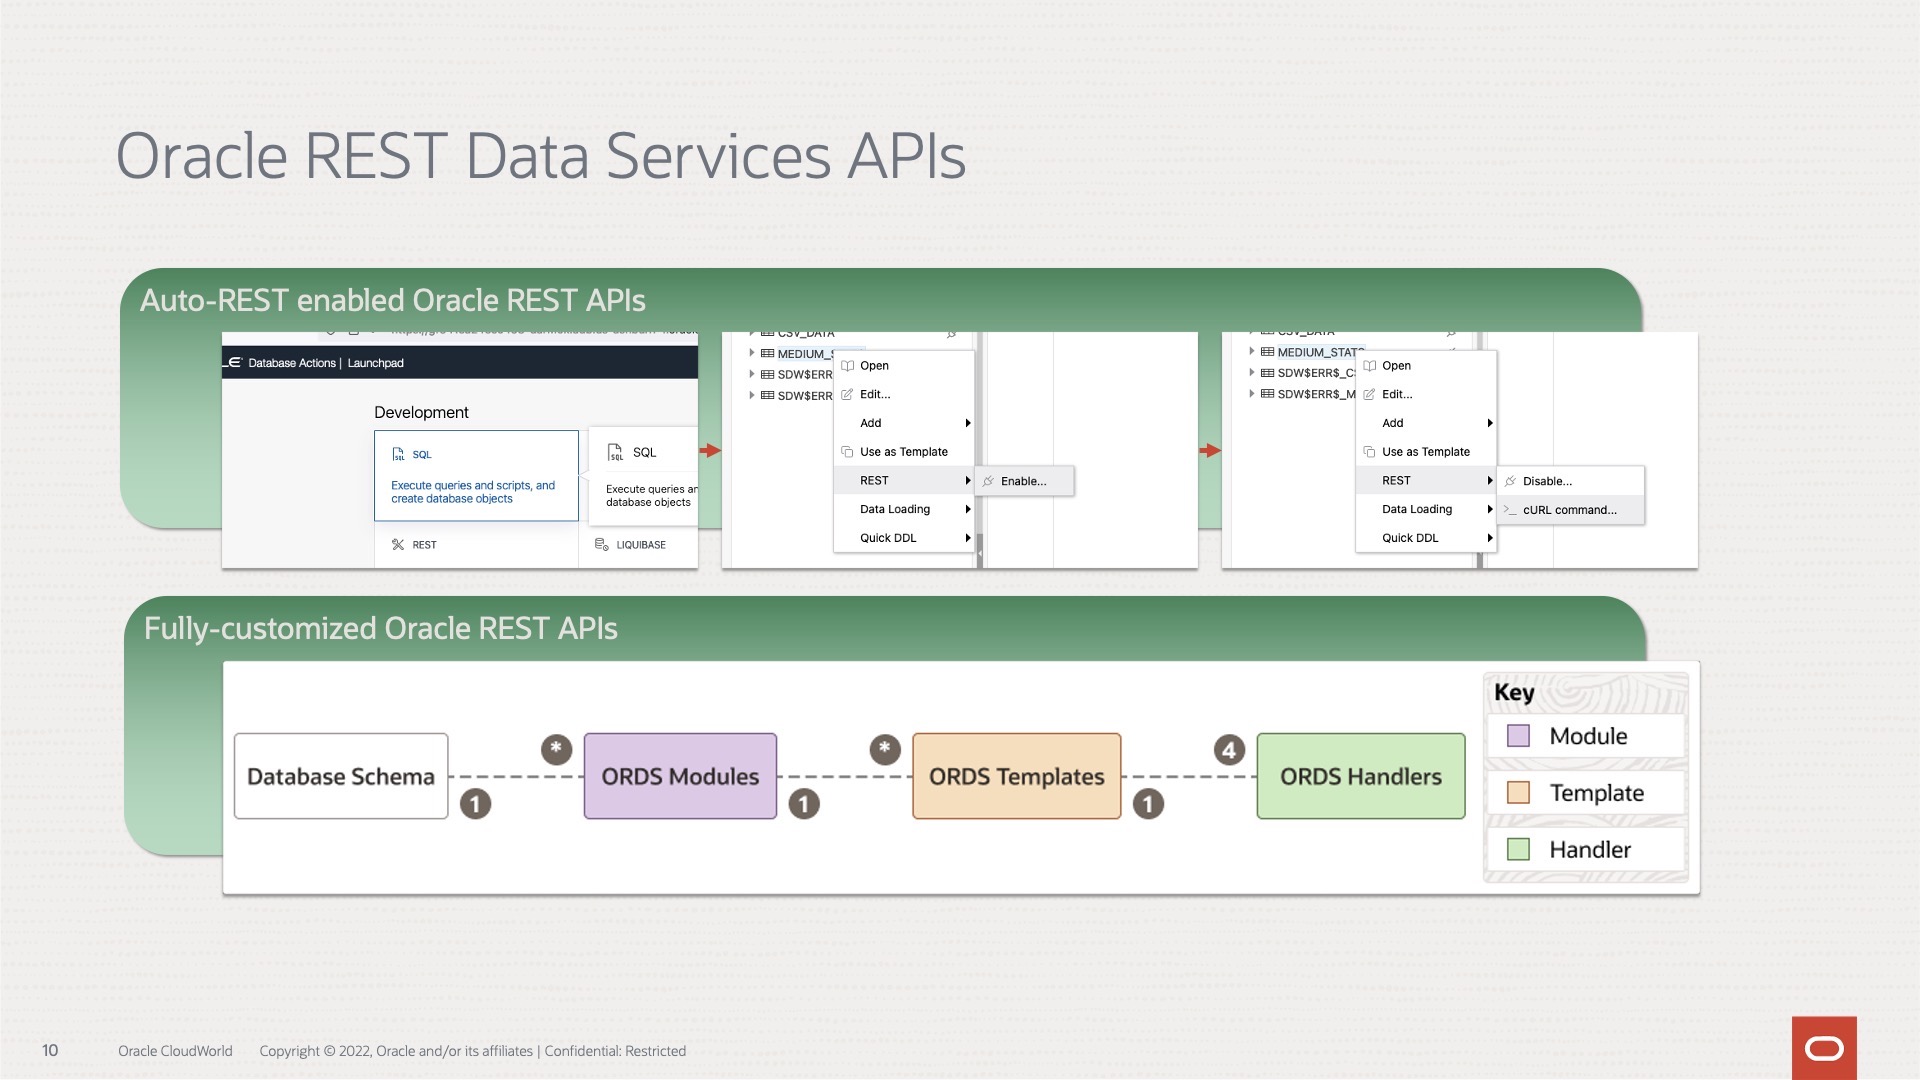
Oracle REST APIs: A LiveLabs review
Recently Jeff and I were invited by the Oracle Developers and Developer Relations teams to do a walkthrough of a LiveLabs workshop, “How to Build Powerful and Secure REST APIs for Your Oracle Autonomous Database.” We spent about 90 minutes moving through selected labs in the workshop. Luckily they recorded it for us; you can…
Written by
-
Python POST requests three ways with Oracle REST Data Services (ORDS)
The simple POST request It was bugging me that I couldn’t perform a simple Python POST request to an ORDS REST-enabled table. I don’t mean to convey that this isn’t possible. Up until very recently, I wasn’t able to do this. Luckily I had a few hours free, so I took to the docs to…
Written by