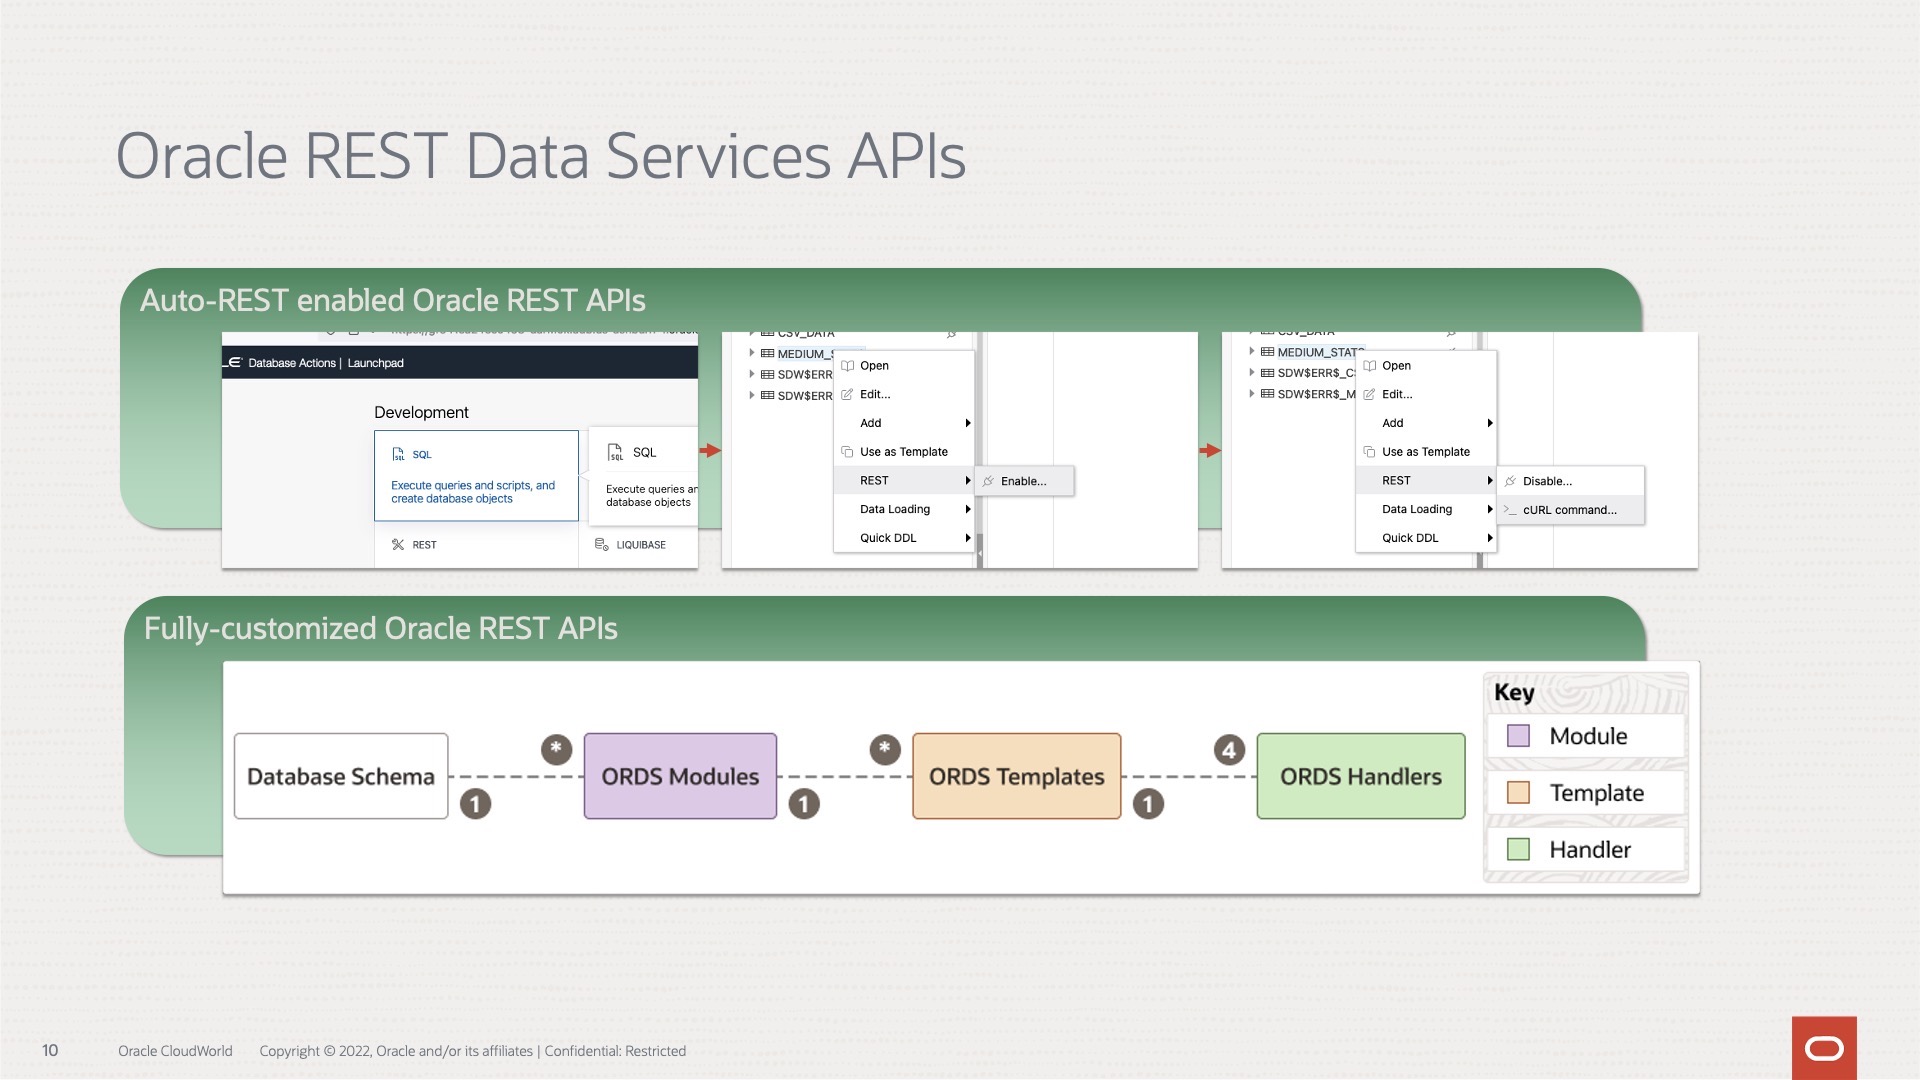
Tag: APIs
-
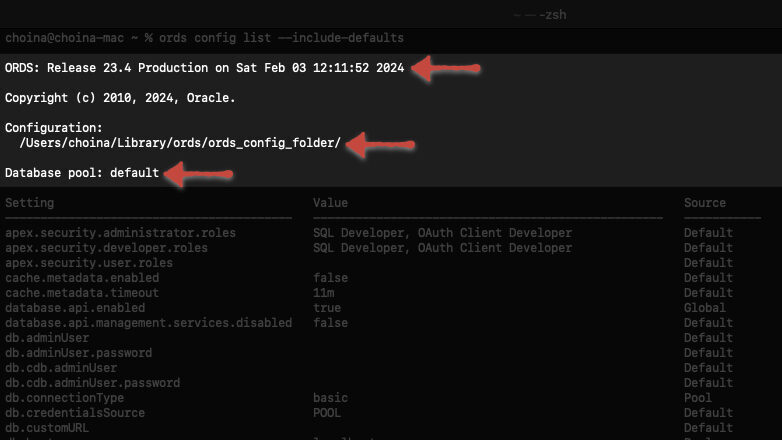
The one ORDS command you NEED to know!
ords config list –include-defaults That’s it. Goodbye! I’m kidding, there’s more. But if you don’t feel like reading anymore, bookmark this post and return when you’re ready. Assuming you have ORDS installed, you too can execute the ords config list –include-defaults command to reveal almost all the configuration settings for your ORDS installation. Here is…
Written by
-
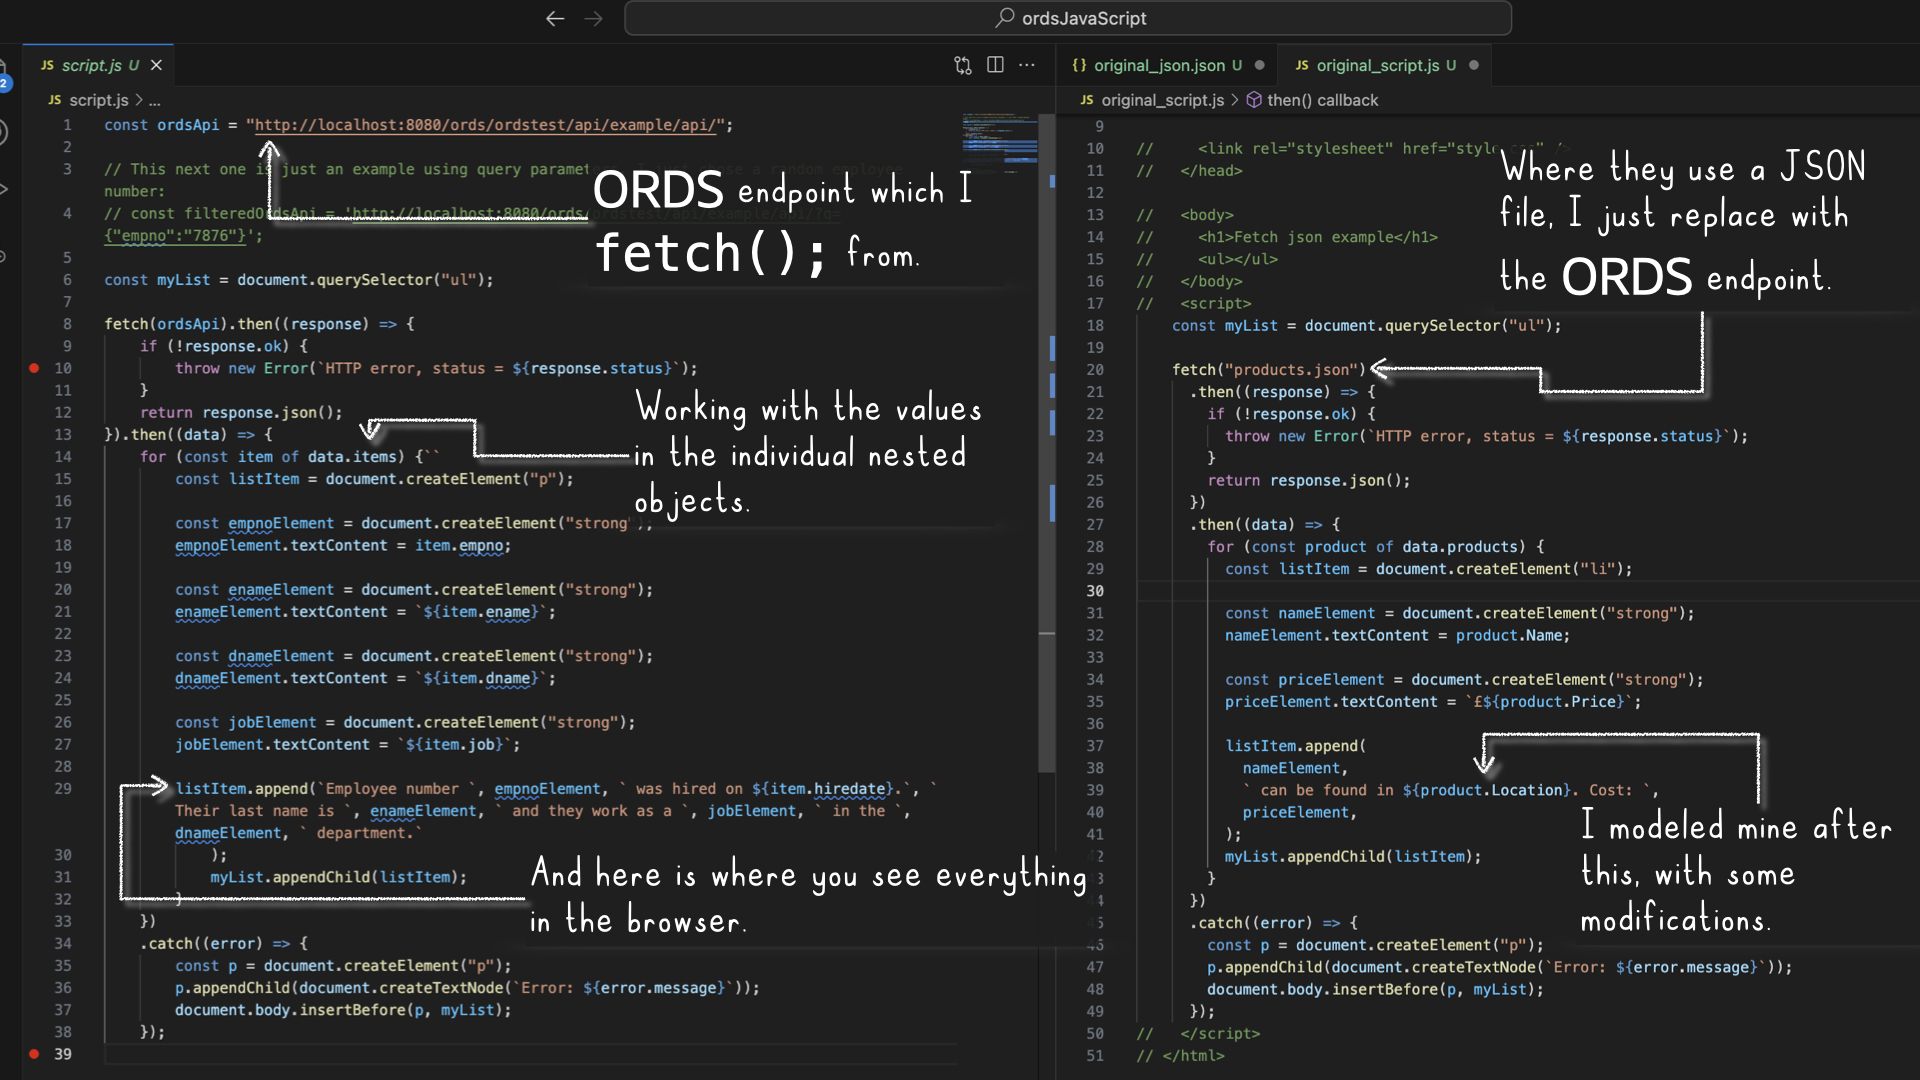
ORDS, JavaScript, the Fetch API, and HTML
I found JavaScript and HTML code here and here and “remixed” it to work with one of my sample ORDS APIs. Here is the result: Impressive, no? Care to try it out? Read on friend! References I’ll front load with all the necessary stuff. That way, you can bounce if you don’t feel like reading.…
Written by
-
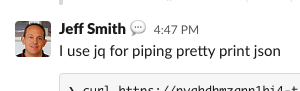
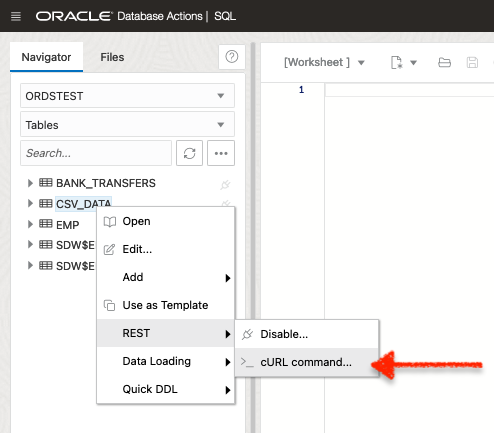
HELP!! parse error: Invalid numeric literal at line x, column x?! It’s not your Oracle REST API!!
A while back (yesterday), I penned a blog post highlighting the ORDS REST-Enabled SQL Service. And in that blog, I displayed the output of a cURL command. A cURL command I issued to an ORDS REST-Enabled SQL Service endpoint. Unfortunately, it was very messy and very unreadable. I mentioned that I would fix it later.…
Written by
-
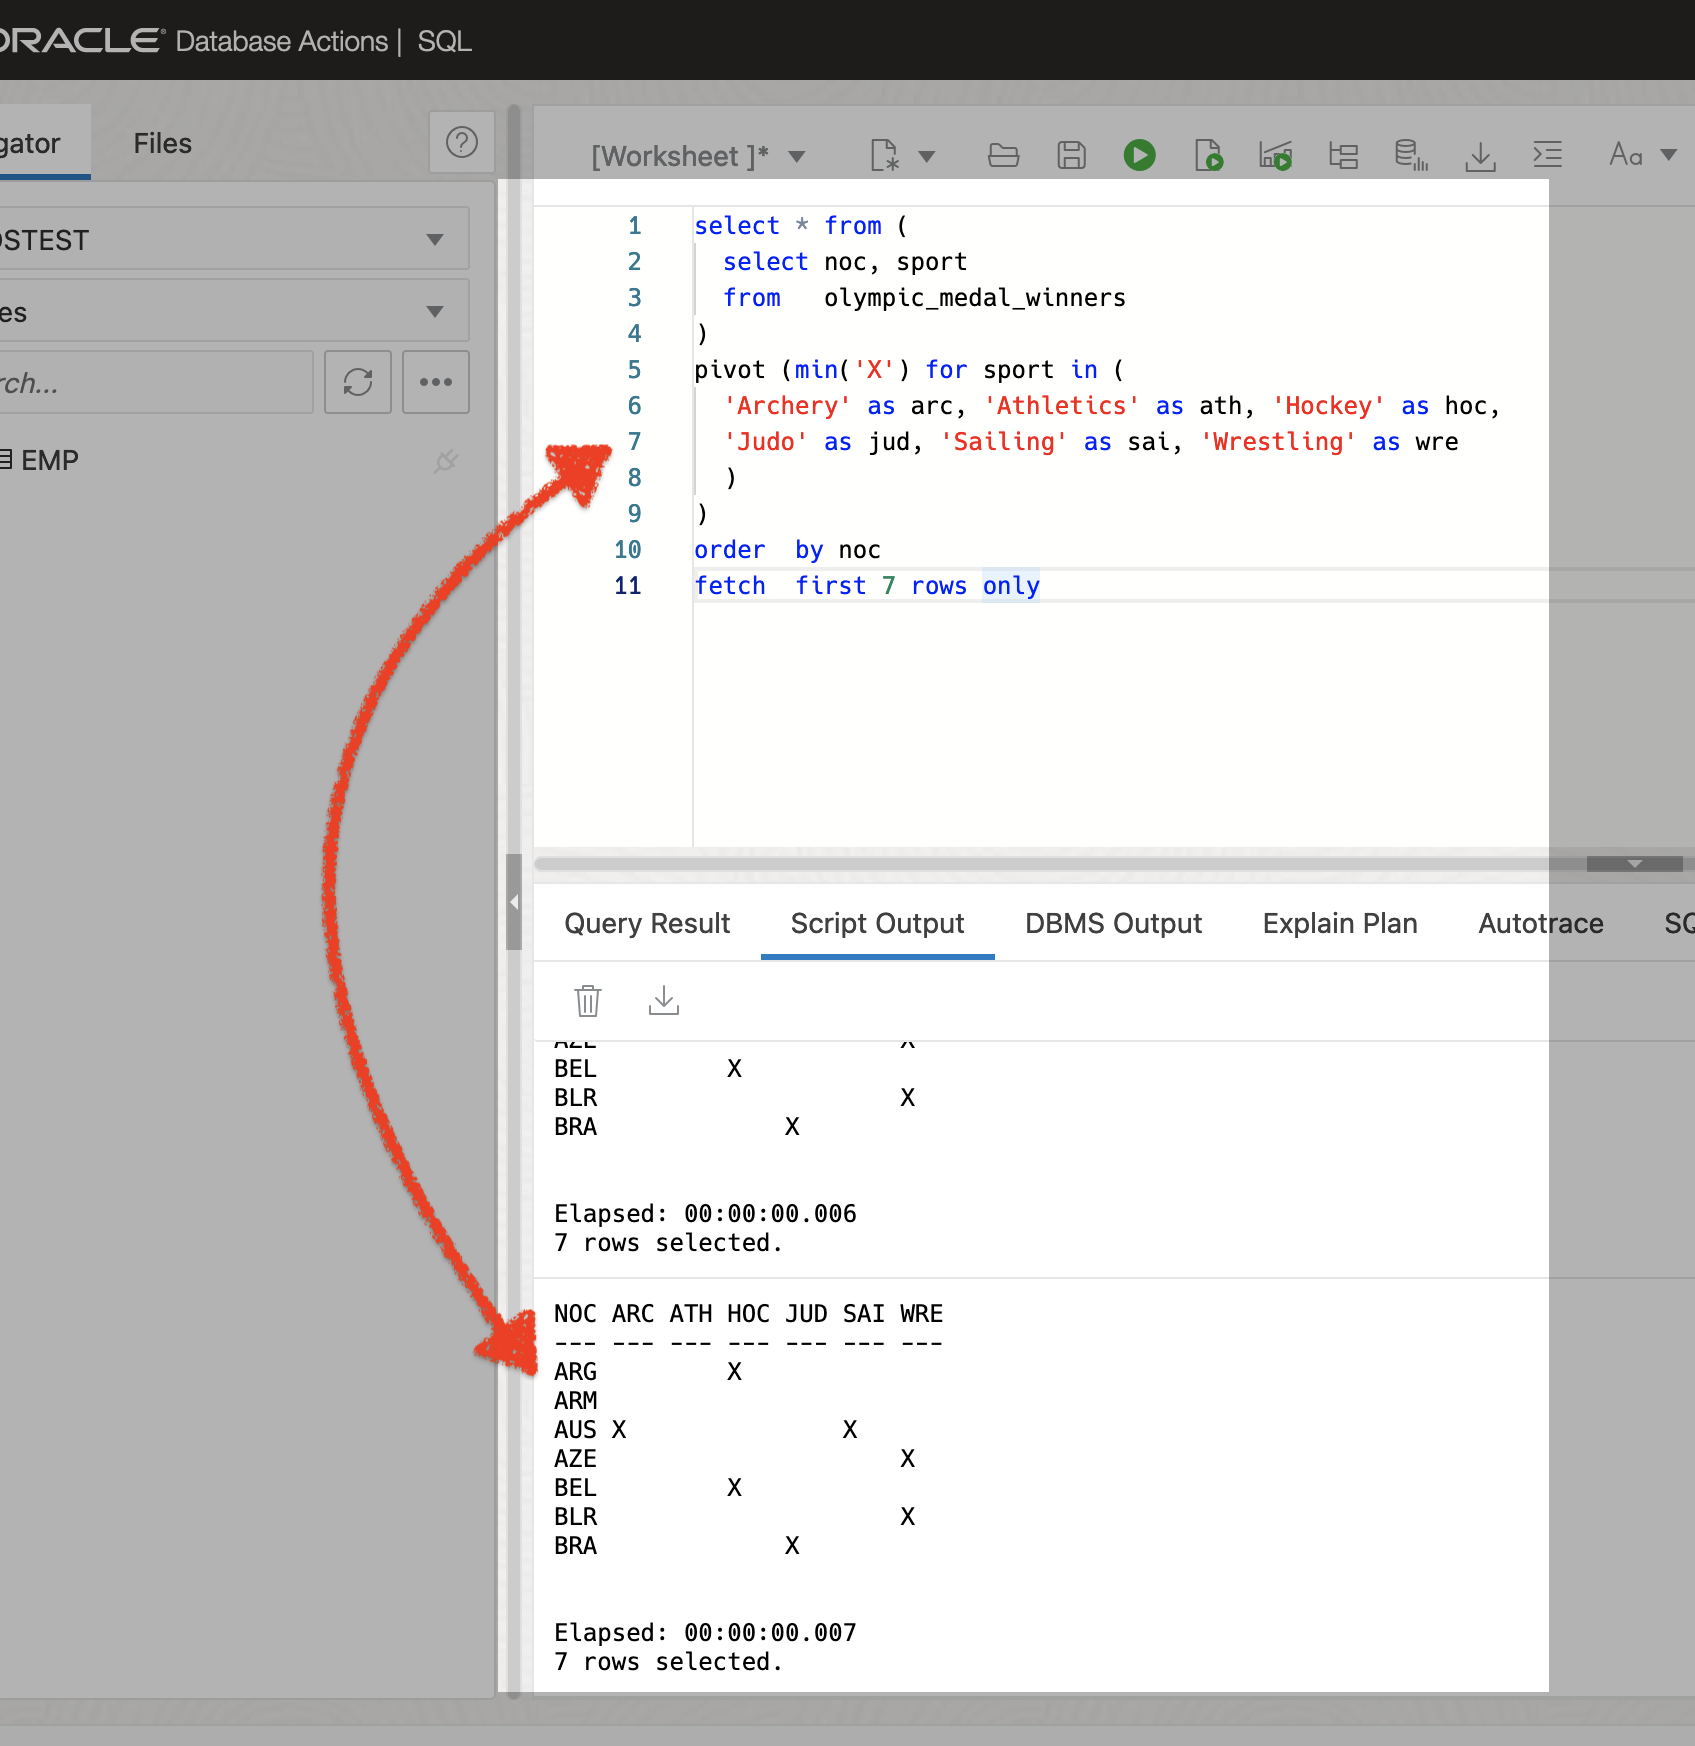
A quick ORDS REST-Enabled SQL Service example
I promise this post will connect back to an overarching theme. But for now, I want to show how you can take a SQL query and use that in combination with the ORDS REST-Enabled SQL Service to request data from a database table. The SQL query Here is the SQL query I’m using: The SQL…
Written by
-
ETags and Oracle REST APIs
About this post I explore ETags and how they can be used in cURL commands when interacting with Oracle REST APIs. I also discuss some of the performance benefits of using ETags. This is not exhaustive, but I hope it introduces you to ETags or reminds you of their existence! But first… LATE-BREAKING NEWS!! A…
Written by
-
User Guide: Oracle database in a Podman container, install ORDS locally, and access a SQL Worksheet on localhost
Summary The title says it all. I’ve run through this about ten times now. But I’ll show you how to start a Podman container (with a volume attached) and install ORDS on your local machine. And then, once installed, we’ll create and REST-enable a user so that the user can take full advantage of Oracle…
Written by
-
Oracle Database REST APIs and Apple Automator Folder Actions
The plan was to create an ORACLE REST endpoint and then POST a CSV file to that auto-REST enabled table (you can see how I did that here, in section two of my most recent article). But, instead of doing this manually, I wanted to automate this POST request using Apple’s Automator application… Me…two paragraphs…
Written by

-
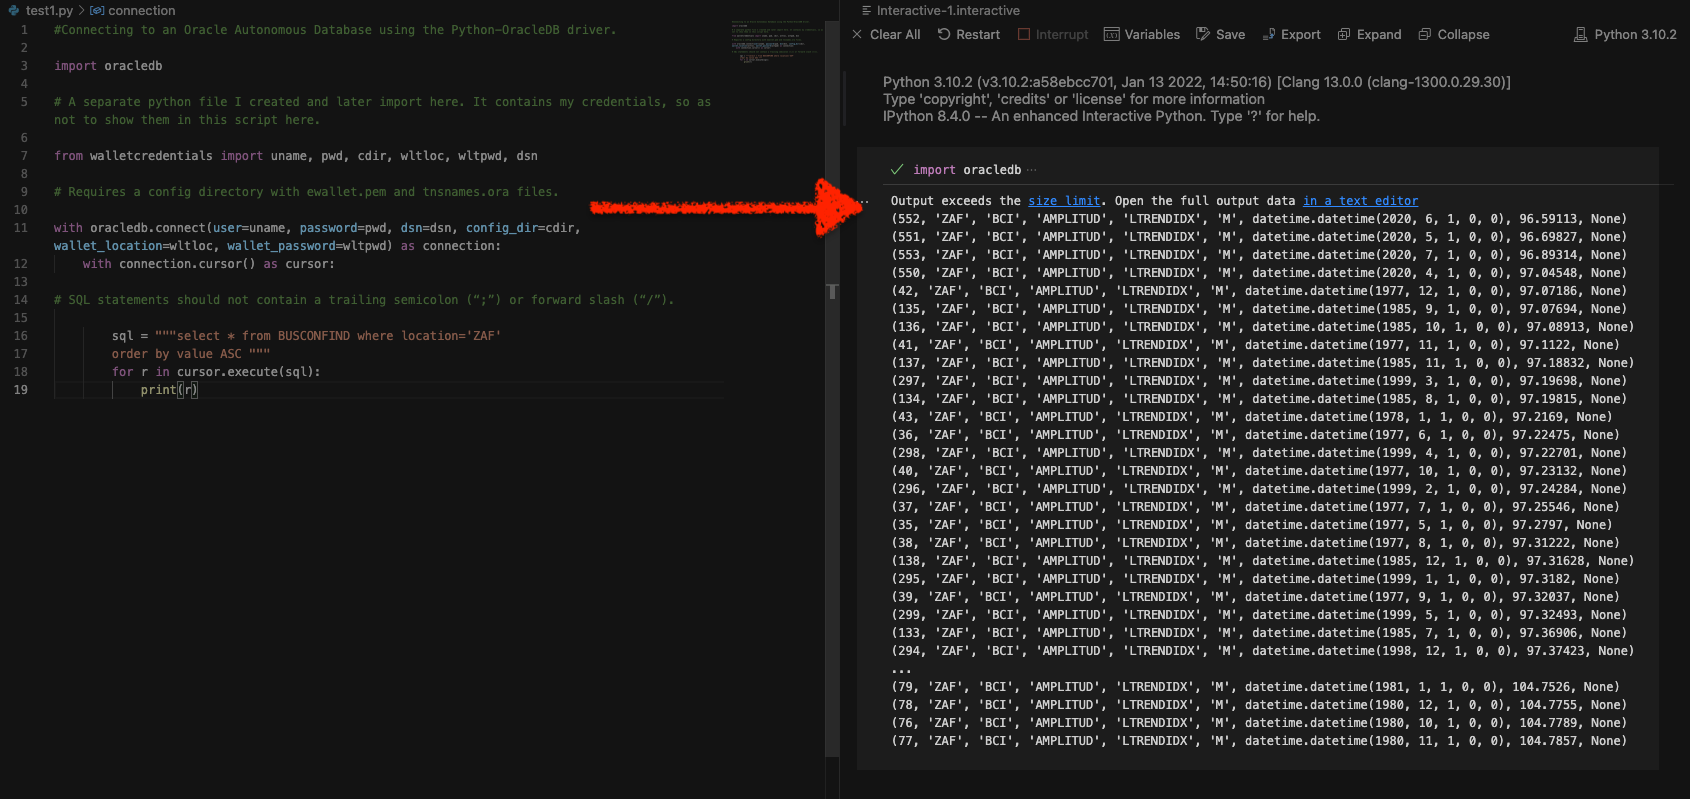
Python and the Oracle Autonomous Database: Three Ways to Connect
Watch the deep dive videos: Part I Part II Part III Welcome back I finally had a break in my PM duties to share a small afternoon project [I started a few weeks ago]. I challenged myself to a brief Python coding exercise. I wanted to develop some code that allowed me to connect to…
Written by
-
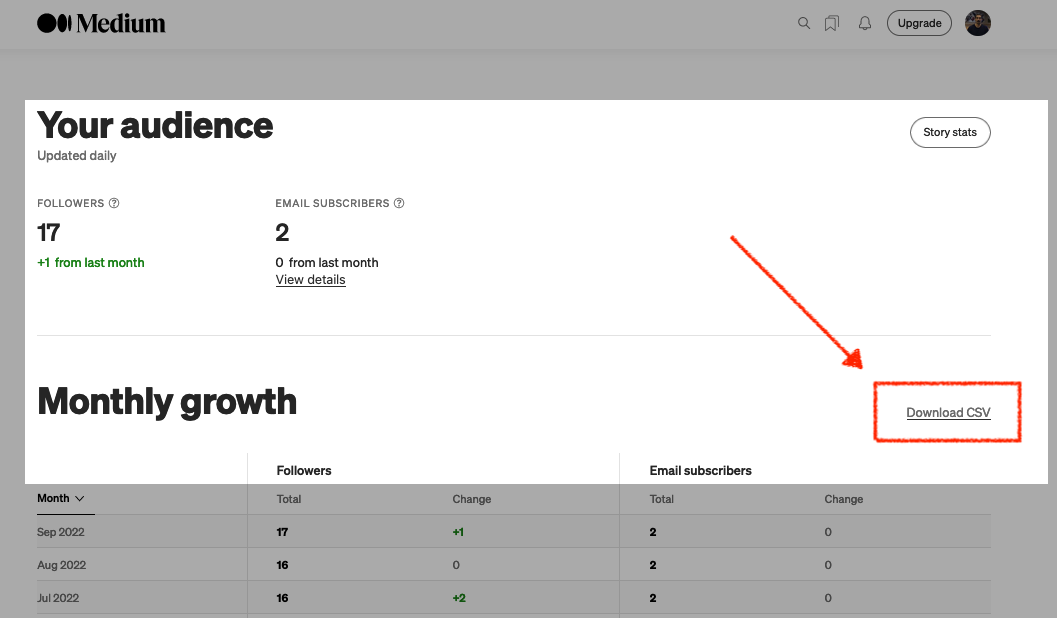
Fun with Python GET requests, Medium stats, and the Oracle Autonomous Database
I feel so silly for posting this because you’ll quickly realize that I will have to leave things unfinished for now. But I was so excited that I got something to work, that I had to share! If you’ve been following along, you know you can always find me here. But I do try my best…
Written by
-
Oracle REST APIs: A LiveLabs review
Recently Jeff and I were invited by the Oracle Developers and Developer Relations teams to do a walkthrough of a LiveLabs workshop, “How to Build Powerful and Secure REST APIs for Your Oracle Autonomous Database.” We spent about 90 minutes moving through selected labs in the workshop. Luckily they recorded it for us; you can…
Written by