Tag: Oracle REST Database Services
-
ORDS as a JotForm webhook: An actual customer use case
Recently, we (one of our Support engineers and I) worked with a customer who had integrated various ORDS POST APIs with a web-based form application called JotForm. JotForm offers integrations for numerous workflows, some official and others you can create independently. That’s where we come in. In this example, a user would enter information into…
Written by
-
ORDS 24.4 Release Highlights
So what even is new in ORDS 24.4? How about an abbreviated list of some fan favorites? Pre-Authenticated endpoints Using the new ORDS_PAR PL/SQL package, users can create, revoke, issue and set tokens and token life for specific resources. Your REST-enabled schema will automatically have access to this new feature in 24.4. You can execute…
Written by
-
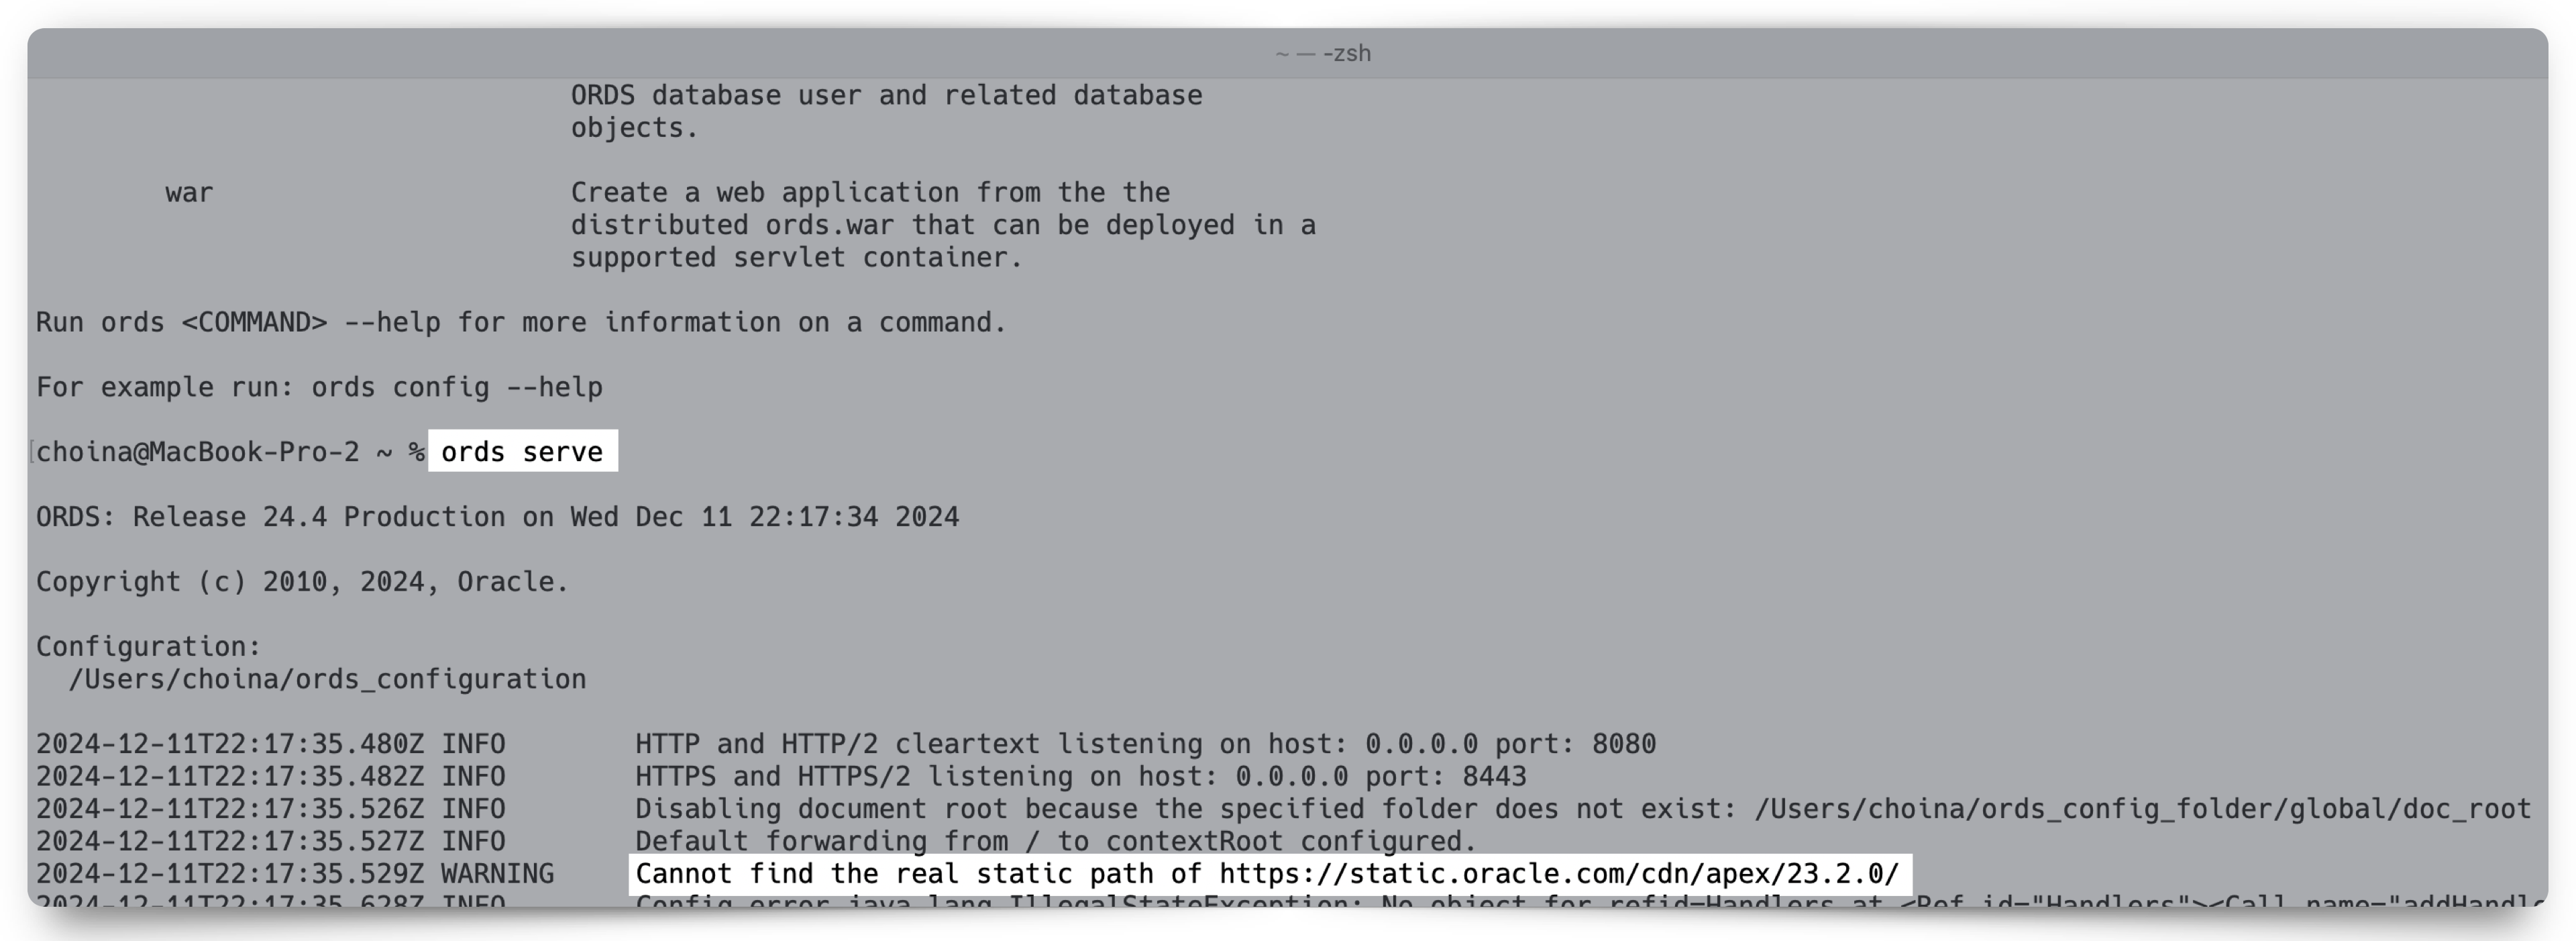
ORDS WARNING Cannot find the real static path of
Problem description You’ve just upgraded ORDS and issued the ords serve command. As ORDS is starting up, you see the following warning (or something like it): How to fix Easy! In this case, I removed the standalone.static.path property of the ORDS Global configuration settings. WAIT JUST A MINUTE! This approach was successful because I determined…
Written by
-
ORDS Standalone: specifying a response header with jetty.xml
NOTE: This article shows how to include a jetty.xml file in your ORDS Standalone deployment, so a user-defined response header is provided with each HTTP response. I’m also requesting that all or some of what you see below make it into our docs. The following article picks up from where this one left off. NOTE:…
Written by
-
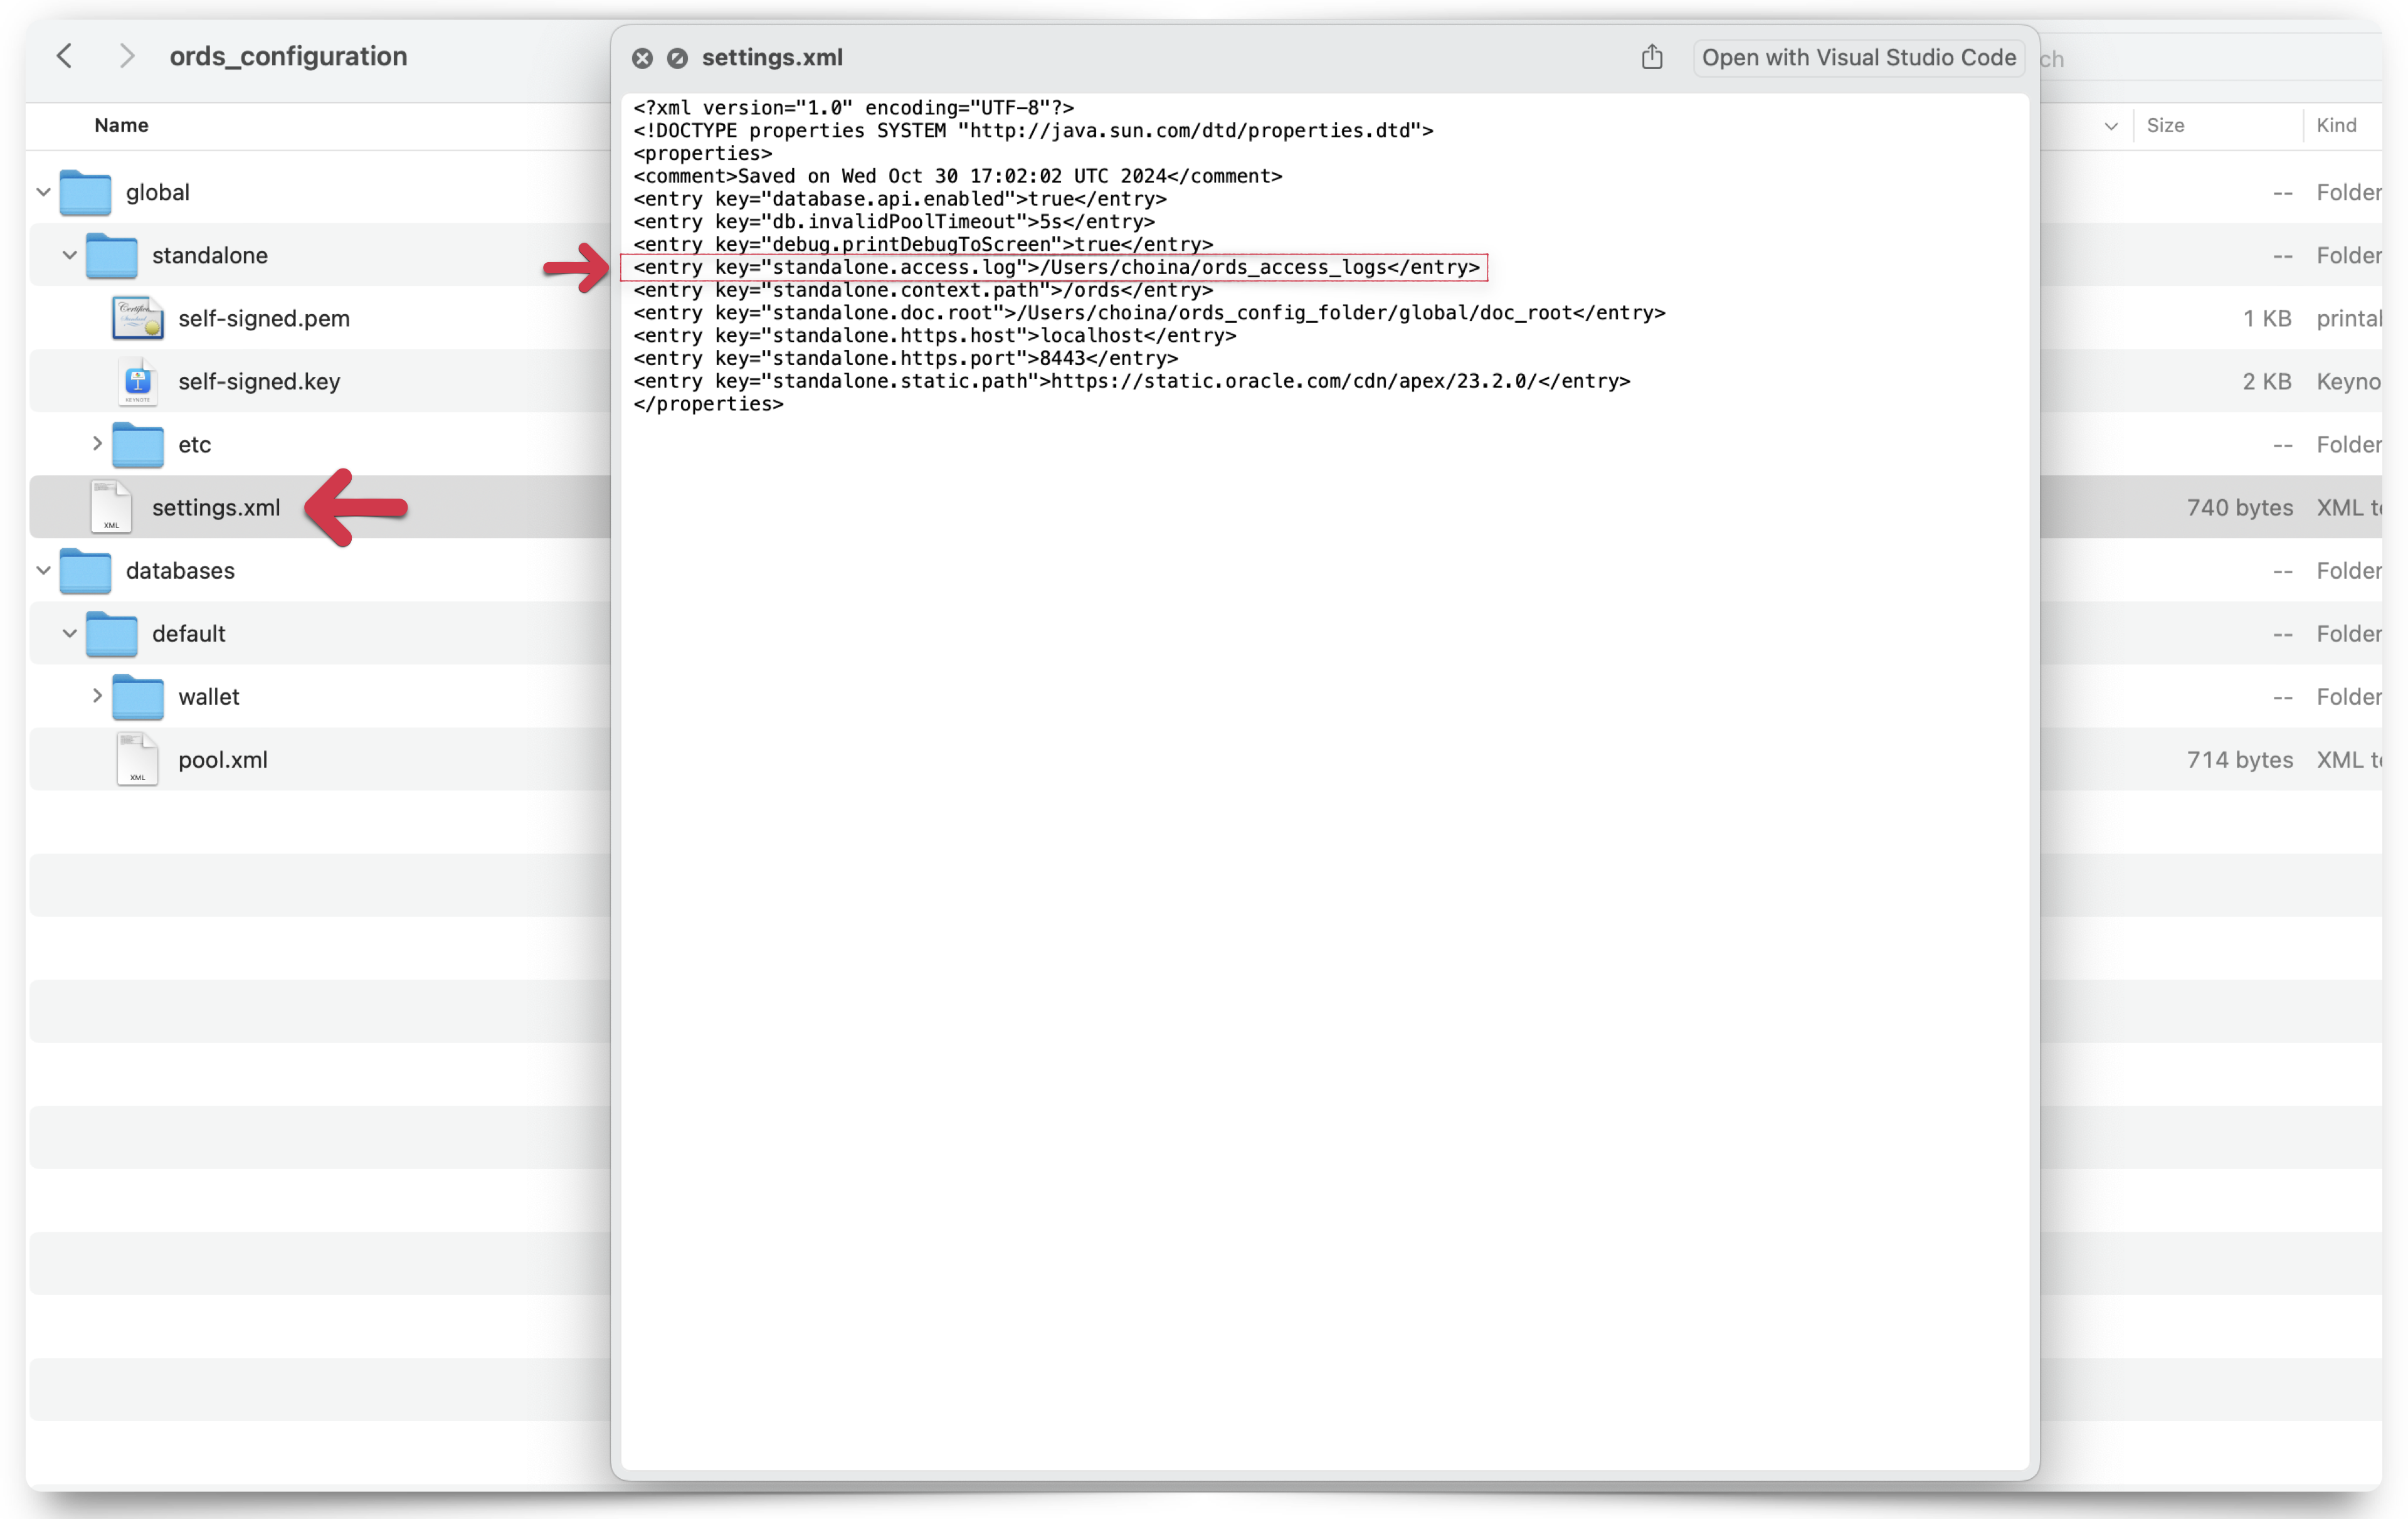
ORDS Standalone access logs: Jetty and customizing with XML
Did you know that you can very quickly and easily enable access logging when you are running ORDS in standalone mode (i.e., when using the embedded Jetty server)? FYI: This article is an excerpt from a living document I’ve been working on dedicated to ORDS installation, configuration, and usage (from the development/developer’s perspective). And in…
Written by
-
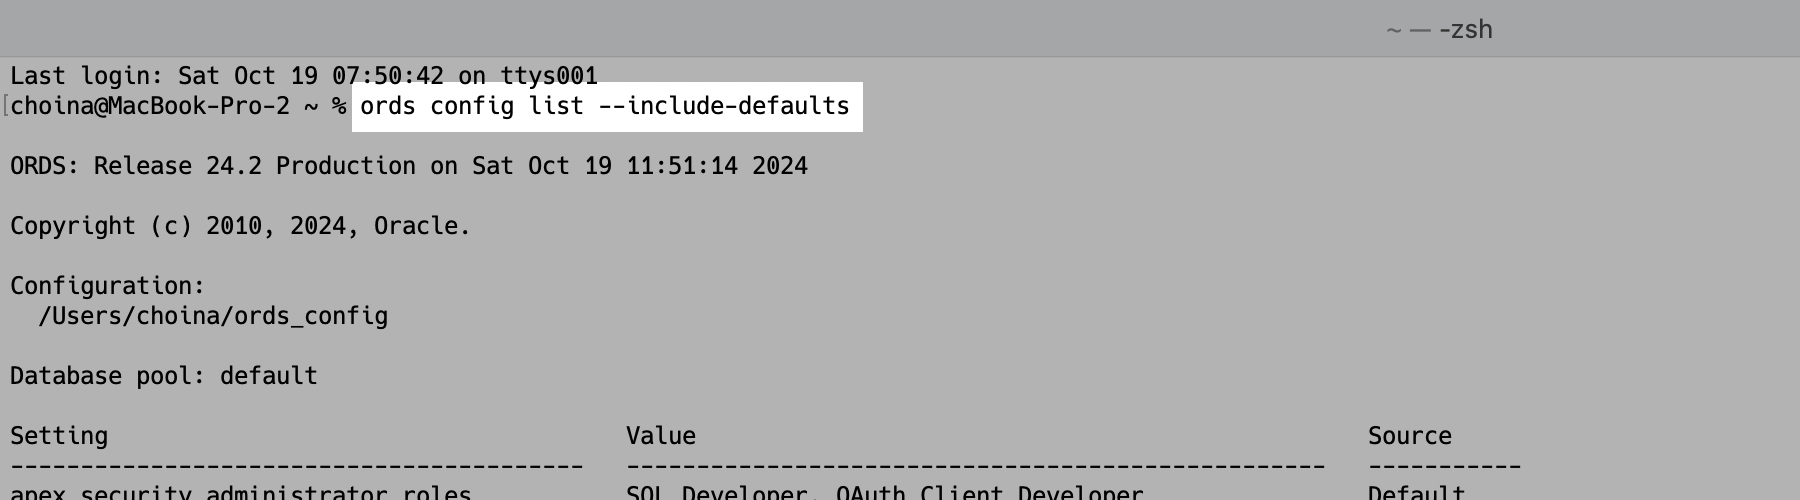
ORDS Configuration options: about HTTP error responses
Reading docs can be hard We send you poor folks to our documentation, and sometimes, it’s a section we haven’t reviewed in quite some time! I don’t think this is specific to any one organization. But over the years, details get lost, forgotten, or stored in an obscure guide section, only to be reviewed once…
Written by
-
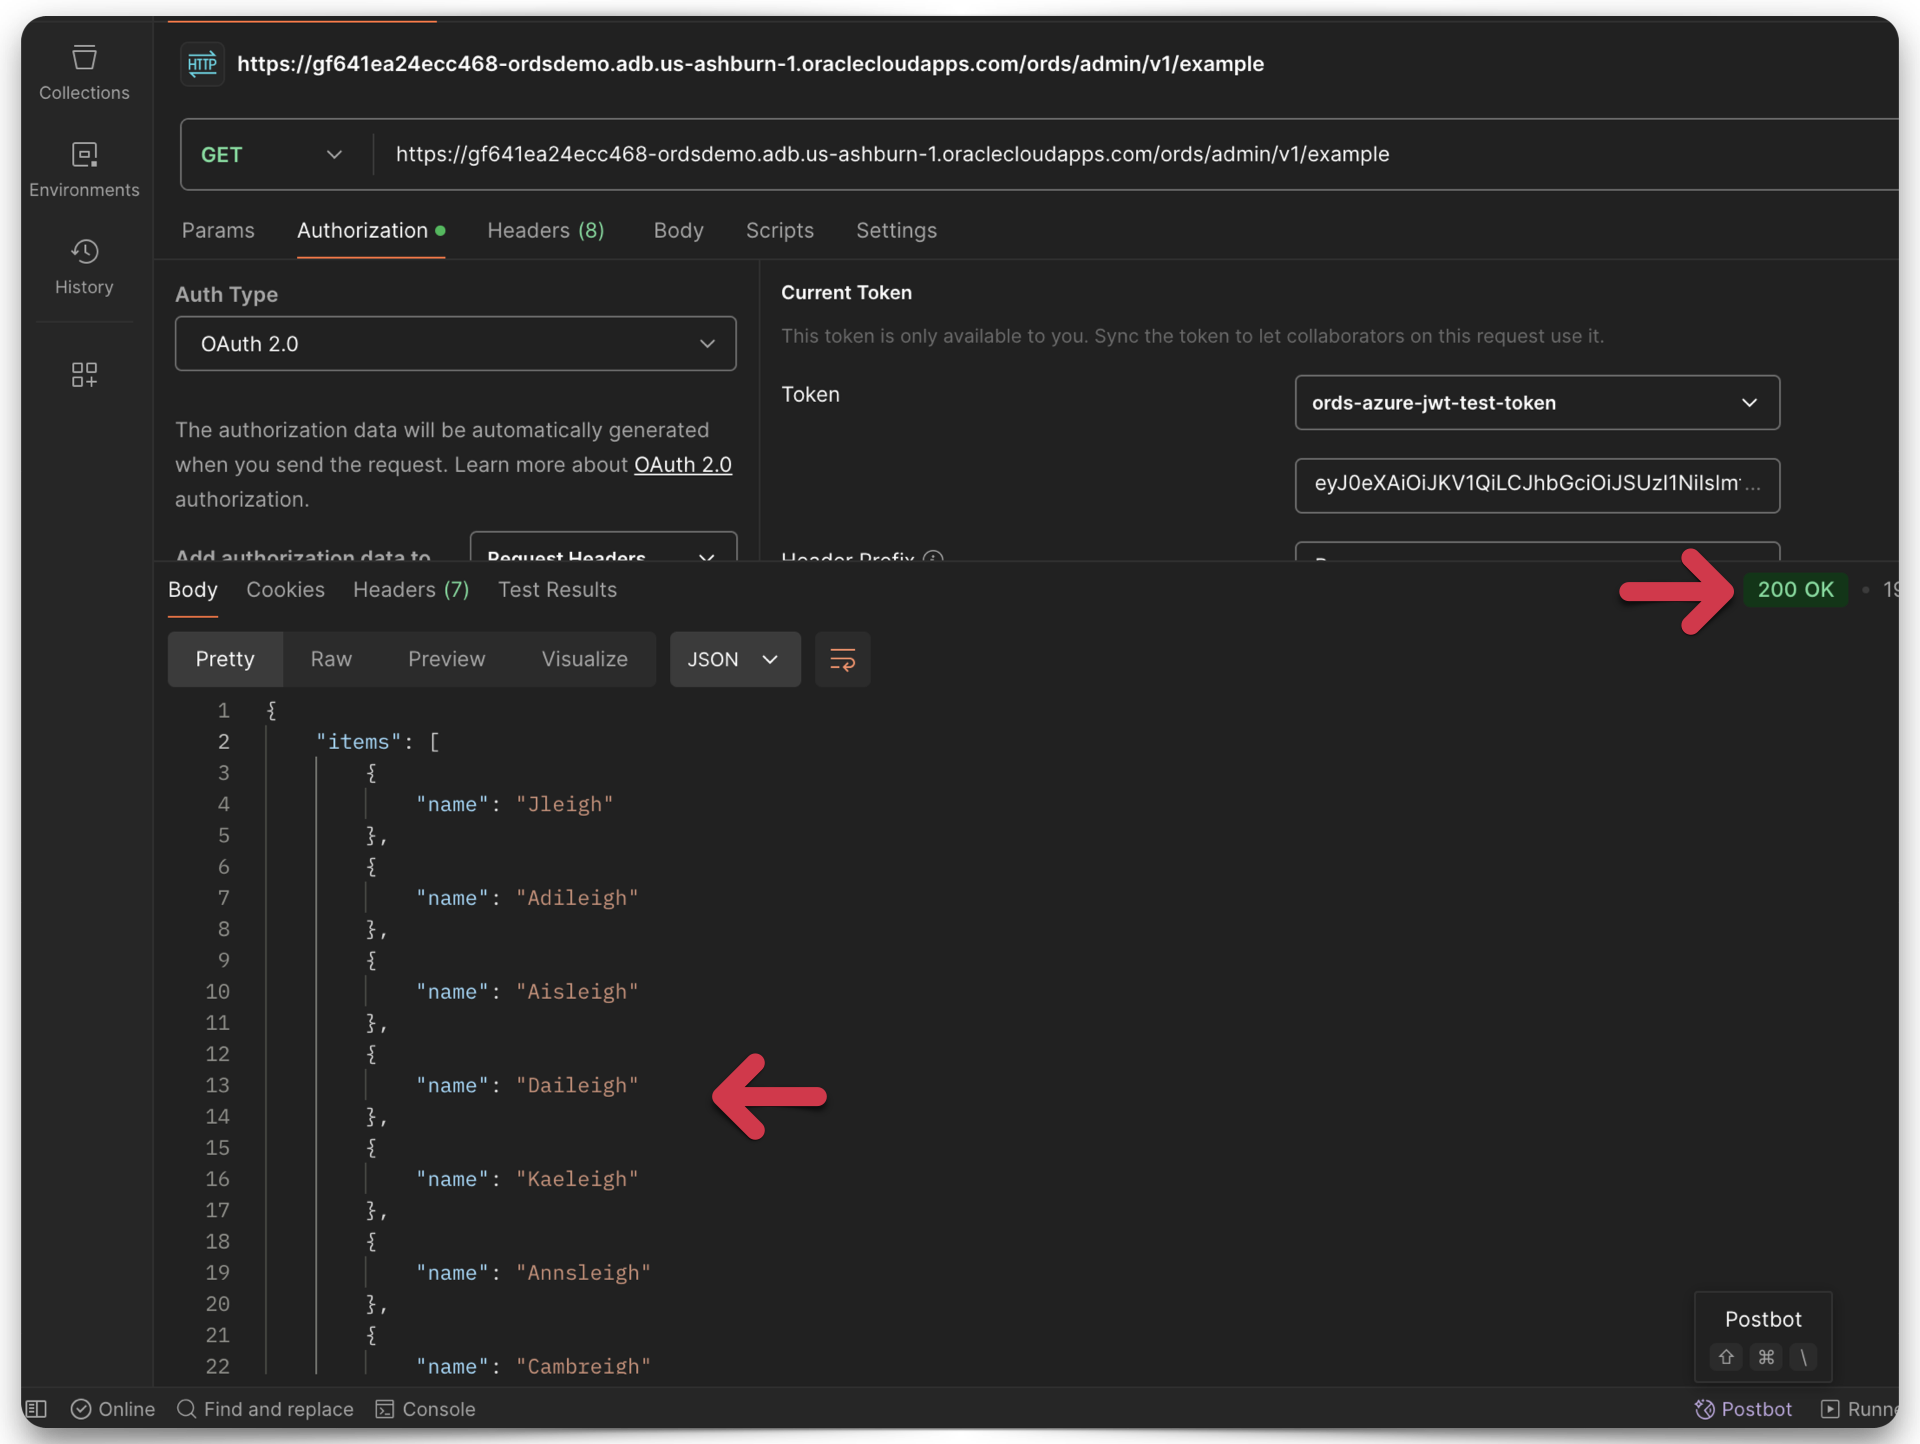
Microsoft Entra OAuth2.0 JWTs and ORDS secure APIs Tutorial: Configuration and Testing
Since ORDS first introduced support for authenticating with JWTs, there have been many questions surrounding configuration and testing. In this example, I cover, from start to finish: If this sounds like what you are looking for, then read on. There’s a lot to cover here, so there’s no faffing about on this one. Let’s go!…
Written by
-
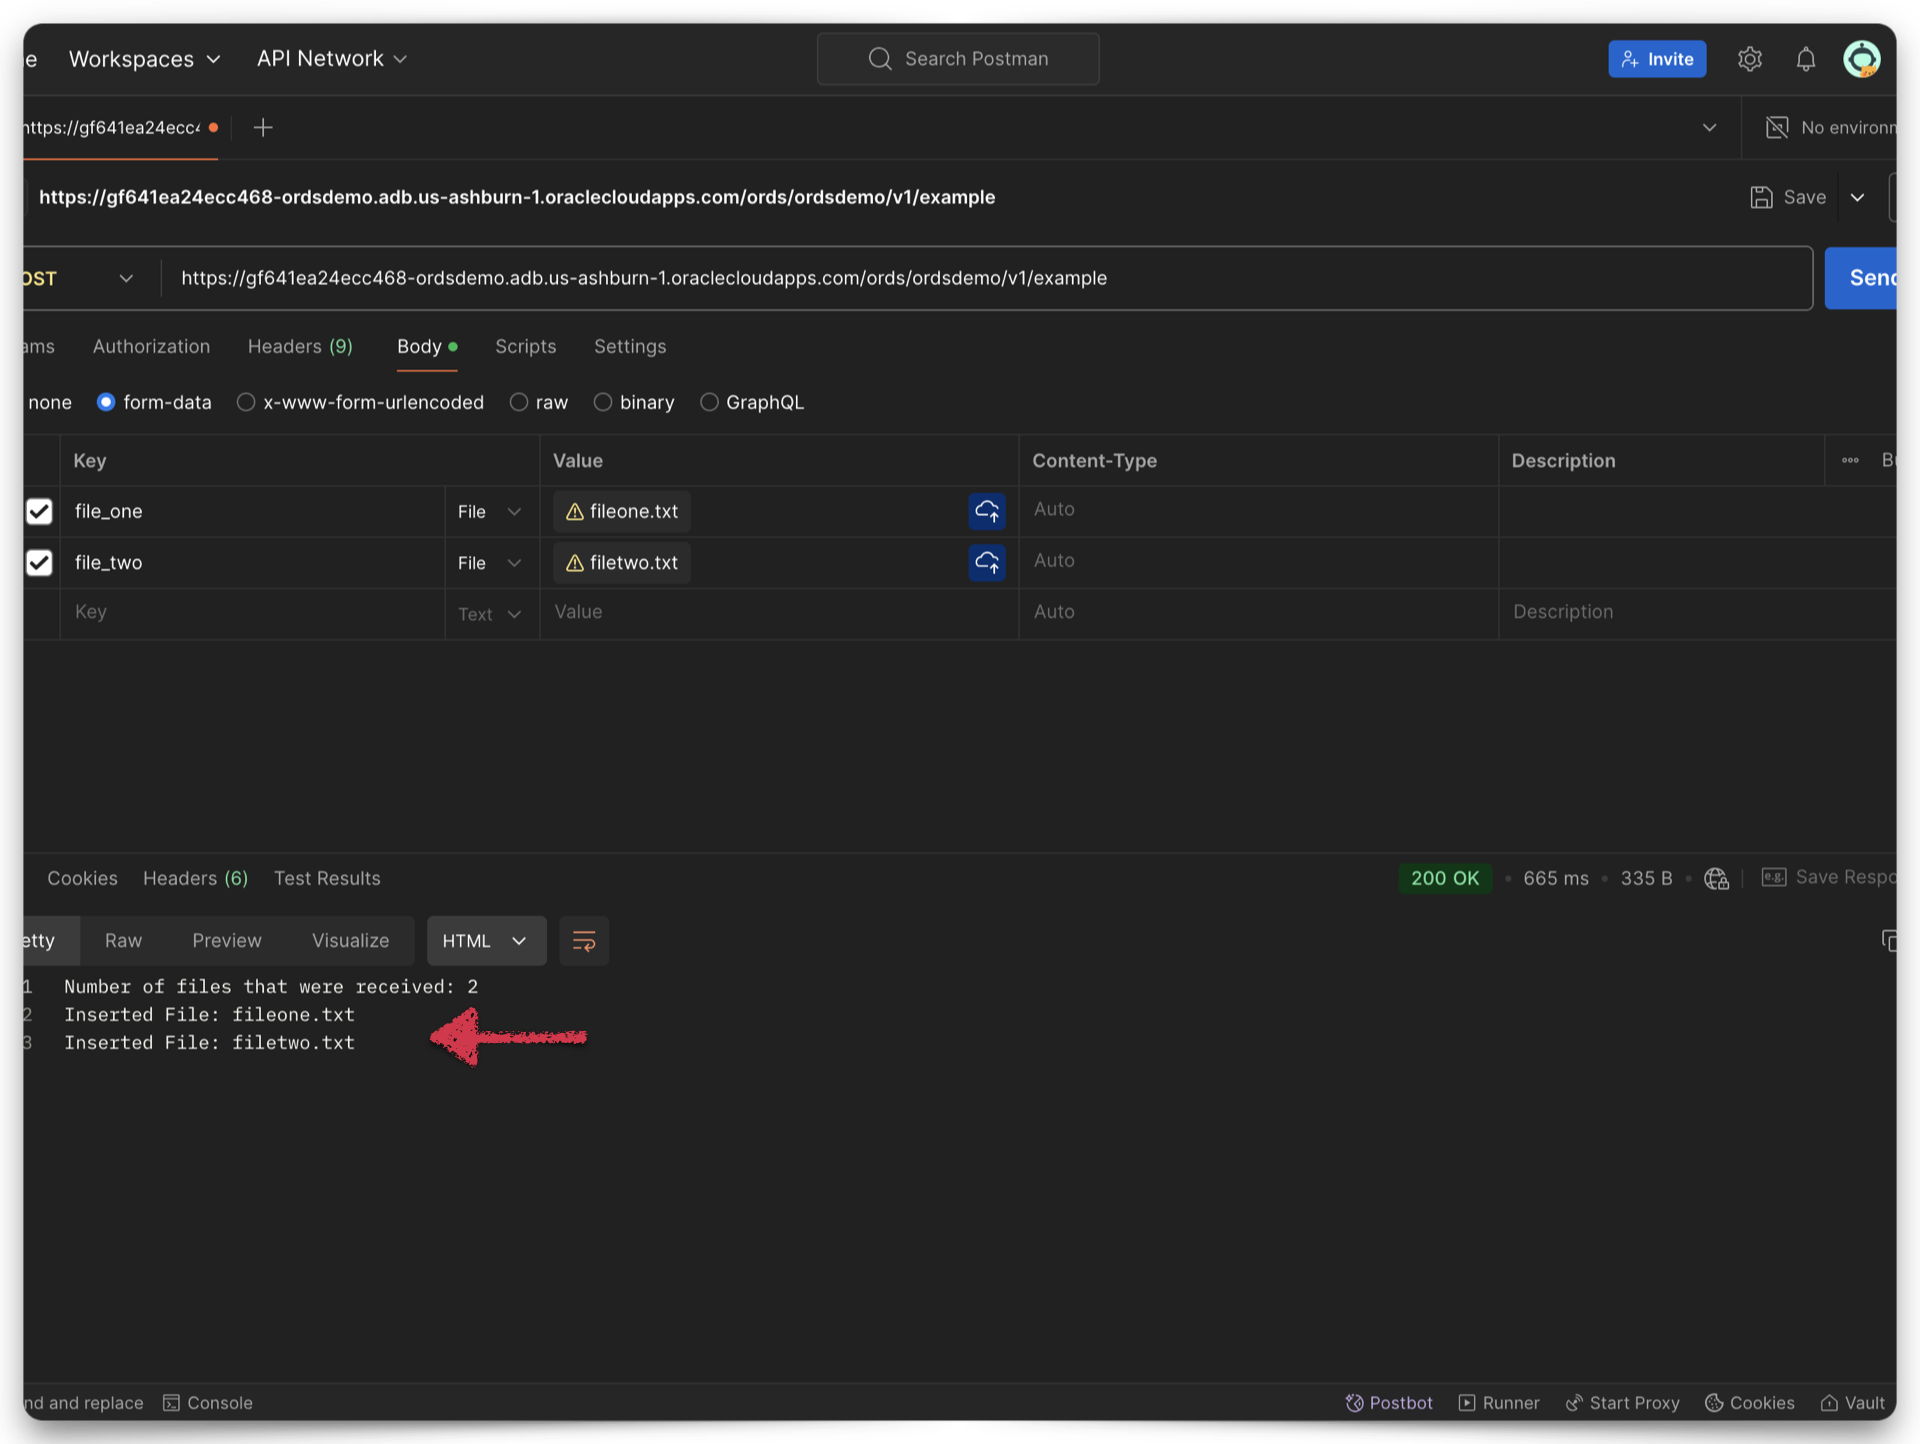
New ORDS feature: handling multiple files from a multipart/form-data POST request
A new feature An ORDS user (or application) can now upload multiple files as part of a multipart/form-data POST request under various conditions. How can this be achieved with an ORDS endpoint? NOTE: Before you continue, it might be helpful to refresh your memory on, or learn more about multipart/form-data as a Content-Type. Details here.…
Written by
-
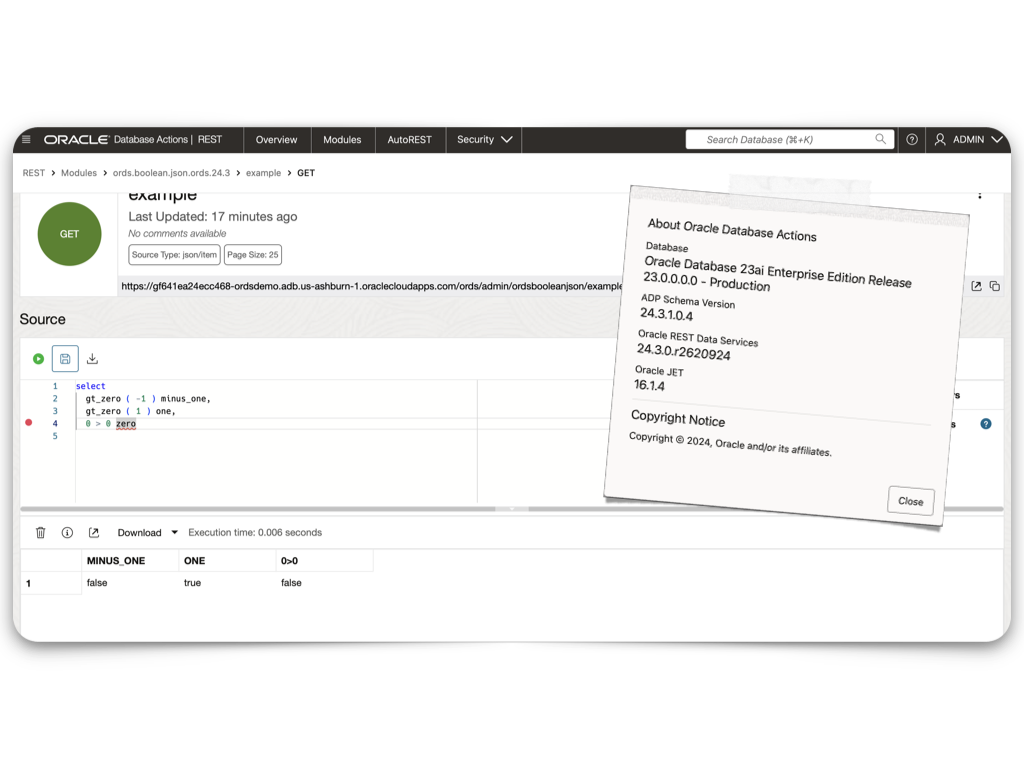
ORDS 24.3 Release Highlights
Overview There’s plenty to talk about in this release. However, I’m most excited about the performance improvements, ORDS sample applications, and documentation changes. Read on to get the whole story. Enhancements API Performance REST API responses from either AutoREST or customer based modules could see as much as a 30% improvement in response times. About…
Written by
-
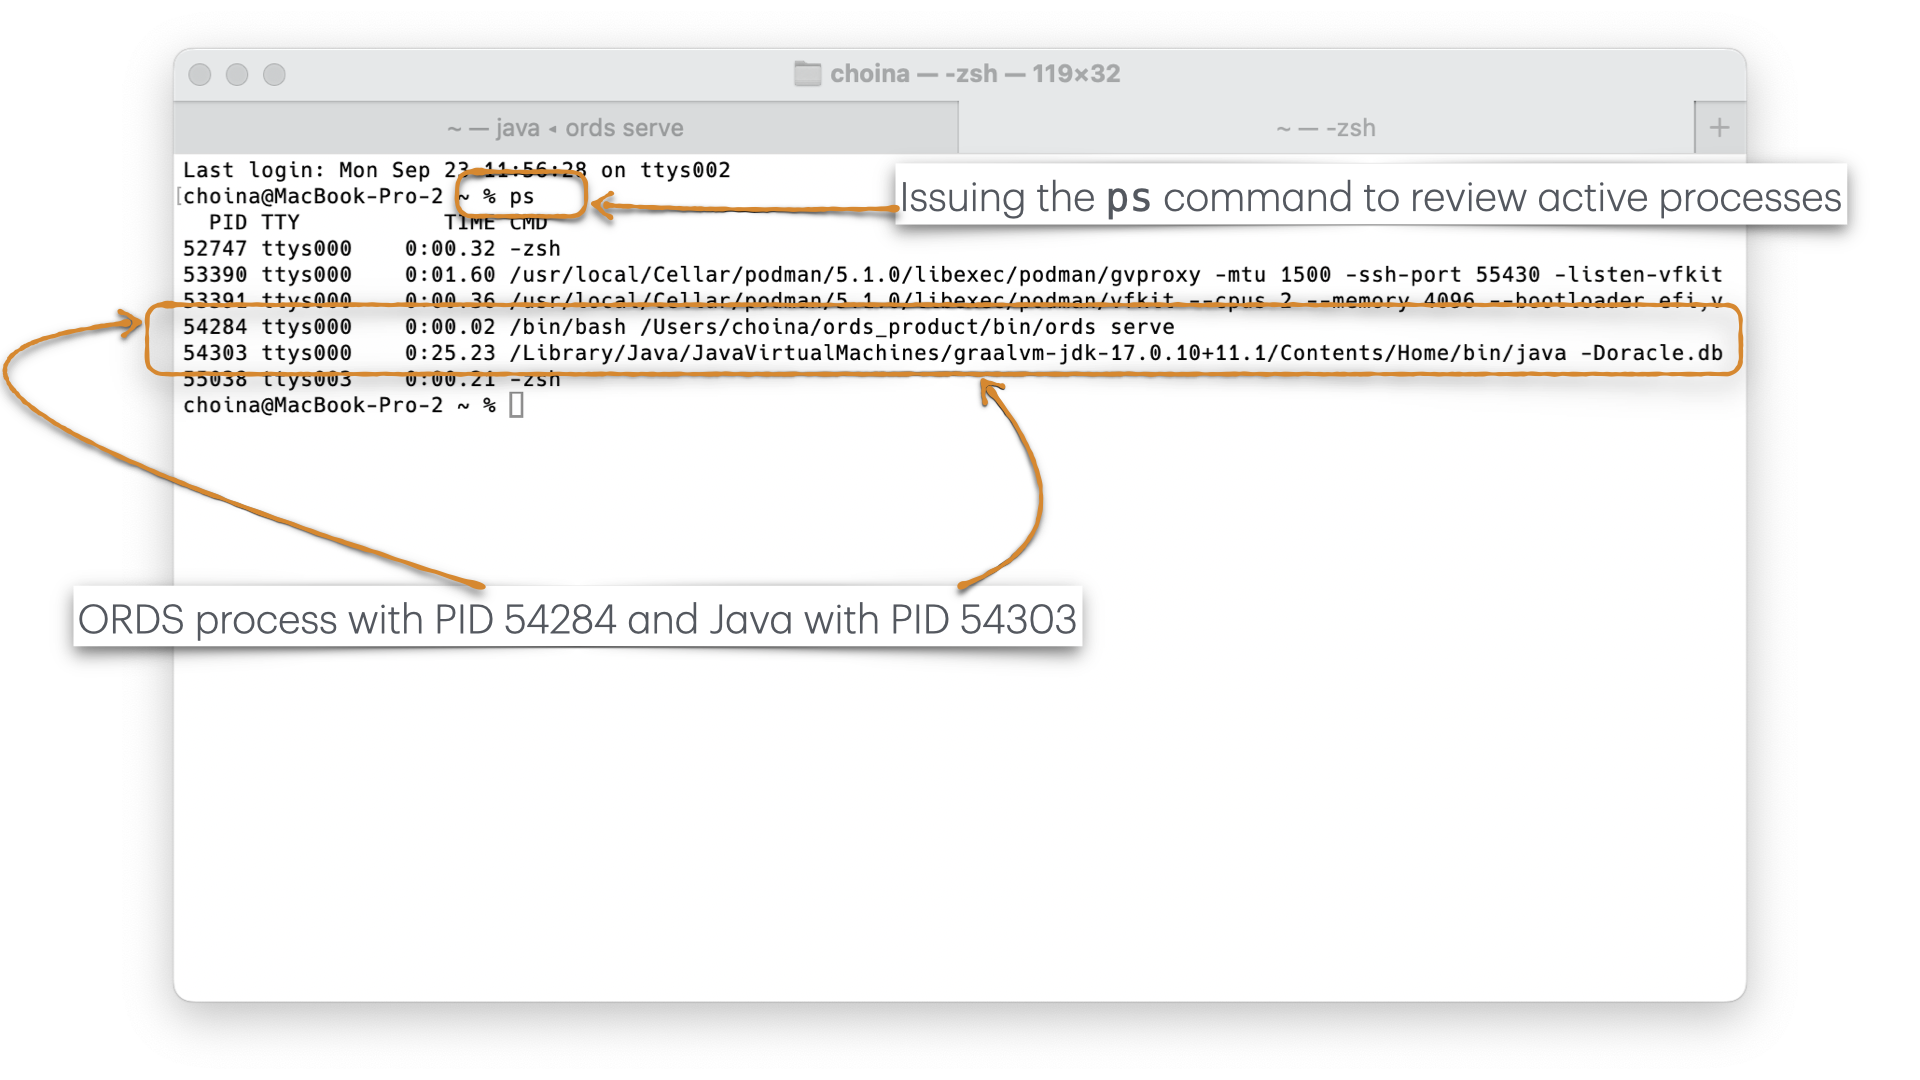
How to kill an ORDS process
How do I “kill” an ORDS process? FYI: This was all done on a MacBook, so…this may differ on a PC or Linux machine. Apologies m’Lord… Here are the options I’ve found to “kill” an ORDS process: It looks like we’ve included in our docs how to start ORDS (with the ords serve command), but…
Written by