Category: Uncategorized
-
Example: an ORDS API that returns a user-configured JSON object
This actually came about from a Support Request. We were troubleshooting a JWT issue, that had ORDS in the mix. Ultimately, this is looking more and more like a networking issue (maybe something to do with routing rules between the load balancer and the backend server). But in the course of our troubleshooting, we wanted…
Written by
-
ORDS Standalone: specifying a response header with jetty.xml
NOTE: This article shows how to include a jetty.xml file in your ORDS Standalone deployment, so a user-defined response header is provided with each HTTP response. I’m also requesting that all or some of what you see below make it into our docs. The following article picks up from where this one left off. NOTE:…
Written by
-
See you at Oracle Cloud World 2024
Are you going? If so, great! I’ve taken the liberty of hand-picking and listing the sessions where our team will be: The sessions I’m most excited about are the two ORDS-based sample applications. We have one that our development team created (that’s the React one) and another Python one that was mostly (with a lot…
Written by

-
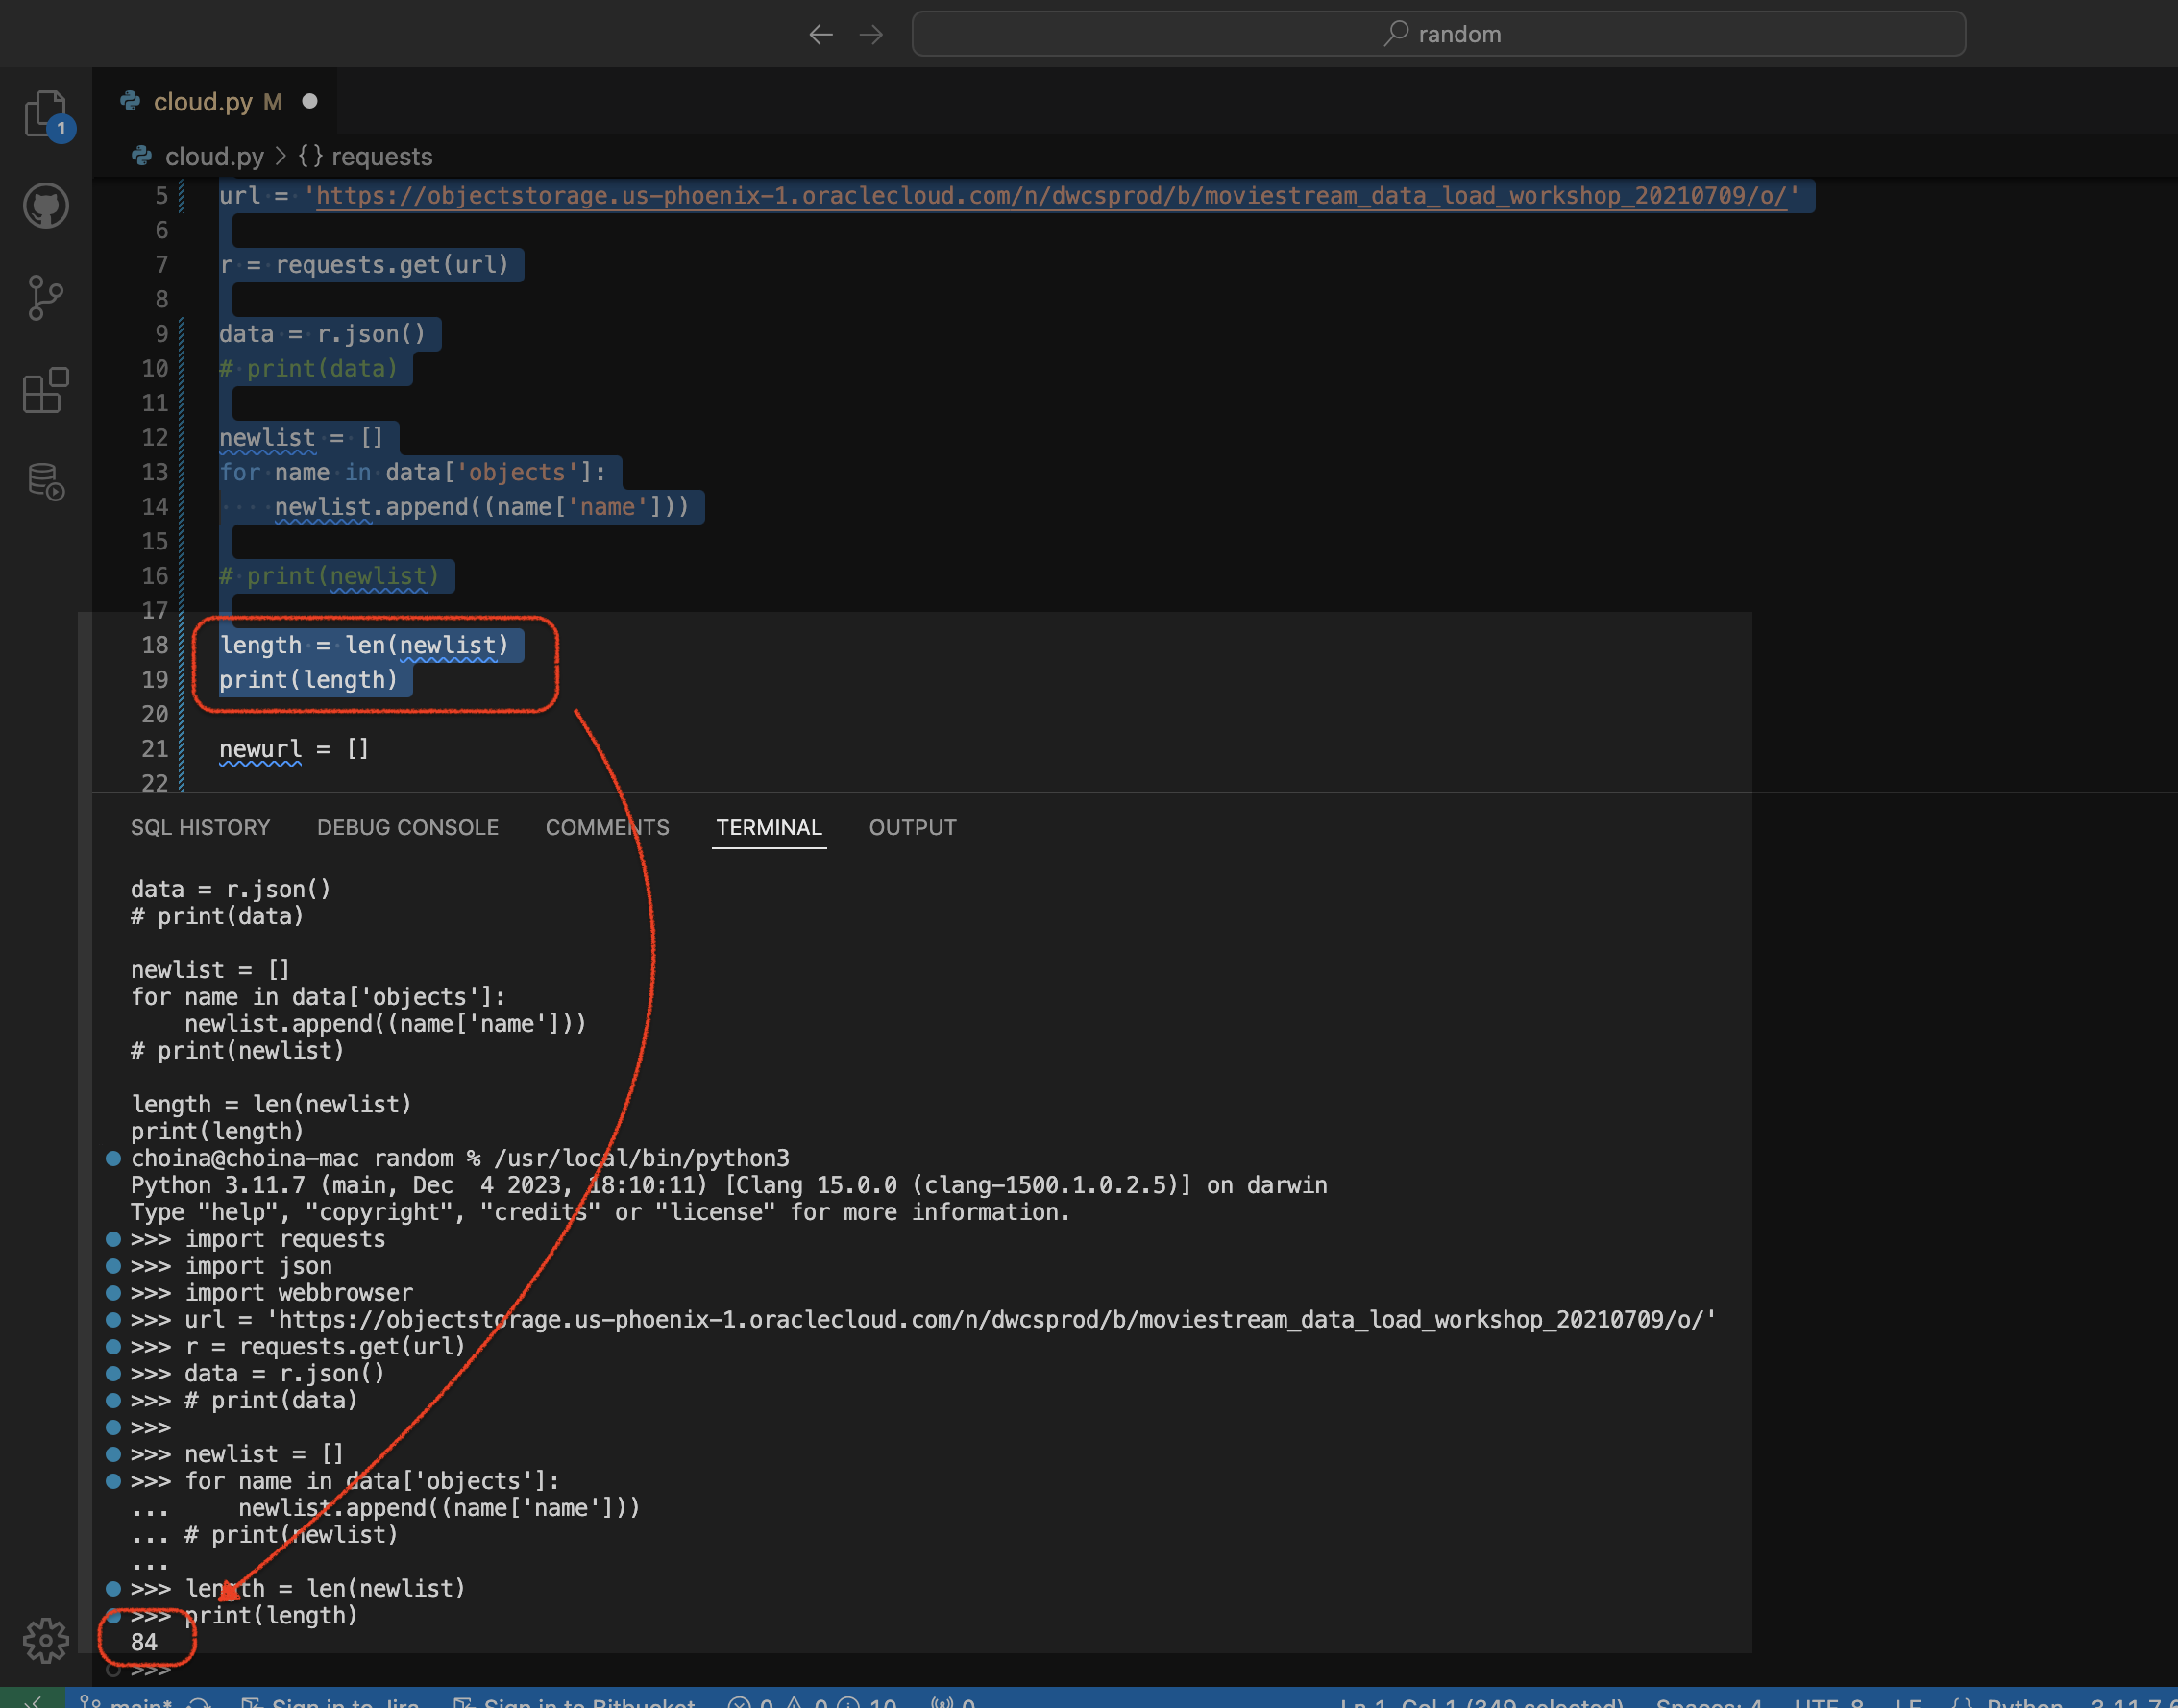
Python script to retrieve objects from Oracle Cloud Bucket
For…reasons, I needed a way to retrieve all the .CSV files in a regional bucket in Oracle Cloud Object Storage, located at this address: https://objectstorage.us-phoenix-1.oraclecloud.com/n/dwcsprod/b/moviestream_data_load_workshop_20210709/o You can visit it; we use it for one of our LiveLabs (this one), so I’m sure it will stay live for a while 😘. Once there, you’ll see all…
Written by