Category: PL/SQL
-
Example: an ORDS API that returns a user-configured JSON object
This actually came about from a Support Request. We were troubleshooting a JWT issue, that had ORDS in the mix. Ultimately, this is looking more and more like a networking issue (maybe something to do with routing rules between the load balancer and the backend server). But in the course of our troubleshooting, we wanted…
Written by
-
ORDS as a JotForm webhook: An actual customer use case
Recently, we (one of our Support engineers and I) worked with a customer who had integrated various ORDS POST APIs with a web-based form application called JotForm. JotForm offers integrations for numerous workflows, some official and others you can create independently. That’s where we come in. In this example, a user would enter information into…
Written by
-
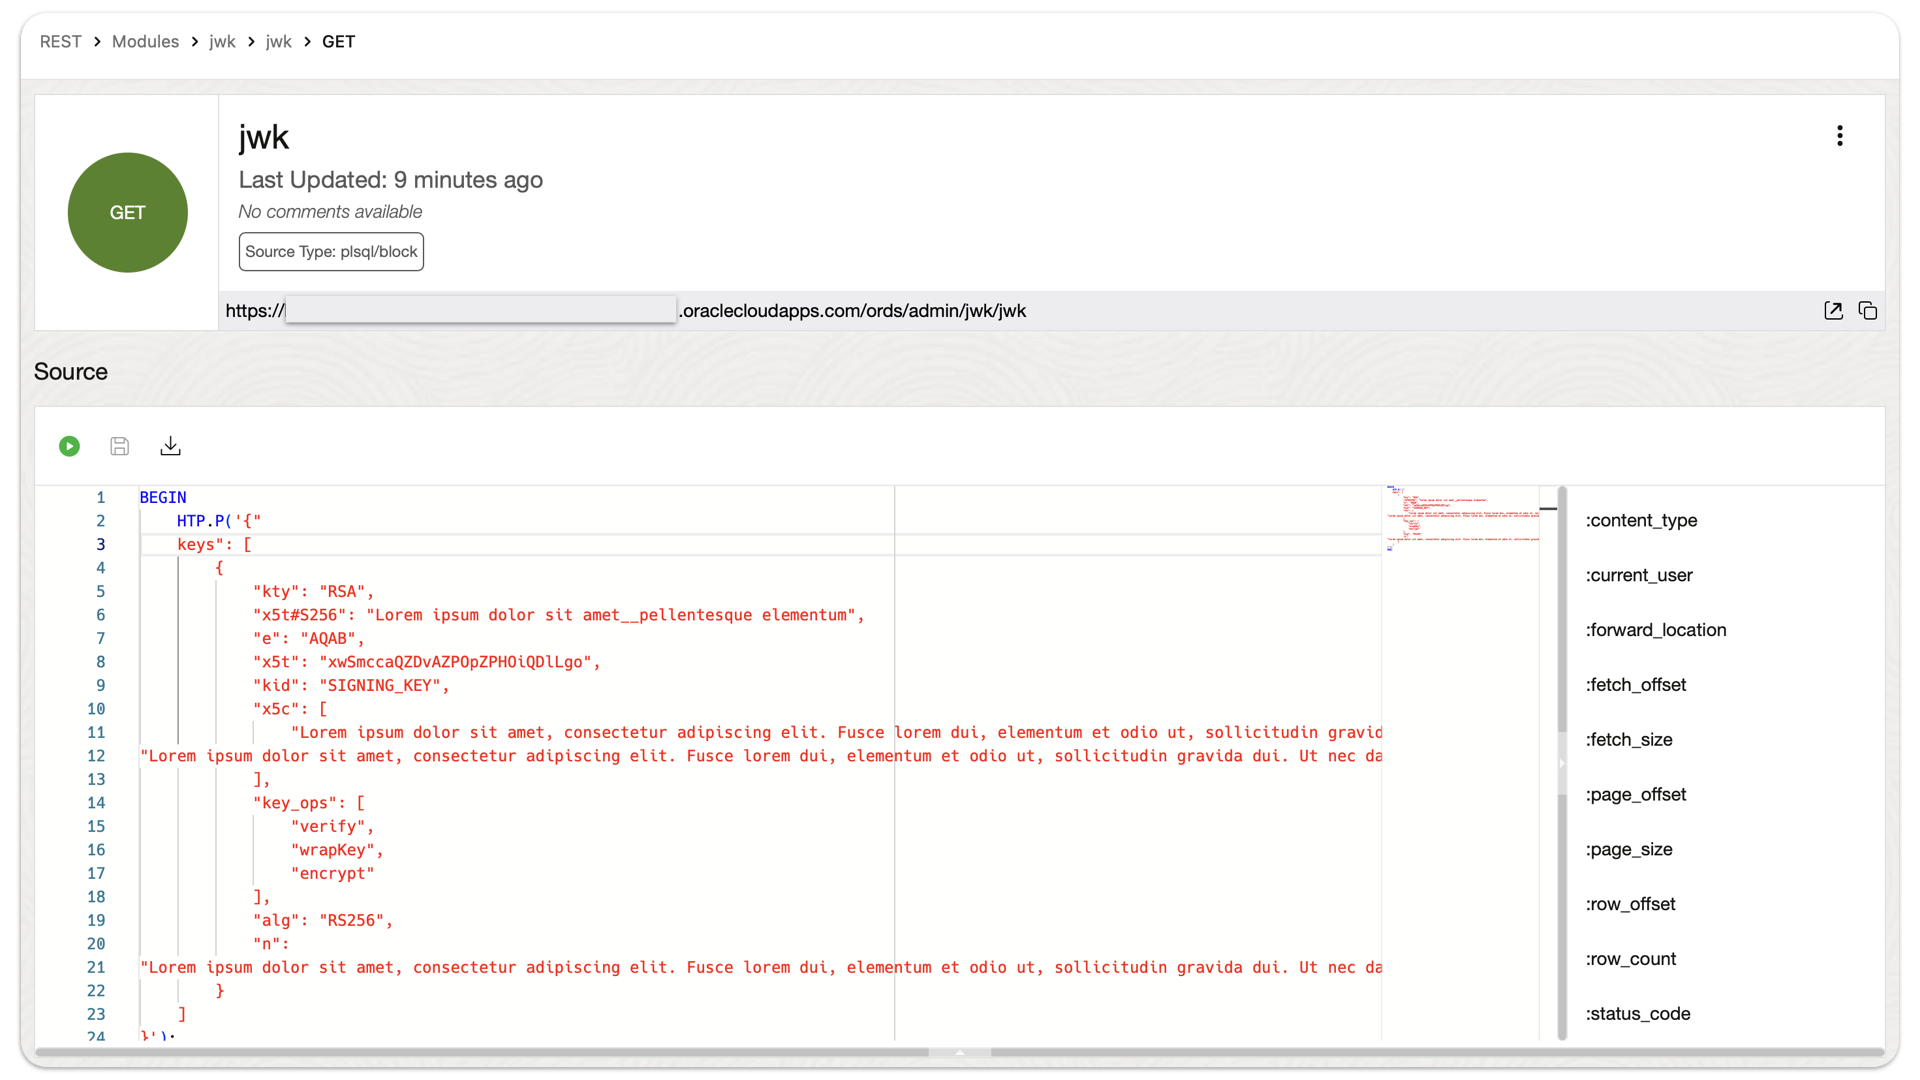
An ORDS GET request to retrieve CGI Environment variables from the PRINT_CGI_ENV PL/SQL procedure
ALERT: This is going to seem extremely out of context! But this post actually loosely relates to the ORDS Pre-hook functions section of our docs. I’m in the process of (1) working on a presentation and (2) updating this section of the docs as well (productivity trifecta for the win!), hence why we are here.…
Written by
-
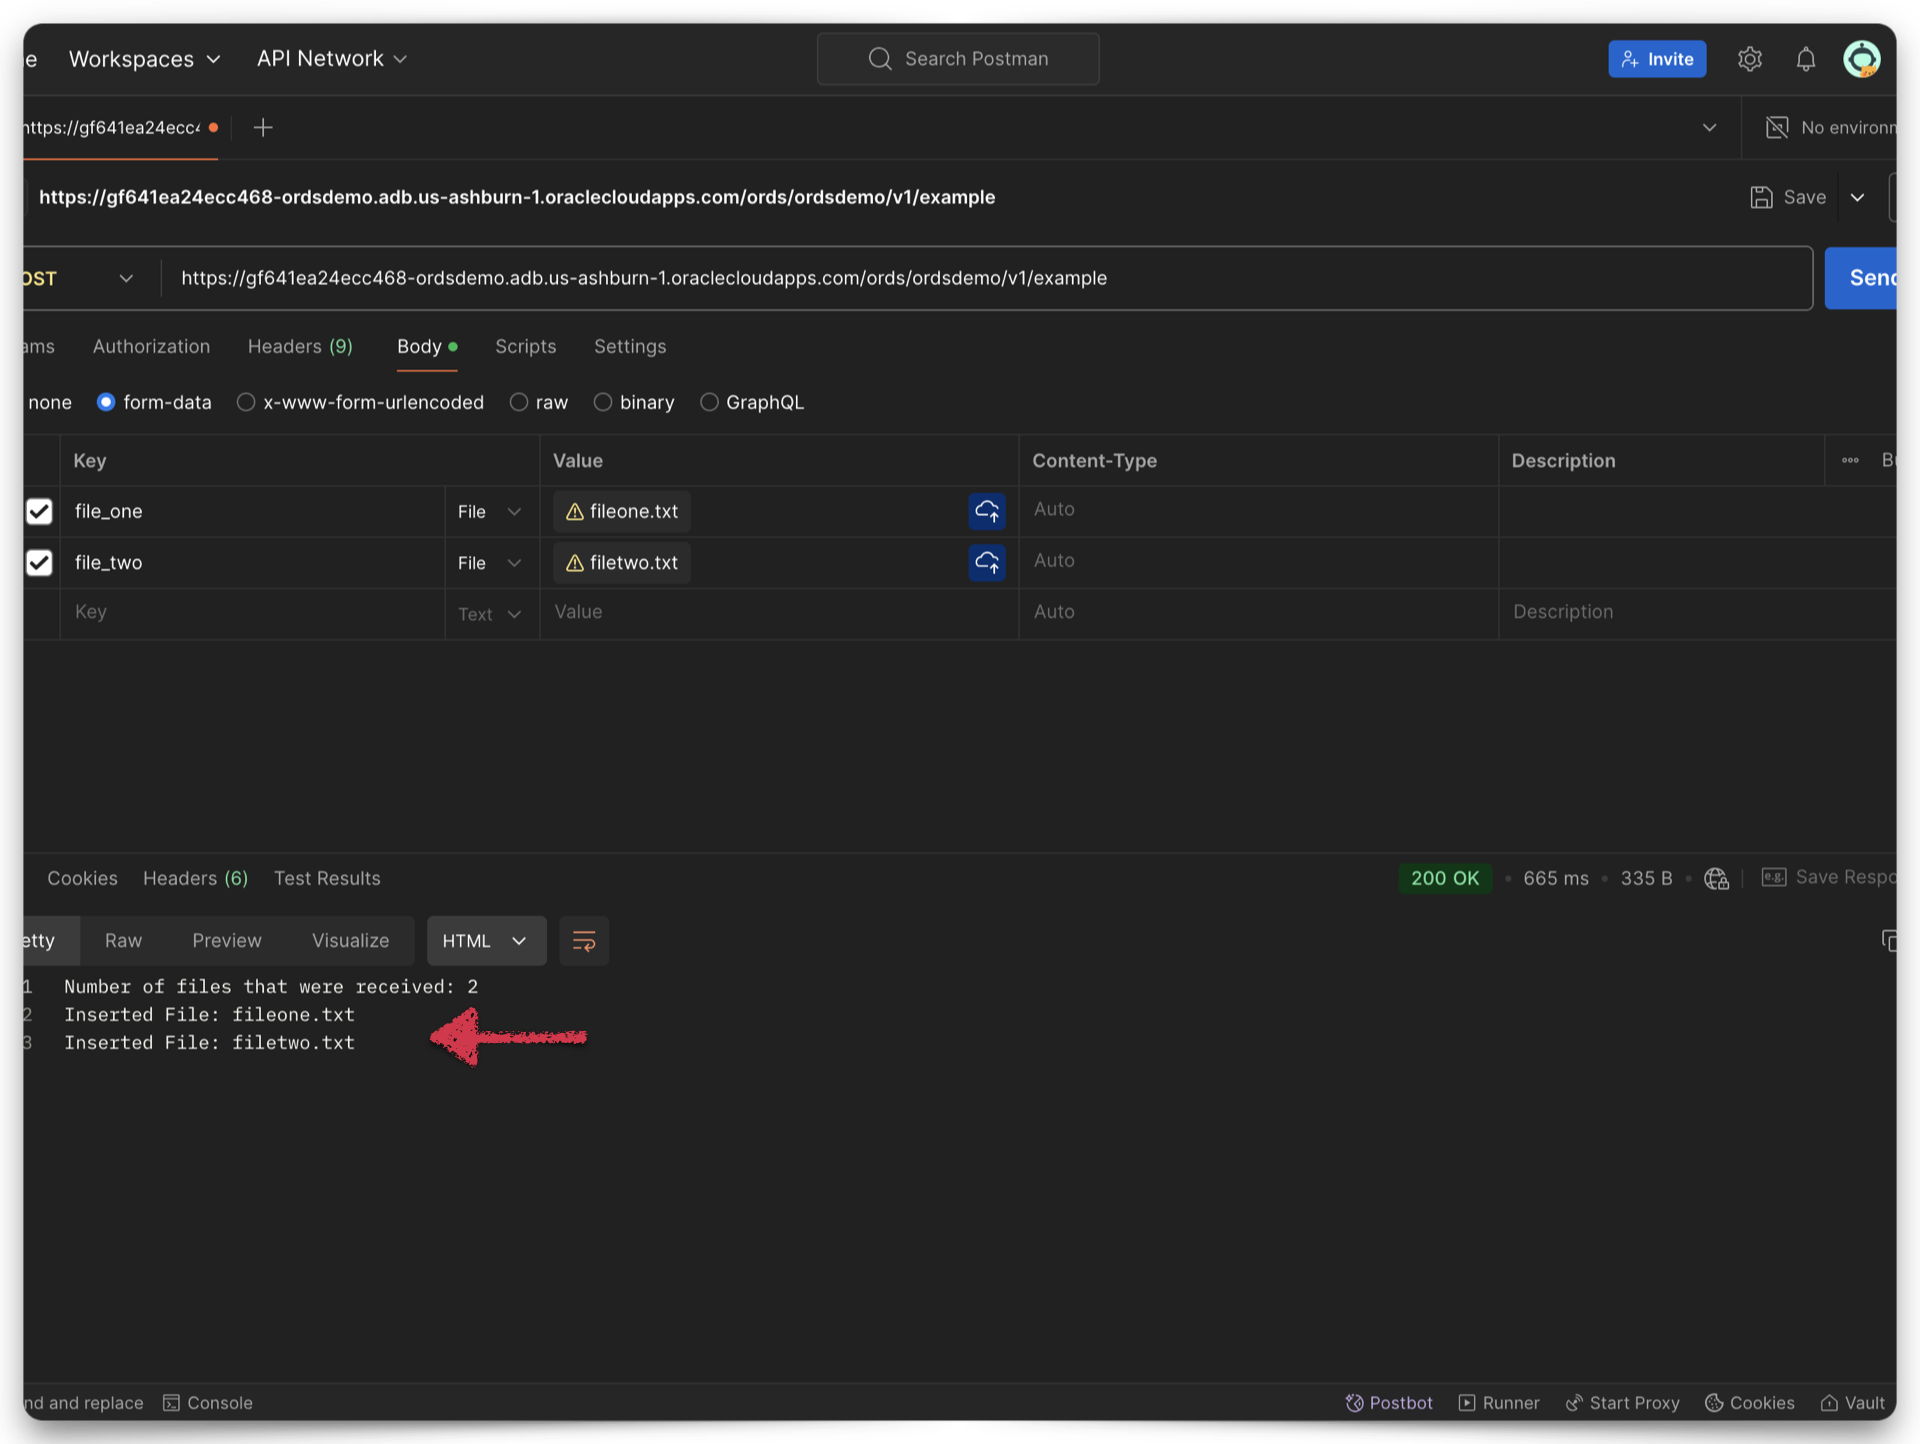
New ORDS feature: handling multiple files from a multipart/form-data POST request
A new feature An ORDS user (or application) can now upload multiple files as part of a multipart/form-data POST request under various conditions. How can this be achieved with an ORDS endpoint? NOTE: Before you continue, it might be helpful to refresh your memory on, or learn more about multipart/form-data as a Content-Type. Details here.…
Written by
-
Random Access Memories: ORDS and JWTs
EXTRA EXTRA! ORDS now supports JSON Web Tokens (JWTs). You can find most of the details in the OAuth PL/SQL Package Reference chapter of the ORDS Developer’s Guide. ORDS JWT OAUTH parameters You’ll notice two new procedures in that package: OAUTH.CREATE_JWT_PROFILE and OAUTH.DELETE_JWT_PROFILE. After getting acquainted with them, I wanted to highlight three parameters of…
Written by

-
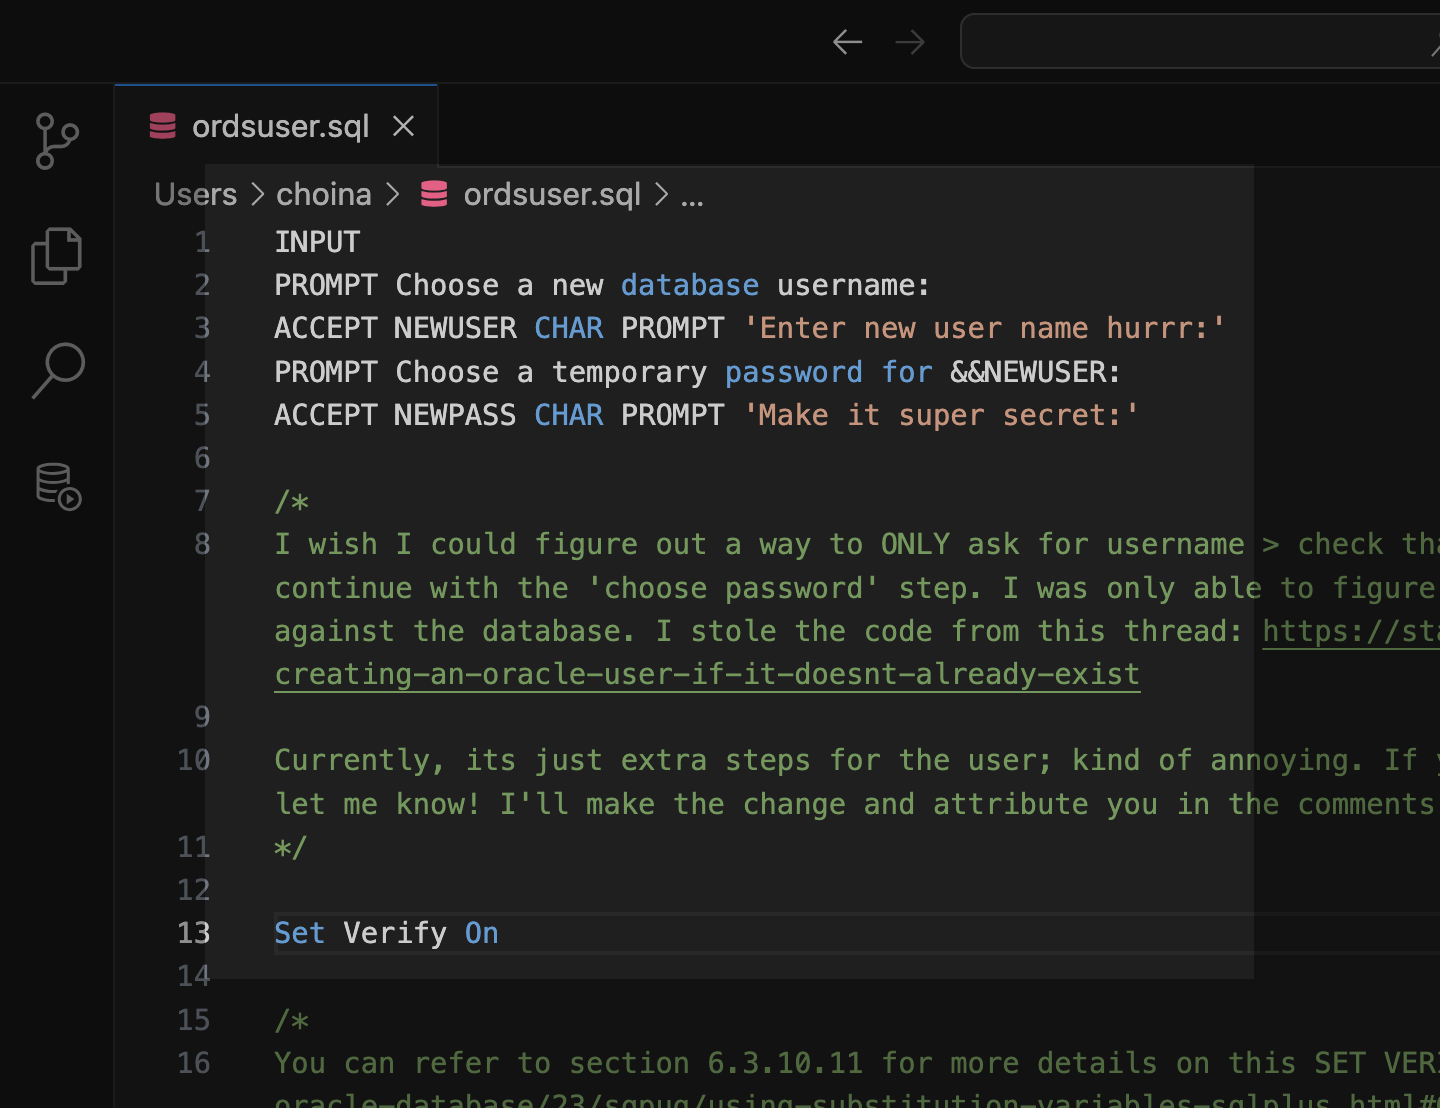
Tinkering: a SQL script for the ORDS_ADMIN.ENABLE_SCHEMA procedure
Post-ORDS installation Once you’ve installed ORDS, you need to REST-enable your schema before taking advantage of ORDS (I used to forget this step, but now it’s like second nature). RESOURCES: I’ve discussed ORDS installation here and here. I’d check both pages if you’re unfamiliar with it or want a refresher. ORDS.ENABLE_SCHEMA / ADMIN_ORDS.ENABLE_SCHEMA While logged into your…
Written by