Category: Automation
-
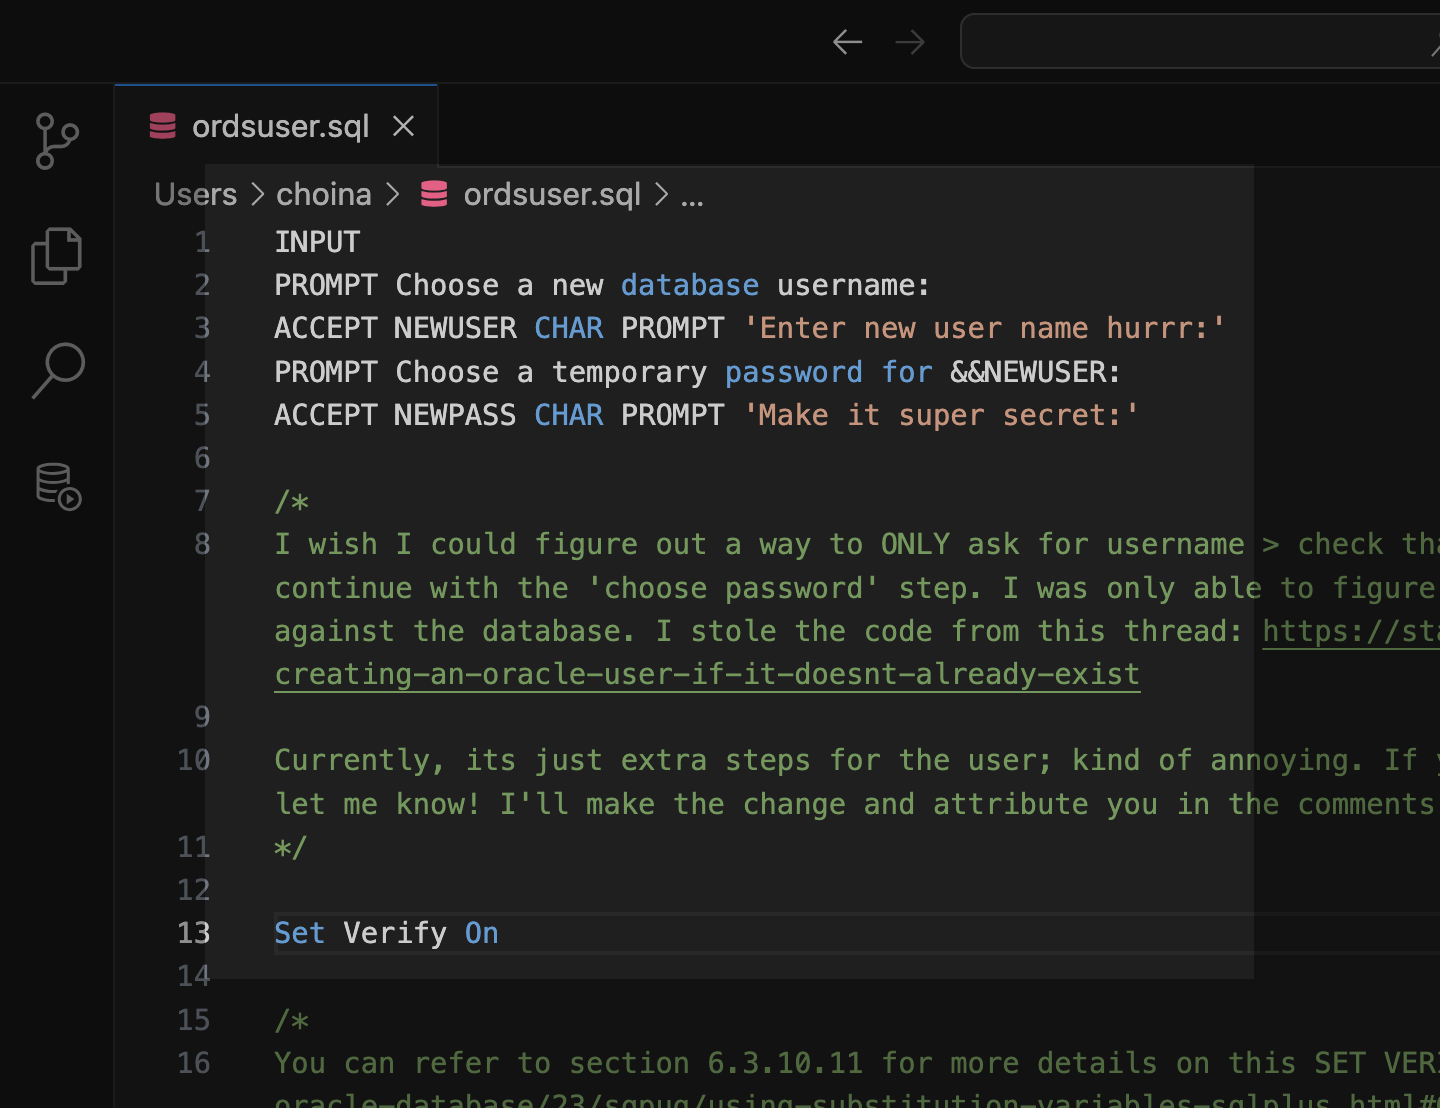
Tinkering: a SQL script for the ORDS_ADMIN.ENABLE_SCHEMA procedure
Post-ORDS installation Once you’ve installed ORDS, you need to REST-enable your schema before taking advantage of ORDS (I used to forget this step, but now it’s like second nature). RESOURCES: I’ve discussed ORDS installation here and here. I’d check both pages if you’re unfamiliar with it or want a refresher. ORDS.ENABLE_SCHEMA / ADMIN_ORDS.ENABLE_SCHEMA While logged into your…
Written by
-
ORDS, SQLcl, APEX via YUM and DNF
TL;DR BREAKING NEWS!! APEX packages with ORDS and SQLcl now available in Oracle Linux YUM servers and through ULN The deets Here is what you need to know. We are releasing three new APEX (a.k.a. “The Artist formerly known as Oracle Application Express”) packages for the following repositories: NoARCH RPMs One more update! These RPMs…
Written by
-
Oracle Database REST APIs and Apple Automator Folder Actions
The plan was to create an ORACLE REST endpoint and then POST a CSV file to that auto-REST enabled table (you can see how I did that here, in section two of my most recent article). But, instead of doing this manually, I wanted to automate this POST request using Apple’s Automator application… Me…two paragraphs…
Written by
