Category: JavaScript
-
Random Access Memories: ORDS and JWTs
EXTRA EXTRA! ORDS now supports JSON Web Tokens (JWTs). You can find most of the details in the OAuth PL/SQL Package Reference chapter of the ORDS Developer’s Guide. ORDS JWT OAUTH parameters You’ll notice two new procedures in that package: OAUTH.CREATE_JWT_PROFILE and OAUTH.DELETE_JWT_PROFILE. After getting acquainted with them, I wanted to highlight three parameters of…
Written by

-
Build an ORDS API Resource Module, GET request with JavaScript fetch, display in HTML
Really trying to optimize SEO with that title 👆🏼! Recap 💡 All the code you’ll see in this post can be found in my moviestreamjs github repository.💡 This post is a continuation of a previous one, which can be found here. In this post, I’ll: If you are coming from the previous related post, then…
Written by
-
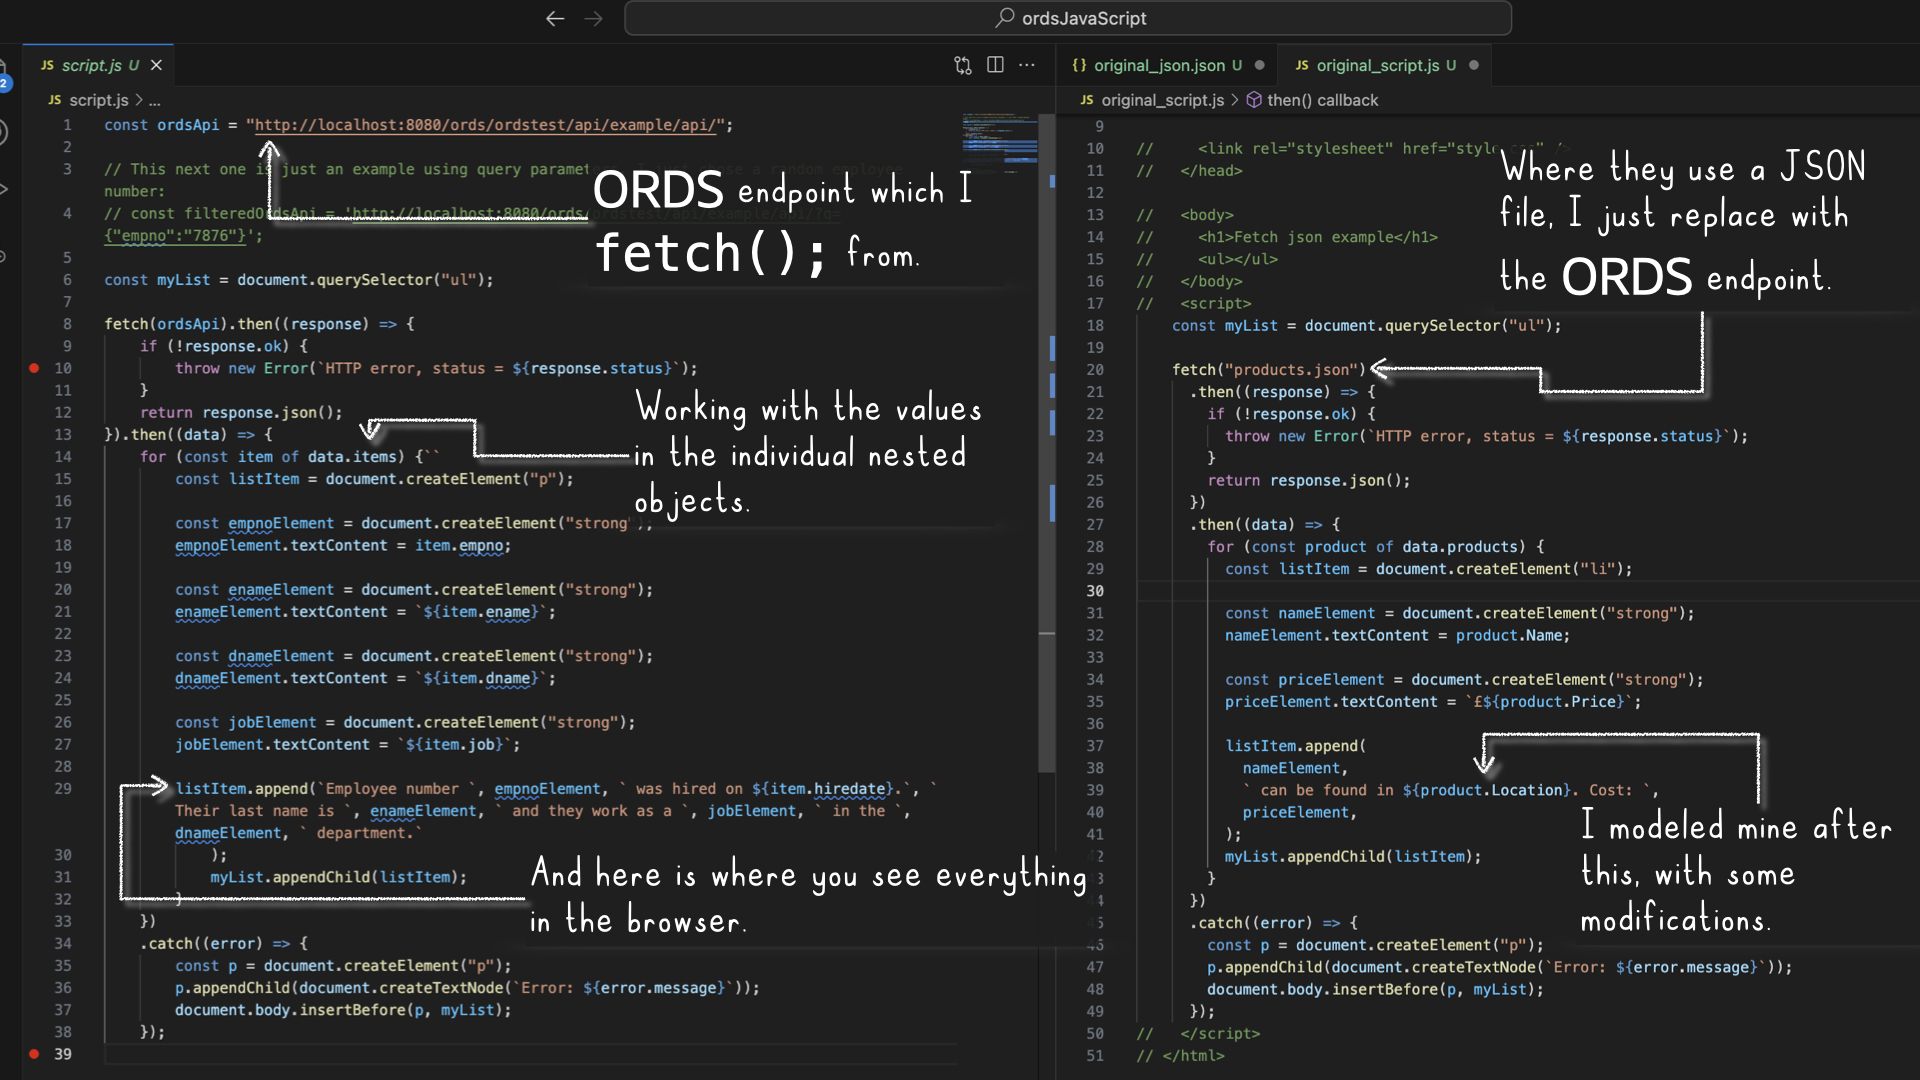
ORDS, JavaScript, the Fetch API, and HTML
I found JavaScript and HTML code here and here and “remixed” it to work with one of my sample ORDS APIs. Here is the result: Impressive, no? Care to try it out? Read on friend! References I’ll front load with all the necessary stuff. That way, you can bounce if you don’t feel like reading.…
Written by