Tag: IAM JWTs
-
401 Unauthorized invalid_token – troubleshooting Oracle Cloud IAM JWTs with ORDS
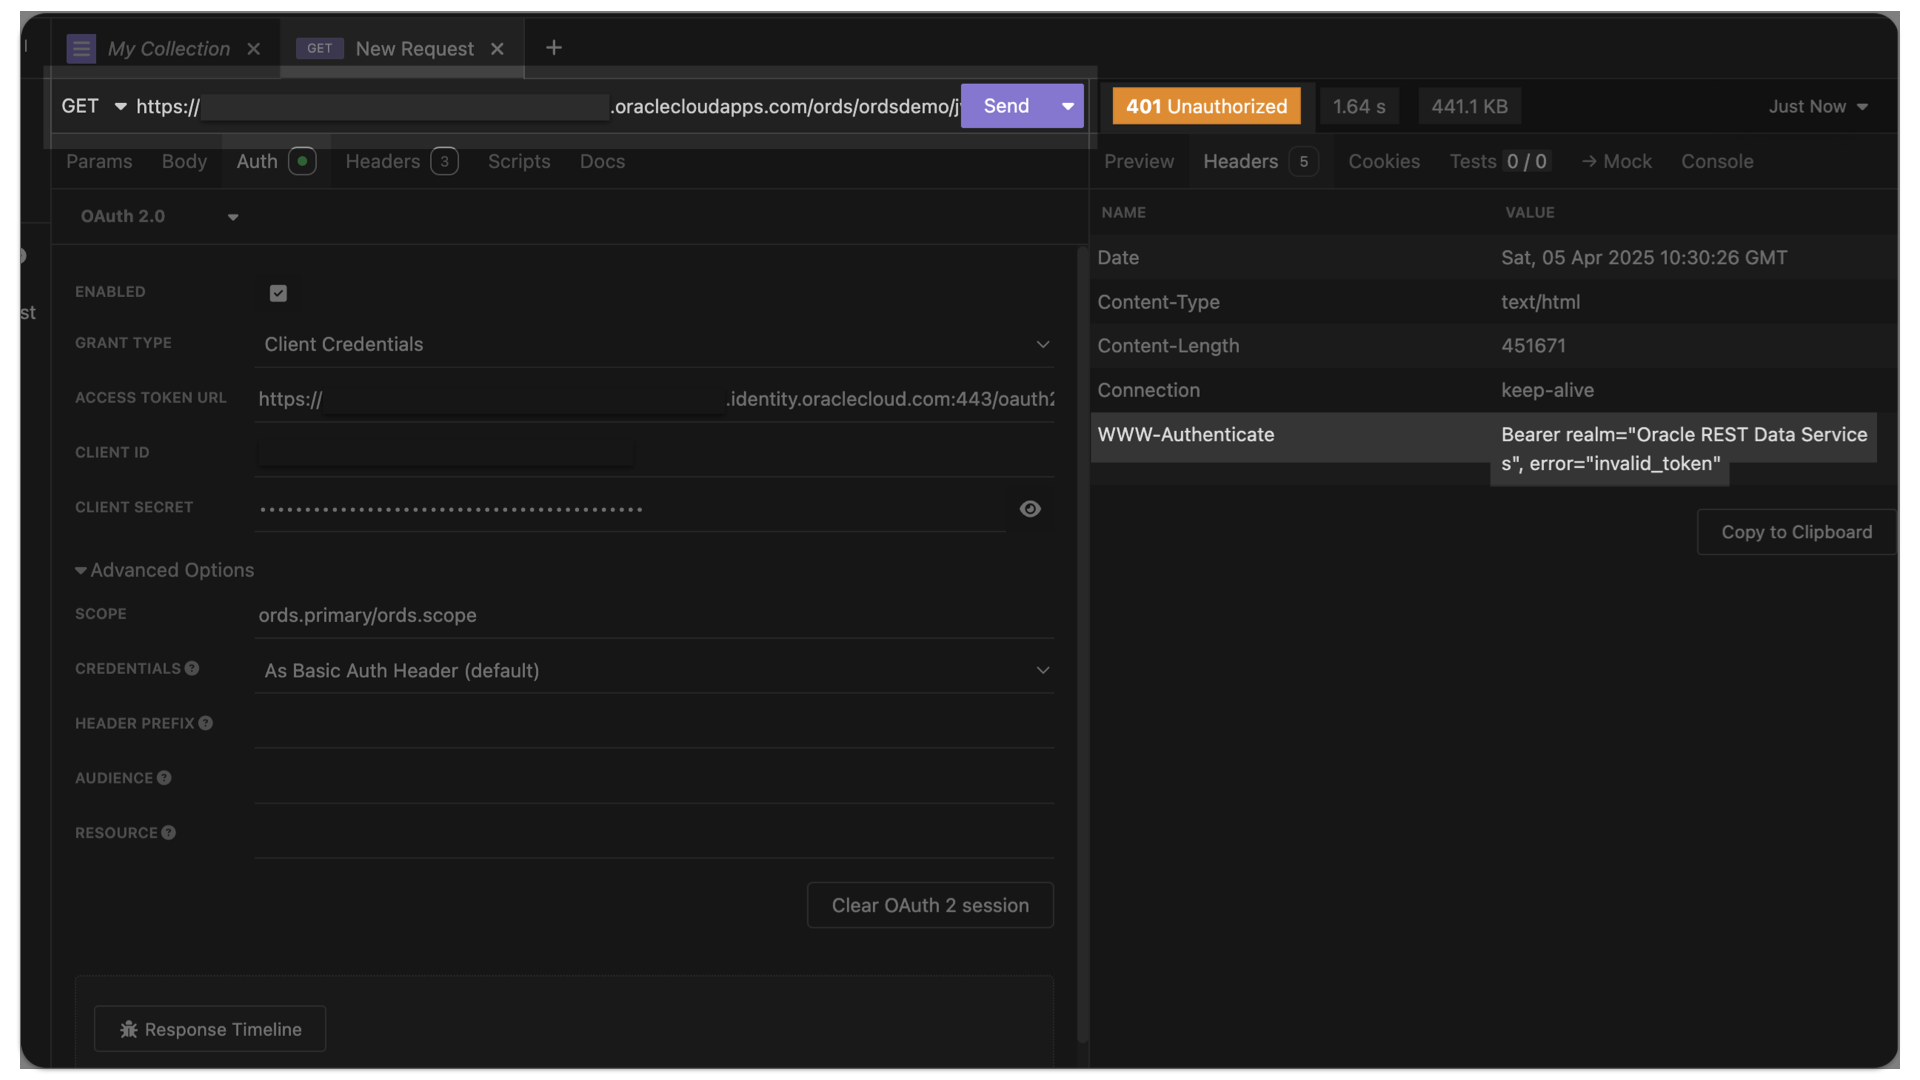
Symptoms You are able to request an access token from OCI IAM. Yet, when you issue the subsequent request to your target resource (an ORDS endpoint), you receive the following message (error=”invalid_token”): Actions you’ve taken YET…you still receive this error=”invalid_token” message, it is quite possible that you have not made the JWK URL publically accessible in…
Written by
-
Configuring OCI IAM Domain JWTs to use with ORDS OAuth2.0 protected APIs
Table of Contents Intended Audience/Purpose Does this describe you? Creating a Domain Configure Client Access Adding an Integrated Application to the Domain Adding the application Configuring OAuth Resource server configuration Client Configuration Issuing a POST request to obtain a JWT Gathering the required values for the request Setting up Postman Requesting the JWT ORDS configuration…
Written by